-
图片的谱表征
本文是对Understanding Convolutions on Graphs以及对应的google colab:SpectralRepresentations.ipynb的学习总结。
通过学习此文,也可以深入理解下图神经网络中谱空间模型。
注意:该colab存在一两处bug,可参考本文fix过的代码。完整代码见https://download.csdn.net/download/WANGWUSHAN/86781716。
1.导入库
import functools import itertools import os import matplotlib.pyplot as plt import numpy as np import scipy.sparse import scipy.sparse.linalg- 1
- 2
- 3
- 4
- 5
- 6
- 7
2.定义相关子函数
主要包括了计算图的拉普拉斯矩阵 L = D − A L=D-A L=D−A以及图的重建子函数。
def get_index(x, y, img_width, img_height): return y * img_width + x def get_neighbours(x, y, img_width, img_height): neighbours_x_pos = [max(0, x - 1), x, min(x + 1, img_width - 1)] neighbours_y_pos = [max(0, y - 1), y, min(y + 1, img_height - 1)] neighbours = itertools.product(neighbours_x_pos, neighbours_y_pos) neighbours = set(neighbours) neighbours.discard((x, y)) return neighbours def compute_sparse_laplacian(img_width, img_height): #计算图的拉普拉斯矩阵 neighbours_fn = functools.partial( get_neighbours, img_width=img_width, img_height=img_height) index_fn = functools.partial( get_index, img_width=img_width, img_height=img_height) senders = [] recievers = [] values = [] for x in range(img_width): for y in range(img_height): pos = (x, y) pos_index = index_fn(*pos) degree = 0. for neighbour in neighbours_fn(*pos): neigh_index = index_fn(*neighbour) senders.append(pos_index) recievers.append(neigh_index) values.append(-1.) degree += 1. senders.append(pos_index) recievers.append(pos_index) values.append(degree) return scipy.sparse.coo_matrix((values, (senders, recievers))) def keep_first_components(img_data, num_components): #图的重建子函数 orig_shape = img_data.shape img_reshaped = np.reshape(img_data, (-1, 3)) chosen_eigenvecs = eigenvecs[:, :num_components] spectral_coeffs = chosen_eigenvecs.T @ img_reshaped upd_img_data_reshaped = chosen_eigenvecs @ spectral_coeffs return np.reshape(upd_img_data_reshaped, orig_shape).astype(int)- 1
- 2
- 3
- 4
- 5
- 6
- 7
- 8
- 9
- 10
- 11
- 12
- 13
- 14
- 15
- 16
- 17
- 18
- 19
- 20
- 21
- 22
- 23
- 24
- 25
- 26
- 27
- 28
- 29
- 30
- 31
- 32
- 33
- 34
- 35
- 36
- 37
- 38
- 39
- 40
- 41
- 42
- 43
- 44
- 45
- 46
- 47
- 48
- 49
- 50
3.主函数
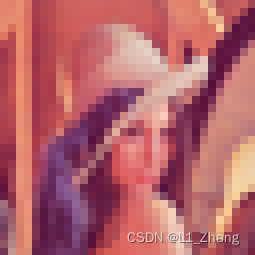
3.1 读入lenna图片、resize以及保存
from PIL import Image img_name = 'E:/lenna.png' img_width = 32 img_height = 32 img_data = np.asarray(Image.open(img_name).resize((img_width, img_height))) save_dir = 'E:/spectral_representation' if not os.path.exists(save_dir): os.makedirs(save_dir) plt.axis('off') _ = plt.imshow(img_data) plt.show() Image.fromarray(img_data).save(os.path.join(save_dir, '1ena.png'))- 1
- 2
- 3
- 4
- 5
- 6
- 7
- 8
- 9
- 10
- 11
- 12
- 13
原图resize之后,显示如下:

3.2 计算该图像的拉普拉斯矩阵及谱特征
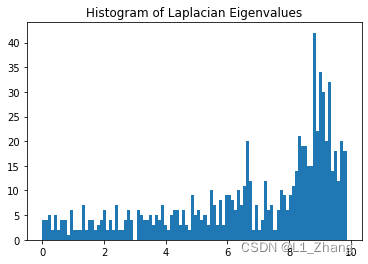
计算拉普拉斯矩阵,以及该矩阵的特征值、特征向量。
num_eigenvecs = 800 assert num_eigenvecs < img_width*img_height v0 = np.ones(img_width * img_height) laplacian = compute_sparse_laplacian(img_width, img_height) eigenvals, eigenvecs = scipy.sparse.linalg.eigsh( laplacian, k=num_eigenvecs, which='SM', v0=v0) assert np.all(eigenvals >= 0) plt.hist(eigenvals, bins=100) plt.title('Histogram of Laplacian Eigenvalues') plt.show()- 1
- 2
- 3
- 4
- 5
- 6
- 7
- 8
- 9
- 10
- 11

3.3 图像重建及保存
base_name = os.path.basename(img_name).split('.')[0] for num_components in [1, 10, 100, 200, 500, num_eigenvecs]: upd_img_data = keep_first_components( img_data, num_components).astype(np.uint8) upd_img_name = f'{base_name}-{num_components}.png' # plt.axis('off') # plt.imshow(upd_img_data) Image.fromarray(upd_img_data).save( os.path.join(save_dir, upd_img_name))- 1
- 2
- 3
- 4
- 5
- 6
- 7
- 8
- 9
- 10
- 11
- 12
base_name = os.path.basename(img_name).split('.')[0] for num_components in [1, 10, 100, 200, 500, img_width*img_height]: upd_img_data = keep_first_components( img_data, num_components).astype(np.uint8) upd_img_name = f'{base_name}-{num_components}.png' plt.axis('off') plt.imshow(upd_img_data) Image.fromarray(upd_img_data).save( os.path.join(save_dir, upd_img_name))- 1
- 2
- 3
- 4
- 5
- 6
- 7
- 8
- 9
- 10
- 11
- 12
下图从左到右使用的特征向量个数分别为1, 10, 100, 200, 500, 800。可以看出随着特征向量增多,重建效果越来越好。

参考文献
[1] Understanding Convolutions on Graphs
[2] google colab:SpectralRepresentations.ipynb -
相关阅读:
软件测试入门+面试点
授权调用: 介绍 Transformers 智能体 2.0
数据结构笔记——线性表
类暗黑破坏神属性系统思路
英特尔实验室公布集成光子学研究新进展
E117-经典赛题-主机发现与信息收集
分享几个可以免费使用GPT的网站
python使用泛型
python文件的读取
CommunityToolkit.Mvvm8.1 viewmodel使用-旧式写法(2)
- 原文地址:https://blog.csdn.net/WANGWUSHAN/article/details/127403281