-
Java 面试问题 —— 多线程模块(JUC 模块)
目录:
- 1、进程和线程的区别
- 2、线程的生命周期
- 3、线程池,七大参数,底层怎么实现的
- 4、线程池的七种创建方式
- 5、使用线程池的好处
- 6、往线程池提交任务,执⾏过程是怎么样的?
- 7、为什么创建线程池一定要使用 ThreadPoolExecutor
- 8、线程池有哪些状态。状态是如何转换的?
- 9、如何使用线程池执行定时任务
- 10、如何判断线程池已经执行完所有的任务
- 11、守护线程和用户线程
- 12、如何创建⼀个线程, callable 会⽤在哪些场景
- 13、 run⽅法和start⽅法的区别
- 14、为什么wait和notify必须放在synchronized中?
- 15、java中sleep方法和wait方法的5个区别
- 16、如何解决线程安全问题
- 17、CAS
- 18、怎么销毁线程(中断线程)
- 19、单例模型
- 20、死锁产生的原因
- 21、死锁的排查工具有哪些
- 22、volatile 有什么用
- 23、为什么使用读写锁,他有什么优点(具体内容后面介绍)
- 24、公平锁和非公平锁
- 25、线程的休眠方式
- 26、notify是随机唤醒吗?
- 27、JUC 包底下有哪些类
- 28、synchronized 详解
- 29、synchronized 底层如何实现
- 30、为什么每一个对象都可以被设置为锁
- 31、可重入锁
- 32、可重入锁实现
- 33、关于锁的小总结
- 34、JMM (Java 内存模型)
- 35、原子类
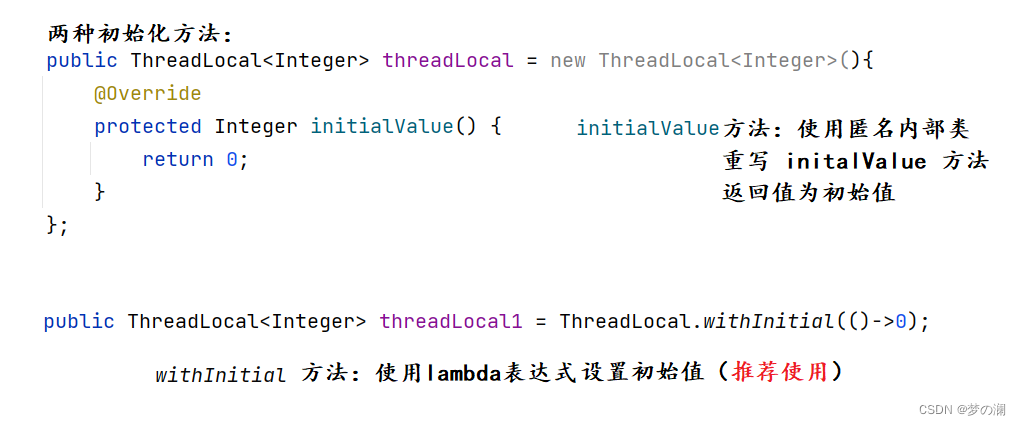
- 36、ThreadLocal 本地线程变量
- 37、Java 对象内存布局
- 38、synchronized 锁升级
- 39、AQS
- 40、读写锁
- 41、wait 和 await 的区别
1、进程和线程的区别:- a、进程包括线程,一个进程中可以有多个线程,多个线程可以共享进程资源,线程是进程的实际运行单位
- b、进程和线程都是为了处理并发编程的,进程的创建和销毁开销更大,线程创建和销毁相对开销更小(轻量级进程,这里更多指的是内核线程),主要是省去了申请和释放的过程(线程池)
- c、操作系统创建进程,需要给进程分配内存空间,所以进程是操作系统分配资源的基本单位,操作系统创建线程,需要在 CPU 上调度执行,所以线程是操作系统调度执行的基本单位
- d、进程具有独立性,每个进程都有自己的虚拟地址空间,如果一个进程挂了,一般不会影响其他线程,而线程是多个线程共用同一块内存空间,如果一个线程挂了,甚至会导致整个系统的崩溃
- e、线程上下文切换很快(切换上下文:从一个线程转换到另一个线程),进程上下文切换很慢
- f、线程的操作者一般是程序员、进程的操作者一般是操作系统
2、线程的生命周期
- Java 线程的生命周期有以下 6 种状态:
- 1、NEW 新建状态
- 2、RUNNABLE 运行状态
- 3、TERMINATED 销毁状态
- 4、BLOCK 阻塞状态
- 5、TIMED_WAITING 有限时间等待状态
- 6、WAITING 无线时间等待状态
- NEW 状态:创建线程还没 start
Thread t1 = new Thread(() -> System.out.println("这是一个线程"));
System.out.println(t1.getState());
- RUNNABLE 运行状态:在线程中的状态
Thread t2 = new Thread(()->{
           while(true){

           }
        });
        t2.start();
  System.out.println(t2.getState());
- TERMINATED 当前线程执行完毕
Thread t1 = new Thread(() -> System.out.println("这是一个线程"));
        t1.start();
        Thread.sleep(100);
        System.out.println(t1.getState());
- BLOCK 阻塞状态:两个线程对同一个资源进行加锁,一个线程先占用锁,另一个线程就处于 block 状态,下面的主线程先占用锁,一开始获取到 thread 线程是正在运行中的状态,主线程休眠 1 s,thread 线程执行到 synchronized 锁的位置,此时锁还在主线程中,所以此时需要等待锁释放,就是 block 状态
Object object1 = new Object(); Thread thread = new Thread(()->{ try { Thread.sleep(100); } catch (InterruptedException e) { e.printStackTrace(); } synchronized (object1){ } }); thread.start(); synchronized (object1){ System.out.println(thread.getState()); try { Thread.sleep(1000); } catch (InterruptedException e) { e.printStackTrace(); } System.out.println(thread.getState()); }- TIMED_WAITING :有限时间等待状态,在线程中调用 sleep 休眠
        Thread t3 = new Thread(()->{
            while(true){
                try {
                    Thread.sleep(10000);
                } catch (InterruptedException e) {
                    e.printStackTrace();
                }
            }
        });

        t3.start();
        Thread.sleep(100);
        System.out.println(t3.getState());
- WAITING 状态:在线程中调用 wait 方法
Object object = new Object();
        Thread t4 = new Thread(()->{
            synchronized (object){
                try {
                    object.wait();
                } catch (InterruptedException e) {
                    e.printStackTrace();
                }
            }
        });

        t4.start();
        Thread.sleep(3000);
        System.out.println(t4.getState());

        Thread t5 = new Thread(()->{
            synchronized (object){
                object.notify();
            }
        });

        t5.start();
3、线程池,七大参数,底层怎么实现的- 1、corePoolSize:核心线程数,是指线程池中长期存活的线程
- 2、maximumPoolSize:最大线程数,线程池可以存放的最多线程数,当线程池任务队列中满了以后,可以创建的最大线程数
- 3、keepAliveTime:空闲线程存活时间,空闲线程 = 最大线程数 - 核心线程数,当线程池中没有任务了,会销毁一部分线程,销毁的就是空闲的线程
- 4、TimeUnit:空闲线程存活时间的单位,有(天、小时、分钟、秒、毫秒、微秒、纳秒)
- 5、BlockingQueue:线程池任务队列,用来存储线程池中所有待执行的任务
- 6、ThreadFactor:线程工厂,创建线程时调用的工厂方法,通过此方法可以设置线程的名字、优先级、线程类型等
- 7、RejectedExecutionHandler:拒绝策略,当线程池的任务超出线程池中的可以存储的最大值时,执行的策略:AbortPolicy(拒绝并抛出异常)、CallerRunsPolicy(使用当前调用的线程执行次任务)、DiscardOldestPolicy(抛弃队列(头部 / 最旧)的任务,执行当前任务)、DiscardPolicy(忽略并抛弃当前任务)
- 底层实现:
- 池化技术:提前准备一些资源,有需要时可以重复使用这些资源
- 线程池底层原理:线程池中会事先启动若干数量的线程,这些线程都处于休眠状态,当一个客户端有一个新的请求时,唤醒线程池中某一个睡眠的线程,让它来处理客户端的请求,处理完这个请求之后,线程又会变成休眠状态
- 线程池是线程使用的一种方式,将线程和任务的概念分开,使用线程执行任务,并实现统一的线程和任务的管理,避免频繁的创建线程和销毁线程
4、线程池的七种创建方式- ①、创建固定的线程数 newFixedThreadPool
/** * 创建固定线程数 */ ExecutorService service = Executors.newFixedThreadPool(2); //创建任务 Runnable runnable = new Runnable() { @Override public void run() { System.out.println("任务被执行,线程:" + Thread.currentThread().getName()); } }; service.submit(runnable); service.execute(runnable); service.submit(runnable);- ②、创建可以缓存的线程池:newCacheThreadPool
ExecutorService executorService = Executors.newCachedThreadPool(); // for (int i = 0; i < 10; i++) { executorService.execute(()->{ System.out.println("执行任务,线程" + Thread.currentThread().getName()); try { TimeUnit.SECONDS.sleep(1); } catch (InterruptedException e) { e.printStackTrace(); } }); }- ③、创建单个线程数执行的线程池:newSingleThreadExecutor 保证先进先出的顺序
ExecutorService executorService = Executors.newSingleThreadExecutor(); for (int i = 0; i < 10; i++) { int finalI = i; executorService.execute(()->{ System.out.println("执行任务" + finalI); try { TimeUnit.SECONDS.sleep(1); } catch (InterruptedException e) { e.printStackTrace(); } }); }- ④、创建延迟执行的线程池:newScheduledThreadPool
ScheduledExecutorService scheduledExecutorService = Executors.newScheduledThreadPool(5); System.out.println("添加任务,时间:" + new Date()); scheduledExecutorService.schedule(()->{ System.out.println("任务被执行,时间:" + new Date()); },2,TimeUnit.SECONDS);- ⑤、创建单线程的延迟执行线程池:newSingleThreadScheduledExecutor
ScheduledExecutorService scheduledExecutorService1 = Executors.newSingleThreadScheduledExecutor(); System.out.println("添加任务,时间 " + new Date()); scheduledExecutorService1.schedule(()->{ System.out.println("任务被执行,时间" + new Date()); },2,TimeUnit.SECONDS);- ⑥、创建抢占式执行的线程池:newWorkStealingPool
ExecutorService executorService = Executors.newWorkStealingPool(); for (int i = 0; i < 10; i++) { int finalI = i; executorService.execute(()->{ System.out.println("线程" + Thread.currentThread().getName() + "执行任务" + finalI); }); } while (!executorService.isTerminated()) { }- ⑦、传统手动创建线程池:支持 7 个参数的设置
ThreadPoolExecutor threadPoolExecutor = new ThreadPoolExecutor(5, 10, 100, TimeUnit.SECONDS, new LinkedBlockingQueue<>(10)); for (int i = 0; i < 10; i++) { int finalI = i; threadPoolExecutor.execute(()->{ System.out.println("线程" + Thread.currentThread().getName() + "执行任务" + finalI); }); }- 推荐使用最后一种创建方法,更能明确线程池的运行规则,规避资源耗尽的风险

5、使用线程池的好处- ①、复用线程,降低资源消耗,线程在创建时要开辟虚拟机栈、本地方法栈、程序计数器等私有线程内部空间,而销毁时这些资源要进行回收,使用线程池,就避免这样的创建和销毁线程的开销了
- ②、提高响应速度:线程池复用已有线程,而不使用线程池需要新创建,创建是需要花费时间的,所以线程池能够更开的响应任务和执行任务
- ③、管理线程数和任务数:
- 控制最大并发数:线程池可以控制最大线程数,避免线程过多,因为 CPU 处理线程数是一定的,超过此数就会导致线程间恶意抢占执行,反而会降低程序性能
- 控制任务最大数:如果任务无限多,那么内存空间不足的情况下,会导致程序执行出错,使用线程池通过其拒绝策略可以处理多出来的任务,从而保障系统正确运行
- ④、更多增强功能:定时执行、周期执行等
6、 往线程池提交任务,执⾏过程是怎么样的?- 线程池的执行流程:先判断当前线程数是否小于线程池中的核心线程数,如果小于,则创建一个新的线程执行此任务,如果大于,则看当前任务执行队列满没满,如果没满,则将任务加入到任务队列中,如果满了,则看当前线程池中线程数是否已经超过最大线程数,如果没有超过,则新建线程执行此任务,如果超过了,即执行拒绝策略。
- 拒绝策略:
- ①、AbortPolicy:中止策略,线程池会抛出异常,中止当前任务
- ②、CallerRunsPolicy:把任务交给提交当前任务的线程执行
- ③、DiscardPolicy:忽略当前任务
- ④、DiscardOldestPolicy:忽略掉最旧的任务,执行当前任务
- 拒绝策略演示:
- ①、默认的拒绝策略:AbortPolicy
ThreadPoolExecutor threadPoolExecutor1 = new ThreadPoolExecutor(1,1,10,TimeUnit.SECONDS,new LinkedBlockingQueue<>(1));
            Runnable runnable = new Runnable() {
                @Override
                public void run() {
                    System.out.println("当前任务被执行,执行时间:" + new Date() +
                            " 执行线程:" + Thread.currentThread().getName());
                }
            };
            threadPoolExecutor1.execute(runnable);
            threadPoolExecutor1.execute(runnable);
            threadPoolExecutor1.execute(runnable);
        };
- ②、CallerRunsPolicy,超过的最大线程数的几个线程也会执行起来,由 main 线程来执行
public static void main(String[] args) {
        ThreadPoolExecutor threadPoolExecutor1 = new ThreadPoolExecutor(1,1,10, TimeUnit.SECONDS,new LinkedBlockingQueue<>(1), new ThreadPoolExecutor.CallerRunsPolicy());
        Runnable runnable = new Runnable() {
            @Override
            public void run() {
                System.out.println("当前任务被执行,执行时间:" + new Date() +
                        " 执行线程:" + Thread.currentThread().getName());
            }
        };
        threadPoolExecutor1.execute(runnable);
        threadPoolExecutor1.execute(runnable);
        threadPoolExecutor1.execute(runnable);
    }
- ③、DiscardPolicy:直接忽略当前的任务
public static void main(String[] args) {
        ThreadPoolExecutor threadPoolExecutor1 = new ThreadPoolExecutor(1,1,10, TimeUnit.SECONDS,new LinkedBlockingQueue<>(1), new ThreadPoolExecutor.DiscardPolicy());
        Runnable runnable = new Runnable() {
            @Override
            public void run() {
                System.out.println("当前任务被执行,执行时间:" + new Date() +
                        " 执行线程:" + Thread.currentThread().getName());
            }
        };
        threadPoolExecutor1.execute(runnable);
        threadPoolExecutor1.execute(runnable);
        threadPoolExecutor1.execute(runnable);

    }
- ④、忽略最旧的任务,执行当前任务
public static void main(String[] args) {
        ThreadPoolExecutor threadPoolExecutor1 = new ThreadPoolExecutor(1,1,10, TimeUnit.SECONDS,new LinkedBlockingQueue<>(1), new ThreadPoolExecutor.DiscardOldestPolicy());
        Runnable runnable = new Runnable() {
            @Override
            public void run() {
                System.out.println("当前任务被执行,执行时间:" + new Date() +
                        " 执行线程:" + Thread.currentThread().getName());
            }
        };
        threadPoolExecutor1.execute(runnable);
        threadPoolExecutor1.execute(runnable);
        threadPoolExecutor1.execute(runnable);

    }
- ⑤、自定义拒绝策略,实现 new RejectedExecutionHandler() 并重写 rejectedExecution 方法
public static void main(String[] args) {
        ThreadPoolExecutor threadPoolExecutor1 = new ThreadPoolExecutor(1, 1, 10, TimeUnit.SECONDS, new LinkedBlockingQueue<>(1), new RejectedExecutionHandler() {
            @Override
            public void rejectedExecution(Runnable r, ThreadPoolExecutor executor) {
                System.out.println("自定义拒绝策略");
            }
        });
        Runnable runnable = new Runnable() {
            @Override
            public void run() {
                System.out.println("当前任务被执行,执行时间:" + new Date() +
                        " 执行线程:" + Thread.currentThread().getName());
            }
        };
        threadPoolExecutor1.execute(runnable);
        threadPoolExecutor1.execute(runnable);
        threadPoolExecutor1.execute(runnable);

    }
7、为什么创建线程池一定要使用 ThreadPoolExecutor- 通过 ThreadPoolExecutor 创建池,可以自定义拒绝策略,自定义线程池大小,以及核心线程数的数量,让线程池的执行更加透明和可控,避免资源的消耗尽的风险
- Executors 规定的最大线程数是趋近于无线大的

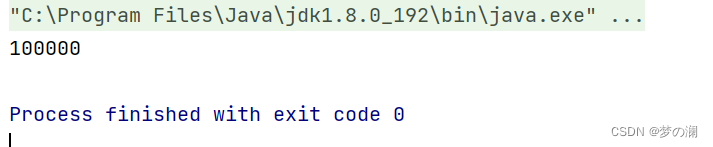
public static void main(String[] args) {
        ExecutorService executorService = Executors.newCachedThreadPool();
        List<Object> list = new ArrayList<>();
        for (int i = 0; i < 10; i++) {
            int finalI = i;
            executorService.execute(new Runnable() {
                @Override
                public void run() {
                    try {
                        Thread.sleep(finalI * 200);
                    } catch (InterruptedException e) {
                        e.printStackTrace();
                    }

                    OOMClass oomClass = new OOMClass();
                    list.add(oomClass);
                    System.out.println("执行任务:" + finalI);
                }
            });
        }
    }

- 利用 Executor 创建线程池,最大线程数为 Integer.MAX_VALUE,当任务数到达一定数量时,会创建很多线程,像上面的 OOM 实例创建就需要 1M 加上 JDK 系统类的加载也要占用一定的系统资源,所以上面设置内存大小为 10 M,所以这里在运行到任务数为 6 时,程序这里就报异常了
- 使用 ThreadPoolExecution 优化,设置合适的最大线程数,核心线程数和拒绝策略,可以避免上面的内存泄漏问题
import java.util.ArrayList;
import java.util.List;
import java.util.concurrent.*;

/**
 * ThreadPoolExecutor 演示示例
 */
public class ThreadPoolExecutorExample {
    static class OOMClass {
        // 创建 1MB 大小的变量(1M = 1024KB = 1024*1024Byte)
        private byte[] data_byte = new byte[1 * 1024 * 1024];
    }

    public static void main(String[] args) throws InterruptedException {
        // 手动创建线程池,最大线程数 2,最多存储 2 个任务,其他任务会被忽略
        ThreadPoolExecutor threadPool = new ThreadPoolExecutor(2, 2,
                0L, TimeUnit.SECONDS, new LinkedBlockingQueue<>(2),
                new ThreadPoolExecutor.DiscardPolicy()); // 拒绝策略:忽略任务
        List<Object> list = new ArrayList<>();
        // 添加任务
        for (int i = 0; i < 10; i++) {
            int finalI = i;
            threadPool.execute(new Runnable() {
                @Override
                public void run() {
                    // 定时添加
                    try {
                        Thread.sleep(finalI * 200);
                    } catch (InterruptedException e) {
                        e.printStackTrace();
                    }
                    // 将 1m 对象添加到集合
                    OOMClass oomClass = new OOMClass();
                    list.add(oomClass);
                    System.out.println("执行任务:" + finalI);
                }
            });
        }
        // 关闭线程池
        threadPool.shutdown();
        // 检测线程池的任务执行完
        while (!threadPool.awaitTermination(3, TimeUnit.SECONDS)) {
            System.out.println("线程池中还有任务在处理");
        }
    }
}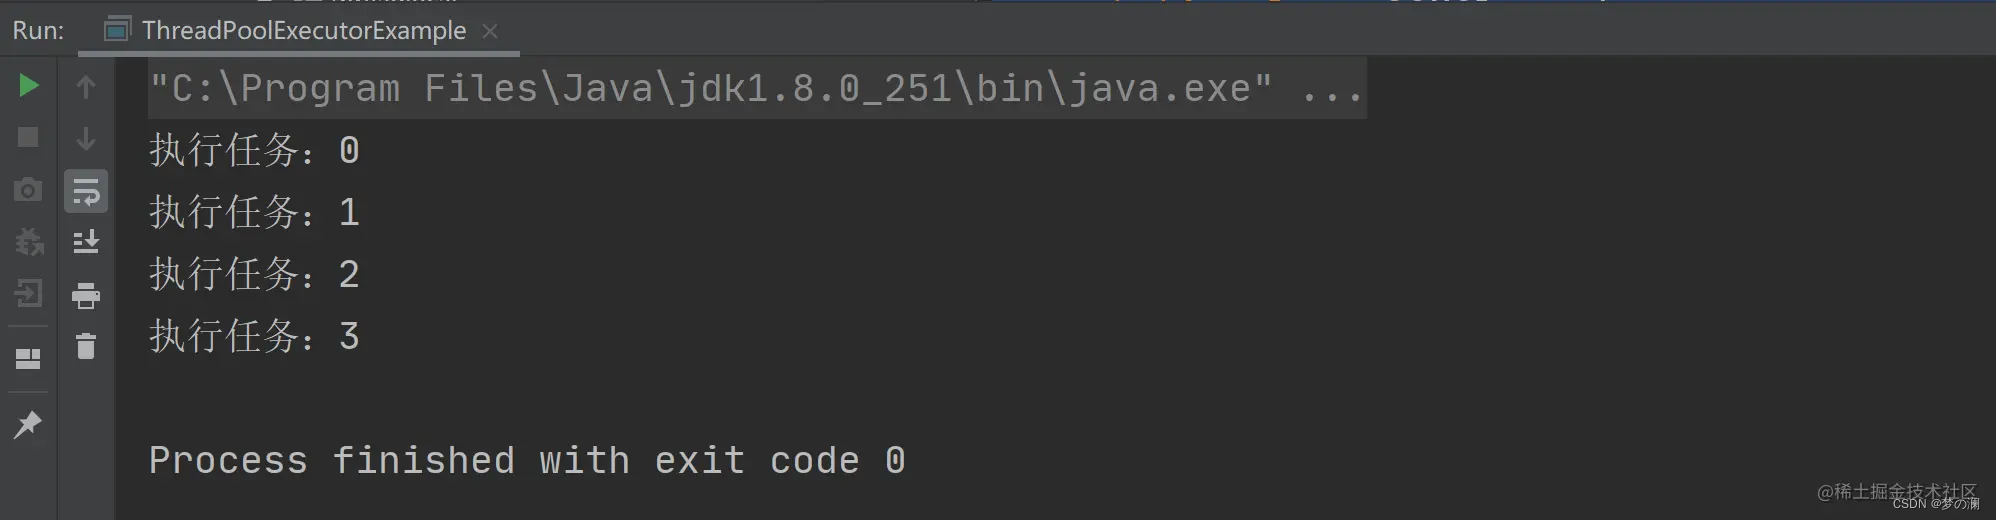
- 这里可以看到,没有发生 OOM 问题,这就是手动创建线程池的优点
8、线程池有哪些状态。状态是如何转换的?- 线程池有以下 5 种状态
- 1、RUNNING:运行状态,当线程池创建好之后,线程池就处于 RUNNING 状态,如果不手动调用关闭方法,那么线程池在整个程序运行期间都是这个状态
- 2、SHUTDOWN:关闭状态,不再接收新任务的提交,但是会将保存在任务队列中的任务执行完毕
- 3、STOP:停止状态,不再接收新任务的提交,中断当前正在运行的任务,放弃任务队列中的任务
- 4、TIDYING:整理状态,所有任务都执行完成后,当前线程池中的活动线程数为 0,到此状态时,会调用线程池中的 terminated 方法
- 5、TERMINATED:销毁状态,当执行完线程池的 terminated 方法就会进入到此状态

- 状态是如何转换的:
- ①、当调用 shutdown 方法时,线程池会从 RUNNING 状态转换为 SHUTDOWN 状态,再到 TIDYING 状态,最后到 TERMINATED 状态
- ②、当调用 shutdownnow 方法时,线程池会从 RUNNING 状态转换为 STOP 状态,再到 TIDYING 状态,最后到 TERMINATED 状态
9、如何使用线程池执行定时任务- 1、schedule 方法只能执行一次定时任务
public static void main(String[] args) {
        ScheduledExecutorService scheduledExecutorService = Executors.newScheduledThreadPool(10);
        System.out.println("添加任务" + LocalDateTime.now());

        scheduledExecutorService.schedule(new Runnable(){
            @Override
            public void run() {
                System.out.println("执行 schedule 方法:" + LocalDateTime.now());
            }
        },2,TimeUnit.SECONDS);
    }
- 2、scheduleAtFixedRate,可以执行多次定时任务,3L 是首次执行的时间,2L 是后面每个任务执行的间隔
public static void main(String[] args) {
        ScheduledExecutorService scheduledExecutorService = Executors.newScheduledThreadPool(10);
        System.out.println("添加任务" + LocalDateTime.now());

        scheduledExecutorService.scheduleAtFixedRate(new Runnable() {
            @Override
            public void run() {
                System.out.println("执行 scheduleAtFixedRate 方法:" + LocalDateTime.now());

            }
        },3L,2L,TimeUnit.SECONDS);
    }
- 3、scheduleWithFixedDelay 方法是在方法执行完成之后,再隔 N 秒执行下一个定时任务,scheduleWithFixedDelay 方法的执行受定时任务执行的时长影响。下面的任务执行 2s,每个任务执行间隔为 2s,所以除第一个任务外,后面的任务时间间隔为 2 + 2 为 4 s
public static void main(String[] args) {
        ScheduledExecutorService scheduledExecutorService = Executors.newScheduledThreadPool(10);
        System.out.println("添加任务" + LocalDateTime.now());

        scheduledExecutorService.scheduleWithFixedDelay(new Runnable() {
            @Override
            public void run() {
                System.out.println("执行 scheduleWithFixedDelay 方法:" + LocalDateTime.now());
                try {
                    Thread.sleep(2000);
                } catch (InterruptedException e) {
                    e.printStackTrace();
                }
            }
        },3L,2L,TimeUnit.SECONDS);
    }
10、如何判断线程池已经执行完所有的任务?public static void main(String[] args) { // 创建线程池 ThreadPoolExecutor threadPool = new ThreadPoolExecutor(10, 20, 0, TimeUnit.SECONDS, new LinkedBlockingDeque<>(1024)); // 添加任务 addTask(threadPool); // 打印结果 System.out.println("线程池任务执行完成!"); } /** * 给线程池添加任务 */ private static void addTask(ThreadPoolExecutor threadPool) { // 任务总数 final int taskCount = 5; // 添加任务 for (int i = 0; i < taskCount; i++) { final int finalI = i; threadPool.submit(new Runnable() { @Override public void run() { try { // 随机休眠 0-4s int sleepTime = new Random().nextInt(5); TimeUnit.SECONDS.sleep(sleepTime); } catch (InterruptedException e) { e.printStackTrace(); } System.out.println(String.format("任务%d执行完成", finalI)); } }); } }
- 上面代码的情况,我们是想等线程池中的任务执行完成后再打印,线程池任务执行完成,但是可以看到,这里还没执行完,就打印了线程池任务执行完成,这是由于“线程池任务执行完成” 是位于 main 线程中的,main 线程和线程池中线程并发执行,所以我们要判断一下线程池中的线程是否执行完毕
- 有以下四种方法:
- 1、isTerminated 需要手动调用 shutdown 方法
private static void isOver(ThreadPoolExecutor threadPool) {
        threadPool.shutdown();
        while(!threadPool.isTerminated()){

        }
    }
- 2、getCompletedTaskCount 比对当前完成的任务数和总任务数是否匹配,不匹配一直循环
private static void isOver(ThreadPoolExecutor threadPool) {
        while(threadPool.getCompletedTaskCount() != threadPool.getTaskCount()){

        }
    }
-
无需手动关闭线程池,但是二者返回的都是近似值,因为在线程池中任务和线程的状态可能是动态变化的,所以这里返回的是一个近似的值
-
3、CountDownLatch:可以理解为一个计数器,包含 N 个任务的计数器,没执行完一个任务,计数器 - 1,直到计数器为 0,任务线程池中任务都执行完毕
public static void main(String[] args) throws InterruptedException {
        ThreadPoolExecutor threadPoolExecutor = new ThreadPoolExecutor(10,20,0,TimeUnit.SECONDS,new LinkedBlockingQueue<>(1024));
        final int taskCount = 5;
        CountDownLatch countDownLatch = new CountDownLatch(taskCount);

        for (int i = 0; i < taskCount; i++) {
            final int finalI = i;
            threadPoolExecutor.submit(new Runnable() {
                @Override
                public void run() {
                    System.out.println("执行任务" + finalI);
                    countDownLatch.countDown();
                }
            });
        }

        countDownLatch.await();
        System.out.println();
        System.out.println("线程池任务执行完毕");
    }
-
无需手动关闭线程池,但是 countdownlatch 只能用一次,不能复用,执行多个线程就会出现最上面的问题:

-
4、CyclicBarrier 循环计数器,可以复用的 countdownlatch
public static void main21(String[] args) throws InterruptedException {
        ThreadPoolExecutor threadPoolExecutor = new ThreadPoolExecutor(10,20,0,TimeUnit.SECONDS,new LinkedBlockingQueue<>(1024));
        final int taskCount = 5;
        CyclicBarrier cyclicBarrier = new CyclicBarrier(taskCount, new Runnable() {
            @Override
            public void run() {
                System.out.println();
                System.out.println("所有线程已经执行完毕");
            }
        });

        for (int i = 0; i < taskCount; i++) {
            final int finalI = i;
            threadPoolExecutor.submit(new Runnable() {
                @Override
                public void run() {
                    System.out.println("执行任务" + finalI);
                    try {
                        cyclicBarrier.await();
                    } catch (InterruptedException e) {
                        e.printStackTrace();
                    } catch (BrokenBarrierException e) {
                        e.printStackTrace();
                    }
                }
            });
        }
    }
- 不需要手动关闭线程池,设计复杂度比较高,但是可以复用,但是使用比较复杂,日常使用比较少
11、守护线程和用户线程- 创建线程和线程池中的线程默认都是用户线程,可以通过 Thread.isDaemon() 来判断,如果返回的是 true 则是守护线程,返回的是 false 则为用户线程
- 守护线程的定义:守护线程称之为后台线程或服务线程,守护线程是为用户线程服务的,当程序中的用户线程全部执行完毕,守护线程也会随之结束
public static void main1(String[] args) {
        Thread thread = new Thread(()->{
            System.out.println("用户线程");
        });

        System.out.println(thread.isDaemon());

        ThreadPoolExecutor poolExecutor = new ThreadPoolExecutor(5,10,1, TimeUnit.SECONDS,new LinkedBlockingQueue<>(3));
        poolExecutor.execute(()->{
            System.out.println("ThreadPool为"  +(Thread.currentThread().isDaemon() == true ? "守护线程" : "用户线程"));
        });
    }
- 当用户线程执行一个任务:打印 1 - 9,发现可以正常打印出结果
 public static void main2(String[] args) {
        Thread thread = new Thread(()->{
            for (int i = 0; i < 10; i++) {
                System.out.println(i);
                try {
                    Thread.sleep(100);
                } catch (InterruptedException e) {
                    e.printStackTrace();
                }
            }
        });

        thread.start();
    }
- 当守护线程执行打印 1 - 9,此时因为 main 线程结束,所以守护线程也结束,不管守护线程有没有执行完
public static void main(String[] args) {
        Thread thread = new Thread(()->{
            for (int i = 0; i < 10; i++) {
                System.out.println(i);
                try {
                    Thread.sleep(100);
                } catch (InterruptedException e) {
                    e.printStackTrace();
                }
            }
        });

        thread.setDaemon(true);
        thread.start();
    }
- 线程池中的线程设置为守护线程
public static void main(String[] args) throws InterruptedException {
        ThreadFactory threadFactory = new ThreadFactory() {
            @Override
            public Thread newThread(Runnable r) {
                Thread thread = new Thread(r);
                thread.setDaemon(true);
                return thread;
            }
        };

        ThreadPoolExecutor poolExecutor = new ThreadPoolExecutor(10,20,1,TimeUnit.SECONDS, new LinkedBlockingQueue<>(5), threadFactory);
        poolExecutor.execute(()->{
            System.out.println("当前线程池线程为:" + (Thread.currentThread().isDaemon() ? "守护线程" : "用户线程"));
        });

        Thread.sleep(2000);
    }
- 注意设置线程类型一定要在线程开始(start 之前,否则会报错)


- 从上面的例子可以看出来守护线程的级别比较低,一般用于实现用户服务用户线程或者保证程序正常运行,比如 GC 就是守护线程
12、 如何创建⼀个线程, callable 会⽤在哪些场景一共有七种方法:
- ①、继承 Thread 类,重写 run 方法:(缺点 java 是单继承,继承一个类后,其他类就不能继承了)
class MyThread extends Thread{ @Override public void run() { System.out.println("创建线程方法1"); } } public static void main1(String[] args) { MyThread thread = new MyThread(); thread.start(); }- ②、使用匿名内部类,重写 run 方法
public static void main2(String[] args) { Thread thread = new Thread(){ @Override public void run() { System.out.println("创建线程方法2"); } }; thread.start(); }- ③、实现 Runnable 接口:
class MyCallable implements Callable<Integer>{ @Override public Integer call() throws Exception { System.out.println("创建线程方法5"); return 0; } } public static void main4(String[] args) { Thread thread = new Thread(new MyRunnable()); thread.start(); }- ④、使用匿名内部类:
public static void main3(String[] args) { Thread thread = new Thread(new Runnable() { @Override public void run() { System.out.println("创建线程方法3"); } }); thread.start(); }- ⑤、使用 lambda 表达式:
public static void main5(String[] args) { Thread thread = new Thread(()->{ System.out.println("创建线程方法5"); }); thread.start(); }- ⑥、callable + futuretask 创建线程,可以获取到线程的执行结果,实现 callable 接口,重写 call 方法
class MyCallable implements Callable<Integer>{ @Override public Integer call() throws Exception { System.out.println("创建线程方法5"); return 0; } } public static void main6(String[] args) throws ExecutionException, InterruptedException { MyCallable callable = new MyCallable(); FutureTask futureTask = new FutureTask(callable); Thread thread = new Thread(futureTask); thread.start(); System.out.println(futureTask.get()); }- ⑦、使用匿名内部类:
public static void main(String[] args) {
        FutureTask futureTask = new FutureTask(new Callable<Integer>() {
            @Override
            public Integer call() throws Exception {
                System.out.println("创建线程方法7");
                return 0;
            }
        });

        Thread thread = new Thread(futureTask);
        thread.start();
    }
13、 run⽅法和start⽅法的区别- 首先,二者的执行结果看起来并无两样:
public static void main(String[] args) {
        Thread thread1 = new Thread(()->{
            System.out.println("执行 thread1");
        });

        thread1.run();

        Thread thread2 = new Thread(()->{
            System.out.println("执行 thread2");
        });

        thread2.start();
    }
- 表面上看起来,二者执行结果好像一致,但如果具体看两个线程的执行线程名,就可以看出区别
public static void main(String[] args) {
        Thread thread1 = new Thread(()->{
            System.out.println(Thread.currentThread().getName() + "执行 thread1");
        });

        thread1.run();

        Thread thread2 = new Thread(()->{
            System.out.println(Thread.currentThread().getName() + "执行 thread2");
        });

        thread2.start();
    }
- thread1 是 main 线程去执行的,thread2 则是创建了一个新的线程来执行。所以 start 和 run 的方法性质不同,run 方法就是去执行 run 方法,start 方法是真正开启一个线程去执行任务
- run 方法叫做线程体,里面包括具体要执行的业务代码,当调用 run 方法时,会立即执行 run 方法中的代码,而调用 start 方法则是启动一个线程将其设置为就绪状态,就是调用 start 方法,不会立即执行
- 区别 3:run 方法可以调用多次,start 方法只能调用一次,start 源代码如下:

- start 方法的执行流程:首次调用 start 方法,线程的状态从 NEW 到 就绪状态,再次调用 start 方法,JVM 判断出当前线程的状态不是 NEW 状态,就会抛出 IllegalThreadStateException 非法线程状态的异常,这也是 start 方法不可以复用的原因
14、为什么wait和notify必须放在synchronized中?为了避免多线程并发问题,对于 wait 和 notify 都是需要等待队列存在的,如果不在 synchronized 中调用,就不会有等待队列的存在了,看下面这样阻塞队列的一个例子
public class MyBlockingQueue {
    Queue<String> queue = new LinkedList<>();

    public void put(String str){
        queue.offer(str);
        notify();
    }

    public String get() throws InterruptedException {
        while(queue.isEmpty()){
            wait();
        }

        return queue.remove();
    }
}
- 当执行线程 1 执行完步骤 ① 还没有进行入到步骤 ② 阻塞状态,此时另外一个线程插入了数据,但是线程 1 已经判断过了,所以会直接进入阻塞状态,会导致队列中插入的那条数据无法被读取到,这就是程序并发执行结果混乱的问题,所以 wait 和 notify 需要配合 synchronized 一起使用:
public class MyBlockingQueue { Queue<String> queue = new LinkedList<>(); public void put(String str){ synchronized (MyBlockingQueue.class){ queue.offer(str); notify(); } } public String get() throws InterruptedException { synchronized (MyBlockingQueue.class){ while(queue.isEmpty()){ wait(); } } return queue.remove(); } }- 当线程 1 调用 get 方法会获取到 MyBlockingQueue 的锁,此时其他线程调用 put 方法就会阻塞等待,这样就避免了,数据在队列中读取不到的情况了
15、java中sleep方法和wait方法的5个区别- 1、语法使用不同:wait 需要配合 synchronized 一起使用,否则会报异常,sleep 不需要
- 2、wait 来自 Object 类,sleep 来自 Thread 类
- 3、唤醒方式不同,sleep 到达休眠时间后会自动唤醒,wait 需要使用 notify 或者 notifyAll 来进行唤醒
- 4、释放锁资源不同:
- sleep 在休眠中,不会释放锁资源:
public static void main(String[] args) throws InterruptedException {
        Object lock = new Object();

        Thread thread = new Thread(()->{
           synchronized (lock){
               System.out.println("新线程获取到锁资源" + new Date());
               try {
                   Thread.sleep(2000);
                   System.out.println("新线程释放到锁资源"+ new Date());
               } catch (InterruptedException e) {
                   e.printStackTrace();
               }
           }
        });
        thread.start();

//        Thread.sleep(200);
        System.out.println(Thread.currentThread().getName() + " 线程尝试获取锁资源"+ new Date());
        synchronized (lock){
            System.out.println(Thread.currentThread().getName() + " 线程获取到锁资源"+ new Date());
        }
    }
-
可以发现直到新线程释放了锁,main 线程才获取到锁,所以 sleep 在休眠状态,也是不会释放锁的
-
wait 在休眠状态会释放锁资源:
public static void main(String[] args) throws InterruptedException {
        Object lock = new Object();
        Thread thread = new Thread(()->{
           synchronized (lock){
               System.out.println("新线程获取到锁"+new Date());
               try {
                   lock.wait(2000);
                   System.out.println("新线程释放锁"+new Date());
               } catch (InterruptedException e) {
                   e.printStackTrace();
               }
           }
        });
        thread.start();
        Thread.sleep(200);
        System.out.println("main线程尝试获取锁"+new Date());
        synchronized (lock){
            System.out.println("main线程获取到锁"+new Date());
        }
    }
-
可以看到 wait 休眠期间是释放锁的
-
5、线程进入状态不同:sleep 是有限时间等待状态,wait 是无线时间等待状态
16、如何解决线程安全问题- 线程安全问题:由于多线程并发导致的程序 bug(程序的运行结果达不到预期)
- 解决方法:
- 1、使用线程安全的类:比如 -》原子类
- 2、加锁排队执行,synchronized 加锁(自动释放锁)或者 reentrantlock 加锁(需要手动释放锁)
- 3、使用本地线程变量,为每个线程创建了一份独属于自己的变量,不同线程操作不同的变量,就不会造成线程安全问题了
- 线程安全问题:两个线程同时操作同一变量就会发生线程安全问题,给一个变量增 1 有三个步骤,load、add、save,如果两个线程同时 load 到的是原来的值,再进行分别自增对于变量本身其实只自增一次,这是由于线程是抢占式执行的,所以多个线程自增的三步执行都是不确定的,所以造成了线程安全问题:


- 结果每次都是不一样的,这就是线程安全问题
- 解决办法:
- 1、使用线程安全的类,比如原子类,解决上面的线程安全问题,采用原子类
public static void main(String[] args) throws InterruptedException {
        AtomicInteger count1 = new AtomicInteger(0);

        Thread t1 = new Thread(()->{
            for (int i = 0; i < 50000; i++) {
                count1.incrementAndGet();
            }
        });
        t1.start();

        Thread t2 = new Thread(()->{
            for (int i = 0; i < 50000; i++) {
                count1.incrementAndGet();
            }
        });
        t2.start();

        t1.join();
        t2.join();

        System.out.println(count1);
    }
- load、add、save 三个操作合为一体,就不存在线程安全问题了
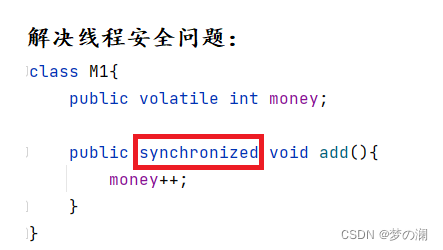
- 2、加锁 synchronized、reentrantlock
- ①、synchronized 加锁

- reentrantlock 加锁(需要手动加锁、释放锁)
- ①、synchronized 加锁
public static void main(String[] args) throws InterruptedException {
        ReentrantLock reentrantLock = new ReentrantLock();

        Thread thread = new Thread(()->{
                reentrantLock.lock();
                for (int i = 0; i < 50000; i++) {
                    count++;
                }
                reentrantLock.unlock();
        });

        thread.start();
        Thread thread1 = new Thread(()->{

            reentrantLock.lock();
            for (int i = 0; i < 50000; i++) {
                count++;
            }
            reentrantLock.unlock();

        });
        thread1.start();

        thread.join();
        thread1.join();
        System.out.println(count);
    }
- 3、ThreadLocal 本地线程变量,每一个线程操作自己的变量,这样就不会造成线程安全问题了
private static int number = 0; public static void main(String[] args) throws InterruptedException { ThreadLocal<Integer> count1 = ThreadLocal.withInitial(()->0); Thread thread = new Thread(()->{ for (int i = 0; i < 50000; i++) { count1.set(count1.get() + 1); } number += count1.get(); }); thread.start(); Thread thread1 = new Thread(()->{ for (int i = 0; i < 50000; i++) { count1.set(count1.get() + 1); } number += count1.get(); }); thread1.start(); thread.join(); thread1.join(); System.out.println(number); }- java 中线程安全的类:
- 1、Vector
- 2、HashTable
- 3、currenthashmap
- 4、stringbuffer
- 5、string
- java 中线程不安全的类:
- 1、ArrayList
- 2、LinkedList
- 3、HashMap
- 4、TreeMap
- 5、HashSet
- 6、TreeSet
- 7、StringBuilder
17、CAS- CAS 全程:Compare and Swap 比较和交换,它是一条 CPU 并发语句,用于判断某个值是否满足预期值,如果满足,则进行修改为新的值,这个过程是原子的
- CAS 使用了三个基本的操作数:内存地址 V,旧的预期值 A,计算后要修改后的新值 B
- 比如:内存地址为 V 中存储的变量值为 1,那么旧的预期值为 1,计算后要修改的新值为 2,在 1 线程要提交更新之前,线程 2 修改了内存的值为 2,此时线程 1 将预期值 A 和 内存 V 中数值进行比较,发现 A 和 实际 V 中的值不同,线程 1 重新读取内存中的值,并重新计算想要修改的值,这个重写尝试的过程被称为 “自旋”,线程 1 再次提交,此时没有其他线程修改内存中的值,此时旧值 A 和内存 V 中的数值一致,进行 swap 操作,使内存 V 中的值为 B
- 总结:当更新一个变量时,只有当变量的预期值 A 和内存中 V 的实际值相等时,才会进行更新操作,这就是 CAS
- CAS 基本原理:
- CAS 主要操作是 compare 和 swap,CAS 是一种系统原语,原语由若干指令组成,来完成某个功能,这些指令执行过程中,是不能被中断的,也就是说 CAS 是一条 CPU 原子指令,由操作系统硬件来保证。Unsafe 提供 CAS 底层实现为 CPU 指令 cmpxchg,执行指令时,会判断当前系统是否为多核系统,如果是就给总线加锁,只有一个总线可以加锁成功,加锁之后会进行 CAS 操作,也就是 CAS 的原子性实际上是 CPU 实现独占的,比起 synchronized 重量级锁,这里的排他时间要短的多,所以多线程下性能会更好
- CAS 应用:在 Java 中不会直接使用到 CAS ,CAS 被封装为一些工具类位于 java.util.concurrent
- 最常用 CAS 的类:原子类(使用 volatile + CAS 保证操作的原子性)

- 上面是原子在包中的位置
- 原子类的原码:
- 原子类的自增方法:
- 最常用 CAS 的类:原子类(使用 volatile + CAS 保证操作的原子性)

-
this 是当前对象的引用,valueofset 是变量的内存偏移地址,第三个参数是一个常量 1
-
通过上面的源代码可以发现,此处的自增方法调用的是 unsafe 类的 getandaddInt 方法

-
发现此时循环中就是 CAS 操作

-
此操作是获取到当前原子类对象的值 value

-
可以发现此时 value 是被 volatile 修饰的,保证内存可见性,防止读数据时直接从寄存器中读取

-
CAS 的实际操作就是:通过 var1 和 var2 拿到内存中实际的变量值,和预期值进行比较,数值一致,更新内存中的值为 var5 + var4,不一致,就一直循环到 CAS 操作执行成功
-
正如上面所示,原子类的自增通过 CAS 和 volatile 关键字实现了操作的原子性,从而保证了多线程并发情况下多个线程操作同一变量而产生的线程安全问题,但是这仅仅只适合于一些粒度比较小的需求才有效,如果比较复杂的业务逻辑还是需要加锁
-
CAS 的问题:
-
1、典型 ABA 问题,假如一个变量初始值为 A,修改为 B,然后又修改为 A ,再 ABA 看来,此时的变量的值是没有发生过变化的,所以会进行多次 CAS 操作,这就是 ABA 问题
- 解决办法:引入版本号,每次对变量值进行修改,都将版本号进行 + 1,每次进行 compare 操作时连同数值和版本号一同比较,数值一致但版本号不一致也不能进行变量数值的更新。AtomicStampedReference 这个类引入了版本号
- 演示:

- AtomicStampedReference 引入版本号解决 ABA 问题

-
2、自旋开销问题:当 CAS 发生问题时,如果资源竞争非常激烈,自旋时间长,会给 CPU 带来比较大的开销
-
3、只能保证单个变量的原子性,对多个共享变量的操作 CAS 是无法同时保证原子性的,此时需要采用加锁的方式,或者采用该类 AtomicReference
-
-
总结:CAS 是靠硬件来实现的从而在硬件层面提升效率,最底层还是交给硬件来保证原子性和可见性,实现方式是通过基于硬件平台的汇编指令,核心思想就是比较变量的值 V 和预期值是否一致,如果一致,交换不一致,自旋再来
-
基于 CAS 实现自旋锁

18、怎么销毁线程(中断线程)中断是一种协作协商机制,Java 没有给中断添加任何语法,需要程序员自己实现
-
关于线程中断这里有三个 API 可以供我们使用:
- 1、interrupt:设置中断标志位为 true,发起一个协商而不会立即终止线程
- 2、interrupted:返回当前线程的中断状态,将当前线程的中断状态设为 false,清除当前线程的中断状态
- 3、isinterrupted:判断当前线程的中断状态
-
interrupted 与 isinterrupted 区别:

-
可以看到两个方法调用都是底层的 native 方法,只是标识位传参值不一样,传 true 代表清除线程中断状态,传 false 代表不清除
-
1、设置标志位(使用 volatile 变量或者是原子类),当 while 中的标志位为设置为 true 线程即中断,这里使用 volatile 关键字,保证每次 flg 读取的都是内存中的值,防止内存可见性问题
private volatile static boolean flg = false; public static void main(String[] args) throws InterruptedException { Thread thread = new Thread(()->{ while(!flg){ System.out.println("hello"); try { Thread.sleep(500); } catch (InterruptedException e) { e.printStackTrace(); } } }); thread.start(); Thread.sleep(1000); flg = true; }- 2、使用线程中的方法设置标志位:(只是设置标志位,不会立即终止线程,需要线程自己做终止的操作)
//标志位 Thread.currentThread().isInterrupted()) //中断方法 thread.interrupt();- 当调用 thread.interrupt(); 如果当前线程为就绪状态,设置标志位 true,如果阻塞状态(sleep)就会抛出异常(此时抛出异常需要使用 break 及时中断线程否则就会打印一个异常日志后继续执行程序)
public static void main(String[] args) throws InterruptedException {
        Thread thread = new Thread(()->{
           while(!Thread.currentThread().isInterrupted()){
               System.out.println("hello");
               try {
                   Thread.sleep(500);
               } catch (InterruptedException e) {
                   e.printStackTrace();
                   break;
               }
           }
        });

        thread.start();
        Thread.sleep(1000);

        thread.interrupt();
    }
- 可以发现当程序打印错误日志的时候,程序就正常终止了,如果程序没有阻塞就会把标志设置为 true
    public static void main(String[] args) throws InterruptedException {
        Thread thread = new Thread(()->{
           while(!Thread.currentThread().isInterrupted()){
               System.out.println("hello");
//               try {
//                   Thread.sleep(500);
//               } catch (InterruptedException e) {
//                   e.printStackTrace();
//                   break;
//               }
           }
        });

        thread.start();
        Thread.sleep(1000);

        thread.interrupt();
    }
19、单例模型- 1、饿汉模型
- 饿汉模式又被称为预加载模式,在进行类加载的时候直接创建并初始化单例模型,所以其不存在线程安全问题,它是依靠 ClassLoader 类机制,在程序启动时只加载一次
public class Singleton1 { private static Singleton1 instance = new Singleton1(); //因为是单例模型 只允许创建一次 实例 所以构造方法不对外 private Singleton1(){}; //通过 get 方法返回实例 public static Singleton1 getInstance(){ return instance; } }- 优、缺点:线程安全,但是采用预加载,如果没有使用到此对象,会造成资源空间浪费
- 2、懒汉模型:采用懒加载的方式,只有当此对象被用到的时候,才进行初始化
private static volatile Singleton2 singleton2 = null; private Singleton2(){}; public static Singleton2 getInstance(){ if(singleton2 == null){ synchronized (Singleton2.class){ if(singleton2 == null){ singleton2 = new Singleton2(); } } } return singleton2; }-
这里采用双重锁校验机制 + volatile 关键字保证线程安全
- 第一层 if 校验:检验当前这个对象有没有初始化

- 加锁:防止多线程并发条件下导致创建多个实例(保证单例模型)

- 第二层 if 校验:如果每个线程进来都进行加锁,会产生大量锁,锁冲突会比较高,会降低程序性能,所以这里如果 singleton2 实例已经创建好,那么就不需要进行加锁等待,直接返回实例即可

- 最后使用 volatile 修饰 singleton2 对象,保证在 if 内读到都是内存中最新的 singleton2 对象,防止内存可见性问题:如果存在多个线程去进行 getinstance 操作,编译器会把这个读内存的操作修改为读寄存器的操作,如果触发了这个优化,可能会导致其他线程修改了 instance 但后面的线程感知不到,这就是内存可见性问题,这里主要影响最外层的 if 判断,内层 if 影响不大,因为 synchronized 也可以防止内存可见性问题。同时 volatile 还可以防止指令重排序的问题,在 instance = new singleton 语句中看似只有一个语句,其实是有三步的

- 如果不加 volatile 可能语句的执行顺序,为 1 3 2,当线程 1 执行步骤 3 后发现此时的 instance 已经不为 null(但是此时没有执行步骤 2),此时如果将此对象交给线程 2 ,那么线程 2 就会得到一个初始化一半的对象

- 满足上面的这几条,就是线程安全的饿汉模型了
- 第一层 if 校验:检验当前这个对象有没有初始化
-
3、静态内部类
- 静态内部类,既能保证线程安全,又是懒加载,静态内部类只有在被调用时,才通过 classloader 来加载和初始化静态内部类。外部类加载时,内部类不需要立即加载,内部类不加载则不去初始化 INSTANCE,不初始化就不会占用内存,当 getInstance() 被调用时,SingleTonHoler才在SingleTon的运行时常量池里,把符号引用替换为直接引用,这时静态对象INSTANCE也真正被创建。getInstance()方法并没有多次去new对象,故不管多少个线程去调用getInstance()方法,取的都是同一个INSTANCE对象,而不用去重新创建。虚拟机会保证一个类的 clinit() 方法在多线程环境中被正确地加锁、同步,如果多个线程同时去初始化一个类,那么只会有一个线程去执行这个类的 clinit ()方法,其他线程都需要阻塞等待,直到活动线程执行 clinit()方法完毕。所以其既能保证线程安全也是懒加载
public class Singleton3 { //只能初始化一次 private Singleton3(){}; //静态内部类 private static class SingletonHolder{ private static final Singleton3 instance = new Singleton3(); } //提供公共方法获取到实例 private static Singleton3 getInstance(){ return SingletonHolder.instance; } }- 4、枚举
- 枚举也是第一次被使用时,才会进行类加载和初始化,所以也是线程安全的且是懒加载
public enum Singleton4 { INSTANCE; public Singleton4 getInstance(){ return INSTANCE; } }- 单例模型适合频繁被访问的对象,或者是创建和销毁需要花费大量时间的对象,使用单例模型可以避免频繁的创建和销毁对象
20、死锁产生的原因-
死锁是指两个或者两个以上单元对都在等待对方释放锁资源,但没有一方提起释放锁,从而造成了一种阻塞现象被称为锁

-
死锁的产生的原因:
- 1、互斥条件:运算单元对所分配到的资源具有排他性,也就是说在某一个时间段,某个锁资源只能被一个运算单元占用
- 2、请求和保持条件:运算单元至少保持一个资源,但又发起新的资源请求,而该资源恰好被其他运算单元占用,此时运算单元阻塞,但是又对自己已获得的资源保持不放
- 3、不可剥夺条件:运算单元获取到某一资源,在未使用完前,不可以被剥夺
- 4、环路等待条件:A 运算单元等待 B 运算单元释放占用的资源,B 又等待着 A 释放资源,这就是环路等待
-
死锁的产生需要同时满足上面的所有条件才会产生死锁
-
死锁如何解决:破坏掉任意一个或者多个条件即可
- 比如:可以通过修改获得锁的顺序来解决环路等待的问题
修改前:

修改后:

- 先让 线程 1 获取到 A , B 锁,后 线程1 释放 B 锁,线程 1 释放 A 锁,线程 2 获取到 A 锁,线程 2 获取 B 锁,然后再分别释放,这样就避免了需要依赖对方的锁资源来保证程序继续向下执行,从而避免了死锁的问题
- 比如:可以通过修改获得锁的顺序来解决环路等待的问题
21、死锁的排查工具有哪些- 死锁案例:
private static Object a = new Object();
    private static Object b = new Object();

    public static void main(String[] args) {
        new Thread(()->{
            synchronized (a){
                System.out.println("线程1获取到 a 锁,尝试获取 b 锁");
                try {
                    TimeUnit.SECONDS.sleep(1);
                } catch (InterruptedException e) {
                    e.printStackTrace();
                }
                synchronized (b){
                    System.out.println("获取到 b 锁");
                }
            }
        }).start();


        new Thread(()->{
            synchronized (b){
                System.out.println("线程1获取到 b 锁,尝试获取 a 锁");
                synchronized (a){
                    System.out.println("获取到 a 锁");
                }
            }
        }).start();
    }
- 使用命令 jps -l 查看当前类的进程号,jstack + 进程号 查看具体信息:可以发现是死锁导致程序无法停下来

- 图形化工具:jconsole

22、volatile 有什么用-
防止内存可见性问题
- java 的内存模型为 jmm,内存模型规定,所有的变量都需要保存到主内存上,每个线程都有自己的工作内存,工作内存中保存了该线程用到的变量和主内存副本,对于主内存的变量线程是不能直接读写的

- 线程去读写工作内存(寄存器)的速度要比读写主内存(内存)的速度要快很多(因为线程不能直接去读写内存中的变量),所以当大量线程去读写内存时,编译器可能会把这个读内存的操作修改为读寄存器的内容,所以当一个变量被当前线程修改后,其他线程是感知不到的,这就是内存可见性问题,给变量加上 volatile 关键字即可
- java 的内存模型为 jmm,内存模型规定,所有的变量都需要保存到主内存上,每个线程都有自己的工作内存,工作内存中保存了该线程用到的变量和主内存副本,对于主内存的变量线程是不能直接读写的
-
指令重排序:
- 指编译器 / CPU 为了优化程序性能对指令的顺序做出重排序的一种手段,可能最后的字节码文件中的内容和编写的代码顺序不一致,对于上面提到的单例模型,就出现了指令重排序的问题。
- 注意:如果两个操作访问同一变量,且两个操作其中一个为写操作,此时两操作就存在数据依赖性,此时需要禁止重排序


-
volatile 如何实现保证内存可见性和有序性:利用内存屏障
-
内存屏障:是一种屏障指令,使得 CPU 或者编译器对屏障指令前后发出的内存操作执行排序的约束
- 内存屏障使用之前所有的写操作都要写到主内存中
- 内存屏障使用之后所有的读操作都能获得内存屏障之前所有的写操作最新结果(实现了可见性)
- 内存屏障是CPU或编译器在对内存随机访问的操作中的一个同步点,使得此点之前的所有读写操作都执行完毕才能进行后续的操作(保证了有序性,避免重排)
-
内存屏障的分类
- 1、粗分:读屏障、写屏障
- ①、写屏障:告诉处理器在写屏障之前所有存储在缓存中的数据同步到主存中,也就是当看到 store 指令,就必须把指令之前的所有写入指令执行完毕才能继续向下执行
- ②、读屏障:处理器在读屏障之后的读操作,都在读屏障之后,也就是说 load 屏障指令之后能保证后面读到数据指令一定能读到最新的数据
- 2、细分:读写、读读、写读、写写屏障:实现禁止重排

- 1、粗分:读屏障、写屏障
-
volatile 读写屏障插入策略
- ①、写:
- 每个 volatile 写操作前面插入一个 storestore 屏障
- 每个 volatile 写操作后面出入一个 storeload 屏障

- ②、读:
- 每个 volatile 读操作之后插入一个 loadload 屏障
- 每个 volatile 读操作后面插入一个 loadstore 屏障

- ①、写:
-
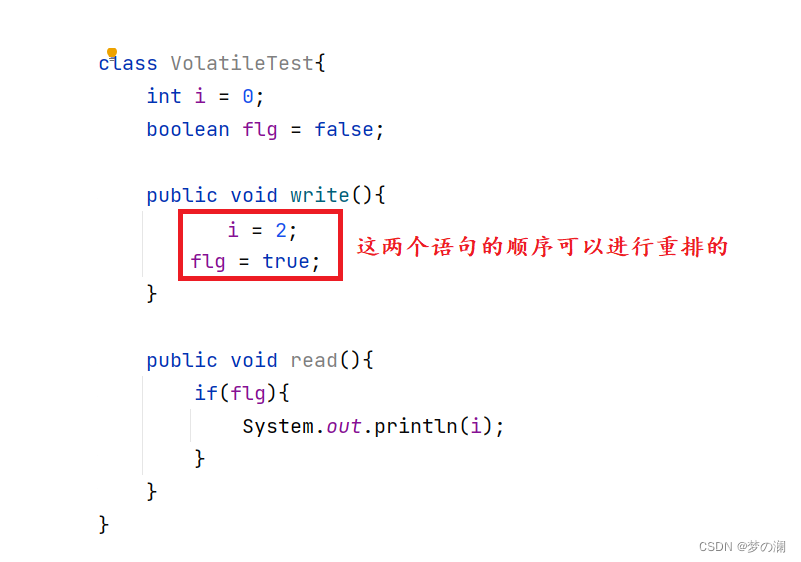
看下面两个方法:
-
如上图就可能造成线程 1 在执行期间发生了指令重排序,然后此时先执行的是 flg = true 把标志位哦设置为了 true 此时线程二读到的是 true,就会打印 i 为 0,此时结果就和我们设置的思想偏差了,所以这就是指令重排序造成的问题,所以需要使用 volatile 修饰 flg,利用内存屏障去禁止指令的重排序,下面的示意图展示了 volatile 是如何通过内存屏障避免了指令重排序的问题


可见性问题:不同线程对变量操作后及时可见,即一个线程修改了变量所有立即可见
-
验证 volatile 可见性:


- 该现象的原因可能是:main 线程修改变量后没有及时刷新到主内存中,或者因为 Thread 没有读取主内存的变量值,而是一直在读取其工作内存中的旧值,所以导致循环没有停止。
- 改正方式,volatile 修饰 Thread 线程,保存内存可见性


- volatile 的读写流程:

- 上面的 lock 和 unlock 是为了多线程情况下,防止其他线程的数据写入到主线程内,获取其他线程读取到主内存中的值,同一时刻只允许一个线程去操作主内存中的数值,保证线程安全
-
为什么 volatile 无法保证原子性:
- 看上面线程不安全的例子:


- 可以看到结果还是不正确,可以看到 volatile 是无法保证原子性的
- 原因:自增操作不是原子的,自增分为三步:load、add、save,由于 volatile 可以保证可见性,如图上面的两个线程,两个线程都 load 到主内存中的数值到自己线程的工作内存中,当任意一个线程先行 save 自己工作线程的变量到主内存中,此时的线程 2 可能还正进行到自增的 add 操作(因为操作不是原子的),由于可见性,此时线程 2 放弃当前读到的数值,重新去主内存读新的数值,此时就失去了一次自增的操作,所以由于自增操作不是原子的,所以无法保证原子性


- 看上面线程不安全的例子:
-
volatile 的适用场景:
- ①、单一赋值,但是含复合赋值的不行(比如:i++ 包含三步才能实现)
- ②、状态标志,判断业务是否结束
- ③、开销比较低的读,读多写少,使用内部锁和 volatile 变量减少同步的开销
- ④、双重所校验的单例模型(懒汉模型)(用来禁止指令重排序)
-
总结:
- volatile 写操作之前,都禁止重排到 volatile 之后
- volatile 读操作之前,都禁止重排到 volatile 之前
- volatile 写之后 volatile 读,禁止重排序
23、为什么使用读写锁,他有什么优点(具体内容后面介绍)- 读写锁,将读和写分为两部分,读锁和写锁,读锁本身是线程安全的,而写锁是互斥锁,不允许多个线程同时拥有锁,并且写操作和读操作都是互斥的,总的来说读读不互斥,读写,写写互斥
- 优点分析:
- 1、提高程序性能:多个锁可以同时执行,相比普通锁在任何情况下都需要排队执行,读写锁提高了程序的性能
- 2、避免临时数据:读写操作是排队执行的,所以没有临时数据被读到的情况
- 读多写少的场景可以使用到读写锁
24、公平锁和非公平锁- 公平锁:每个线程获取到锁的顺序是按照线程访问锁的先后顺序获取的,最前面的线程总是最先获取到锁
- 非公平锁:每个线程获取到锁的顺序是无序的,所有线程会竞争获取锁
- 应用场景:Java 中 synchronized 和 reentrantlock 默认都是非公平锁,但是 reentrantlock 可以设置为公平锁,但是 synchronized 只能是非公平锁

- 公平锁:
static ReentrantLock reentrantLock = new ReentrantLock(true);

    public static void main(String[] args) {
        for (int i = 0; i < 3; i++) {
            Thread thread = new Thread(()->{
                for (int j = 0; j < 2; j++) {
                    reentrantLock.lock();
                    System.out.println("当前线程" + Thread.currentThread().getName());
                    reentrantLock.unlock();
                }
            });
            thread.start();
        }
    }
- 公平锁线程获取锁的顺序是:A -> B -> C -> A -> B -> C
- 非公平锁:
static ReentrantLock reentrantLock1 = new ReentrantLock();

    public static void main(String[] args) {
        for (int i = 0; i < 3; i++) {
            Thread thread = new Thread(()->{
                for (int j = 0; j < 2; j++) {
                    reentrantLock1.lock();
                    System.out.println("当前线程" + Thread.currentThread().getName());
                    reentrantLock1.unlock();
                }
            });
            thread.start();
        }
    }
-
非公平锁,获取锁的顺序是 A -> A -> B -> B -> C -> C,原因是所有线程都争抢锁时,因为当前执行线程处于活跃状态,其他线程属于等待状态(还需要被唤醒),所以当前线程总是会先获取到锁,所以最终获取锁的顺序是:A -> A -> B -> B -> C -> C
-
执行流程:
- 1、公平锁:获取锁时,先将线程放入到等待队列的队尾并休眠,当某线程用完锁后,从等待队列中取出队首,锁的使用顺序也是队列中的优先顺序,整个过程中,线程会从用户状态切换到内核态,再从休眠状态恢复到运行状态,线程每次休眠和恢复都需要从用户态转换为内核态,这个过程是比较费时间的,所以公平锁,执行速度比较慢
- 2、非公平锁:当线程获取锁,会通过 CAS 尝试获取锁,尝试成功直接获取锁,获取失败阻塞等待(进行阻塞队列),获取锁不用遵循先到先得的规则,避免线程休眠和恢复的操作,提高执行效率

-
优点分析:
- 公平锁:平均分配资源,不会出现线程饿死的情况,但是唤醒线程开销大,执行效率慢
- 非公平锁:抢占式获取锁,效率更高,但是会出现线程饿死的情况
25、线程的休眠方式:- 1、Thread.sleep() 括号内指定休眠的时间,具体参数为一个 long 类型的毫秒数,表示对应时间过后,线程自动唤醒
public static void main(String[] args) {
        Thread thread = new Thread(()->{
            try {
                Thread.sleep(1000);
            } catch (InterruptedException e) {
                e.printStackTrace();
            }
            System.out.println("sleep 线程休眠");
        });

        thread.start();
    }
- 2、TimeUnit 和 sleep 功能一样,都是过 N 个单位时间后唤醒线程
public static void main(String[] args) {
        Thread thread = new Thread(()->{
            System.out.println("线程开始时间" + new Date());
            try {
                TimeUnit.SECONDS.sleep(1);
            } catch (InterruptedException e) {

            }
            System.out.println("结束时间" + new Date());
        });
        thread.start();
    }
- 3、wait 无线时间阻塞,需要使用 notify 或者 notifyAll 进行唤醒,需要配合 synchronized 使用
public static void main(String[] args) {
        Object lock = new Object();

        Thread thread = new Thread(()->{
            System.out.println("wait()开始前");
            synchronized (lock){
                try {
                    lock.wait();
                } catch (InterruptedException e) {
                    e.printStackTrace();
                }

                System.out.println("wait()开始后");
            }
        });
        thread.start();

        Thread thread1 = new Thread(()->{
            try {
                Thread.sleep(1000);
            } catch (InterruptedException e) {
                e.printStackTrace();
            }
            System.out.println("notify开始前");
           synchronized (lock){
               lock.notify();
           }
            System.out.println("notify开始后");
        });
        thread1.start();
    }
- 4、Condition:wait 的升级版,常用方法有以下几个:

public static void main(String[] args) {
        ReentrantLock lock = new ReentrantLock();
        Condition condition = lock.newCondition();

        Thread thread = new Thread(()->{
            System.out.println("wait前");
           lock.lock();
            try {
                condition.await();
            } catch (InterruptedException e) {
                e.printStackTrace();
            }
            System.out.println("wait后");
            lock.unlock();
        });
        thread.start();

        Thread thread1 = new Thread(()->{
            System.out.println("signal前");
            lock.lock();
            condition.signal();
            System.out.println("signal后");
            lock.unlock();
        });
        thread1.start();
    }
- 5、LockSupport 更底层的唤醒和休眠线程,通过许可机制实现阻塞和唤醒的功能。许可证不可以积累,只能有一个。
- park 方法和 unpark 方法都是调用底层的 UNSAFE 方法,调用 unpark(Thread) 方法后,就会将 Thread 线程的许可证 permit 发放,会自动唤醒 park 线程
- 优点:
- 正常 + 无锁块要求
- 如果存在 notify 和 wait 顺序的颠倒,前面 synchronized 和 Condition 两种方法 wait 方法会一直休眠,但是这里可以正常运行。因为 unpark 发放了凭证,再到 park 位置有证直接通过,所以可以正常运行

public static void main(String[] args) {
        Thread thread1 = new Thread(()->{
            System.out.println("线程1休眠");
            LockSupport.park();
            System.out.println("线程1执行结束");
        });
        thread1.start();

        Thread thread2 = new Thread(()->{
            System.out.println("线程2休眠");
            LockSupport.park();
            System.out.println("线程2执行结束");
        });
        thread2.start();

        Thread thread3 = new Thread(()->{
            System.out.println("线程3唤醒线程1");
            LockSupport.unpark(thread1);
        });
        thread3.start();
    }
26、notify是随机唤醒吗?- notify 唤醒线程是随机的,但是具体实现还是依赖于 JVM ,也就是 notify 的唤醒规则最终取决于 JVM 的厂商,不同厂商 notify 的唤醒规则是不同的,主流的 HotSpot 虚拟机会按照线程休眠的顺序唤醒线程
27、JUC 包底下有哪些类- ThreadPoolExecutor,ArrayBlockingQueue,LinkedBlockingQueue 等阻塞队列
- ConcurrentHashMap CopyOnWriteArrayList 线程安全的容器或集合
- CountDownLatch CyclicBarrier Semophore(信号量)callable reentrantlock
28、synchronized 详解:- synchronized 修饰方法,同一时刻只要有一个线程去调用一个 synchronized 方法,其他线程只能等待,也就是还说某一时刻,只能有唯一的一个线程去访问这些 synchronized 方法,锁的是当前对象,被锁定后其他的线程都不能进入到当前对象的 synchronized 方法。被 static 修饰的锁定的类,锁的是类模板。锁代码块,锁的是括号内的对象
- 锁静态方法(静态同步方法),锁定的是

- 锁普通方法,被称为同步方法,锁住的是通过模板 new 出来的实例

- 同步代码块,锁住的就是括号内的对象

29、synchronized 底层如何实现- 1、同步代码块,是通过 monitor enter 和 monitor exit 指令实现锁的获取和释放的
    private Object object = new Object();
    public void func(){
        synchronized (object){
            System.out.println("获取锁");
        }
    }
-
反编译后,一般都是两个 exit 对应一个 enter,第二个 exit 是代表如果获取锁期间发生异常情况,没有正常释放锁,走这里的第二个出口,第一个 exit 代表正常退出走的出口,极端情况下,也会有一对一的情况
-
2、同步方法:
    public synchronized void m2(){

    }

    public static void main(String[] args) {

    }
- 同步方法加锁的实现:调用指令检查方法的 ACC_SYNCHRONIZED 访问标志位是否被设置,如果被设置了,执行线程将先持有 monitor 锁,然后再执行方法,最后执行完成(是否正常完成还是在执行期间发生异常)都使用锁
- 3、静态同步方法:底层实现加锁的方式和普通同步方法一样,都是设置标志位,只是静态同步方法,加了一位表示符,代表加的是类锁

30、为什么每一个对象都可以被设置为锁- 每个对象中有一个看不见的锁,被称为内部锁,该对象是在HotSpot底层C++语言编写的(openjdk里面看),这个类中记录着一些关于锁的信息,比如 owner 就记录着持有锁的线程,所以每一个对象都可以被设置为锁

31、可重入锁- 外层获取到对象的锁,内层也对同一对象加锁,理论上是会发生死锁的情况,但是 synchronized、reentrantlock 在设计上都被设置为了可重入锁,执行到内层时,可以自动获取到对象的锁,避免了死锁的方法
- 同步代码块:
private static Object object = new Object();
    public static void main(String[] args) {
        synchronized (object){
            System.out.println("外层执行");
            synchronized (object){
                System.out.println("内层执行");
            }
        }
    }
- 同步方法:
class Student{
    public synchronized void func1(){
        System.out.println("执行 func1");
        func2();
    }

    public synchronized void func2(){
        System.out.println("执行 func2");
    }
}

public static void main(String[] args) {
        new Thread(()->{
           new Student().func1();
        }).start();
    }
- 可以发现均为发现死锁的问题,这就是 synchronized 是可重入锁的原因,reentrantlock 也一样(注意加锁和释放锁的次数要保持一致),那可冲入锁如何实现?
32、可重入锁实现每一个锁对象拥有一个锁计数器和一个指向持有该锁的线程的指针,当执行 monitorenter 时如果目标对象的计数器为 0,证明没有线程持有此锁,那么就将该锁对象的指针指向该线程,计数器 + 1,在目标锁对象计数器不为 0 的情况下,如果锁对象持有线程是当前线程,那么就将计数器 + 1,否则进行等待,当执行 monitorexit 时计数器 - 1,计数器为 0 代表锁已经释放
33、关于锁的小总结
34、JMM (Java 内存模型)- 通过任务管理器(性能)可以看到 CPU 的三级缓存

- 那么整体计算机结构如下图:

- CPU 缓存的存在是因为,内存处理速度远小于CPU,所以 CPU 不可能一直等着内存处理完,所以通过缓存协议,如果 CPU 处理速度极快,就将处理好的数据先放到高速缓存中,再通过缓存协议和内存进行高效的交互

- 上面这套交互的规则就是 JMM :JMM 是用来屏蔽掉不同操作系统和硬件的造成的内存访问差异,以实现 java 在各平台下都能到达一致的访问效果,JMM 让 CPU 可以和 内存直接沟通(通过告诉缓存和缓存协议)

- JMM 的三大特性

35、原子类解决 ABA 问题的两个原子类:
- AtomicStampedReference、AtomicMarkableReference
- 区别:
- AtomicMarkableReference:解决是否修改过(标记位为 true / false),默认 false 修改过就是 true
- AtomicStampedReference:解决修改过几次
以一种线程安全的方式操作非线程安全对象内的某些字段
- 在同步方法中,使用 synchronized 加锁,会对整个对象加锁,有时可能只是同步方法中的一个字段会造成线程安全问题。所以使用可以使用粒度更下的方法来保证线程安全,也可以一定程度上提高程序性能
- 使用到的是以下三个类:
- ①、AtomicIntegerFieldUpdater
- ②、AtomicLongFieldUpdater
- ③、AtomicReferenceFieldUpdater
- 使用条件:
- 更新对象的属性必须使用 public volatile 修饰符(也算是 volatile 一个使用场景)
- 因为对象的属性修改类型原子类是抽象类,所以每次都需要使用静态方法创建一个更新器
- 之前保证一个自增方法的线程安全问题:
- 使用原子类解决:

原子增强类:
- LongAdder 适用用于多线程高并发统计的案例,其比 AtomicLong 有更大的吞吐量,但同时也会消耗更大的空间
- 使用规则:
- LongAdder 只能计算加法,且从 0 开始
- LongAccumulator 可以定义函数
- 演示:
- LongAdder (只有自增方法)


- LongAccumulator :支持自定义函数(两种定义方式)

- LongAdder (只有自增方法)
- 高并发大数据的统计,我们可以看下上面两个类和 synchronized 和 普通原子类的 AtomicLong 效率的差别:
package Thread; import java.util.concurrent.CountDownLatch; import java.util.concurrent.atomic.AtomicLong; import java.util.concurrent.atomic.LongAccumulator; import java.util.concurrent.atomic.LongAdder; /** * Created with IntelliJ IDEA. * Description: * User: Lenovo * Date: 2022-09-24 * Time: 14:32 */ class clickNum{ int number; public synchronized void clickBySynchronized(){ number++; } AtomicLong atomicLong = new AtomicLong(0); public void clickByAtomicLong(){ atomicLong.getAndIncrement(); } LongAdder longAdder = new LongAdder(); public void clickByLongAdder(){ longAdder.increment(); } LongAccumulator longAccumulator = new LongAccumulator((x,y)-> x+y, 0); public void clickLongAccumulator(){ longAccumulator.accumulate(1); } } public class Thread10 { private static final int ThreadNum = 50; private static final int _1w = 10000; public static void main(String[] args) throws InterruptedException { clickNum clickNum = new clickNum(); CountDownLatch countDownLatch1 = new CountDownLatch(ThreadNum); CountDownLatch countDownLatch2 = new CountDownLatch(ThreadNum); CountDownLatch countDownLatch3 = new CountDownLatch(ThreadNum); CountDownLatch countDownLatch4 = new CountDownLatch(ThreadNum); long startTime = 0; long endTime = 0; startTime = System.currentTimeMillis(); for (int i = 1; i <= ThreadNum; i++) { new Thread(()->{ try { for (int j = 1; j <= 100 * _1w; j++) { clickNum.clickBySynchronized(); } }finally { countDownLatch1.countDown(); } },String.valueOf(i)).start(); } countDownLatch1.await(); endTime = System.currentTimeMillis(); System.out.println("执行时间" + (endTime - startTime) + "\t" +clickNum.number); startTime = System.currentTimeMillis(); for (int i = 1; i <= ThreadNum; i++) { new Thread(()->{ try { for (int j = 1; j <= 100 * _1w; j++) { clickNum.clickByAtomicLong(); } }finally { countDownLatch2.countDown(); } },String.valueOf(i)).start(); } countDownLatch2.await(); endTime = System.currentTimeMillis(); System.out.println("执行时间" + (endTime - startTime) + "\t" +clickNum.atomicLong.get()); startTime = System.currentTimeMillis(); for (int i = 1; i <= ThreadNum; i++) { new Thread(()->{ try { for (int j = 1; j <= 100 * _1w; j++) { clickNum.clickByLongAdder(); } }finally { countDownLatch3.countDown(); } },String.valueOf(i)).start(); } countDownLatch3.await(); endTime = System.currentTimeMillis(); System.out.println("执行时间" + (endTime - startTime) + "\t" +clickNum.longAdder); startTime = System.currentTimeMillis(); for (int i = 1; i <= ThreadNum; i++) { new Thread(()->{ try { for (int j = 1; j <= 100 * _1w; j++) { clickNum.clickLongAccumulator(); } }finally { countDownLatch4.countDown(); } },String.valueOf(i)).start(); } countDownLatch4.await(); endTime = System.currentTimeMillis(); System.out.println("执行时间" + (endTime - startTime) + "\t" + clickNum.longAccumulator.get()); } }- 执行结果:可以看到最后两个增强原子类的统计效率是非常快的,和 synchronized 的方式比较提升了 30 多的效率,还是比较可观的

- LongAdder 为什么执行的快:
- LongAdder 采用分散热点的思想,将 value 分散到 cell 数组中,不同线程命中数组的不同位置,各个线程对每个位置的值进行 CAS 操作,降低了冲突的概率,要想真正获取到 long 值,只需要将数组中各个位置的数值累加起来即可。核心思想就是把之前 AtomicLong 一个 value 更新的压力分散到多个 value 中,降低更新热点。
- LongAdder 最初无竞争时只更新 base,更新 base 失败后,首次创建 Cell[] 数组,当多个线程同时竞争一个 cell 比较激烈时,可能就要对 cell[] 数组进行扩容(2 倍扩容)
- LongAdder 执行流程:
- 当 cell 数组为空,尝试使用 CAS 更新 base 字段,成功则退出
- 如果 cell 数组为空,CAS 更新 base 字段失败,uncontented 为 true,调用 longAccumulate
- 如果 cell 数组不为空,当当前线程映射槽位为空,uncontented 为 true,调用 longAccumulate
- 如果 cell 数组不为空,当当前线程映射槽位为空,CAS 更新 cell 的值,成功则返回,否则 uncontented 为 false,调用 longAccumulate 扩容
36、ThreadLocal 本地线程变量- ThreadLocal 主要用于实现每个线程都有自己一份专属的本地线程变量副本(自己的变量不麻烦别人,不和其他人共享,人人有份,人各一份)
- 注意事项:在使用完 ThreadLoacl 后记得 remove 防止内存泄漏,后面说

- ThreadLocalMap 实际上就是一个以 threadLocal 实例为 key,任意对象的值为 value 的 Entry 集合

- Thread ThreadLocal ThreadLocalMap 三者可以看作:Thread 是一个人,ThreadLocal 是身份证,ThreadLocalMap 是身份证的内容:名字、身份证号
- 通过上面的源代码可以发现,ThreadLocal 是一个弱引用对象

- 强引用:普通对象引用就是强引用,就即使这个引用后面不会再被用到,JVM 也不会回收
- 软引用:当系统内存充足时,它不会被回收。当系统内存不足时,会被回收
- 弱引用:当系统发生 gc 直接被回收
- 虚引用:需要配合引用队列使用,返回值为 null,就好像什么都没有引用,进入到队列中有东西,进行后续操作
- 为什么 ThreadLocalMap 的 key 里要使用弱引用:

tl 引用调用方法结束,栈帧要进行销毁,如果 key 是强引用,key 存的是 TheadLocal ,强引用不会被回收,那么此时 ThreadLocalMap 中某个 Entry 还持有着此对象的引用,如果是弱引用,就会大概率减少内存泄漏的问题,弱引用使 ThreadLocal 对象在执行完毕后顺利被回收且 Entry 中的 key 指向 null。 - 但是 key 为 null,value 有值,当 value 值多了也会造成内存泄漏,所以弱引用不能保证 100% 内存不泄漏,所以当 ThreadLocal 不用后一定要 remove 清除(寻找脏 key (key == null)将其 value 赋值为 null)
37、Java 对象内存布局- 平时我们进行 new 对象操作,new 出来的对象在堆中的存储布局可以划分为三部分:对象头、实例数据、对其填充
- 对象头可以分为两部分:对象标记(Mark Word)、类元信息(类型指针)

- 对象头中的对象标记记录着以下信息:哈希码、GC标记、GC次数、同步锁标记、偏向锁标记

- 类型指针:指向创建对象的模板,即对象来源自哪里
- 当一个对象(自定义 / 内置对象)创建出来其中没有任何属性,默认大小只是有对象头的大小为 12 字节(存储指针压缩的问题,这里压缩了类型指针的大小,为了提高内存利用率,否则本身类型指针大小应该为 8,主要目的是为了更好去利用对齐填充的空间)
- 当一个对象创建出来大小规定是 8 的倍数,所以不足 8 倍数时使用对齐填充来补充到 8 的倍数
38、synchronized 锁升级锁优化的背景:用锁确实可以保证数据安全性,但是会带来性能下降,无锁虽然性能会提高,但是安全性会下降,那么锁升级就是为平衡这二者
- 锁升级的过程:无锁 ——> 偏向锁——>轻量级锁——>重量级锁
synchronized 为重量级锁,因为 synchronized 效率低下,因为监视器锁是依赖底层的操作系统的系统互斥量来实现的,挂起和恢复都需要用户态和内核态之间的相互转换(这个过程效率是比较低效的),所以考虑减低获得锁和释放锁所带来的性能消耗,引入了轻量级锁和偏向锁
偏向锁:markword 存储的是偏向的线程 ID
轻量级锁:markword 存储的是指向线程栈中的 Lock Record 指针
重量级锁:markword 存储的是执行堆中的 monitor 对象的指针- synchronized 锁:由对象头中的 Mark Word 根据锁的标志位不同而被复用及锁升级策略

- 偏向锁:多线程情况下,锁不仅不存在多线程竞争,还存在同一个线程多次获得线程,偏向锁就是在这种情况下的,它的出现就是为了解决只有一个线程执行同步时提高性能。偏向锁会偏向第一个获得锁的线程,在下面一段时间如果锁没有被其他线程访问,则持有偏向锁的线程将永远不需要触发同步,即偏向锁在没有竞争的情况下消除了同步语句,连 CAS 都不做了,直接提高程序性能,比如下面的情况
class Sale{
    public int count = 50;

    Object object = new Object();
    public synchronized void saleCount(){
        synchronized (object){
            if(count > 0){
                System.out.println(Thread.currentThread().getName() + " 卖出 " + (count--) + " 还剩下 " + count);
            }
        }
    }
}
public class Thread1 {
    public static void main(String[] args) {
        Sale sale = new Sale();
        new Thread(()->{
            for (int i = 0; i < 55; i++) {
                sale.saleCount();
            }
        },"A").start();

        new Thread(()->{
            for (int i = 0; i < 55; i++) {
                sale.saleCount();
            }

        },"B").start();

        new Thread(()->{
            for (int i = 0; i < 55; i++) {
                sale.saleCount();
            }
        },"C").start();
    }
}
- 偏向锁只需要在线程第一次获取到锁时,记录下偏向线程 ID(通过 CAS),后续这个线程再进入同步代码块时,就不需要申请和释放锁,只需要去 markword 检查里面是不是自己线程的 ID。
- 注意:偏向锁只有遇到其他线程尝试竞争偏向锁时,持有偏向锁的线程才会释放锁,线程不会主动是方法偏向锁
- 偏向锁的撤销:我们上面知道当线程再次进入同步代码块时,需要检查 markword 中的 ID,如果相等,那么还是当前线程持有偏向锁,没有竞争,自始至终都是这一个线程使用锁。如果不相等就尝试使用 CAS 来更新 markword 中的 ID,如果竞争成功,当前线程退出,那么可以使用 CAS 来更新 Markword 中的 ID,如果竞争失败,这时候可能需要锁升级到轻量级锁,才能线程公平竞争锁
- 所以这里线程释放偏向锁的时机很重要:
- 当有另外的线程逐步来竞争锁,就不会使用偏向锁了,要升级为轻量级锁
- 尝试竞争对象头的 CAS 操作失败时,会等待到安全局点(此时不会执行任何代码)撤销偏向锁
- 当一个线程正在执行 synchronized 代码块,当其他线程竞争锁时,所持有的偏向锁才会是释放并产生锁升级,此时轻量级锁由原来的持有偏向锁的线程持有,继续执行同步代码块,其他线程会进入自旋等待状态获得该轻量级锁

- 轻量级锁:多线程竞争,但是任意时刻最多只有一个线程竞争,即不存在锁竞争太过激烈的情况,也就没有线程阻塞(获取锁的冲突时间极短),通过 CAS 减少重量级锁使用操作系统互斥量产生的性能消耗,说白了先自旋,不行才升级阻塞
- 轻量级锁的核心:自旋 CAS 不断的尝试获取锁,能不升级锁就不升级,尽量不要阻塞
- 轻量级锁释放:当前线程使用 CAS 来获取锁,如果没有发生竞争,那么获取成功,如果因为其他线程因为自旋多次导致轻量级锁升级为重量级锁,那么 CAS 就会操作失败,释放锁并唤醒被阻塞的线程。轻量级锁每次退出同步代码块都需要释放锁
- 轻量级锁升级(当自旋锁自旋到一定次数后(Java 6 后具体次数采用自适应的方法)升级为重量级锁)
重锁
Java 中的 synchronized 重量级锁是基于进入和退出 Monitor 对象实现的。在编译时期会在同步代码块插入 monitor enter 指令,结束位置会插入 monitor exit 指令。如果当前线程获取到锁对象,在其未释放前,其他线程无法获取到此锁对象
总结:

锁消除
如果多个线程对多个对象加锁不产生锁冲突,或者在单线程下使用线程安全的类,编译器为了提高程序性能,会进行锁消除,比如下面的代码:


可以看到是 10 个线程操作 10 个不同的 object 所以 synchronized 锁也就没用了,所以这里编译器会进行锁消除,提高程序性能
锁粗化
方法中首尾相连,前后相邻都是一个锁对象,编译器就会把几个小块的同步代码块合并成一大块,加大锁的范围,一次申请释放就可以,避免多次申请和释放,提高性能,比如下面的代码在运行过程中就会发生锁粗化

编译器将上面的代码优化为:

39、AQS用于实现锁或者其他同步组件的公共基础部分的抽象实现,是重量级基础框架及整个 JUC 的基石,主要用于锁分配给谁的问题

为什么 AQS 是 JUC 的基础
JUC 框架中的类,我们可以顺利使用的类(Reentrantlock、CountDownlatch)底层都是依赖于 AQS 实现的。
JUC 中会涉及到加锁问题,加锁就会造成阻塞,有阻塞就需要有排队,要排队就需要队列,来管理谁先谁后,谁是下一个获取锁的,谁又在队列中不想排列退出……,如果资源共享,就需要一定的等待唤醒机制来保证锁分配,这些规范 AQS 来进行统一的规范管理
AQS 将请求线程封装成一个个 Node 通过 CAS 自旋以及 LockSupport 的方式,维护 status 的状态,使并发到同步的效果
AQS 能干什么
AQS 是一种抽象的队列同步器,作用是来保证等待状态下后续线程的唤醒机制

每个线程被封装成 Node 结点,结点之间组成双向链表,整个双向链表又构成一个队列。头指针指向首结点,尾指针指向尾结点,监视着状态位,当有线程占用,同步器中进行等待,当 status 状态位空闲,队列中形参新的通知唤醒机制,挨个去获取锁Node 结点的内部结构:


以非公平锁 Reentrantlock 为例作为突破口走起,方法 lock(),即 Reentrantlock 的实现原理
首先 Reentrantlock 底子就是 AQS ,底层实现了 lock 接口,基本都是聚合了一个队列同步器的子类完成线程访问控制的

从非公平锁和公平锁的构造方法开始看:

- 再看接口:lock 接口

- AQS 中 acquire 的执行流程:

- 获取锁 acquire 方法的三个实现方法
- ①、tyracquire 方法:这里采用的是非公平的 tryacquire,公平的 tryacquire 就是比非公平的版本多一个前置结点的判断,其他完全一样

- ②、addwaiter 方法:

- ③、acquireQueued 方法

- ①、tyracquire 方法:这里采用的是非公平的 tryacquire,公平的 tryacquire 就是比非公平的版本多一个前置结点的判断,其他完全一样
- 那么总有一个时刻,线程 A 释放了锁,那么如何去唤醒等待队列中的线程,解锁的流程我们看,reentrantlock 的 unlock 方法

线程在等待队列中取消等待的情况

40、读写锁- 读写锁继承的接口,和底层的 Sync 类

- 读写锁的定义:一个资源可以被多个读线程访问,或者被一个写线程访问,但不允许同时存在多个读写线程,和 lock 的区别就是同一时刻可以运行多个读线程同时访问,lock 不管是读线程还是写线程同一时刻只允许一个线程访问同一资源。所以读写锁更适用于读多写少的情况
读写锁的演示:
- 首先演示 reentrantlock 锁:
import java.sql.Time;
import java.util.HashMap;
import java.util.Map;
import java.util.concurrent.TimeUnit;
import java.util.concurrent.locks.Lock;
import java.util.concurrent.locks.ReadWriteLock;
import java.util.concurrent.locks.ReentrantLock;
import java.util.concurrent.locks.ReentrantReadWriteLock;

/**
 * Created with IntelliJ IDEA.
 * Description:
 * User: Lenovo
 * Date: 2022-09-29
 * Time: 9:47
 */
//资源类 模拟一个简单的缓存
class MyResoure{
    Map<String,String> map = new HashMap<>();
    //reentrantlock 等于 synchronized
    Lock lock = new ReentrantLock();
    //reentrantreadwritelock 一体两面 读写互斥 读读互斥
    ReadWriteLock rwLock = new ReentrantReadWriteLock();

    //写操作
    public void write(String key, String value) throws InterruptedException {
        lock.lock();
//       rwLock.writeLock().lock();
        //正在写入
        try{
            System.out.println(Thread.currentThread().getName() + " 正在写入");
            map.put(key, value);
            TimeUnit.MILLISECONDS.sleep(500);
            System.out.println(Thread.currentThread().getName() + " 完成写入");
        }finally {
//            rwLock.writeLock().unlock();
            lock.unlock();
        }
    }

    //读操作
    public void read(String key){
        lock.lock();
//        rwLock.readLock().lock();
        try{
            System.out.println(Thread.currentThread().getName() + "正在读取");
            String result = map.get(key);
            //读比写块
            TimeUnit.MILLISECONDS.sleep(2000);

            System.out.println(Thread.currentThread().getName() + "读取完毕");
        } catch (InterruptedException e) {
            e.printStackTrace();
        } finally {
//            rwLock.readLock().unlock();
            lock.unlock();
        }
    }

}
public class ReentrantReadWriteLockDemo {

    public static void main(String[] args) throws InterruptedException {
        MyResoure resoure = new MyResoure();
        for (int i = 1; i <= 10; i++) {
            int finalI = i;
            new Thread(()->{
                //往缓存写入
                try {
                    resoure.write(finalI +"", finalI +"");
                } catch (InterruptedException e) {
                    e.printStackTrace();
                }
            }).start();
        }

        for (int i = 1; i <= 10; i++) {
            int finalI = i;
            new Thread(()->{
                resoure.read(finalI+"");
            }).start();
        }

        TimeUnit.SECONDS.sleep(1);
        for (int i = 0; i < 3; i++) {
            int finalI = i;
            new Thread(()->{
                //往缓存写入
                try {
                    resoure.write(finalI +"", finalI +"");
                } catch (InterruptedException e) {
                    e.printStackTrace();
                }
            }).start();
        }
    }
}
reentrantreadwritelock 锁降级
写锁降级为读锁,类似 linux 的文件读写权限理解,就像是写权限高于读权限一样
- reentrantreadwritelock 支持公平和非公平锁两个版本
- reentrantreadwritelock 支持可重入锁,读可以再获取读,写可以再获取写,同时写还可以获取读,这就是锁降级的原因
- reentrantreadwritelock 锁降级:遵循获取写锁、获取读锁、再释放写锁的次序,写锁可以降级为读锁
读写锁演示:
- 首先读写锁可以降级(写锁降级为读锁)、但是读锁不能升级为写锁
- 锁降级的目的:为了让当前线程感知到数据的变化,保证数据一致性

- 读写锁:同一个线程自己持有写锁时再去拿读锁,其本质相当于重入。写后不释放锁,当前线程立刻再去获得读锁,如果写后释放锁,再去获得读锁,当前线程不一定可以抢占到此读锁,等此线程抢占到读锁,可能数据已经被其他线程改的 “面目全非”,所以在写后一定不要释放写锁,而是立刻去获取读锁,再去进行一系列操作,最后先释放写锁,再释放读锁
比读写锁更快的锁——版本锁(StampedLock)
-
StampLock 是 jdk 1.8 新增的读写锁,也是对 1.5 中的 reentrantreadwritelock 的优化。reentrantreadwritelock 实现了读写分离,但一旦读操作比较多的时候,想要获取写锁就比较难了,比如 1000 线程。999 个读,1个写,那么唯一一个写操作的线程就很难获取到写锁,因为有可能 999 个线程长时间占用锁,需要等到读锁释放才可以加写锁
-
StampLock 采用乐观锁(线程A在读的时候,认为其他线程修改数据的概率小)的方式获取锁后,其他线程尝试获取到写锁的时候不会阻塞,这其实是对读锁的优化,所以,在获取乐观读锁后,还需要对其结果进行校验
-
StampLock 完全可以实现 reentrantreadwritelock 的读写锁功能:
public class StampLockDemo {
    static int number = 37;
    static StampedLock stampedLock = new StampedLock();

    public void write(){
        long stamp = stampedLock.writeLock();
        System.out.println(Thread.currentThread().getName() + " 准备写入");

        try{
            number = number + 13;
            System.out.println(Thread.currentThread().getName() + " 写入完毕");
        }finally {
            stampedLock.unlockWrite(stamp);
        }
    }

    public void read() throws InterruptedException {
        long stamp = stampedLock.readLock();
        System.out.println(Thread.currentThread().getName() + " 准备读,持续 4 s");

        for (int i = 0; i < 4; i++) {
            TimeUnit.SECONDS.sleep(1);
            System.out.println(Thread.currentThread().getName() +" 正在读………………");
        }
        try{
            int result = number;
            System.out.println(Thread.currentThread().getName() + "获取成员变量" + result);
            System.out.println("写操作没有修改成功,读锁时候写锁无法介入,传统读写互斥");
        }finally {
            stampedLock.unlockRead(stamp);
        }
    }

    public static void main(String[] args) throws InterruptedException {
        StampLockDemo stampLockDemo = new StampLockDemo();
        new Thread(()->{
            try {
                stampLockDemo.read();
            } catch (InterruptedException e) {
                e.printStackTrace();
            }
        },"readThread").start();

        TimeUnit.SECONDS.sleep(1);

        new Thread(()->{
            System.out.println(Thread.currentThread().getName() + " come in");
            stampLockDemo.write();
        },"writeThread").start();
    }
}
-
可以发现在读操作期间,写操作是没有执行的,所以和上面的 reentrantreadwritelock 目前是一致的,只是添加了戳记,其他都一样
-
尝试使用乐观锁去读:


-
缺点:
- 1、不可重入
- 2、乐观或者悲观锁都不支持 Condition
- 3、一定不要调用中断操作,即不要调用 interrupt 方法,会影响其性能
41、wait 和 await 的区别:
-
①、继承的父类不同:wait 父类为 Object,await 父类为 ConditionObject
-
②、wait 需要配合 synchronized 使用,await 不需要
-
③、await 阻塞需要使用 condition 对象
-
④、wait 阻塞需要使用 notify 唤醒,await 阻塞需要使用 signal
-
⑤、wait 一般适用于 synchronized 场景中,而 await 一般只适用于 reentrantlock 中
42、谈谈信号量,信号量是适⽤于线程还是适⽤于进程,如何保证它对两个进程是可⻅的
- 信号量是一种用于提供不同进程之间或者一个给定的不同线程间同步手段的原语
- 信号量:使用到的类是 Semaphore ,信号量类似于停车场的提示牌,当进入一辆车提示牌 -1,驶出 +1,这个牌子就是信号量,用于记录可用资源的个数,每次申请了一个可用资源,计数器 -1(P操作),每次释放一个可用资源,计数器 +1(V操作)
- 引入这样的概念,就可以认为锁是二维信号量,可用资源就一个,计数器的取值 ,非 0 即 1,信号量就把锁推广到一般情况,可用资源多时如何处理
-
相关阅读:
1、鸿蒙学习-为应用/服务进行签名
JSD-2204-酷莎商城(管理员模块)-密码加密-Day10
Inner Join与Left Join
21天学习挑战赛-《Autosar从入门到精通-实战篇》
可能是2022最详细的【Java SE 】顺序结构、分支结构、循环结构讲解
Java版本+企业电子招投标系统源代码之电子招投标系统建设的重点和未来趋势
Redis的高可用
java培训之InitBinder注解
单调栈介绍和使用
第五十七章 CSP的常见问题 - 如何调试CSP页面?
- 原文地址:https://blog.csdn.net/baiyang2001/article/details/126892291