-
springcloud
1.Eureka服务注册中心
EnableEurekaServer
@EnableEurekaServer:激活EurekaServer端配置
在SpringCloud中当你需要使用Eureka注册中心的时候你在配置Eureka的服务端的时候需要在启动类上添加@EnableEurekaServer注解
eureka服务器对应的依赖<!-- eureka-server --> <dependency> <groupId>org.springframework.cloud</groupId> <artifactId>spring-cloud-starter-netflix-eureka-server</artifactId> </dependency>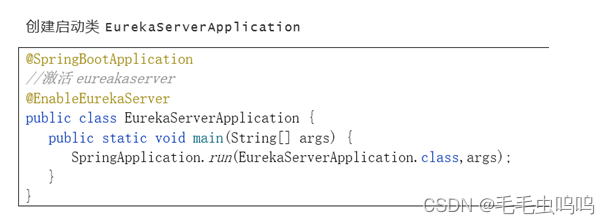
EnableEurekaClient
注册到eureka中的服务引入的依赖
<dependency>
      <groupId>org.springframework.cloud</groupId>
      <artifactId>spring-cloud-starter-netflix-eureka-client</artifactId>
</dependency>
@EnableDiscoveryClient 或 @EnableEurekaClient在SpringCloud中当你需要使用Eureka注册中心的时候你在配置Eureka的客户端的时候需要在启动类上添加@EnableDiscoveryClient 或 @EnableEurekaClient注解
从spring cloud E版本之后就不需要添加该注解,只需要引入Eureka依赖,并在配置文件配置Eureka地址即可实现将服务注册到Eureka注册中心。只有服务提供者即生产者才需要在服务中心注入,消费者注入也没有关系。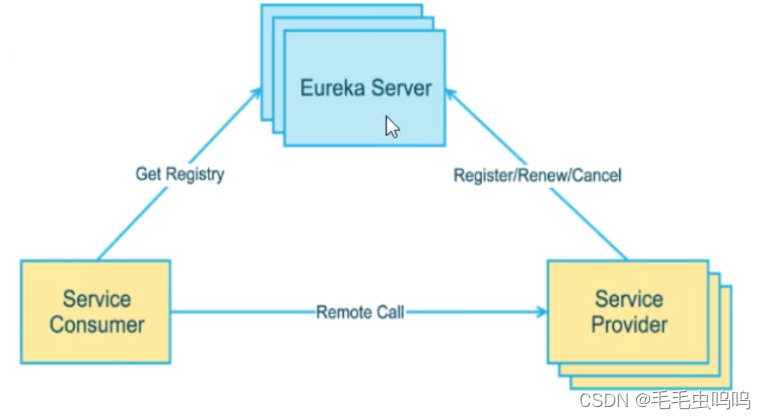
一个配置文件代表一个springboot服务。具体流程:
- 注册中心eureka服务,配置eureka的地址,
@EnableEurekaServer表示该服务为eureka服务 - 生产者服务注册到eureka,配置文件配置和
@EnableEurekaClient将服务注册到Eureka中。生产者为服务提供者。 - 消费者注册到eureka,配置文件配置和
@EnableEurekaClient将服务注册到Eureka中。消费者为服务使用者。 - 消费者通过RestTemplate调用生产者的接口,实现跨服务接口调用。
- 同一种服务的生产者可能有多个,为了防止某个宕机导致无法提供服务的情况。
- 消费者可以通过在RestTemplate上加入@LoadBalanced实现负载均衡,轮询调用同一服务的不同提供者。
- 注册中心也可以有多个,防止注册中心挂掉
具体实现:
1.eureka服务配置文件
server:
  port: 7001

eureka:
  instance:
    hostname: localhost  #eureka服务端的实例名称
  client:
    #false表示不向注册中心注册自己(想注册也可以,不过没必要)
    register-with-eureka: false
    #false表示自己端就是注册中心,职责就是维护服务实例,并不需要去检索服务
    fetch-registry: false
    service-url:
      #设置与eurekaServer交互的地址查询服务和注册服务都需要依赖这个地址
      defaultZone: http://${eureka.instance.hostname}:${server.port}/eureka/
2.两个提供同一服务的生产者注册到eureka
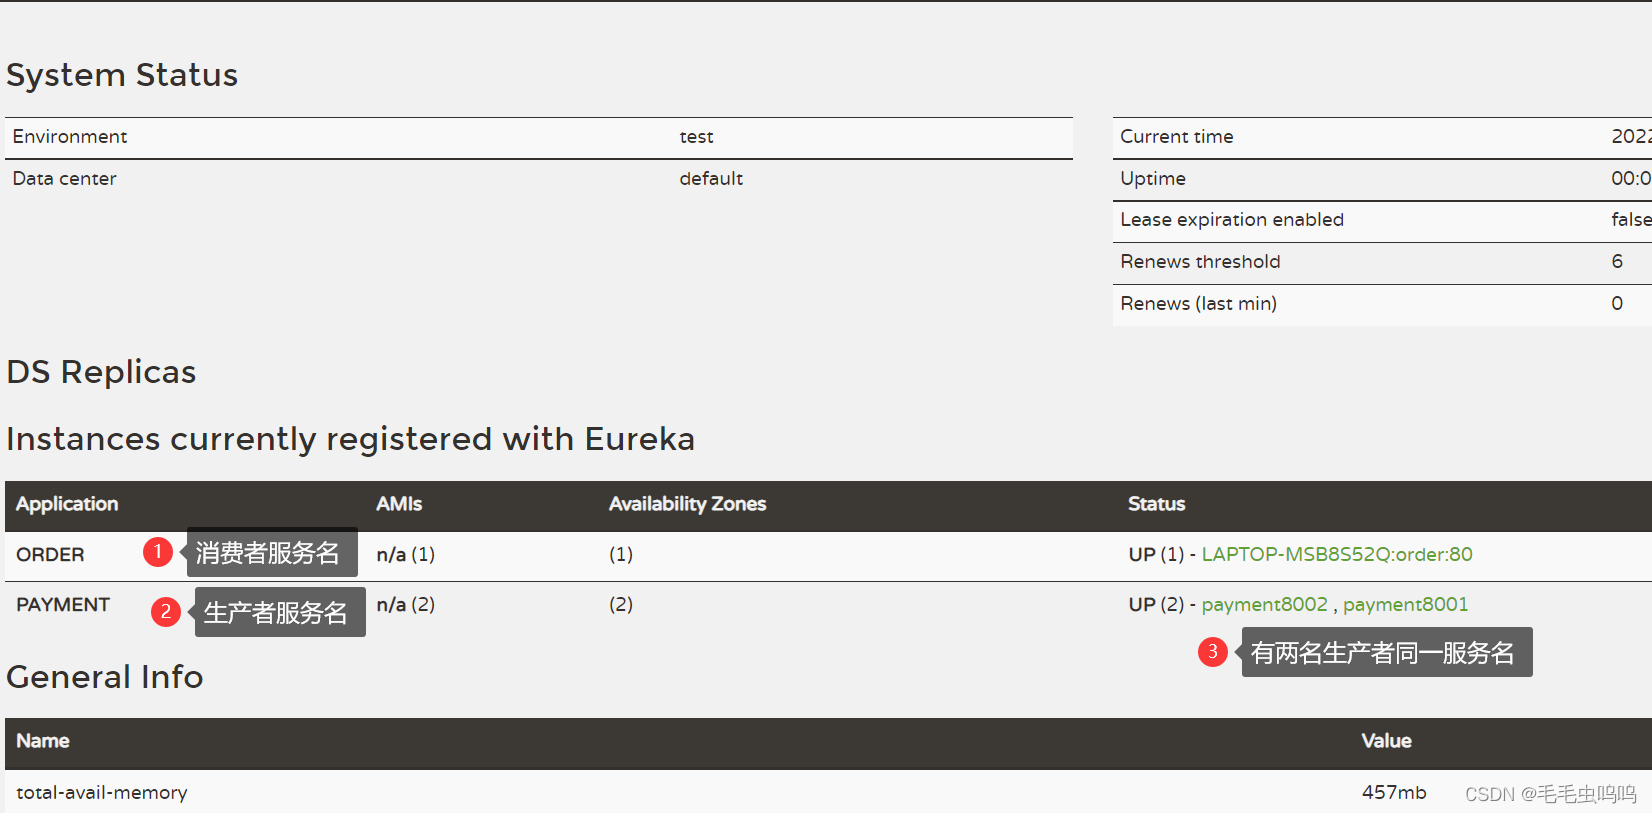
因为两个生产者提供相同的服务,所以两个服务的名称相同,都为payment,通过端口号区分不同提供者。
(1)生产者1server: port: 8001 spring: application: name: payment eureka: client: #false表示不向注册中心注册自己 register-with-eureka: true #false表示自己端就是注册中心,职责就是维护服务实例,并不需要去检索服务 fetch-registry: true service-url: #设置与eurekaServer交互的地址查询服务和注册服务都需要依赖这个地址 defaultZone: http://localhost:7001/eureka instance: instance-id: payment8001 # 显示ip prefer-ip-address: true(2)生产者二
server:
  port: 8002

spring:
  application:
    name: payment

eureka:
  client:
    #false表示不向注册中心注册自己
    register-with-eureka: true
    #false表示自己端就是注册中心,职责就是维护服务实例,并不需要去检索服务
    fetch-registry: true
    service-url:
      #设置与eurekaServer交互的地址查询服务和注册服务都需要依赖这个地址
      defaultZone: http://localhost:7001/eureka
  instance:
    instance-id: payment8002
    # 显示ip
    prefer-ip-address: true
3.消费者注册到eureka
server:
  port: 80

spring:
  application:
    name: order

eureka:
  client:
    #false表示不向注册中心注册自己
    register-with-eureka: true
    #false表示自己端就是注册中心,职责就是维护服务实例,并不需要去检索服务
    fetch-registry: true
    service-url:
      #设置与eurekaServer交互的地址查询服务和注册服务都需要依赖这个地址
      defaultZone: http://localhost:7001/eureka
4.生产者通过RestTemplate实现跨服务调用
(1)注入RestTemplate
因为提供同一服务的有两个生产者,为了实现负载均衡,使用@LoadBalanced@Configuration public class Applicationcontext { @Bean @LoadBalanced // 负载均衡 public RestTemplate restTemplate(){ return new RestTemplate(); } }(2)跨服务调用
a. 注入RestTemplate
b. 定义服务提供者的服务名,通过服务名确定服务提供者ip,此处为http://PAYMENT
c. 使用RestTemplate发送post或get请求实现跨服务接口调用
@RestController @Slf4j public class ConsumerController { public static final String PAYMENT_URL = "http://PAYMENT"; @Resource private RestTemplate restTemplate; //因为浏览器只支持get请求,为了方便这里就用get @GetMapping("/consumer/payment/create") public CommonResult<Payment> create(Payment payment){ log.info("********插入的数据:" + payment); //postForObject分别有三个参数:请求地址,请求参数,返回的对象类型 return restTemplate.postForObject(PAYMENT_URL + "/payment/create", payment, CommonResult.class); } @GetMapping("/consumer/payment/get/{id}") public CommonResult<Payment> getPayment(@PathVariable("id") Long id){ log.info("********查询的id:" + id); //getForObject两个参数:请求地址,返回的对象类型 return restTemplate.getForObject(PAYMENT_URL + "/payment/get/" + id, CommonResult.class); } }2.Ribbon负载均衡服务调用
ribbon= 负载均衡+RestTemplate调用
前面eureka已经使用@LoadBalanced实现了负载均衡。
分析:引入eureka的jar包中包含了ribbon,所以上面的@LoadBalanced实际就是ribbon实现的,只是采用了轮询的默认负载均衡算法。
ribbon的负载均衡算法由IRule接口定义,默认为轮询算法


负载均衡算法替换
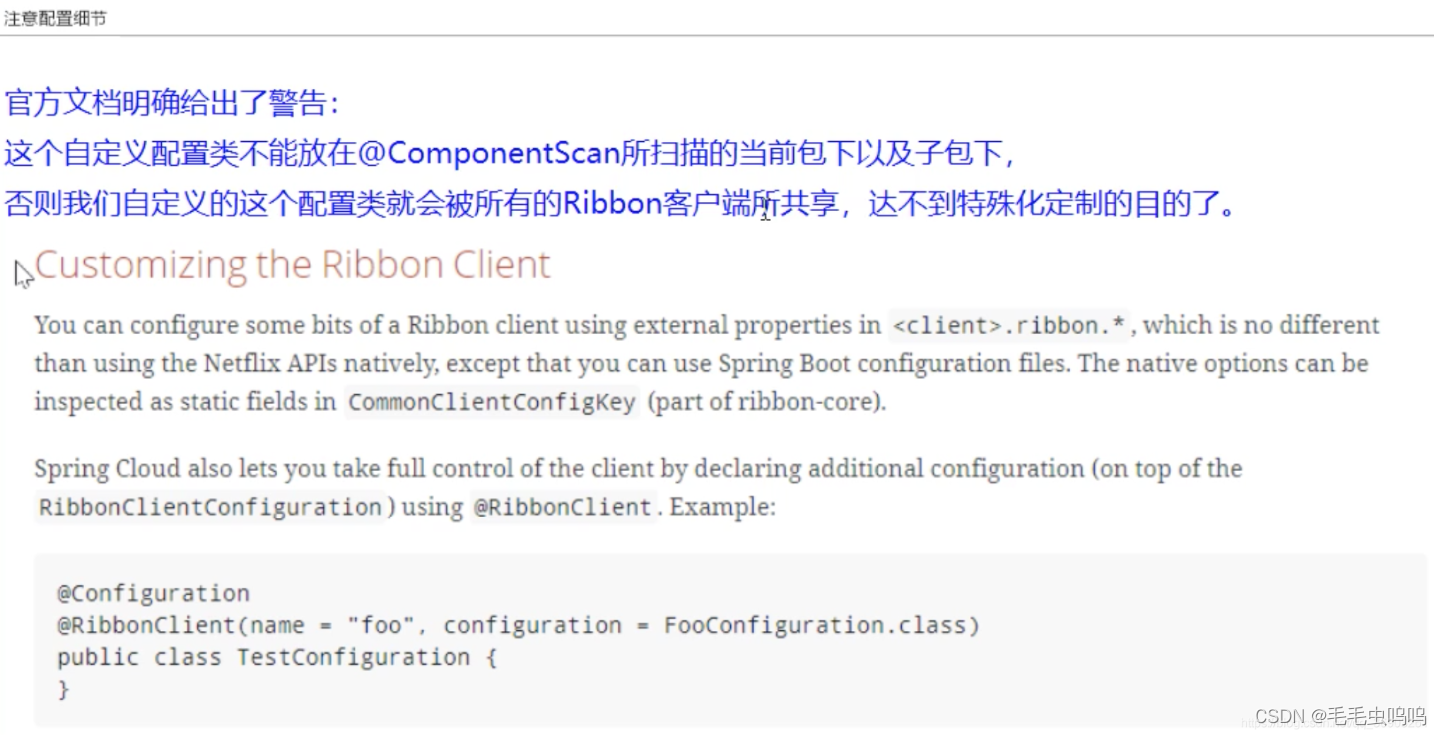
Ribbon的自定义配置类不可以放在@ComponentScan所扫描的当前包下以及子包下,否则这个自定义配置类就会被所有的Ribbon客户端共享,达不到为指定的Ribbon定制配置,而@SpringBootApplication注解里就有@ComponentScan注解,所以不可以放在主启动类所在的包下。(因为Ribbon是客户端(消费者)这边的,所以Ribbon的自定义配置类是在客户端(消费者)添加,不需要在提供者或注册中心添加)1.所以
Ribbon的自定义配置类不能放在springcloud包下,要在atguigu包下再新建一个myrule包。
2.在此包下新建
MySelfRule自定义配置类,配置负载均衡算法。// 替换Ribbon负载均衡算法 @Configuration public class MySelfRule { @Bean public IRule myRule(){ return new RandomRule(); } }3.在主启动类上添加
@RibbonClient(name = "PAYMENT", configuration = MySelfRule.class)
name为指定的服务名(服务名必须与注册中心显示的服务名大小写一致)
configuration为指定服务使用自定义配置(自定义负载均衡机制)@SpringBootApplication() @EnableEurekaClient @RibbonClient(name = "PAYMENT", configuration = MySelfRule.class) public class Consumer { public static void main(String[] args) { SpringApplication.run(Consumer.class,args); } }4.测试
erueka页面
生产者服务调用消费者接口
随机算法调用8001服务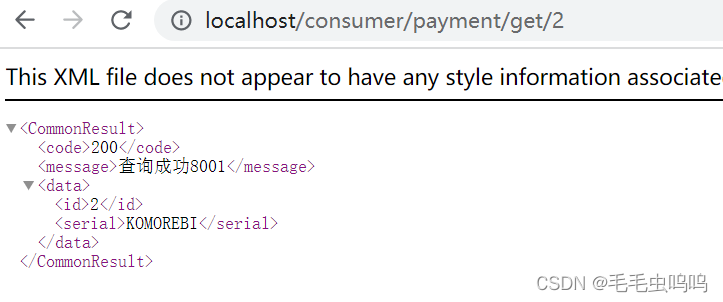
随机算法调用8001服务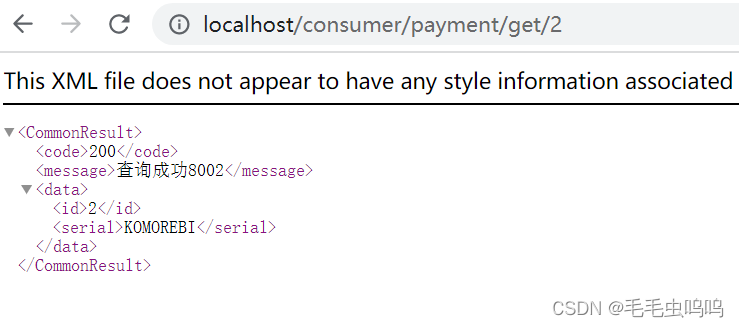
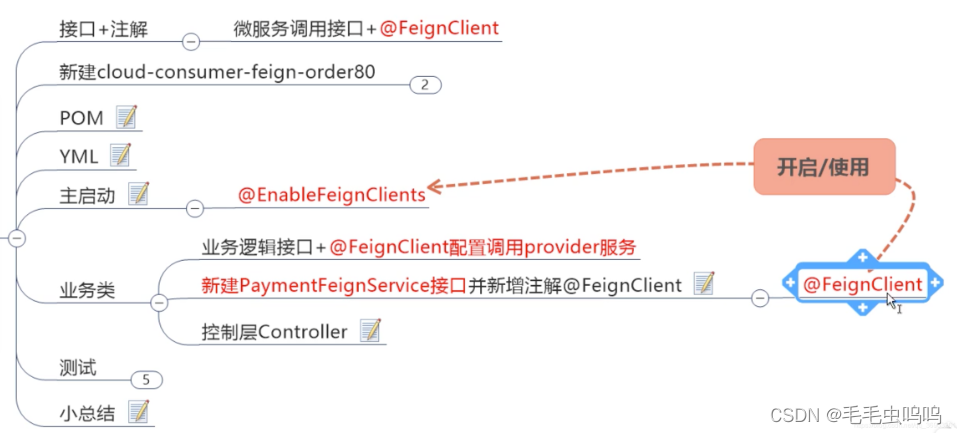
3.OpenFeign负载均衡服务调用
feign自带ribbon,所以自带负载均衡

使用Feign可以简化不同服务接口调用的流程:只需要创建一个接口并在接口上添加一个@FeignClient注解即可。启动类加入EnableFeignClient注解
由于OpenFeign = Ribbon + RestTemplate,所以OpenFeign也是使用在消费者服务端的。实例:创建一个消费者服务,使用
OpenFeign 代替 Ribbon + RestTemplate进行服务调用。
-
创建项目,端口80和使用
Ribbon + RestTemplate服务调用的消费者同一个端口,测试时之启动一个消费者。 -
导入依赖
<dependencies> <!-- openfeign --> <dependency> <groupId>org.springframework.cloud</groupId> <artifactId>spring-cloud-starter-openfeign</artifactId> </dependency> <!-- eureka-client --> <dependency> <groupId>org.springframework.cloud</groupId> <artifactId>spring-cloud-starter-netflix-eureka-client</artifactId> </dependency> <!-- 引用自己定义的api通用包,可以使用Payment支付Entity --> <dependency> <groupId>com.angenin.springcloud</groupId> <artifactId>cloud-api-commons</artifactId> <version>${project.version}</version> </dependency> <dependency> <groupId>org.springframework.boot</groupId> <artifactId>spring-boot-starter-web</artifactId> </dependency> <dependency> <groupId>org.springframework.boot</groupId> <artifactId>spring-boot-starter-actuator</artifactId> </dependency> <dependency> <groupId>org.projectlombok</groupId> <artifactId>lombok</artifactId> <optional>true</optional> </dependency> <dependency> <groupId>org.springframework.boot</groupId> <artifactId>spring-boot-starter-test</artifactId> <scope>test</scope> </dependency> </dependencies> -
pom文件,配置eureka服务器地址
消费者是不用注册到eureka注册中心server: port: 80 spring: application: name: order eureka: client: #false表示不向注册中心注册自己 register-with-eureka: false service-url: #设置与eurekaServer交互的地址查询服务和注册服务都需要依赖这个地址 defaultZone: http://localhost:7001/eureka -
启动类
@EnableFeignClients开启feign@SpringBootApplication @EnableFeignClients public class OrderFeign80 { public static void main(String[] args) { SpringApplication.run(OrderFeign80.class,args); } } -
openfeign配置
(1)在springcloud包下新建service.PaymentFeignService接口
(业务逻辑接口+@FeignClient配置调用provider服务。)
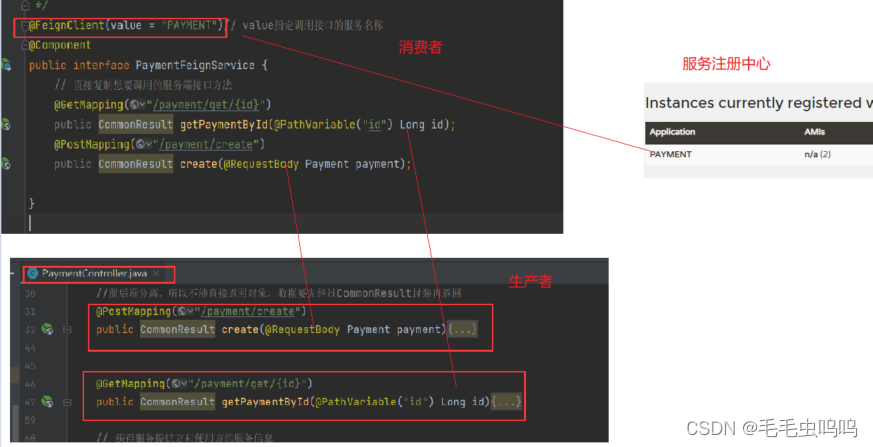
(2)新建PaymentFeignService接口并新增注解@FeignClient
@FeignClient(value = "PAYMENT")// value指定调用接口的服务名称
在接口里面直接定义想要调用的服务端接口方法,写法与原服务controller接口相同。@FeignClient(value = "PAYMENT")// value指定调用接口的服务名称 @Component public interface PaymentFeignService { // 直接复制想要调用的服务端接口方法 @GetMapping("/payment/get/{id}") public CommonResult getPaymentById(@PathVariable("id") Long id); @PostMapping("/payment/create") public CommonResult create(@RequestBody Payment payment); }(3)在springcloud包下新建controller.OrderFeignController
注入前面定义好的PaymentFeignService 接口,定义消费者端的接口,通过PaymentFeignService 中的方法跨服务调用接口
@RestController
@Slf4j
public class OrderFeignController {
    @Autowired
    PaymentFeignService paymentFeignService;

    @GetMapping("/consumer/payment/get/{id}")
    public CommonResult<Payment> getPayment(@PathVariable("id") Long id){
        log.info("********查询的id:" + id);
        //getForObject两个参数:请求地址,返回的对象类型
        return paymentFeignService.getPaymentById(id);
    }

    @GetMapping("/consumer/payment/create")
    public CommonResult<Payment> create(Payment payment){
        log.info("********添加payment: " + payment.getSerial());
        return paymentFeignService.create(payment);
    }

}
总结
openfeign超时控制
openfeign在接口调用时,默认是等待一秒,如果超过该时间,没有相应就会报错超时。
提供者在处理服务时用了3秒,提供者认为花3秒是正常,而消费者只愿意等1秒,1秒后,提供者会没返回数据,消费者就会造成超时调用报错。
所以需要双方约定好时间,不使用默认的。
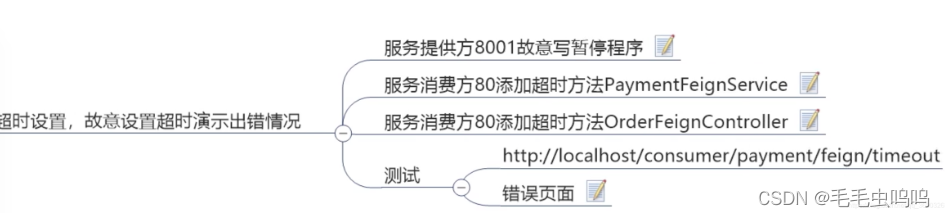
-
在8001,8002的PaymentController里添加:(模拟服务处理时间长)
由于提供相同服务的生产者有两个,分别部署在8001和8002,所以要添加生产者的接口方法时,不仅要在8001中添加,还要在8002中添加。// 模拟超时服务接口 @GetMapping("/payment/timeout") public String paymentFeignTimeout(){ try{ TimeUnit.SECONDS.sleep(3); }catch (InterruptedException e){ e.printStackTrace(); } return serverPort; } -
在在80的PaymentFeignService中添加:
// 模拟超时服务接口 @GetMapping("/payment/timeout") public String paymentFeignTimeout(); -
然后在80的OrderFeignController中添加:
// 模拟超时服务接口 @GetMapping("/consumer/payment/timeout") public String paymentFeignTimeout(){ return paymentFeignService.paymentFeignTimeout(); } -
生产者8001调用自己的接口,三秒后得到响应
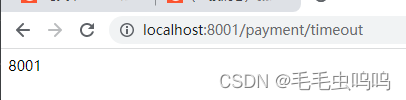
-
消费者80调用生产者的接口,由于默认事件是1s,所以3s响应会超时。
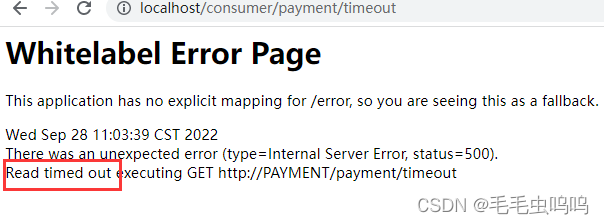

-
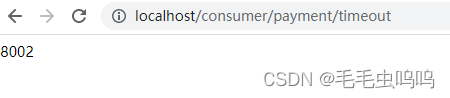
通过配置解决超时问题
在80的yml中添加:
#没提示不管它,可以设置 ribbon: #指的是建立连接后从服务器读取到可用资源所用的时间 ReadTimeout: 5000 #指的是建立连接使用的时间,适用于网络状况正常的情况下,两端连接所用的时间 ConnectTimeout: 5000- 重新访问http://localhost/consumer/payment/timeout,3秒后显示。
日志控制
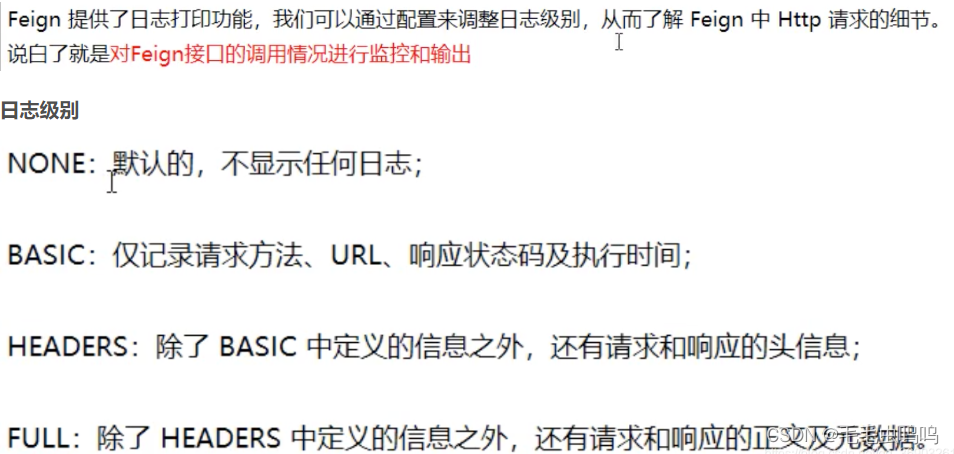
-
配置日志bean
在80的springcloud包下新建config.FeignConfig@Configuration public class FeignConfig { @Bean Logger.Level feignLoggerLevel(){ //打印最详细的日志 return Logger.Level.FULL; } } -
yml文件开启日志
#开启日志的feign客户端 logging: level: #feign日志以什么级别监控哪个接口 com.angenin.springcloud.service.PaymentFeignService: debug #写你们自己的包名 -
测试

4.Hystrix
构建Hystrix生产者实例
构建一个可以正常访问的项目,并注册到eureka中,该项目中有两个接口,一个模拟正常访问,一个模拟超时访问。超时访问后面用于模拟Hystrix的服务降级、熔断等功能。
- 创建工程
- pom文件
- 配置文件
- 启动类
- service、controller
- 测试
(1)创建工程payment -hystrix-8001
(2)pom依赖和之前的都相同,只是多了一个hystrix的依赖org.springframework.cloud spring-cloud-starter-netflix-hystrix (3)配置文件
端口号、服务名、eureka地址server: port: 8001 spring: application: name: hystrix-payment eureka: client: register-with-eureka: true fetch-registry: true service-url: defaultZone: http://localhost:7001/eureka(4)启动类,记得加@EnableEurekaClient注解
(5)业务类
PaymentService 提供两个方法,分别是正常访问和超时访问,超时访问后面用于模拟Hystrix的服务降级、熔断等功能。@Service public class PaymentService { // 正常访问的方法 public String paymentInfo_ok(Integer id){ return "线程池:"+Thread.currentThread().getName() + "\tpaymentInfo_OK,id:" + id; } // 超时访问的方法 public String paymentInfo_timeout(Integer id){ int timeNumber = 3; try { TimeUnit.SECONDS.sleep(timeNumber); } catch (InterruptedException e) { e.printStackTrace(); } return "线程池:" + Thread.currentThread().getName() + "\tpaymentInfo_TimeOut,id:" + id + ",耗时:" + timeNumber + "秒"; } }PaymmentController
@RestController
@Slf4j
public class PaymmentController {

    @Resource
    private PaymentService paymentService;

    @GetMapping("/payment/hystrix/ok/{id}")
    public String paymentInfo_OK(@PathVariable("id") Integer id){
        String result = paymentService.paymentInfo_ok(id);
        log.info("******result:" + result);
        return result;
    }

    @GetMapping("/payment/hystrix/timeout/{id}")
    public String paymentInfo_TimeOut(Integer id){
        String result = paymentService.paymentInfo_timeout(id);
        log.info("******result:" + result);
        return result;
    }

}
构建Hystrix消费者实例
-
新建consumerhystrix80服务,和之前的80相同,只是多了一个hystrix的依赖
<!-- hystrix --> <dependency> <groupId>org.springframework.cloud</groupId> <artifactId>spring-cloud-starter-netflix-hystrix</artifactId> </dependency> -
yml同consumer-feign-80
-
启动类同consumer-feign-80
-
service、controller
feign接口@Component @FeignClient(value = "CLOUD-PROVIDER-HYSTRIX-PAYMENT") public interface PaymentHystrixService { @GetMapping("/payment/hystrix/ok/{id}") public String paymentInfo_OK(@PathVariable("id") Integer id); @GetMapping("/payment/hystrix/timeout/{id}") public String paymentInfo_TimeOut(@PathVariable("id") Integer id); }controller
@RestController @Slf4j public class OrderHystrix { @Resource private OrderHystric paymentHystrixService; @GetMapping("/consumer/payment/hystrix/ok/{id}") public String paymentInfo_OK(@PathVariable("id") Integer id){ String result = paymentHystrixService.paymentInfo_OK(id); return result; } @GetMapping("/consumer/payment/hystrix/timeout/{id}") public String paymentInfo_TimeOut(@PathVariable("id") Integer id){ String result = paymentHystrixService.paymentInfo_TimeOut(id); return result; } } -
启动jmeter,然后再进行测试,jmeter可以模拟发出上万个请求。
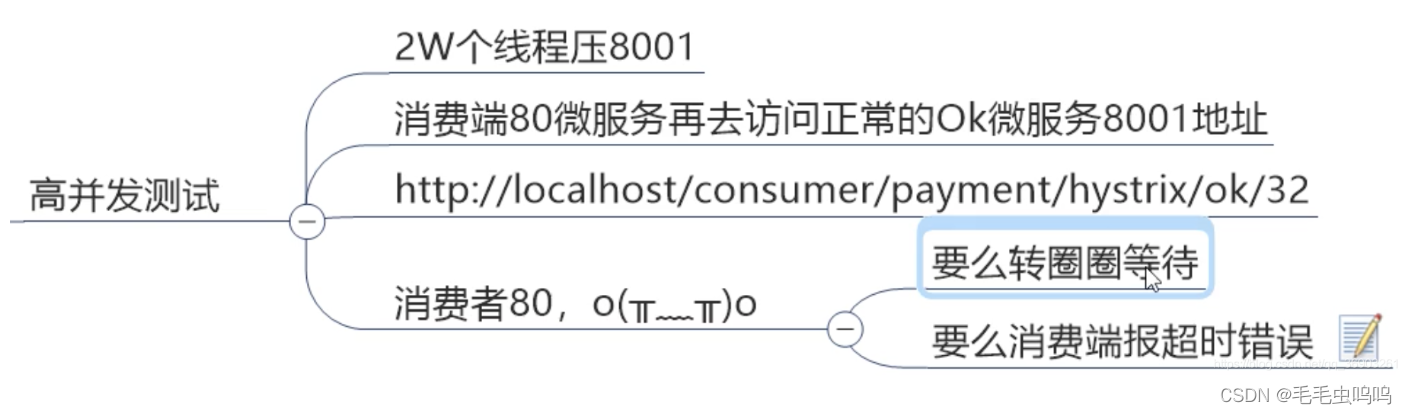
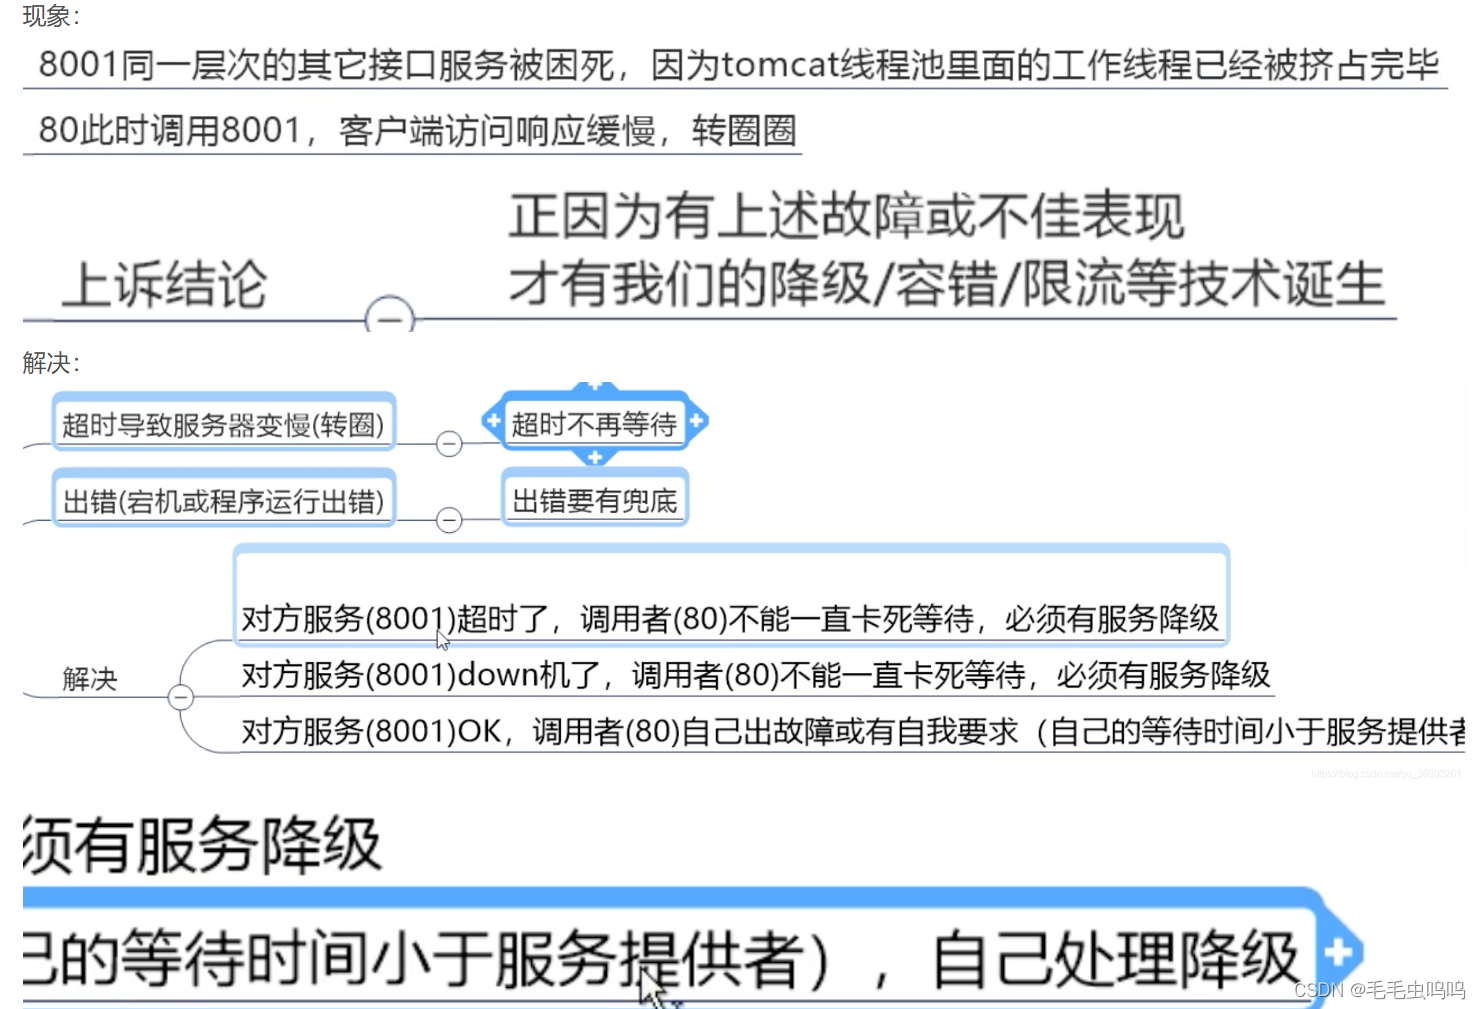
故障现象、导致原因以及解决
- 注册中心eureka服务,配置eureka的地址,
-
相关阅读:
9月1日,开学快乐!新的学期,新的开始!
Docker 网络管理及资源控制
JLINK掉固件后重刷
linux安装vsftp
AI智能视频分析系统提升水泥厂安全监管解决方案
Linux--网络入门基础
Git 的介绍、安装及其基本操作
基础 | NIO - [Files & Path & Charset]
人工神经网络教学视频第三版,人工神经网络教程
如何通过在线培训考试系统进行远程教育
- 原文地址:https://blog.csdn.net/weixin_43424325/article/details/127086190