-
k8s从入门到精通
目录
3.1 helm3安装 ingress-nginx(k8s版本要求1.20以上)
k8s介绍
k8s架构图

一、kubernetes 部署
1.0 sealos一键部署
1.环境规划
- 系统版本 CentOS 7.9.2009
- 服务器配置2核4g
- k8s版本1.20.2
- docker版本docker-ce-19.03.14 docker-ce-cli-19.03.14
- IP规划-3主2子节点
- 20.6.100.220 k8s-m01
- 20.6.100.221 k8s-m02
- 20.6.100.222 k8s-m03
- 20.6.100.223 k8s-node01
- 20.6.100.224 k8s-node02
- 20.6.100.225 k8s-ck
.系统配置yum
- #添加访问互联路由
- cat > /etc/resolv.conf <<EOF
- nameserver 8.8.8.8
- nameserver 114.114.114.114
- EOF
- #设置为阿里云yum源
- mkdir -p /etc/yum.repos.d/bak && mv /etc/yum.repos.d/CentOS* /etc/yum.repos.d/bak
- curl -o /etc/yum.repos.d/CentOS-Base.repo http://mirrors.aliyun.com/repo/Centos-7.repo
- yum clean all
- yum -y install sshpass wget conntrack ntpdate ntp ipvsadm ipset jq iptables curl sysstat libseccomp wget vim net-tools git lrzsz unzip gcc telnet
2.0二进制安装包下载
- 链接:https://pan.baidu.com/s/1OBT9pxcZiuHx0hLxS2Fd1g?pwd=fhbg
- 提取码:fhbg
2.1安装脚本来着-博哥爱运维
cat k8s_install_new .sh
- #!/bin/bash
- # auther: boge
- # descriptions: the shell scripts will use ansible to deploy K8S at binary for siample
- # 传参检测
- [ $# -ne 6 ] && echo -e "Usage: $0 rootpasswd netnum nethosts cri cni k8s-cluster-name\nExample: bash $0 newpasswd 20.6.100 220\ 221\ 222\ 223\ 224 [containerd|docker] [calico|flannel] test\n" && exit 11
- # 变量定义
- export release=3.0.0
- export k8s_ver=v1.20.2 # v1.20.2, v1.19.7, v1.18.15, v1.17.17
- rootpasswd=$1
- netnum=$2
- nethosts=$3
- cri=$4
- cni=$5
- clustername=$6
- if ls -1v ./kubeasz*.tar.gz &>/dev/null;then software_packet="$(ls -1v ./kubeasz*.tar.gz )";else software_packet="";fi
- pwd="/etc/kubeasz"
- # deploy机器升级软件库
- if cat /etc/redhat-release &>/dev/null;then
- yum update -y
- else
- apt-get update && apt-get upgrade -y && apt-get dist-upgrade -y
- [ $? -ne 0 ] && apt-get -yf install
- fi
- # deploy机器检测python环境
- python2 -V &>/dev/null
- if [ $? -ne 0 ];then
- if cat /etc/redhat-release &>/dev/null;then
- yum install gcc openssl-devel bzip2-devel wget -y
- wget https://www.python.org/ftp/python/2.7.16/Python-2.7.16.tgz
- tar xzf Python-2.7.16.tgz
- cd Python-2.7.16
- ./configure --enable-optimizations
- make altinstall
- ln -s /usr/bin/python2.7 /usr/bin/python
- cd -
- else
- apt-get install -y python2.7 && ln -s /usr/bin/python2.7 /usr/bin/python
- fi
- fi
- # deploy机器设置pip安装加速源
- if [[ $clustername != 'aws' ]]; then
- mkdir ~/.pip
- cat > ~/.pip/pip.conf <<CB
- [global]
- index-url = https://mirrors.aliyun.com/pypi/simple
- [install]
- trusted-host=mirrors.aliyun.com
- CB
- fi
- # deploy机器安装相应软件包
- if cat /etc/redhat-release &>/dev/null;then
- yum install git python-pip sshpass wget -y
- [ -f ./get-pip.py ] && python ./get-pip.py || {
- wget https://bootstrap.pypa.io/pip/2.7/get-pip.py && python get-pip.py
- }
- else
- apt-get install git python-pip sshpass -y
- [ -f ./get-pip.py ] && python ./get-pip.py || {
- wget https://bootstrap.pypa.io/pip/2.7/get-pip.py && python get-pip.py
- }
- fi
- python -m pip install --upgrade "pip < 21.0"
- pip -V
- pip install --no-cache-dir ansible netaddr
- # 在deploy机器做其他node的ssh免密操作
- for host in `echo "${nethosts}"`
- do
- echo "============ ${netnum}.${host} ===========";
- if [[ ${USER} == 'root' ]];then
- [ ! -f /${USER}/.ssh/id_rsa ] &&\
- ssh-keygen -t rsa -P '' -f /${USER}/.ssh/id_rsa
- else
- [ ! -f /home/${USER}/.ssh/id_rsa ] &&\
- ssh-keygen -t rsa -P '' -f /home/${USER}/.ssh/id_rsa
- fi
- sshpass -p ${rootpasswd} ssh-copy-id -o StrictHostKeyChecking=no ${USER}@${netnum}.${host}
- if cat /etc/redhat-release &>/dev/null;then
- ssh -o StrictHostKeyChecking=no ${USER}@${netnum}.${host} "yum update -y"
- else
- ssh -o StrictHostKeyChecking=no ${USER}@${netnum}.${host} "apt-get update && apt-get upgrade -y && apt-get dist-upgrade -y"
- [ $? -ne 0 ] && ssh -o StrictHostKeyChecking=no ${USER}@${netnum}.${host} "apt-get -yf install"
- fi
- done
- # deploy机器下载k8s二进制安装脚本
- if [[ ${software_packet} == '' ]];then
- curl -C- -fLO --retry 3 https://github.com/easzlab/kubeasz/releases/download/${release}/ezdown
- sed -ri "s+^(K8S_BIN_VER=).*$+\1${k8s_ver}+g" ezdown
- chmod +x ./ezdown
- # 使用工具脚本下载
- ./ezdown -D && ./ezdown -P
- else
- tar xvf ${software_packet} -C /etc/
- chmod +x ${pwd}/{ezctl,ezdown}
- fi
- # 初始化一个名为my的k8s集群配置
- CLUSTER_NAME="$clustername"
- ${pwd}/ezctl new ${CLUSTER_NAME}
- if [[ $? -ne 0 ]];then
- echo "cluster name [${CLUSTER_NAME}] was exist in ${pwd}/clusters/${CLUSTER_NAME}."
- exit 1
- fi
- if [[ ${software_packet} != '' ]];then
- # 设置参数,启用离线安装
- sed -i 's/^INSTALL_SOURCE.*$/INSTALL_SOURCE: "offline"/g' ${pwd}/clusters/${CLUSTER_NAME}/config.yml
- fi
- # to check ansible service
- ansible all -m ping
- #---------------------------------------------------------------------------------------------------
- #修改二进制安装脚本配置 config.yml
- sed -ri "s+^(CLUSTER_NAME:).*$+\1 \"${CLUSTER_NAME}\"+g" ${pwd}/clusters/${CLUSTER_NAME}/config.yml
- ## k8s上日志及容器数据存独立磁盘步骤(参考阿里云的)
- [ ! -d /var/lib/container ] && mkdir -p /var/lib/container/{kubelet,docker}
- ## cat /etc/fstab
- # UUID=105fa8ff-bacd-491f-a6d0-f99865afc3d6 / ext4 defaults 1 1
- # /dev/vdb /var/lib/container/ ext4 defaults 0 0
- # /var/lib/container/kubelet /var/lib/kubelet none defaults,bind 0 0
- # /var/lib/container/docker /var/lib/docker none defaults,bind 0 0
- ## tree -L 1 /var/lib/container
- # /var/lib/container
- # ├── docker
- # ├── kubelet
- # └── lost+found
- # docker data dir
- DOCKER_STORAGE_DIR="/var/lib/container/docker"
- sed -ri "s+^(STORAGE_DIR:).*$+STORAGE_DIR: \"${DOCKER_STORAGE_DIR}\"+g" ${pwd}/clusters/${CLUSTER_NAME}/config.yml
- # containerd data dir
- CONTAINERD_STORAGE_DIR="/var/lib/container/containerd"
- sed -ri "s+^(STORAGE_DIR:).*$+STORAGE_DIR: \"${CONTAINERD_STORAGE_DIR}\"+g" ${pwd}/clusters/${CLUSTER_NAME}/config.yml
- # kubelet logs dir
- KUBELET_ROOT_DIR="/var/lib/container/kubelet"
- sed -ri "s+^(KUBELET_ROOT_DIR:).*$+KUBELET_ROOT_DIR: \"${KUBELET_ROOT_DIR}\"+g" ${pwd}/clusters/${CLUSTER_NAME}/config.yml
- if [[ $clustername != 'aws' ]]; then
- # docker aliyun repo
- REG_MIRRORS="https://pqbap4ya.mirror.aliyuncs.com"
- sed -ri "s+^REG_MIRRORS:.*$+REG_MIRRORS: \'[\"${REG_MIRRORS}\"]\'+g" ${pwd}/clusters/${CLUSTER_NAME}/config.yml
- fi
- # [docker]信任的HTTP仓库
- sed -ri "s+127.0.0.1/8+${netnum}.0/24+g" ${pwd}/clusters/${CLUSTER_NAME}/config.yml
- # disable dashboard auto install
- sed -ri "s+^(dashboard_install:).*$+\1 \"no\"+g" ${pwd}/clusters/${CLUSTER_NAME}/config.yml
- # 融合配置准备
- CLUSEER_WEBSITE="${CLUSTER_NAME}k8s.gtapp.xyz"
- lb_num=$(grep -wn '^MASTER_CERT_HOSTS:' ${pwd}/clusters/${CLUSTER_NAME}/config.yml |awk -F: '{print $1}')
- lb_num1=$(expr ${lb_num} + 1)
- lb_num2=$(expr ${lb_num} + 2)
- sed -ri "${lb_num1}s+.*$+ - "${CLUSEER_WEBSITE}"+g" ${pwd}/clusters/${CLUSTER_NAME}/config.yml
- sed -ri "${lb_num2}s+(.*)$+#\1+g" ${pwd}/clusters/${CLUSTER_NAME}/config.yml
- # node节点最大pod 数
- MAX_PODS="120"
- sed -ri "s+^(MAX_PODS:).*$+\1 ${MAX_PODS}+g" ${pwd}/clusters/${CLUSTER_NAME}/config.yml
- # 修改二进制安装脚本配置 hosts
- # clean old ip
- sed -ri '/192.168.1.1/d' ${pwd}/clusters/${CLUSTER_NAME}/hosts
- sed -ri '/192.168.1.2/d' ${pwd}/clusters/${CLUSTER_NAME}/hosts
- sed -ri '/192.168.1.3/d' ${pwd}/clusters/${CLUSTER_NAME}/hosts
- sed -ri '/192.168.1.4/d' ${pwd}/clusters/${CLUSTER_NAME}/hosts
- # 输入准备创建ETCD集群的主机位
- echo "enter etcd hosts here (example: 222 221 220) ↓"
- read -p "" ipnums
- for ipnum in `echo ${ipnums}`
- do
- echo $netnum.$ipnum
- sed -i "/\[etcd/a $netnum.$ipnum" ${pwd}/clusters/${CLUSTER_NAME}/hosts
- done
- # 输入准备创建KUBE-MASTER集群的主机位
- echo "enter kube-master hosts here (example: 222 221 220) ↓"
- read -p "" ipnums
- for ipnum in `echo ${ipnums}`
- do
- echo $netnum.$ipnum
- sed -i "/\[kube_master/a $netnum.$ipnum" ${pwd}/clusters/${CLUSTER_NAME}/hosts
- done
- # 输入准备创建KUBE-NODE集群的主机位
- echo "enter kube-node hosts here (example: 224 223) ↓"
- read -p "" ipnums
- for ipnum in `echo ${ipnums}`
- do
- echo $netnum.$ipnum
- sed -i "/\[kube_node/a $netnum.$ipnum" ${pwd}/clusters/${CLUSTER_NAME}/hosts
- done
- # 配置容器运行时CNI
- case ${cni} in
- flannel)
- sed -ri "s+^CLUSTER_NETWORK=.*$+CLUSTER_NETWORK=\"${cni}\"+g" ${pwd}/clusters/${CLUSTER_NAME}/hosts
- ;;
- calico)
- sed -ri "s+^CLUSTER_NETWORK=.*$+CLUSTER_NETWORK=\"${cni}\"+g" ${pwd}/clusters/${CLUSTER_NAME}/hosts
- ;;
- *)
- echo "cni need be flannel or calico."
- exit 11
- esac
- # 配置K8S的ETCD数据备份的定时任务
- if cat /etc/redhat-release &>/dev/null;then
- if ! grep -w '94.backup.yml' /var/spool/cron/root &>/dev/null;then echo "00 00 * * * `which ansible-playbook` ${pwd}/playbooks/94.backup.yml &> /dev/null" >> /var/spool/cron/root;else echo exists ;fi
- chown root.crontab /var/spool/cron/root
- chmod 600 /var/spool/cron/root
- else
- if ! grep -w '94.backup.yml' /var/spool/cron/crontabs/root &>/dev/null;then echo "00 00 * * * `which ansible-playbook` ${pwd}/playbooks/94.backup.yml &> /dev/null" >> /var/spool/cron/crontabs/root;else echo exists ;fi
- chown root.crontab /var/spool/cron/crontabs/root
- chmod 600 /var/spool/cron/crontabs/root
- fi
- rm /var/run/cron.reboot
- service crond restart
- #---------------------------------------------------------------------------------------------------
- # 准备开始安装了
- rm -rf ${pwd}/{dockerfiles,docs,.gitignore,pics,dockerfiles} &&\
- find ${pwd}/ -name '*.md'|xargs rm -f
- read -p "Enter to continue deploy k8s to all nodes >>>" YesNobbb
- # now start deploy k8s cluster
- cd ${pwd}/
- # to prepare CA/certs & kubeconfig & other system settings
- ${pwd}/ezctl setup ${CLUSTER_NAME} 01
- sleep 1
- # to setup the etcd cluster
- ${pwd}/ezctl setup ${CLUSTER_NAME} 02
- sleep 1
- # to setup the container runtime(docker or containerd)
- case ${cri} in
- containerd)
- sed -ri "s+^CONTAINER_RUNTIME=.*$+CONTAINER_RUNTIME=\"${cri}\"+g" ${pwd}/clusters/${CLUSTER_NAME}/hosts
- ${pwd}/ezctl setup ${CLUSTER_NAME} 03
- ;;
- docker)
- sed -ri "s+^CONTAINER_RUNTIME=.*$+CONTAINER_RUNTIME=\"${cri}\"+g" ${pwd}/clusters/${CLUSTER_NAME}/hosts
- ${pwd}/ezctl setup ${CLUSTER_NAME} 03
- ;;
- *)
- echo "cri need be containerd or docker."
- exit 11
- esac
- sleep 1
- # to setup the master nodes
- ${pwd}/ezctl setup ${CLUSTER_NAME} 04
- sleep 1
- # to setup the worker nodes
- ${pwd}/ezctl setup ${CLUSTER_NAME} 05
- sleep 1
- # to setup the network plugin(flannel、calico...)
- ${pwd}/ezctl setup ${CLUSTER_NAME} 06
- sleep 1
- # to setup other useful plugins(metrics-server、coredns...)
- ${pwd}/ezctl setup ${CLUSTER_NAME} 07
- sleep 1
- # [可选]对集群所有节点进行操作系统层面的安全加固 https://github.com/dev-sec/ansible-os-hardening
- #ansible-playbook roles/os-harden/os-harden.yml
- #sleep 1
- cd `dirname ${software_packet:-/tmp}`
- k8s_bin_path='/opt/kube/bin'
- echo "------------------------- k8s version list ---------------------------"
- ${k8s_bin_path}/kubectl version
- echo
- echo "------------------------- All Healthy status check -------------------"
- ${k8s_bin_path}/kubectl get componentstatus
- echo
- echo "------------------------- k8s cluster info list ----------------------"
- ${k8s_bin_path}/kubectl cluster-info
- echo
- echo "------------------------- k8s all nodes list -------------------------"
- ${k8s_bin_path}/kubectl get node -o wide
- echo
- echo "------------------------- k8s all-namespaces's pods list ------------"
- ${k8s_bin_path}/kubectl get pod --all-namespaces
- echo
- echo "------------------------- k8s all-namespaces's service network ------"
- ${k8s_bin_path}/kubectl get svc --all-namespaces
- echo
- echo "------------------------- k8s welcome for you -----------------------"
- echo
- # you can use k alias kubectl to siample
- echo "alias k=kubectl && complete -F __start_kubectl k" >> ~/.bashrc
- # get dashboard url
- ${k8s_bin_path}/kubectl cluster-info|grep dashboard|awk '{print $NF}'|tee -a /root/k8s_results
- # get login token
- ${k8s_bin_path}/kubectl -n kube-system describe secret $(${k8s_bin_path}/kubectl -n kube-system get secret | grep admin-user | awk '{print $1}')|grep 'token:'|awk '{print $NF}'|tee -a /root/k8s_results
- echo
- echo "you can look again dashboard and token info at >>> /root/k8s_results <<<"
- #echo ">>>>>>>>>>>>>>>>> You can excute command [ source ~/.bashrc ] <<<<<<<<<<<<<<<<<<<<"
- echo ">>>>>>>>>>>>>>>>> You need to excute command [ reboot ] to restart all nodes <<<<<<<<<<<<<<<<<<<<"
- rm -f $0
- [ -f ${software_packet} ] && rm -f ${software_packet}
- #rm -f ${pwd}/roles/deploy/templates/${USER_NAME}-csr.json.j2
- #sed -ri "s+${USER_NAME}+admin+g" ${pwd}/roles/prepare/tasks/main.yml
2.2运行脚本 并加入参数, newpasswd是服务器密码
- bash k8s_install_new .sh newpasswd 20.6.100 220\ 221\ 222\ 223\ 224 docker calico test
#脚本运行中途需要输入如下参数

二、harbor仓库搭建
1.安装
- #目录/root上传文件docker-compose和harbor-offline-installer-v1.2.0.tgz
- mv /root/docker-compose /usr/local/bin/
- chmod a+x /usr/local/bin/docker-compose
- ln -s /usr/local/bin/docker-compose /usr/bin/docker-compose
- tar -zxvf harbor-offline-installer-v2.4.1.tgz
- mv harbor /usr/local/
- cd /usr/local/harbor/
- cp harbor.yml.tmpl harbor.yml
- sed -i 's/hostname: reg.mydomain.com/hostname: 20.6.100.225/g' harbor.yml
- sed -i 's/https/#https/g' harbor.yml
- sed -i 's/port: 443/#port: 443/g' harbor.yml
- sed -i 's/certificate/#certificate/g' harbor.yml
- sed -i 's/private_key/#private_key/g' harbor.yml
- mkdir -p /etc/docker/
- cat >/etc/docker/daemon.json<<EOF
- {
- "registry-mirrors": ["https://gv33cz42.mirror.aliyuncs.com", "https://registry.cn-hangzhou.aliyuncs.com", "https://registry.docker-cn.com", "https://docker.mirrors.ustc.edu.cn", "https://dockerhub.azk8s.cn"],
- "exec-opts": ["native.cgroupdriver=systemd"],
- "max-concurrent-downloads": 20,
- "live-restore": true,
- "storage-driver": "overlay2",
- "max-concurrent-uploads": 10,
- "debug": true,
- "log-opts": {
- "max-size": "100m",
- "max-file": "10"
- },
- "insecure-registries": ["20.6.100.225:80"]
- }
- EOF
- systemctl daemon-reload && systemctl restart docker && systemctl status docker
- #安装
- ./install.sh
- ## 重启harbor
- cd /usr/local/harbor/
- docker-compose down -v
- docker-compose up -d
- docker ps|grep harbor
2.需要访问仓库的其他节点的 daemon.json添加如下内容
- cat >/etc/docker/daemon.json<<EOF
- {
- "registry-mirrors": ["https://gv33cz42.mirror.aliyuncs.com", "https://registry.cn-hangzhou.aliyuncs.com", "https://registry.docker-cn.com", "https://docker.mirrors.ustc.edu.cn", "https://dockerhub.azk8s.cn"],
- "exec-opts": ["native.cgroupdriver=systemd"],
- "max-concurrent-downloads": 20,
- "live-restore": true,
- "storage-driver": "overlay2",
- "max-concurrent-uploads": 10,
- "debug": true,
- "log-opts": {
- "max-size": "100m",
- "max-file": "10"
- },
- "insecure-registries": ["20.6.100.225:80"]
- }
- EOF
- systemctl daemon-reload && systemctl restart docker && systemctl status docker
3.节点使用仓库
- #登入仓库网站
- docker login -u admin -p Harbor12345 20.6.100.225:80
- #下载镜像
- docker pull daocloud.io/library/nginx:1.9.1
- #给镜像打上标签
- docker tag daocloud.io/library/nginx:1.9.1 20.6.100.225:5000/library/nginx:1.9.1
- #镜像上传
- docker push 20.6.100.225:80/library/nginx:1.9.1
- #删除镜像
- docker rmi 20.6.100.225:80/library/nginx:1.9.1
- #打包
- docker save daocloud.io/library/nginx:1.9.1 > /root/nginx-1.9.1.tar
- #加载包
- docker load -i /root/nginx-1.9.1.tar
三、k8s流量入口Ingress
1.逻辑图

Ingress是允许入站连接到达集群服务的一组规则。即介于物理网络和群集svc之间的一组转发规则。
其实就是实现L4 L7的负载均衡:
注意:这里的Ingress并非将外部流量通过Service来转发到服务pod上,而只是通过Service来找到对应的Endpoint来发现pod进行转发
internet
|
[ Ingress ] ---> [ Services ] ---> [ Endpoint ]
--|-----|-- |
[ Pod,pod,...... ]<-------------------------|aliyun-ingress-controller有一个很重要的修改,就是它支持路由配置的动态更新,
大家用过Nginx的可以知道,在修改完Nginx的配置,我们是需要进行nginx -s reload来重加载配置才能生效的,
在K8s上,这个行为也是一样的,但由于K8s运行的服务会非常多,所以它的配置更新是非常频繁的,
因此,如果不支持配置动态更新,对于在高频率变化的场景下,Nginx频繁Reload会带来较明显的请求访问问题:1.造成一定的QPS抖动和访问失败情况
2.对于长连接服务会被频繁断掉
3.造成大量的处于shutting down的Nginx Worker进程,进而引起内存膨胀详细原理分析见这篇文章: https://developer.aliyun.com/article/692732
2.准备来部署aliyun-ingress-controller,下面直接是生产中在用的yaml配置,我们保存了aliyun-ingress-nginx.yaml准备开始部署:
- cat > /data/k8s/aliyun-ingress-nginx.yaml <<EOF
- apiVersion: v1
- kind: Namespace
- metadata:
- name: ingress-nginx
- labels:
- app: ingress-nginx
- ---
- apiVersion: v1
- kind: ServiceAccount
- metadata:
- name: nginx-ingress-controller
- namespace: ingress-nginx
- labels:
- app: ingress-nginx
- ---
- apiVersion: rbac.authorization.k8s.io/v1beta1
- kind: ClusterRole
- metadata:
- name: nginx-ingress-controller
- labels:
- app: ingress-nginx
- rules:
- - apiGroups:
- - ""
- resources:
- - configmaps
- - endpoints
- - nodes
- - pods
- - secrets
- - namespaces
- - services
- verbs:
- - get
- - list
- - watch
- - apiGroups:
- - "extensions"
- - "networking.k8s.io"
- resources:
- - ingresses
- verbs:
- - get
- - list
- - watch
- - apiGroups:
- - ""
- resources:
- - events
- verbs:
- - create
- - patch
- - apiGroups:
- - "extensions"
- - "networking.k8s.io"
- resources:
- - ingresses/status
- verbs:
- - update
- - apiGroups:
- - ""
- resources:
- - configmaps
- verbs:
- - create
- - apiGroups:
- - ""
- resources:
- - configmaps
- resourceNames:
- - "ingress-controller-leader-nginx"
- verbs:
- - get
- - update
- ---
- apiVersion: rbac.authorization.k8s.io/v1beta1
- kind: ClusterRoleBinding
- metadata:
- name: nginx-ingress-controller
- labels:
- app: ingress-nginx
- roleRef:
- apiGroup: rbac.authorization.k8s.io
- kind: ClusterRole
- name: nginx-ingress-controller
- subjects:
- - kind: ServiceAccount
- name: nginx-ingress-controller
- namespace: ingress-nginx
- ---
- apiVersion: v1
- kind: Service
- metadata:
- labels:
- app: ingress-nginx
- name: nginx-ingress-lb
- namespace: ingress-nginx
- spec:
- # DaemonSet need:
- # ----------------
- type: ClusterIP
- # ----------------
- # Deployment need:
- # ----------------
- # type: NodePort
- # ----------------
- ports:
- - name: http
- port: 80
- targetPort: 80
- protocol: TCP
- - name: https
- port: 443
- targetPort: 443
- protocol: TCP
- - name: metrics
- port: 10254
- protocol: TCP
- targetPort: 10254
- selector:
- app: ingress-nginx
- ---
- kind: ConfigMap
- apiVersion: v1
- metadata:
- name: nginx-configuration
- namespace: ingress-nginx
- labels:
- app: ingress-nginx
- data:
- keep-alive: "75"
- keep-alive-requests: "100"
- upstream-keepalive-connections: "10000"
- upstream-keepalive-requests: "100"
- upstream-keepalive-timeout: "60"
- allow-backend-server-header: "true"
- enable-underscores-in-headers: "true"
- generate-request-id: "true"
- http-redirect-code: "301"
- ignore-invalid-headers: "true"
- log-format-upstream: '{"@timestamp": "$time_iso8601","remote_addr": "$remote_addr","x-forward-for": "$proxy_add_x_forwarded_for","request_id": "$req_id","remote_user": "$remote_user","bytes_sent": $bytes_sent,"request_time": $request_time,"status": $status,"vhost": "$host","request_proto": "$server_protocol","path": "$uri","request_query": "$args","request_length": $request_length,"duration": $request_time,"method": "$request_method","http_referrer": "$http_referer","http_user_agent": "$http_user_agent","upstream-sever":"$proxy_upstream_name","proxy_alternative_upstream_name":"$proxy_alternative_upstream_name","upstream_addr":"$upstream_addr","upstream_response_length":$upstream_response_length,"upstream_response_time":$upstream_response_time,"upstream_status":$upstream_status}'
- max-worker-connections: "65536"
- worker-processes: "2"
- proxy-body-size: 20m
- proxy-connect-timeout: "10"
- proxy_next_upstream: error timeout http_502
- reuse-port: "true"
- server-tokens: "false"
- ssl-ciphers: ECDHE-RSA-AES128-GCM-SHA256:ECDHE-ECDSA-AES128-GCM-SHA256:ECDHE-RSA-AES256-GCM-SHA384:ECDHE-ECDSA-AES256-GCM-SHA384:DHE-RSA-AES128-GCM-SHA256:DHE-DSS-AES128-GCM-SHA256:kEDH+AESGCM:ECDHE-RSA-AES128-SHA256:ECDHE-ECDSA-AES128-SHA256:ECDHE-RSA-AES128-SHA:ECDHE-ECDSA-AES128-SHA:ECDHE-RSA-AES256-SHA384:ECDHE-ECDSA-AES256-SHA384:ECDHE-RSA-AES256-SHA:ECDHE-ECDSA-AES256-SHA:DHE-RSA-AES128-SHA256:DHE-RSA-AES128-SHA:DHE-DSS-AES128-SHA256:DHE-RSA-AES256-SHA256:DHE-DSS-AES256-SHA:DHE-RSA-AES256-SHA:AES128-GCM-SHA256:AES256-GCM-SHA384:AES128-SHA256:AES256-SHA256:AES128-SHA:AES256-SHA:AES:CAMELLIA:DES-CBC3-SHA:!aNULL:!eNULL:!EXPORT:!DES:!RC4:!MD5:!PSK:!aECDH:!EDH-DSS-DES-CBC3-SHA:!EDH-RSA-DES-CBC3-SHA:!KRB5-DES-CBC3-SHA
- ssl-protocols: TLSv1 TLSv1.1 TLSv1.2
- ssl-redirect: "false"
- worker-cpu-affinity: auto
- ---
- kind: ConfigMap
- apiVersion: v1
- metadata:
- name: tcp-services
- namespace: ingress-nginx
- labels:
- app: ingress-nginx
- ---
- kind: ConfigMap
- apiVersion: v1
- metadata:
- name: udp-services
- namespace: ingress-nginx
- labels:
- app: ingress-nginx
- ---
- apiVersion: apps/v1
- kind: DaemonSet
- metadata:
- name: nginx-ingress-controller
- namespace: ingress-nginx
- labels:
- app: ingress-nginx
- annotations:
- component.version: "v0.30.0"
- component.revision: "v1"
- spec:
- # Deployment need:
- # ----------------
- # replicas: 1
- # ----------------
- selector:
- matchLabels:
- app: ingress-nginx
- template:
- metadata:
- labels:
- app: ingress-nginx
- annotations:
- prometheus.io/port: "10254"
- prometheus.io/scrape: "true"
- scheduler.alpha.kubernetes.io/critical-pod: ""
- spec:
- # DaemonSet need:
- # ----------------
- hostNetwork: true
- # ----------------
- serviceAccountName: nginx-ingress-controller
- priorityClassName: system-node-critical
- affinity:
- podAntiAffinity:
- preferredDuringSchedulingIgnoredDuringExecution:
- - podAffinityTerm:
- labelSelector:
- matchExpressions:
- - key: app
- operator: In
- values:
- - ingress-nginx
- topologyKey: kubernetes.io/hostname
- weight: 100
- nodeAffinity:
- requiredDuringSchedulingIgnoredDuringExecution:
- nodeSelectorTerms:
- - matchExpressions:
- - key: type
- operator: NotIn
- values:
- - virtual-kubelet
- containers:
- - name: nginx-ingress-controller
- image: registry.cn-beijing.aliyuncs.com/acs/aliyun-ingress-controller:v0.30.0.2-9597b3685-aliyun
- args:
- - /nginx-ingress-controller
- - --configmap=$(POD_NAMESPACE)/nginx-configuration
- - --tcp-services-configmap=$(POD_NAMESPACE)/tcp-services
- - --udp-services-configmap=$(POD_NAMESPACE)/udp-services
- - --publish-service=$(POD_NAMESPACE)/nginx-ingress-lb
- - --annotations-prefix=nginx.ingress.kubernetes.io
- - --enable-dynamic-certificates=true
- - --v=2
- securityContext:
- allowPrivilegeEscalation: true
- capabilities:
- drop:
- - ALL
- add:
- - NET_BIND_SERVICE
- runAsUser: 101
- env:
- - name: POD_NAME
- valueFrom:
- fieldRef:
- fieldPath: metadata.name
- - name: POD_NAMESPACE
- valueFrom:
- fieldRef:
- fieldPath: metadata.namespace
- ports:
- - name: http
- containerPort: 80
- - name: https
- containerPort: 443
- livenessProbe:
- failureThreshold: 3
- httpGet:
- path: /healthz
- port: 10254
- scheme: HTTP
- initialDelaySeconds: 10
- periodSeconds: 10
- successThreshold: 1
- timeoutSeconds: 10
- readinessProbe:
- failureThreshold: 3
- httpGet:
- path: /healthz
- port: 10254
- scheme: HTTP
- periodSeconds: 10
- successThreshold: 1
- timeoutSeconds: 10
- # resources:
- # limits:
- # cpu: "1"
- # memory: 2Gi
- # requests:
- # cpu: "1"
- # memory: 2Gi
- volumeMounts:
- - mountPath: /etc/localtime
- name: localtime
- readOnly: true
- volumes:
- - name: localtime
- hostPath:
- path: /etc/localtime
- type: File
- nodeSelector:
- boge/ingress-controller-ready: "true"
- tolerations:
- - operator: Exists
- initContainers:
- - command:
- - /bin/sh
- - -c
- - |
- mount -o remount rw /proc/sys
- sysctl -w net.core.somaxconn=65535
- sysctl -w net.ipv4.ip_local_port_range="1024 65535"
- sysctl -w fs.file-max=1048576
- sysctl -w fs.inotify.max_user_instances=16384
- sysctl -w fs.inotify.max_user_watches=524288
- sysctl -w fs.inotify.max_queued_events=16384
- image: registry.cn-beijing.aliyuncs.com/acs/busybox:v1.29.2
- imagePullPolicy: Always
- name: init-sysctl
- securityContext:
- privileged: true
- procMount: Default
- ---
- ## Deployment need for aliyun'k8s:
- #apiVersion: v1
- #kind: Service
- #metadata:
- # annotations:
- # service.beta.kubernetes.io/alibaba-cloud-loadbalancer-id: "lb-xxxxxxxxxxxxxxxxxxx"
- # service.beta.kubernetes.io/alibaba-cloud-loadbalancer-force-override-listeners: "true"
- # labels:
- # app: nginx-ingress-lb
- # name: nginx-ingress-lb-local
- # namespace: ingress-nginx
- #spec:
- # externalTrafficPolicy: Local
- # ports:
- # - name: http
- # port: 80
- # protocol: TCP
- # targetPort: 80
- # - name: https
- # port: 443
- # protocol: TCP
- # targetPort: 443
- # selector:
- # app: ingress-nginx
- # type: LoadBalancer
- EOF
3.#开始部署
kubectl apply -f aliyun-ingress-nginx.yaml
4.我们查看下pod,会发现空空如也,为什么会这样呢?
kubectl -n ingress-nginx get pod
注意上面的yaml配置里面,我使用了节点选择配置,只有打了我指定lable标签的node节点,也会被允许调度pod上去运行
nodeSelector:
boge/ingress-controller-ready: “true”5.给mast 打标签,想运行什么节点上就给什么节点打标签
kubectl label node 20.6.100.220 boge/ingress-controller-ready=true
kubectl label node 20.6.100.221 boge/ingress-controller-ready=true
kubectl label node 20.6.100.222 boge/ingress-controller-ready=true6.接着可以看到pod就被调试到这两台node上启动了
kubectl -n ingress-nginx get pod -o wide
7 子节点修改haproxy.cfg
vi /etc/haproxy/haproxy.cfg- listen ingress-http
- bind 0.0.0.0:80
- mode tcp
- option tcplog
- option dontlognull
- option dontlog-normal
- balance roundrobin
- server 20.6.100.220 20.6.100.220:80 check inter 2000 fall 2 rise 2 weight 1
- server 20.6.100.221 20.6.100.221:80 check inter 2000 fall 2 rise 2 weight 1
- server 20.6.100.222 20.6.100.222:80 check inter 2000 fall 2 rise 2 weight 1
- listen ingress-https
- bind 0.0.0.0:443
- mode tcp
- option tcplog
- option dontlognull
- option dontlog-normal
- balance roundrobin
- server 20.6.100.220 20.6.100.220:443 check inter 2000 fall 2 rise 2 weight 1
- server 20.6.100.221 20.6.100.221:443 check inter 2000 fall 2 rise 2 weight 1
- server 20.6.100.222 20.6.100.222:443 check inter 2000 fall 2 rise 2 weight 1
8.子节点安装keepalived
yum install -y keepalived
9.编辑配置修改为如下:
这里是node 20.6.100.223
- cat > /etc/keepalived/keepalived.conf <<EOF
- global_defs {
- router_id lb-master
- }
- vrrp_script check-haproxy {
- script "killall -0 haproxy"
- interval 5
- weight -60
- }
- vrrp_instance VI-kube-master {
- state MASTER
- priority 120
- unicast_src_ip 20.6.100.223
- unicast_peer {
- 20.6.100.224
- }
- dont_track_primary
- interface ens160 # 注意这里的网卡名称修改成你机器真实的内网网卡名称,可用命令ip addr查看
- virtual_router_id 111
- advert_int 3
- track_script {
- check-haproxy
- }
- virtual_ipaddress {
- 20.6.100.226
- }
- }
- EOF
10.这里是node 20.6.100.224
- cat > /etc/keepalived/keepalived.conf <<EOF
- global_defs {
- router_id lb-master
- }
- vrrp_script check-haproxy {
- script "killall -0 haproxy"
- interval 5
- weight -60
- }
- vrrp_instance VI-kube-master {
- state MASTER
- priority 120
- unicast_src_ip 20.6.100.224
- unicast_peer {
- 20.6.100.223
- }
- dont_track_primary
- interface ens160
- virtual_router_id 111
- advert_int 3
- track_script {
- check-haproxy
- }
- virtual_ipaddress {
- 20.6.100.226
- }
- }
- EOF
11.启动服务器
- # 重启服务
- systemctl restart haproxy.service
- systemctl restart keepalived.service
- # 查看运行状态
- systemctl status haproxy.service
- systemctl status keepalived.service
- # 添加开机自启动(haproxy默认安装好就添加了自启动)
- systemctl enable keepalived.service
- # 查看是否添加成功
- systemctl is-enabled keepalived.service
- #enabled就代表添加成功了
- # 同时我可查看下VIP是否已经生成
- ip a|grep 226
12.然后准备nginx的ingress配置,保留为nginx-ingress.yaml,并执行它
- apiVersion: v1
- kind: Service
- metadata:
- namespace: test
- name: nginx
- labels:
- app: nginx
- spec:
- ports:
- - port: 80
- protocol: TCP
- targetPort: 80
- selector:
- app: nginx
- ---
- apiVersion: apps/v1
- kind: Deployment
- metadata:
- namespace: test
- name: nginx
- labels:
- app: nginx
- spec:
- replicas: 1
- selector:
- matchLabels:
- app: nginx
- template:
- metadata:
- labels:
- app: nginx
- spec:
- containers:
- - name: nginx
- image: nginx
- ports:
- - containerPort: 80
- ---
- apiVersion: extensions/v1beta1
- kind: Ingress
- metadata:
- namespace: test
- name: nginx-ingress
- spec:
- rules:
- - host: nginx.boge.com
- http:
- paths:
- - backend:
- serviceName: nginx
- servicePort: 80
- path: /
13.运行
- kubectl apply -f nginx-ingress.yaml
- #查看创建的ingress资源
- # kubectl get ingress
- NAME CLASS HOSTS ADDRESS PORTS AGE
- nginx-ingress
nginx.boge.com 80 13s - # 我们在其它节点上,加下本地hosts,来测试下效果
- 20.6.1.226 nginx.boge.com
- #测试
- curl nginx.boge.com
14.生产环境正常情况下大部分是一个Ingress对应一个Service服务,但在一些特殊情况,需要复用一个Ingress来访问多个服务的,下面我们来实践下
再创建一个nginx的deployment和service,注意名称修改下不要冲突了- # kubectl create deployment web --image=nginx
- deployment.apps/web created
- # kubectl expose deployment web --port=80 --target-port=80
- service/web exposed
- # 确认下创建结果
- # kubectl get deployments.apps
- NAME READY UP-TO-DATE AVAILABLE AGE
- nginx 1/1 1 1 16h
- web 1/1 1 1 45s
- # kubectl get pod
- # kubectl get svc
- # 接着来修改Ingress
- # 注意:这里可以通过两种方式来修改K8s正在运行的资源
- # 第一种:直接通过edit修改在线服务的资源来生效,这个通常用在测试环境,在实际生产中不建议这么用
- kubectl edit ingress nginx-ingress
- # 第二种: 通过之前创建ingress的yaml配置,在上面进行修改,再apply更新进K8s,在生产中是建议这么用的,我们这里也用这种方式来修改
- # vim nginx-ingress.yaml
- apiVersion: extensions/v1beta1
- kind: Ingress
- metadata:
- annotations:
- nginx.ingress.kubernetes.io/rewrite-target: / # 注意这里需要把进来到服务的请求重定向到/,这个和传统的nginx配置是一样的,不配会404
- name: nginx-ingress
- spec:
- rules:
- - host: nginx.boge.com
- http:
- paths:
- - backend:
- serviceName: nginx
- servicePort: 80
- path: /nginx # 注意这里的路由名称要是唯一的
- - backend: # 从这里开始是新增加的
- serviceName: web
- servicePort: 80
- path: /web # 注意这里的路由名称要是唯一的
- # 开始创建
- [root@node-1 ~]# kubectl apply -f nginx-ingress.yaml
- ingress.extensions/nginx-ingress configured
- # 同时为了更直观的看到效果,我们按前面讲到的方法来修改下nginx默认的展示页面
- # kubectl exec -it nginx-f89759699-6vgr8 -- bash
- echo "i am nginx" > /usr/share/nginx/html/index.html
- # kubectl exec -it web-5dcb957ccc-nr2m7 -- bash
- echo "i am web" > /usr/share/nginx/html/index.html
15.因为http属于是明文传输数据不安全,在生产中我们通常会配置https加密通信,现在实战下Ingress的tls配置
- # 这里我先自签一个https的证书
- #1. 先生成私钥key
- openssl genrsa -out tls.key 2048
- #2.再基于key生成tls证书(注意:这里我用的*.boge.com,这是生成泛域名的证书,后面所有新增加的三级域名都是可以用这个证书的)
- openssl req -new -x509 -key tls.key -out tls.cert -days 360 -subj /CN=*.boge.com
- # 看下创建结果
- # ll
- -rw-r--r-- 1 root root 1099 Nov 27 11:44 tls.cert
- -rw-r--r-- 1 root root 1679 Nov 27 11:43 tls.key
- # 在K8s上创建tls的secret(注意默认ns是default)
- kubectl create secret tls mytls --cert=tls.cert --key=tls.key
- # 然后修改先的ingress的yaml配置
- # cat nginx-ingress.yaml
- apiVersion: extensions/v1beta1
- kind: Ingress
- metadata:
- annotations:
- nginx.ingress.kubernetes.io/rewrite-target: / # 注意这里需要把进来到服务的请求重定向到/,这个和传统的nginx配置是一样的,不配会404
- name: nginx-ingress
- spec:
- rules:
- - host: nginx.boge.com
- http:
- paths:
- - backend:
- serviceName: nginx
- servicePort: 80
- path: /nginx # 注意这里的路由名称要是唯一的
- - backend: # 从这里开始是新增加的
- serviceName: web
- servicePort: 80
- path: /web # 注意这里的路由名称要是唯一的
- tls: # 增加下面这段,注意缩进格式
- - hosts:
- - nginx.boge.com # 这里域名和上面的对应
- secretName: mytls # 这是我先生成的secret
- # 进行更新
- kubectl apply -f nginx-ingress.yaml
16.测试现在再来看看https访问的效果:
https://nginx.boge.com/nginx
https://nginx.boge.com/web
注意:这里因为是我自签的证书,所以浏览器地访问时会提示您的连接不是私密连接 ,我这里用的谷歌浏览器,直接点高级,再点击继续前往nginx.boge.com(不安全)
3.1 helm3安装 ingress-nginx(k8s版本要求1.20以上)
1.下载 ingress-nginx-4.2.5.tgz
- helm fetch ingress-nginx/ingress-nginx --version 4.2.5
- #或者curl -LO https://github.com/kubernetes/ingress-nginx/releases/download/helm-chart-4.2.5/ingress-nginx-4.2.5.tgz
2.解压,修改文件
sudo tar -xvf ingress-nginx-4.2.5.tgz && sudo cd ingress-nginx
#下面是已经修改完毕的,可以直接使用
vim values.yaml
- ## nginx configuration
- ## Ref: https://github.com/kubernetes/ingress-nginx/blob/main/docs/user-guide/nginx-configuration/index.md
- commonLabels: {}
- # scmhash: abc123
- # myLabel: aakkmd
- controller:
- name: controller
- image:
- chroot: false
- registry: registry.cn-hangzhou.aliyuncs.com
- image: google_containers/nginx-ingress-controller
- ## repository:
- tag: "v1.3.1"
- #digest: sha256:54f7fe2c6c5a9db9a0ebf1131797109bb7a4d91f56b9b362bde2abd237dd1974
- #digestChroot: sha256:a8466b19c621bd550b1645e27a004a5cc85009c858a9ab19490216735ac432b1
- pullPolicy: IfNotPresent
- # www-data -> uid 101
- runAsUser: 101
- allowPrivilegeEscalation: true
- # -- Use an existing PSP instead of creating one
- existingPsp: ""
- # -- Configures the controller container name
- containerName: controller
- # -- Configures the ports that the nginx-controller listens on
- containerPort:
- http: 80
- https: 443
- # -- Will add custom configuration options to Nginx https://kubernetes.github.io/ingress-nginx/user-guide/nginx-configuration/configmap/
- config: {}
- # -- Annotations to be added to the controller config configuration configmap.
- configAnnotations: {}
- # -- Will add custom headers before sending traffic to backends according to https://github.com/kubernetes/ingress-nginx/tree/main/docs/examples/customization/custom-headers
- proxySetHeaders: {}
- # -- Will add custom headers before sending response traffic to the client according to: https://kubernetes.github.io/ingress-nginx/user-guide/nginx-configuration/configmap/#add-headers
- addHeaders: {}
- # -- Optionally customize the pod dnsConfig.
- dnsConfig: {}
- # -- Optionally customize the pod hostname.
- hostname: {}
- # -- Optionally change this to ClusterFirstWithHostNet in case you have 'hostNetwork: true'.
- # By default, while using host network, name resolution uses the host's DNS. If you wish nginx-controller
- # to keep resolving names inside the k8s network, use ClusterFirstWithHostNet.
- dnsPolicy: ClusterFirstWithHostNet
- # -- Bare-metal considerations via the host network https://kubernetes.github.io/ingress-nginx/deploy/baremetal/#via-the-host-network
- # Ingress status was blank because there is no Service exposing the NGINX Ingress controller in a configuration using the host network, the default --publish-service flag used in standard cloud setups does not apply
- reportNodeInternalIp: false
- # -- Process Ingress objects without ingressClass annotation/ingressClassName field
- # Overrides value for --watch-ingress-without-class flag of the controller binary
- # Defaults to false
- watchIngressWithoutClass: false
- # -- Process IngressClass per name (additionally as per spec.controller).
- ingressClassByName: false
- # -- This configuration defines if Ingress Controller should allow users to set
- # their own *-snippet annotations, otherwise this is forbidden / dropped
- # when users add those annotations.
- # Global snippets in ConfigMap are still respected
- allowSnippetAnnotations: true
- # -- Required for use with CNI based kubernetes installations (such as ones set up by kubeadm),
- # since CNI and hostport don't mix yet. Can be deprecated once https://github.com/kubernetes/kubernetes/issues/23920
- # is merged
- hostNetwork: true
- ## Use host ports 80 and 443
- ## Disabled by default
- hostPort:
- # -- Enable 'hostPort' or not
- enabled: false
- ports:
- # -- 'hostPort' http port
- http: 80
- # -- 'hostPort' https port
- https: 443
- # -- Election ID to use for status update
- electionID: ingress-controller-leader
- ## This section refers to the creation of the IngressClass resource
- ## IngressClass resources are supported since k8s >= 1.18 and required since k8s >= 1.19
- ingressClassResource:
- # -- Name of the ingressClass
- name: nginx
- # -- Is this ingressClass enabled or not
- enabled: true
- # -- Is this the default ingressClass for the cluster
- default: false
- # -- Controller-value of the controller that is processing this ingressClass
- controllerValue: "k8s.io/ingress-nginx"
- # -- Parameters is a link to a custom resource containing additional
- # configuration for the controller. This is optional if the controller
- # does not require extra parameters.
- parameters: {}
- # -- For backwards compatibility with ingress.class annotation, use ingressClass.
- # Algorithm is as follows, first ingressClassName is considered, if not present, controller looks for ingress.class annotation
- ingressClass: nginx
- # -- Labels to add to the pod container metadata
- podLabels: {}
- # key: value
- # -- Security Context policies for controller pods
- podSecurityContext: {}
- # -- See https://kubernetes.io/docs/tasks/administer-cluster/sysctl-cluster/ for notes on enabling and using sysctls
- sysctls: {}
- # sysctls:
- # "net.core.somaxconn": "8192"
- # -- Allows customization of the source of the IP address or FQDN to report
- # in the ingress status field. By default, it reads the information provided
- # by the service. If disable, the status field reports the IP address of the
- # node or nodes where an ingress controller pod is running.
- publishService:
- # -- Enable 'publishService' or not
- enabled: true
- # -- Allows overriding of the publish service to bind to
- # Must be
/ - pathOverride: ""
- # Limit the scope of the controller to a specific namespace
- scope:
- # -- Enable 'scope' or not
- enabled: false
- # -- Namespace to limit the controller to; defaults to $(POD_NAMESPACE)
- namespace: ""
- # -- When scope.enabled == false, instead of watching all namespaces, we watching namespaces whose labels
- # only match with namespaceSelector. Format like foo=bar. Defaults to empty, means watching all namespaces.
- namespaceSelector: ""
- # -- Allows customization of the configmap / nginx-configmap namespace; defaults to $(POD_NAMESPACE)
- configMapNamespace: ""
- tcp:
- # -- Allows customization of the tcp-services-configmap; defaults to $(POD_NAMESPACE)
- configMapNamespace: ""
- # -- Annotations to be added to the tcp config configmap
- annotations: {}
- udp:
- # -- Allows customization of the udp-services-configmap; defaults to $(POD_NAMESPACE)
- configMapNamespace: ""
- # -- Annotations to be added to the udp config configmap
- annotations: {}
- # -- Maxmind license key to download GeoLite2 Databases.
- ## https://blog.maxmind.com/2019/12/18/significant-changes-to-accessing-and-using-geolite2-databases
- maxmindLicenseKey: ""
- # -- Additional command line arguments to pass to nginx-ingress-controller
- # E.g. to specify the default SSL certificate you can use
- extraArgs: {}
- ## extraArgs:
- ## default-ssl-certificate: "
/ " - # -- Additional environment variables to set
- extraEnvs: []
- # extraEnvs:
- # - name: FOO
- # valueFrom:
- # secretKeyRef:
- # key: FOO
- # name: secret-resource
- # -- Use a `DaemonSet` or `Deployment`
- kind: DaemonSet
- # -- Annotations to be added to the controller Deployment or DaemonSet
- ##
- annotations: {}
- # keel.sh/pollSchedule: "@every 60m"
- # -- Labels to be added to the controller Deployment or DaemonSet and other resources that do not have option to specify labels
- ##
- labels: {}
- # keel.sh/policy: patch
- # keel.sh/trigger: poll
- # -- The update strategy to apply to the Deployment or DaemonSet
- ##
- updateStrategy: {}
- # rollingUpdate:
- # maxUnavailable: 1
- # type: RollingUpdate
- # -- `minReadySeconds` to avoid killing pods before we are ready
- ##
- minReadySeconds: 0
- # -- Node tolerations for server scheduling to nodes with taints
- ## Ref: https://kubernetes.io/docs/concepts/configuration/assign-pod-node/
- ##
- tolerations: []
- # - key: "key"
- # operator: "Equal|Exists"
- # value: "value"
- # effect: "NoSchedule|PreferNoSchedule|NoExecute(1.6 only)"
- # -- Affinity and anti-affinity rules for server scheduling to nodes
- ## Ref: https://kubernetes.io/docs/concepts/configuration/assign-pod-node/#affinity-and-anti-affinity
- ##
- affinity: {}
- # # An example of preferred pod anti-affinity, weight is in the range 1-100
- # podAntiAffinity:
- # preferredDuringSchedulingIgnoredDuringExecution:
- # - weight: 100
- # podAffinityTerm:
- # labelSelector:
- # matchExpressions:
- # - key: app.kubernetes.io/name
- # operator: In
- # values:
- # - ingress-nginx
- # - key: app.kubernetes.io/instance
- # operator: In
- # values:
- # - ingress-nginx
- # - key: app.kubernetes.io/component
- # operator: In
- # values:
- # - controller
- # topologyKey: kubernetes.io/hostname
- # # An example of required pod anti-affinity
- # podAntiAffinity:
- # requiredDuringSchedulingIgnoredDuringExecution:
- # - labelSelector:
- # matchExpressions:
- # - key: app.kubernetes.io/name
- # operator: In
- # values:
- # - ingress-nginx
- # - key: app.kubernetes.io/instance
- # operator: In
- # values:
- # - ingress-nginx
- # - key: app.kubernetes.io/component
- # operator: In
- # values:
- # - controller
- # topologyKey: "kubernetes.io/hostname"
- # -- Topology spread constraints rely on node labels to identify the topology domain(s) that each Node is in.
- ## Ref: https://kubernetes.io/docs/concepts/workloads/pods/pod-topology-spread-constraints/
- ##
- topologySpreadConstraints: []
- # - maxSkew: 1
- # topologyKey: topology.kubernetes.io/zone
- # whenUnsatisfiable: DoNotSchedule
- # labelSelector:
- # matchLabels:
- # app.kubernetes.io/instance: ingress-nginx-internal
- # -- `terminationGracePeriodSeconds` to avoid killing pods before we are ready
- ## wait up to five minutes for the drain of connections
- ##
- terminationGracePeriodSeconds: 300
- # -- Node labels for controller pod assignment
- ## Ref: https://kubernetes.io/docs/user-guide/node-selection/
- ##
- nodeSelector:
- kubernetes.io/os: linux
- ingress: "true"
- ## Liveness and readiness probe values
- ## Ref: https://kubernetes.io/docs/concepts/workloads/pods/pod-lifecycle/#container-probes
- ##
- ## startupProbe:
- ## httpGet:
- ## # should match container.healthCheckPath
- ## path: "/healthz"
- ## port: 10254
- ## scheme: HTTP
- ## initialDelaySeconds: 5
- ## periodSeconds: 5
- ## timeoutSeconds: 2
- ## successThreshold: 1
- ## failureThreshold: 5
- livenessProbe:
- httpGet:
- # should match container.healthCheckPath
- path: "/healthz"
- port: 10254
- scheme: HTTP
- initialDelaySeconds: 10
- periodSeconds: 10
- timeoutSeconds: 1
- successThreshold: 1
- failureThreshold: 5
- readinessProbe:
- httpGet:
- # should match container.healthCheckPath
- path: "/healthz"
- port: 10254
- scheme: HTTP
- initialDelaySeconds: 10
- periodSeconds: 10
- timeoutSeconds: 1
- successThreshold: 1
- failureThreshold: 3
- # -- Path of the health check endpoint. All requests received on the port defined by
- # the healthz-port parameter are forwarded internally to this path.
- healthCheckPath: "/healthz"
- # -- Address to bind the health check endpoint.
- # It is better to set this option to the internal node address
- # if the ingress nginx controller is running in the `hostNetwork: true` mode.
- healthCheckHost: ""
- # -- Annotations to be added to controller pods
- ##
- podAnnotations: {}
- replicaCount: 1
- minAvailable: 1
- ## Define requests resources to avoid probe issues due to CPU utilization in busy nodes
- ## ref: https://github.com/kubernetes/ingress-nginx/issues/4735#issuecomment-551204903
- ## Ideally, there should be no limits.
- ## https://engineering.indeedblog.com/blog/2019/12/cpu-throttling-regression-fix/
- resources:
- ## limits:
- ## cpu: 100m
- ## memory: 90Mi
- requests:
- cpu: 100m
- memory: 90Mi
- # Mutually exclusive with keda autoscaling
- autoscaling:
- enabled: false
- minReplicas: 1
- maxReplicas: 11
- targetCPUUtilizationPercentage: 50
- targetMemoryUtilizationPercentage: 50
- behavior: {}
- # scaleDown:
- # stabilizationWindowSeconds: 300
- # policies:
- # - type: Pods
- # value: 1
- # periodSeconds: 180
- # scaleUp:
- # stabilizationWindowSeconds: 300
- # policies:
- # - type: Pods
- # value: 2
- # periodSeconds: 60
- autoscalingTemplate: []
- # Custom or additional autoscaling metrics
- # ref: https://kubernetes.io/docs/tasks/run-application/horizontal-pod-autoscale/#support-for-custom-metrics
- # - type: Pods
- # pods:
- # metric:
- # name: nginx_ingress_controller_nginx_process_requests_total
- # target:
- # type: AverageValue
- # averageValue: 10000m
- # Mutually exclusive with hpa autoscaling
- keda:
- apiVersion: "keda.sh/v1alpha1"
- ## apiVersion changes with keda 1.x vs 2.x
- ## 2.x = keda.sh/v1alpha1
- ## 1.x = keda.k8s.io/v1alpha1
- enabled: false
- minReplicas: 1
- maxReplicas: 11
- pollingInterval: 30
- cooldownPeriod: 300
- restoreToOriginalReplicaCount: false
- scaledObject:
- annotations: {}
- # Custom annotations for ScaledObject resource
- # annotations:
- # key: value
- triggers: []
- # - type: prometheus
- # metadata:
- # serverAddress: http://
:9090 - # metricName: http_requests_total
- # threshold: '100'
- # query: sum(rate(http_requests_total{deployment="my-deployment"}[2m]))
- behavior: {}
- # scaleDown:
- # stabilizationWindowSeconds: 300
- # policies:
- # - type: Pods
- # value: 1
- # periodSeconds: 180
- # scaleUp:
- # stabilizationWindowSeconds: 300
- # policies:
- # - type: Pods
- # value: 2
- # periodSeconds: 60
- # -- Enable mimalloc as a drop-in replacement for malloc.
- ## ref: https://github.com/microsoft/mimalloc
- ##
- enableMimalloc: true
- ## Override NGINX template
- customTemplate:
- configMapName: ""
- configMapKey: ""
- service:
- enabled: true
- # -- If enabled is adding an appProtocol option for Kubernetes service. An appProtocol field replacing annotations that were
- # using for setting a backend protocol. Here is an example for AWS: service.beta.kubernetes.io/aws-load-balancer-backend-protocol: http
- # It allows choosing the protocol for each backend specified in the Kubernetes service.
- # See the following GitHub issue for more details about the purpose: https://github.com/kubernetes/kubernetes/issues/40244
- # Will be ignored for Kubernetes versions older than 1.20
- ##
- appProtocol: true
- annotations: {}
- labels: {}
- # clusterIP: ""
- # -- List of IP addresses at which the controller services are available
- ## Ref: https://kubernetes.io/docs/user-guide/services/#external-ips
- ##
- externalIPs: []
- # -- Used by cloud providers to connect the resulting `LoadBalancer` to a pre-existing static IP according to https://kubernetes.io/docs/concepts/services-networking/service/#loadbalancer
- loadBalancerIP: ""
- loadBalancerSourceRanges: []
- enableHttp: true
- enableHttps: true
- ## Set external traffic policy to: "Local" to preserve source IP on providers supporting it.
- ## Ref: https://kubernetes.io/docs/tutorials/services/source-ip/#source-ip-for-services-with-typeloadbalancer
- # externalTrafficPolicy: ""
- ## Must be either "None" or "ClientIP" if set. Kubernetes will default to "None".
- ## Ref: https://kubernetes.io/docs/concepts/services-networking/service/#virtual-ips-and-service-proxies
- # sessionAffinity: ""
- ## Specifies the health check node port (numeric port number) for the service. If healthCheckNodePort isn’t specified,
- ## the service controller allocates a port from your cluster’s NodePort range.
- ## Ref: https://kubernetes.io/docs/tasks/access-application-cluster/create-external-load-balancer/#preserving-the-client-source-ip
- # healthCheckNodePort: 0
- # -- Represents the dual-stack-ness requested or required by this Service. Possible values are
- # SingleStack, PreferDualStack or RequireDualStack.
- # The ipFamilies and clusterIPs fields depend on the value of this field.
- ## Ref: https://kubernetes.io/docs/concepts/services-networking/dual-stack/
- ipFamilyPolicy: "SingleStack"
- # -- List of IP families (e.g. IPv4, IPv6) assigned to the service. This field is usually assigned automatically
- # based on cluster configuration and the ipFamilyPolicy field.
- ## Ref: https://kubernetes.io/docs/concepts/services-networking/dual-stack/
- ipFamilies:
- - IPv4
- ports:
- http: 80
- https: 443
- targetPorts:
- http: http
- https: https
- type: LoadBalancer
- ## type: NodePort
- ## nodePorts:
- ## http: 32080
- ## https: 32443
- ## tcp:
- ## 8080: 32808
- nodePorts:
- http: ""
- https: ""
- tcp: {}
- udp: {}
- external:
- enabled: true
- internal:
- # -- Enables an additional internal load balancer (besides the external one).
- enabled: false
- # -- Annotations are mandatory for the load balancer to come up. Varies with the cloud service.
- annotations: {}
- # loadBalancerIP: ""
- # -- Restrict access For LoadBalancer service. Defaults to 0.0.0.0/0.
- loadBalancerSourceRanges: []
- ## Set external traffic policy to: "Local" to preserve source IP on
- ## providers supporting it
- ## Ref: https://kubernetes.io/docs/tutorials/services/source-ip/#source-ip-for-services-with-typeloadbalancer
- # externalTrafficPolicy: ""
- # shareProcessNamespace enables process namespace sharing within the pod.
- # This can be used for example to signal log rotation using `kill -USR1` from a sidecar.
- shareProcessNamespace: false
- # -- Additional containers to be added to the controller pod.
- # See https://github.com/lemonldap-ng-controller/lemonldap-ng-controller as example.
- extraContainers: []
- # - name: my-sidecar
- # - name: POD_NAME
- # valueFrom:
- # fieldRef:
- # fieldPath: metadata.name
- # - name: POD_NAMESPACE
- # valueFrom:
- # fieldRef:
- # fieldPath: metadata.namespace
- # volumeMounts:
- # - name: copy-portal-skins
- # mountPath: /srv/var/lib/lemonldap-ng/portal/skins
- # -- Additional volumeMounts to the controller main container.
- extraVolumeMounts: []
- # - name: copy-portal-skins
- # mountPath: /var/lib/lemonldap-ng/portal/skins
- # -- Additional volumes to the controller pod.
- extraVolumes: []
- # - name: copy-portal-skins
- # emptyDir: {}
- # -- Containers, which are run before the app containers are started.
- extraInitContainers: []
- # - name: init-myservice
- # command: ['sh', '-c', 'until nslookup myservice; do echo waiting for myservice; sleep 2; done;']
- extraModules: []
- ## Modules, which are mounted into the core nginx image
- # - name: opentelemetry
- #
- # The image must contain a `/usr/local/bin/init_module.sh` executable, which
- # will be executed as initContainers, to move its config files within the
- # mounted volume.
- admissionWebhooks:
- annotations: {}
- # ignore-check.kube-linter.io/no-read-only-rootfs: "This deployment needs write access to root filesystem".
- ## Additional annotations to the admission webhooks.
- ## These annotations will be added to the ValidatingWebhookConfiguration and
- ## the Jobs Spec of the admission webhooks.
- enabled: true
- # -- Additional environment variables to set
- extraEnvs: []
- # extraEnvs:
- # - name: FOO
- # valueFrom:
- # secretKeyRef:
- # key: FOO
- # name: secret-resource
- # -- Admission Webhook failure policy to use
- failurePolicy: Fail
- # timeoutSeconds: 10
- port: 8443
- certificate: "/usr/local/certificates/cert"
- key: "/usr/local/certificates/key"
- namespaceSelector: {}
- objectSelector: {}
- # -- Labels to be added to admission webhooks
- labels: {}
- # -- Use an existing PSP instead of creating one
- existingPsp: ""
- networkPolicyEnabled: false
- service:
- annotations: {}
- # clusterIP: ""
- externalIPs: []
- # loadBalancerIP: ""
- loadBalancerSourceRanges: []
- servicePort: 443
- type: ClusterIP
- createSecretJob:
- resources: {}
- # limits:
- # cpu: 10m
- # memory: 20Mi
- # requests:
- # cpu: 10m
- # memory: 20Mi
- patchWebhookJob:
- resources: {}
- patch:
- enabled: true
- image:
- registry: registry.cn-hangzhou.aliyuncs.com
- image: google_containers/kube-webhook-certgen
- ## for backwards compatibility consider setting the full image url via the repository value below
- ## use *either* current default registry/image or repository format or installing chart by providing the values.yaml will fail
- ## repository:
- tag: v1.3.0
- # digest: sha256:549e71a6ca248c5abd51cdb73dbc3083df62cf92ed5e6147c780e30f7e007a47
- pullPolicy: IfNotPresent
- # -- Provide a priority class name to the webhook patching job
- ##
- priorityClassName: ""
- podAnnotations: {}
- nodeSelector:
- kubernetes.io/os: linux
- tolerations: []
- # -- Labels to be added to patch job resources
- labels: {}
- securityContext:
- runAsNonRoot: true
- runAsUser: 2000
- fsGroup: 2000
- metrics:
- port: 10254
- # if this port is changed, change healthz-port: in extraArgs: accordingly
- enabled: false
- service:
- annotations: {}
- # prometheus.io/scrape: "true"
- # prometheus.io/port: "10254"
- # clusterIP: ""
- # -- List of IP addresses at which the stats-exporter service is available
- ## Ref: https://kubernetes.io/docs/user-guide/services/#external-ips
- ##
- externalIPs: []
- # loadBalancerIP: ""
- loadBalancerSourceRanges: []
- servicePort: 10254
- type: ClusterIP
- # externalTrafficPolicy: ""
- # nodePort: ""
- serviceMonitor:
- enabled: false
- additionalLabels: {}
- ## The label to use to retrieve the job name from.
- ## jobLabel: "app.kubernetes.io/name"
- namespace: ""
- namespaceSelector: {}
- ## Default: scrape .Release.Namespace only
- ## To scrape all, use the following:
- ## namespaceSelector:
- ## any: true
- scrapeInterval: 30s
- # honorLabels: true
- targetLabels: []
- relabelings: []
- metricRelabelings: []
- prometheusRule:
- enabled: false
- additionalLabels: {}
- # namespace: ""
- rules: []
- # # These are just examples rules, please adapt them to your needs
- # - alert: NGINXConfigFailed
- # expr: count(nginx_ingress_controller_config_last_reload_successful == 0) > 0
- # for: 1s
- # labels:
- # severity: critical
- # annotations:
- # description: bad ingress config - nginx config test failed
- # summary: uninstall the latest ingress changes to allow config reloads to resume
- # - alert: NGINXCertificateExpiry
- # expr: (avg(nginx_ingress_controller_ssl_expire_time_seconds) by (host) - time()) < 604800
- # for: 1s
- # labels:
- # severity: critical
- # annotations:
- # description: ssl certificate(s) will expire in less then a week
- # summary: renew expiring certificates to avoid downtime
- # - alert: NGINXTooMany500s
- # expr: 100 * ( sum( nginx_ingress_controller_requests{status=~"5.+"} ) / sum(nginx_ingress_controller_requests) ) > 5
- # for: 1m
- # labels:
- # severity: warning
- # annotations:
- # description: Too many 5XXs
- # summary: More than 5% of all requests returned 5XX, this requires your attention
- # - alert: NGINXTooMany400s
- # expr: 100 * ( sum( nginx_ingress_controller_requests{status=~"4.+"} ) / sum(nginx_ingress_controller_requests) ) > 5
- # for: 1m
- # labels:
- # severity: warning
- # annotations:
- # description: Too many 4XXs
- # summary: More than 5% of all requests returned 4XX, this requires your attention
- # -- Improve connection draining when ingress controller pod is deleted using a lifecycle hook:
- # With this new hook, we increased the default terminationGracePeriodSeconds from 30 seconds
- # to 300, allowing the draining of connections up to five minutes.
- # If the active connections end before that, the pod will terminate gracefully at that time.
- # To effectively take advantage of this feature, the Configmap feature
- # worker-shutdown-timeout new value is 240s instead of 10s.
- ##
- lifecycle:
- preStop:
- exec:
- command:
- - /wait-shutdown
- priorityClassName: ""
- # -- Rollback limit
- ##
- revisionHistoryLimit: 10
- ## Default 404 backend
- ##
- defaultBackend:
- ##
- enabled: false
- name: defaultbackend
- image:
- registry: k8s.gcr.io
- image: defaultbackend-amd64
- ## for backwards compatibility consider setting the full image url via the repository value below
- ## use *either* current default registry/image or repository format or installing chart by providing the values.yaml will fail
- ## repository:
- tag: "1.5"
- pullPolicy: IfNotPresent
- # nobody user -> uid 65534
- runAsUser: 65534
- runAsNonRoot: true
- readOnlyRootFilesystem: true
- allowPrivilegeEscalation: false
- # -- Use an existing PSP instead of creating one
- existingPsp: ""
- extraArgs: {}
- serviceAccount:
- create: true
- name: ""
- automountServiceAccountToken: true
- # -- Additional environment variables to set for defaultBackend pods
- extraEnvs: []
- port: 8080
- ## Readiness and liveness probes for default backend
- ## Ref: https://kubernetes.io/docs/tasks/configure-pod-container/configure-liveness-readiness-probes/
- ##
- livenessProbe:
- failureThreshold: 3
- initialDelaySeconds: 30
- periodSeconds: 10
- successThreshold: 1
- timeoutSeconds: 5
- readinessProbe:
- failureThreshold: 6
- initialDelaySeconds: 0
- periodSeconds: 5
- successThreshold: 1
- timeoutSeconds: 5
- # -- Node tolerations for server scheduling to nodes with taints
- ## Ref: https://kubernetes.io/docs/concepts/configuration/assign-pod-node/
- ##
- tolerations: []
- # - key: "key"
- # operator: "Equal|Exists"
- # value: "value"
- # effect: "NoSchedule|PreferNoSchedule|NoExecute(1.6 only)"
- affinity: {}
- # -- Security Context policies for controller pods
- # See https://kubernetes.io/docs/tasks/administer-cluster/sysctl-cluster/ for
- # notes on enabling and using sysctls
- ##
- podSecurityContext: {}
- # -- Security Context policies for controller main container.
- # See https://kubernetes.io/docs/tasks/administer-cluster/sysctl-cluster/ for
- # notes on enabling and using sysctls
- ##
- containerSecurityContext: {}
- # -- Labels to add to the pod container metadata
- podLabels: {}
- # key: value
- # -- Node labels for default backend pod assignment
- ## Ref: https://kubernetes.io/docs/user-guide/node-selection/
- ##
- nodeSelector:
- kubernetes.io/os: linux
- # -- Annotations to be added to default backend pods
- ##
- podAnnotations: {}
- replicaCount: 1
- minAvailable: 1
- resources: {}
- # limits:
- # cpu: 10m
- # memory: 20Mi
- # requests:
- # cpu: 10m
- # memory: 20Mi
- extraVolumeMounts: []
- ## Additional volumeMounts to the default backend container.
- # - name: copy-portal-skins
- # mountPath: /var/lib/lemonldap-ng/portal/skins
- extraVolumes: []
- ## Additional volumes to the default backend pod.
- # - name: copy-portal-skins
- # emptyDir: {}
- autoscaling:
- annotations: {}
- enabled: false
- minReplicas: 1
- maxReplicas: 2
- targetCPUUtilizationPercentage: 50
- targetMemoryUtilizationPercentage: 50
- service:
- annotations: {}
- # clusterIP: ""
- # -- List of IP addresses at which the default backend service is available
- ## Ref: https://kubernetes.io/docs/user-guide/services/#external-ips
- ##
- externalIPs: []
- # loadBalancerIP: ""
- loadBalancerSourceRanges: []
- servicePort: 80
- type: ClusterIP
- priorityClassName: ""
- # -- Labels to be added to the default backend resources
- labels: {}
- ## Enable RBAC as per https://github.com/kubernetes/ingress-nginx/blob/main/docs/deploy/rbac.md and https://github.com/kubernetes/ingress-nginx/issues/266
- rbac:
- create: true
- scope: false
- ## If true, create & use Pod Security Policy resources
- ## https://kubernetes.io/docs/concepts/policy/pod-security-policy/
- podSecurityPolicy:
- enabled: false
- serviceAccount:
- create: true
- name: ""
- automountServiceAccountToken: true
- # -- Annotations for the controller service account
- annotations: {}
- # -- Optional array of imagePullSecrets containing private registry credentials
- ## Ref: https://kubernetes.io/docs/tasks/configure-pod-container/pull-image-private-registry/
- imagePullSecrets: []
- # - name: secretName
- # -- TCP service key-value pairs
- ## Ref: https://github.com/kubernetes/ingress-nginx/blob/main/docs/user-guide/exposing-tcp-udp-services.md
- ##
- tcp: {}
- # 8080: "default/example-tcp-svc:9000"
- # -- UDP service key-value pairs
- ## Ref: https://github.com/kubernetes/ingress-nginx/blob/main/docs/user-guide/exposing-tcp-udp-services.md
- ##
- udp: {}
- # 53: "kube-system/kube-dns:53"
- # -- Prefix for TCP and UDP ports names in ingress controller service
- ## Some cloud providers, like Yandex Cloud may have a requirements for a port name regex to support cloud load balancer integration
- portNamePrefix: ""
- # -- (string) A base64-encoded Diffie-Hellman parameter.
- # This can be generated with: `openssl dhparam 4096 2> /dev/null | base64`
- ## Ref: https://github.com/kubernetes/ingress-nginx/tree/main/docs/examples/customization/ssl-dh-param
- dhParam:
3.安装ingress
- # 选择节点打label
- kubectl label node k8s-node01 ingress=true # k8s-node01是自己自定义的node节点名称
- kubectl get node --show-labels
- #创建命名空间
- kubectl create ns ingress-nginx
- # 使用helm进行安装
- helm install ingress-nginx -f values.yaml -n ingress-nginx .
- helm list -n ingress-nginx
- kubectl -n ingress-nginx get pods -o wide
- kubectl -n ingress-nginx get svc -o wide
- # 删除ingress-nginx
- helm delete ingress-nginx -n ingress-nginx
- # 更新ingress-nginx
- helm upgrade ingress-nginx -n -f values.yaml -n ingress-nginx .
4.测试网页
vim test-nginx.yaml
- ---
- apiVersion: apps/v1
- kind: Deployment
- metadata:
- name: my-deploy-nginx
- spec:
- replicas: 2
- selector:
- matchLabels:
- app: mynginx
- template:
- metadata:
- labels:
- app: mynginx
- spec:
- containers:
- - name: mynginx
- image: nginx
- ports:
- - containerPort: 80
- ---
- kind: Service
- apiVersion: v1
- metadata:
- name: myservice
- spec:
- ports:
- - protocol: TCP
- port: 80
- targetPort: 80
- selector:
- app: mynginx
- type: ClusterIP
- ---
- apiVersion: networking.k8s.io/v1
- kind: Ingress
- metadata:
- name: mynginx
- spec:
- ingressClassName: "nginx" #在部署ingress-nginx时,valume.yaml文件中定义的
- rules:
- - host: nginx.rw.com
- http:
- paths:
- - path: /
- pathType: Prefix
- backend:
- service:
- name: myservice
- port:
- number: 80
kubectl apply -f test-nginx.yaml
kubectl get all
kubectl get ingress
四、k8sHPA 自动水平伸缩pod
1.pod内资源分配的配置格式如下:
默认可以只配置requests,但根据生产中的经验,建议把limits资源限制也加上,因为对K8s来说,只有这两个都配置了且配置的值都要一样,这个pod资源的优先级才是最高的,在node资源不够的情况下,首先是把没有任何资源分配配置的pod资源给干掉,其次是只配置了requests的,最后才是两个都配置的情况,仔细品品
resources:
limits: # 限制单个pod最多能使用1核(1000m 毫核)cpu以及2G内存
cpu: "1"
memory: 2Gi
requests: # 保证这个pod初始就能分配这么多资源
cpu: "1"
memory: 2Gi2.我们现在以上面创建的deployment资源web来实践下hpa的效果,首先用我们学到的方法导出web的yaml配置,并增加资源分配配置增加
apiVersion: v1
kind: Service
metadata:
labels:
app: web
name: web
spec:
ports:
- port: 80
protocol: TCP
targetPort: 80
selector:
app: web
---
apiVersion: apps/v1
kind: Deployment
metadata:
labels:
app: web
name: web
namespace: default
spec:
replicas: 1
selector:
matchLabels:
app: web
template:
metadata:
labels:
app: web
spec:
containers:
- image: nginx
name: web
resources:
limits: # 因为我这里是测试环境,所以这里CPU只分配50毫核(0.05核CPU)和20M的内存
cpu: "50m"
memory: 20Mi
requests: # 保证这个pod初始就能分配这么多资源
cpu: "50m"
memory: 20Mi3.运行
kubectl apply -f web.yaml
4.第一种:为deployment资源web创建hpa,pod数量上限3个,最低1个,在pod平均CPU达到50%后开始扩容
kubectl autoscale deployment web --max=3 --min=1 --cpu-percent=50
5.第二种创建hpa
cat hpa-web.yaml
- apiVersion: autoscaling/v2beta1 # v2beta1版本
- #apiVersion: apps/v1
- kind: HorizontalPodAutoscaler
- metadata:
- name: web
- spec:
- maxReplicas: 10
- minReplicas: 1 # 1-10个pod范围内扩容与裁剪
- scaleTargetRef:
- apiVersion: apps/v1
- kind: Deployment
- name: web
- metrics:
- - type: Resource
- resource:
- name: memory
- targetAverageUtilization: 50 # 50%内存利用
6.执行
kubectl apply -f hpa-web.yaml7.我们启动一个临时pod,来模拟大量请求
kubectl run -it --rm busybox --image=busybox -- sh
/ # while :;do wget -q -O- http://web;done#等待2 ~ 3分钟,注意k8s为了避免频繁增删pod,对副本的增加速度有限制
kubectl get hpa web -w

五、k8s存储
5.1 k8s持久化存储02pv pvc
开始部署NFS-SERVER
- # 我们这里在10.0.1.201上安装(在生产中,大家要提供作好NFS-SERVER环境的规划)
- yum -y install nfs-utils
- # 创建NFS挂载目录
- mkdir /nfs_dir
- chown nobody.nobody /nfs_dir
- # 修改NFS-SERVER配置
- echo '/nfs_dir *(rw,sync,no_root_squash)' > /etc/exports
- # 重启服务
- systemctl restart rpcbind.service
- systemctl restart nfs-utils.service
- systemctl restart nfs-server.service
- # 增加NFS-SERVER开机自启动
- systemctl enable rpcbind.service
- systemctl enable nfs-utils.service
- systemctl enable nfs-server.service
- # 验证NFS-SERVER是否能正常访问
- showmount -e 10.0.1.201
- #需要挂载的服务器执行
- yum install nfs-utils -y
接着准备好pv的yaml配置,保存为pv1.yaml
- # cat pv1.yaml
- apiVersion: v1
- kind: PersistentVolume
- metadata:
- name: pv1
- labels:
- type: test-claim # 这里建议打上一个独有的标签,方便在多个pv的时候方便提供pvc选择挂载
- spec:
- capacity:
- storage: 1Gi # <---------- 1
- accessModes:
- - ReadWriteOnce # <---------- 2
- persistentVolumeReclaimPolicy: Recycle # <---------- 3
- storageClassName: nfs # <---------- 4
- nfs:
- path: /nfs_dir/pv1 # <---------- 5
- server: 10.0.1.201
- capacity 指定 PV 的容量为 1G。
- accessModes 指定访问模式为 ReadWriteOnce,支持的访问模式有: ReadWriteOnce – PV 能以 read-write 模式 mount 到单个节点。 ReadOnlyMany – PV 能以 read-only 模式 mount 到多个节点。 ReadWriteMany – PV 能以 read-write 模式 mount 到多个节点。
- persistentVolumeReclaimPolicy 指定当 PV 的回收策略为 Recycle,支持的策略有: Retain – 需要管理员手工回收。 Recycle – 清除 PV 中的数据,效果相当于执行 rm -rf /thevolume/*。 Delete – 删除 Storage Provider 上的对应存储资源,例如 AWS EBS、GCE PD、Azure Disk、OpenStack Cinder Volume 等。
- storageClassName 指定 PV 的 class 为 nfs。相当于为 PV 设置了一个分类,PVC 可以指定 class 申请相应 class 的 PV。
- 指定 PV 在 NFS 服务器上对应的目录,这里注意,我测试的时候,需要手动先创建好这个目录并授权好,不然后面挂载会提示目录不存在 mkdir /nfsdata/pv1 && chown -R nobody.nogroup /nfsdata 。
创建这个pv
- # kubectl apply -f pv1.yaml
- persistentvolume/pv1 created
- # STATUS 为 Available,表示 pv1 就绪,可以被 PVC 申请
- # kubectl get pv
- NAME CAPACITY ACCESS MODES RECLAIM POLICY STATUS CLAIM STORAGECLASS REASON AGE
- pv1 1Gi RWO Recycle Available nfs 4m45s
接着准备PVC的yaml,保存为pvc1.yaml
cat pvc1.yaml
- apiVersion: v1
- kind: PersistentVolumeClaim
- metadata:
- name: pvc1
- spec:
- accessModes:
- - ReadWriteOnce
- resources:
- requests:
- storage: 1Gi
- storageClassName: nfs
- selector:
- matchLabels:
- type: test-claim
创建这个pvc
- # kubectl apply -f pvc1.yaml
- persistentvolumeclaim/pvc1 created
- # 看下pvc的STATUS为Bound代表成功挂载到pv了
- # kubectl get pvc
- NAME STATUS VOLUME CAPACITY ACCESS MODES STORAGECLASS AGE
- pvc1 Bound pv1 1Gi RWO nfs 2s
- # 这个时候再看下pv,STATUS也是Bound了,同时CLAIM提示被default/pvc1消费
- # kubectl get pv
- NAME CAPACITY ACCESS MODES RECLAIM POLICY STATUS CLAIM STORAGECLASS REASON AGE
- pv1 1Gi RWO Recycle Bound default/pvc1 nfs
下面讲下如何回收PVC以及PV
- # 这里删除时会一直卡着,我们按ctrl+c看看怎么回事
- # kubectl delete pvc pvc1
- persistentvolumeclaim "pvc1" deleted
- ^C
- # 看下pvc发现STATUS是Terminating删除中的状态,我分析是因为服务pod还在占用这个pvc使用中
- # kubectl get pvc
- NAME STATUS VOLUME CAPACITY ACCESS MODES STORAGECLASS AGE
- pvc1 Terminating pv1 1Gi RWO nfs 21m
- # 先删除这个pod
- # kubectl delete pod nginx-569546db98-99qpq
- pod "nginx-569546db98-99qpq" deleted
- # 再看先删除的pvc已经没有了
- # kubectl get pvc
- No resources found in default namespace.
- # 根据先前创建pv时的数据回收策略为Recycle – 清除 PV 中的数据,这时果然先创建的index.html已经被删除了,在生产中要尤其注意这里的模式,注意及时备份数据,注意及时备份数据,注意及时备份数据
- # ll /nfs_dir/pv1/
- total 0
- # 虽然此时pv是可以再次被pvc来消费的,但根据生产的经验,建议在删除pvc时,也同时把它消费的pv一并删除,然后再重启创建都是可以的
5.2 StorageClass
1.k8s持久化存储的第三节,给大家带来 StorageClass动态存储的讲解。
我们上节课提到了K8s对于存储解耦的设计是,pv交给存储管理员来管理,我们只管用pvc来消费就好,但这里我们实际还是得一起管理pv和pvc,在实际工作中,我们(存储管理员)可以提前配置好pv的动态供给StorageClass,来根据pvc的消费动态生成pv。
StorageClass我这是直接拿生产中用的实例来作演示,利用nfs-client-provisioner来生成一个基于nfs的StorageClass,部署配置yaml配置如下,保持为nfs-sc.yaml:
- apiVersion: v1
- kind: ServiceAccount
- metadata:
- name: nfs-client-provisioner
- namespace: kube-system
- ---
- kind: ClusterRole
- apiVersion: rbac.authorization.k8s.io/v1
- metadata:
- name: nfs-client-provisioner-runner
- rules:
- - apiGroups: [""]
- resources: ["persistentvolumes"]
- verbs: ["get", "list", "watch", "create", "delete"]
- - apiGroups: [""]
- resources: ["persistentvolumeclaims"]
- verbs: ["get", "list", "watch", "update"]
- - apiGroups: ["storage.k8s.io"]
- resources: ["storageclasses"]
- verbs: ["get", "list", "watch"]
- - apiGroups: [""]
- resources: ["events"]
- verbs: ["list", "watch", "create", "update", "patch"]
- - apiGroups: [""]
- resources: ["endpoints"]
- verbs: ["get", "list", "watch", "create", "update", "patch"]
- ---
- kind: ClusterRoleBinding
- apiVersion: rbac.authorization.k8s.io/v1
- metadata:
- name: run-nfs-client-provisioner
- subjects:
- - kind: ServiceAccount
- name: nfs-client-provisioner
- namespace: kube-system
- roleRef:
- kind: ClusterRole
- name: nfs-client-provisioner-runner
- apiGroup: rbac.authorization.k8s.io
- ---
- kind: Deployment
- apiVersion: apps/v1
- metadata:
- name: nfs-provisioner-01
- namespace: kube-system
- spec:
- replicas: 1
- strategy:
- type: Recreate
- selector:
- matchLabels:
- app: nfs-provisioner-01
- template:
- metadata:
- labels:
- app: nfs-provisioner-01
- spec:
- serviceAccountName: nfs-client-provisioner
- containers:
- - name: nfs-client-provisioner
- #老版本插件使用jmgao1983/nfs-client-provisioner:latest
- # image: jmgao1983/nfs-client-provisioner:latest
- image: vbouchaud/nfs-client-provisioner:latest
- imagePullPolicy: IfNotPresent
- volumeMounts:
- - name: nfs-client-root
- mountPath: /persistentvolumes
- env:
- - name: PROVISIONER_NAME
- value: nfs-provisioner-01 # 此处供应者名字供storageclass调用
- - name: NFS_SERVER
- value: 10.0.1.201 # 填入NFS的地址
- - name: NFS_PATH
- value: /nfs_dir # 填入NFS挂载的目录
- volumes:
- - name: nfs-client-root
- nfs:
- server: 10.0.1.201 # 填入NFS的地址
- path: /nfs_dir # 填入NFS挂载的目录
- ---
- apiVersion: storage.k8s.io/v1
- kind: StorageClass
- metadata:
- name: nfs-boge
- provisioner: nfs-provisioner-01
- # Supported policies: Delete、 Retain , default is Delete
- reclaimPolicy: Retain
2.开始创建这个StorageClass
- # kubectl apply -f nfs-sc.yaml
- serviceaccount/nfs-client-provisioner created
- clusterrole.rbac.authorization.k8s.io/nfs-client-provisioner-runner created
- clusterrolebinding.rbac.authorization.k8s.io/run-nfs-client-provisioner created
- deployment.apps/nfs-provisioner-01 created
- orageclass.storage.k8s.io/nfs-boge created
- # 注意这个是在放kube-system的namespace下面,这里面放置一些偏系统类的服务
- # kubectl -n kube-system get pod -w
- NAME READY STATUS RESTARTS AGE
- calico-kube-controllers-7fdc86d8ff-dpdm5 1/1 Running 1 24h
- calico-node-8jcp5 1/1 Running 1 24h
- calico-node-m92rn 1/1 Running 1 24h
- calico-node-xg5n4 1/1 Running 1 24h
- calico-node-xrfqq 1/1 Running 1 24h
- coredns-d9b6857b5-5zwgf 1/1 Running 1 24h
- metrics-server-869ffc99cd-wfj44 1/1 Running 2 24h
- nfs-provisioner-01-5db96d9cc9-qxlgk 0/1 ContainerCreating 0 9s
- nfs-provisioner-01-5db96d9cc9-qxlgk 1/1 Running 0 21s
- # StorageClass已经创建好了
- # kubectl get sc
- NAME PROVISIONER RECLAIMPOLICY VOLUMEBINDINGMODE ALLOWVOLUMEEXPANSION AGE
- nfs-boge nfs-provisioner-01 Retain Immediate false 37s
3.我们来基于StorageClass创建一个pvc,看看动态生成的pv是什么效果
- # vim pvc-sc.yaml
- kind: PersistentVolumeClaim
- apiVersion: v1
- metadata:
- name: pvc-sc
- spec:
- storageClassName: nfs-boge
- accessModes:
- - ReadWriteMany
- resources:
- requests:
- storage: 1Mi
- # kubectl apply -f pvc-sc.yaml
- persistentvolumeclaim/pvc-sc created
- # kubectl get pvc
- NAME STATUS VOLUME CAPACITY ACCESS MODES STORAGECLASS AGE
- pvc-sc Bound pvc-63eee4c7-90fd-4c7e-abf9-d803c3204623 1Mi RWX nfs-boge 3s
- pvc1 Bound pv1 1Gi RWO nfs 24m
- # kubectl get pv
- NAME CAPACITY ACCESS MODES RECLAIM POLICY STATUS CLAIM STORAGECLASS REASON AGE
- pv1 1Gi RWO Recycle Bound default/pvc1 nfs 49m
- pvc-63eee4c7-90fd-4c7e-abf9-d803c3204623 1Mi RWX Retain Bound default/pvc-sc nfs-boge 7s
4.我们修改下nginx的yaml配置,将pvc的名称换成上面的pvc-sc:
- # vim nginx.yaml
- ---
- apiVersion: apps/v1
- kind: Deployment
- metadata:
- labels:
- app: nginx
- name: nginx
- spec:
- replicas: 1
- selector:
- matchLabels:
- app: nginx
- template:
- metadata:
- labels:
- app: nginx
- spec:
- containers:
- - image: nginx
- name: nginx
- volumeMounts: # 我们这里将nginx容器默认的页面目录挂载
- - name: html-files
- mountPath: "/usr/share/nginx/html"
- volumes:
- - name: html-files
- persistentVolumeClaim:
- claimName: pvc-sc
- # kubectl apply -f nginx.yaml
- service/nginx unchanged
- deployment.apps/nginx configured
- # 这里注意下,因为是动态生成的pv,所以它的目录基于是一串随机字符串生成的,这时我们直接进到pod内来创建访问页面
- # kubectl exec -it nginx-57cdc6d9b4-n497g -- bash
- root@nginx-57cdc6d9b4-n497g:/# echo 'storageClass used' > /usr/share/nginx/html/index.html
- root@nginx-57cdc6d9b4-n497g:/# exit
- # curl 10.68.238.54
- storageClass used
- # 我们看下NFS挂载的目录
- # ll /nfs_dir/
- total 0
- drwxrwxrwx 2 root root 24 Nov 27 17:52 default-pvc-sc-pvc-63eee4c7-90fd-4c7e-abf9-d803c3204623
- drwxr-xr-x 2 root root 6 Nov 27 17:25 pv1
5.ubuntu20.04系统
- #1安装nfs服务端
- sudo apt install nfs-kernel-server -y
- #2. 创建目录
- sudo mkdir -p /nfs_dir/
- #3. 使任何客户端均可访问
- sudo chown nobody:nogroup /data/k8s/
- #sudo chmod 755 /nfs_dir/
- sudo chmod 777 /nfs_dir/
- #4. 配置/etc/exports文件, 使任何ip均可访问(加入以下语句)
- vi /etc/exports
- /nfs_dir/ *(rw,sync,no_subtree_check)
- #5. 检查nfs服务的目录
- # (重新加载配置)
- sudo exportfs -ra
- #(查看共享的目录和允许访问的ip段)
- sudo showmount -e
- #6. 重启nfs服务使以上配置生效
- sudo systemctl restart nfs-kernel-server
- #sudo /etc/init.d/nfs-kernel-server restart
- #查看nfs服务的状态是否为active状态:active(exited)或active(runing)
- systemctl status nfs-kernel-server
- #7. 测试nfs服务是否成功启动
- #安装nfs 客户端
- sudo apt-get install nfs-common
- #创建挂载目录
- sudo mkdir /nfs_dir/
- #7.4 在主机上的Linux中测试是否正常
- sudo mount -t nfs -o nolock -o tcp 192.168.100.11:/nfs_dir/ /nfs_dir/
- #错误 mount.nfs: access denied by server while mounting
六、k8s架构师课程之有状态服务StatefulSet
1.StatefulSet
前面我们讲到了Deployment、DaemonSet都只适合用来跑无状态的服务pod,那么这里的StatefulSet(简写sts)就是用来跑有状态服务pod的。
那怎么理解有状态服务和无状态服务呢?简单快速地理解为:无状态服务最典型的是WEB服务器的每次http请求,它的每次请求都是全新的,和之前的没有关系;那么有状态服务用网游服务器来举例比较恰当了,每个用户的登陆请求,服务端都是先根据这个用户之前注册过的帐号密码等信息来判断这次登陆请求是否正常。
无状态服务因为相互之前都是独立的,很适合用横向扩充来增加服务的资源量
还有一个很形象的比喻,在K8s的无状态服务的pod有点类似于农村圈养的牲畜,饲养它们的人不会给它们每个都单独取个名字(pod都是随机名称,IP每次发生重启也是变化的),当其中一只病了或被卖了,带来的感观只是数量上的减少,这时再买些相应数量的牲畜回来就可以回到之前的状态了(当一个pod因为某些原来被删除掉的时候,K8s会启动一个新的pod来代替它);而有状态服务的pod就像养的一只只宠物,主人对待自己喜欢的宠物都会给它们取一个比较有特色的名字(在K8s上运行的有状态服务的pod,都会被给予一个独立的固定名称),并且每只宠物都有它独特的外貌和性格,如果万一这只宠物丢失了,那么需要到宠物店再买一只同样品种同样毛色的宠物来代替了(当有状态服务的pod删除时,K8s会启动一个和先前一模一样名称的pod来代替它)。
有状态服务sts比较常见的mongo复制集 ,redis cluster,rabbitmq cluster等等,这些服务基本都会用StatefulSet模式来运行,当然除了这个,它们内部集群的关系还需要一系列脚本或controller来维系它们间的状态,这些会在后面进阶课程专门来讲,现在为了让大家先更好的明白StatefulSet,我这里直接还是用nginx服务来实战演示
- 1、创建pv
- -------------------------------------------
- root@node1:~# cat web-pv.yaml
- # mkdir -p /nfs_dir/{web-pv0,web-pv1}
- apiVersion: v1
- kind: PersistentVolume
- metadata:
- name: web-pv0
- labels:
- type: web-pv0
- spec:
- capacity:
- storage: 1Gi
- accessModes:
- - ReadWriteOnce
- persistentVolumeReclaimPolicy: Retain
- storageClassName: my-storage-class
- nfs:
- path: /nfs_dir/web-pv0
- server: 10.0.1.201
- ---
- apiVersion: v1
- kind: PersistentVolume
- metadata:
- name: web-pv1
- labels:
- type: web-pv1
- spec:
- capacity:
- storage: 1Gi
- accessModes:
- - ReadWriteOnce
- persistentVolumeReclaimPolicy: Retain
- storageClassName: my-storage-class
- nfs:
- path: /nfs_dir/web-pv1
- server: 10.0.1.201
- 2、创建pvc(这一步可以省去让其自动创建,这里手动创建是为了让大家能更清楚在sts里面pvc的创建过程)
- -------------------------------------------
- 这一步非常非常的关键,因为如果创建的PVC的名称和StatefulSet中的名称没有对应上,
- 那么StatefulSet中的Pod就肯定创建不成功.
- 我们在这里创建了一个叫做www-web-0和www-web-1的PVC,这个名字是不是很奇怪,
- 而且在这个yaml里并没有提到PV的名字,所以PV和PVC是怎么bound起来的呢?
- 是通过labels标签下的key:value键值对来进行匹配的,
- 我们在创建PV时指定了label的键值对,在PVC里通过selector可以指定label。
- 然后再回到这个PVC的名称定义:www-web-0,为什么叫这样一个看似有规律的名字呢,
- 这里需要看看下面创建StatefulSet中的yaml,
- 首先我们看到StatefulSet的name叫web,设置的replicas为2个,
- volumeMounts和volumeClaimTemplates的name必须相同,为www,
- 所以StatefulSet创建的第一个Pod的name应该为web-0,第二个为web-1。
- 这里StatefulSet中的Pod与PVC之间的绑定关系是通过名称来匹配的,即:
- PVC_name = volumeClaimTemplates_name + "-" + pod_name
- www-web-0 = www + "-" + web-0
- www-web-1 = www + "-" + web-1
- root@node1:~# cat web-pvc.yaml
- kind: PersistentVolumeClaim
- apiVersion: v1
- metadata:
- name: www-web-0
- spec:
- accessModes:
- - ReadWriteOnce
- resources:
- requests:
- storage: 1Gi
- storageClassName: my-storage-class
- selector:
- matchLabels:
- type: web-pv0
- ---
- kind: PersistentVolumeClaim
- apiVersion: v1
- metadata:
- name: www-web-1
- spec:
- accessModes:
- - ReadWriteOnce
- resources:
- requests:
- storage: 1Gi
- storageClassName: my-storage-class
- selector:
- matchLabels:
- type: web-pv1
- 3、创建Service 和 StatefulSet
- -------------------------------------------
- 在上一步中我们已经创建了名为www-web-0的PVC了,接下来创建一个service和statefulset,
- service的名称可以随意取,但是statefulset的名称已经定死了,为web,
- 并且statefulset中的volumeClaimTemplates_name必须为www,volumeMounts_name也必须为www。
- 只有这样,statefulset中的pod才能通过命名来匹配到PVC,否则会创建失败。
- root@node1:~# cat web.yaml
- apiVersion: v1
- kind: Service
- metadata:
- name: web-headless
- labels:
- app: nginx
- spec:
- ports:
- - port: 80
- name: web
- clusterIP: None
- selector:
- app: nginx
- ---
- apiVersion: v1
- kind: Service
- metadata:
- name: web
- labels:
- app: nginx
- spec:
- ports:
- - port: 80
- name: web
- selector:
- app: nginx
- ---
- apiVersion: apps/v1
- kind: StatefulSet
- metadata:
- name: web
- spec:
- selector:
- matchLabels:
- app: nginx # has to match .spec.template.metadata.labels
- serviceName: "web-headless" #需要第4行的name一致
- replicas: 2 # by default is 1
- template:
- metadata:
- labels:
- app: nginx # has to match .spec.selector.matchLabels
- spec:
- terminationGracePeriodSeconds: 10
- containers:
- - name: nginx
- image: nginx
- imagePullPolicy: IfNotPresent
- ports:
- - containerPort: 80
- name: web
- volumeMounts:
- - name: www
- mountPath: /usr/share/nginx/html
- volumeClaimTemplates:
- - metadata:
- name: www
- spec:
- accessModes: [ "ReadWriteOnce" ]
- storageClassName: "my-storage-class"
- resources:
- requests:
- storage: 1Gi
2.动态存储创建sts-web.yaml
- cat sts-web.yaml
- apiVersion: v1
- kind: Service
- metadata:
- name: web-headless
- labels:
- app: nginx
- spec:
- ports:
- - port: 80
- name: web
- clusterIP: None
- selector:
- app: nginx
- ---
- apiVersion: v1
- kind: Service
- metadata:
- name: web
- labels:
- app: nginx
- spec:
- ports:
- - port: 80
- name: web
- selector:
- app: nginx
- ---
- apiVersion: apps/v1
- kind: StatefulSet
- metadata:
- name: web
- spec:
- selector:
- matchLabels:
- app: nginx # has to match .spec.template.metadata.labels
- serviceName: "nginx"
- replicas: 2 # by default is 1
- template:
- metadata:
- labels:
- app: nginx # has to match .spec.selector.matchLabels
- spec:
- terminationGracePeriodSeconds: 10
- containers:
- - name: nginx
- image: nginx
- imagePullPolicy: IfNotPresent
- ports:
- - containerPort: 80
- name: web
- volumeMounts:
- - name: www
- mountPath: /usr/share/nginx/html
- volumeClaimTemplates:
- - metadata:
- name: www
- spec:
- accessModes: [ "ReadWriteOnce" ]
- storageClassName: "nfs-boge" #之前创建的sc
- resources:
- requests:
- storage: 1Gi
- 执行测试
- [root@k8s-m01 nfs_dir]# kubectl apply -f sts-web.yaml -n renwei
- 编辑测试页面
- [root@k8s-m01 nfs_dir]# echo 00000 > renwei-www-web-0-pvc-477af122-468d-43f2-b935-5b1bd653fca5/index.html
- [root@k8s-m01 nfs_dir]# echo 11111 >renwei-www-web-1-pvc-f3e720ec-98bf-4d3e-85bf-44eae02fa1c7/index.html
- 启动临时程序,测试页面
- [root@k8s-m01 nfs_dir]# kubectl det pod svc -n renwei
- [root@k8s-m01 nfs_dir]# curl 0.68.186.15
- [root@k8s-m01 nfs_dir]# kubectl run --rm -it busybox --image=busybox -- sh
- If you don't see a command prompt, try pressing enter.
- / #
- / #
- / # wget www-web-0.web-headless.renwei
- / # cat index.html
- / # exit
- [root@k8s-m01 nfs_dir]# kubectl delete -f sts-web.yaml -n renwei
- #删除pv,pvc
- [root@k8s-m01 nfs_dir]# kubectl get pvc -n renwei
- [root@k8s-m01 nfs_dir]# kubectl -n renwei delete pvc www-web-0
- [root@k8s-m01 nfs_dir]# kubectl -n renwei delete pvc www-web-1
- [root@k8s-m01 nfs_dir]# kubectl get pv
- [root@k8s-m01 nfs_dir]# kubectl delete pv pvc-477af122-468d-43f2-b935-5b1bd653fca5
- [root@k8s-m01 nfs_dir]# kubectl delete pv pvc-f3e720ec-98bf-4d3e-85bf-44eae02fa1c7
- [root@k8s-m01 nfs_dir]# kubectl get pvc -n renwei
- [root@k8s-m01 nfs_dir]# kubectl get pv
七、k8s一次性和定时任务
1.首先讲下一次性任务,在K8s中它叫job,直接来实战一番,先准备下yaml配置
这里我们不知道yaml怎么写,可以直接kubectl create job -h就能看到命令行创建示例了,然后可以根据创建出来的服务资源来导出它的yaml配置为my-job.yaml
- apiVersion: batch/v1 # 1. batch/v1 是当前 Job 的 apiVersion
- kind: Job # 2. 指明当前资源的类型为 Job
- metadata:
- name: my-job
- spec:
- template:
- metadata:
- spec:
- containers:
- - image: busybox
- name: my-job
- command: ["echo","Hello, boge."]
- restartPolicy: Never # 3. restartPolicy 指定什么情况下需要重启容器。对于 Job,只能设置为 Never 或者 OnFailure
2.创建它并查看结果
- # kubectl apply -f my-job.yaml
- job.batch/my-job created
- # kubectl get jobs.batch
- NAME COMPLETIONS DURATION AGE
- my-job 1/1 2s 73s
- # COMPLETIONS 已完成的
- # DURATION 这个job运行所花费的时间
- # AGE 这个job资源已经从创建到目前为止的时间
- # job会生成一个pod,当完成任务后会是Completed的状态
- # kubectl get pod
- NAME READY STATUS RESTARTS AGE
- my-job-7h6fb 0/1 Completed 0 31s
- # 看下这个job生成的pod日志
- # kubectl logs my-job-7h6fb
- Hello, boge.
3. ob失败了会有什么现象出现呢?
我们编辑这个job的yaml,把执行的命令改成一个不存在的命令看看会发生什么
- apiVersion: batch/v1 # 1. batch/v1 是当前 Job 的 apiVersion
- kind: Job # 2. 指明当前资源的类型为 Job
- metadata:
- name: my-job
- spec:
- template:
- metadata:
- spec:
- containers:
- - image: busybox
- name: my-job
- command: ["echoaaa","Hello, boge."]
- restartPolicy: Never # 3. restartPolicy 指定什么情况下需要重启容器。对于 Job,只能设置为 Never 或者 OnFailure
4.创建它
- # kubectl apply -f my-job.yaml
- # 可以观察到这个job因为不成功,并且restartPolicy重启模式是Never不会被重启,但它的job状态始终未完成,所以它会一直不停的创建新的pod,直到COMPLETIONS为1/1,对于我们这个示例,它显然永远都不会成功
- # kubectl get pod
- NAME READY STATUS RESTARTS AGE
- my-job-9fcbm 0/1 StartError 0 47s
- my-job-bt2kd 0/1 StartError 0 54s
- my-job-mlnzz 0/1 StartError 0 37s
- my-job-mntdp 0/1 StartError 0 17s
- # kubectl get job
- NAME COMPLETIONS DURATION AGE
- my-job 0/1 15s 15s
- # 找一个pod看下事件描述,会很清晰地指出命令不存在
- # kubectl describe pod my-job-9fcbm
- Name: my-job-9fcbm
- Namespace: default
- ......
- Events:
- Type Reason Age From Message
- ---- ------ ---- ---- -------
- Normal Scheduled 44s default-scheduler Successfully assigned default/my-job-9fcbm to 10.0.0.204
- Normal Pulling 43s kubelet Pulling image "busybox"
- Normal Pulled 36s kubelet Successfully pulled image "busybox" in 7.299038719s
- Normal Created 36s kubelet Created container my-job
- Warning Failed 36s kubelet Error: failed to create containerd task: OCI runtime create failed: container_linux.go:370: starting container process caused: exec: "echoaaa": executable file not found in $PATH: unknown
- # 删除掉这个job,不然那创建的pod数量可有够多的了
- # kubectl delete job my-job
- # 试试把restartPolicy重启模式换成OnFailure观察看看
- # kubectl get pod
- NAME READY STATUS RESTARTS AGE
- my-job-gs95h 0/1 CrashLoopBackOff 3 84s
- # 可以看到它不会创建新的pod,而是会尝试重启自身,以期望恢复正常,这里看到已经重启了3次,还会持续增加到5,然后会被K8s给删除以尝试,因为这里只是job而不是deployment,它不会自己再启动一个新的pod,所以这个job等于就没有了,这里说明OnFailure是生效的,至少不会有那么多错误的pod出现了
5.并行执行job
准备好yaml配置
- apiVersion: batch/v1
- kind: Job
- metadata:
- name: my-job
- spec:
- parallelism: 2 # 并行执行2个job
- template:
- metadata:
- name: my-job
- spec:
- containers:
- - image: busybox
- name: my-job
- command: ["echo","Hello, boge."]
- restartPolicy: OnFailure
6.创建并查看结果
- # kubectl apply -f my-job.yaml
- job.batch/my-job created
- # job一共启动了2个pod,并且它们的AGE一样,可见是并行创建的
- # kubectl get pod
- NAME READY STATUS RESTARTS AGE
- my-job-fwf8l 0/1 Completed 0 7s
- my-job-w2fxd 0/1 Completed 0 7s
7.再来个组合测试下并行完成定制的总任务数量
- apiVersion: batch/v1
- kind: Job
- metadata:
- name: myjob
- spec:
- completions: 6 # 此job完成pod的总数量
- parallelism: 2 # 每次并发跑2个job
- template:
- metadata:
- name: myjob
- spec:
- containers:
- - name: hello
- image: busybox
- command: ["echo"," hello boge! "]
- restartPolicy: OnFailure
8.创建并查看结果
- # 可以看到是每次并发2个job,完成6个总量即停止
- # kubectl get pod
- NAME READY STATUS RESTARTS AGE
- myjob-54wmk 0/1 Completed 0 11s
- myjob-fgtmj 0/1 Completed 0 15s
- myjob-fkj5l 0/1 Completed 0 7s
- myjob-hsccm 0/1 Completed 0 7s
- myjob-lrpsr 0/1 Completed 0 15s
- myjob-ppfns 0/1 Completed 0 11s
- # 符合预期
- # kubectl get job
- NAME COMPLETIONS DURATION AGE
- myjob 6/6 14s 34s
- # 测试完成后删掉这个资源
- kubectl delete job myjob
9 到此,job的内容就讲完了,在生产中,job比较适合用在CI/CD流水线中,作完一次性任务使用,我在生产中基本没怎么用这个资源。
cronjob上面的job是一次性任务,那我们需要定时循环来执行一个任务可以吗?答案肯定是可以的,就像我们在linux系统上面用crontab一样,在K8s上用cronjob的另一个好处就是它是分布式的,执行的pod可以是在集群中的任意一台NODE上面(这点和cronsun有点类似)
让我们开始实战吧,先准备一下cronjob的yaml配置为my-cronjob.yaml
- apiVersion: batch/v1beta1 # <--------- 当前 CronJob 的 apiVersion
- kind: CronJob # <--------- 当前资源的类型
- metadata:
- name: hello
- spec:
- schedule: "* * * * *" # <--------- schedule 指定什么时候运行 Job,其格式与 Linux crontab 一致,这里 * * * * * 的含义是每一分钟启动一次
- jobTemplate: # <--------- 定义 Job 的模板,格式与前面 Job 一致
- spec:
- template:
- spec:
- containers:
- - name: hello
- image: busybox
- command: ["echo","boge like cronjob."]
- restartPolicy: OnFailure
10.正常创建后,我们过几分钟来看看运行结果
- # 这里会显示cronjob的综合信息
- # kubectl get cronjobs.batch
- NAME SCHEDULE SUSPEND ACTIVE LAST SCHEDULE AGE
- hello * * * * * False 0 66s 2m20s
- # 可以看到它每隔一分钟就会创建一个pod来执行job任务
- # kubectl get pod
- NAME READY STATUS RESTARTS AGE
- hello-1610267460-9b6hp 0/1 Completed 0 2m5s
- hello-1610267520-fm427 0/1 Completed 0 65s
- hello-1610267580-v8g4h 0/1 ContainerCreating 0 5s
- # 测试完成后删掉这个资源
- # kubectl delete cronjobs.batch hello
- cronjob.batch "hello" deleted
cronjob定时任务在生产中的用处很多,这也是为什么上面job我说用得很少的缘故,我们可以把一些需要定时定期运行的任务,在K8s上以cronjob运行,依托K8s强大的资源调度以及服务自愈能力,我们可以放心的把定时任务交给它执行。
八、k8sRBAC角色访问控制
1.RBAC
在k8s上我们如何控制访问权限呢,答案就是Role-based access control (RBAC) - 基于角色(Role)的访问控制,(RBAC)是一种基于组织中用户的角色来调节控制对 计算机或网络资源的访问的方法。
在早期的K8s版本,RBAC还未出现的时候,整个K8s的安全是较为薄弱的,有了RBAC后,我们可以对K8s集群的访问人员作非常明细化的控制,控制他们能访问什么资源,以只读还是可以读写的形式来访问,目前RBAC是K8s默认的安全授权标准,所以我们非常有必要来掌握RBAC的使用,这样才有更有力的保障我们的K8s集群的安全使用,下面我们将以生产中的实际使用来大家了解及掌握RBAC的生产应用。
RBAC里面的几种资源关系图,下面将用下面的资源来演示生产中经典的RBAC应用
|--- Role --- RoleBinding 只在指定namespace中生效
ServiceAccount ---|
|--- ClusterRole --- ClusterRoleBinding 不受namespace限制,在整个K8s集群中生效2.在我看来,RBAC在K8s上的用途主要分为两大类:
第一类是保证在K8s上运行的pod服务具有相应的集群权限,如gitlab的CI/CD,它需要能访问除自身以外其他pod,比如gitlab-runner的pod的权限,再比如gitlab-runner的pod需要拥有创建新的临时pod的权限,用以来构建CI/CD自动化流水线,这里大家没用过不懂没关系,先简单了解下就可以了,在本课程后面基于K8s及gitlab的生产实战CI/CD内容会给大家作详细实战讲解;
第二类是创建能访问K8s相应资源、拥有对应权限的kube-config配置给到使用K8s的人员,来作为连接K8s的授权凭证
第一类的实战这里先暂时以早期的helm2来作下讲解,helm是一个快捷安装K8s各类资源的管理工具,通过之前给大家讲解的,一个较为完整的服务可能会存在deployment,service,configmap,secret,ingress等资源来组合使用,大家在用的过程中可能会觉得配置使用较为麻烦,这时候helm就出现了,它把这些资源都打包封装成它自己能识别的内容,我们在安装一个服务的时候,就只需要作下简单的配置,一条命令即可完成上述众多资源的配置安装,titller相当于helm的服务端,它是需要有权限在K8s中创建各类资源的,在初始安装使用时,如果没有配置RBAC权限,我们会看到如下报错:
root@node1:~# helm install stable/mysql
Error: no available release name found3.这时,我们可以来快速解决这个问题,创建sa关联K8s自带的最高权限的ClusterRole(生产中建议不要这样做,权限太高有安全隐患,这个就和linux的root管理帐号一样,一般都是建议通过sudo来控制帐号权限)
- kubectl create serviceaccount --namespace kube-system tiller
- kubectl create clusterrolebinding tiller-cluster-rule --clusterrole=cluster-admin --serviceaccount=kube-system:tiller
- kubectl patch deploy --namespace kube-system tiller-deploy -p '{"spec":{"template":{"spec":{"serviceAccount":"tiller"}}}}'
4.第二类,我这里就直接以我在生产中实施的完整脚本来做讲解及实战,相信会给大家带来一个全新的学习感受,并能很快掌握它们:
1.创建对指定namespace有所有权限的kube-config
- #!/bin/bash
- #
- # This Script based on https://jeremievallee.com/2018/05/28/kubernetes-rbac-namespace-user.html
- # K8s'RBAC doc: https://kubernetes.io/docs/reference/access-authn-authz/rbac
- # Gitlab'CI/CD doc: hhttps://docs.gitlab.com/ee/user/permissions.html#running-pipelines-on-protected-branches
- #
- # In honor of the remarkable Windson
- BASEDIR="$(dirname "$0")"
- folder="$BASEDIR/kube_config"
- echo -e "All namespaces is here: \n$(kubectl get ns|awk 'NR!=1{print $1}')"
- echo "endpoint server if local network you can use $(kubectl cluster-info |awk '/Kubernetes/{print $NF}')"
- namespace=$1
- endpoint=$(echo "$2" | sed -e 's,https\?://,,g')
- if [[ -z "$endpoint" || -z "$namespace" ]]; then
- echo "Use "$(basename "$0")" NAMESPACE ENDPOINT";
- exit 1;
- fi
- if ! kubectl get ns|awk 'NR!=1{print $1}'|grep -w "$namespace";then kubectl create ns "$namespace";else echo "namespace: $namespace was exist."; exit 1 ;fi
- echo "---
- apiVersion: v1
- kind: ServiceAccount
- metadata:
- name: $namespace-user
- namespace: $namespace
- ---
- kind: Role
- apiVersion: rbac.authorization.k8s.io/v1beta1
- metadata:
- name: $namespace-user-full-access
- namespace: $namespace
- rules:
- - apiGroups: ['', 'extensions', 'apps', 'metrics.k8s.io']
- resources: ['*']
- verbs: ['*']
- - apiGroups: ['batch']
- resources:
- - jobs
- - cronjobs
- verbs: ['*']
- ---
- kind: RoleBinding
- apiVersion: rbac.authorization.k8s.io/v1beta1
- metadata:
- name: $namespace-user-view
- namespace: $namespace
- subjects:
- - kind: ServiceAccount
- name: $namespace-user
- namespace: $namespace
- roleRef:
- apiGroup: rbac.authorization.k8s.io
- kind: Role
- name: $namespace-user-full-access
- ---
- # https://kubernetes.io/zh/docs/concepts/policy/resource-quotas/
- apiVersion: v1
- kind: ResourceQuota
- metadata:
- name: $namespace-compute-resources
- namespace: $namespace
- spec:
- hard:
- pods: "10"
- services: "10"
- persistentvolumeclaims: "5"
- requests.cpu: "1"
- requests.memory: 2Gi
- limits.cpu: "2"
- limits.memory: 4Gi" | kubectl apply -f -
- kubectl -n $namespace describe quota $namespace-compute-resources
- mkdir -p $folder
- tokenName=$(kubectl get sa $namespace-user -n $namespace -o "jsonpath={.secrets[0].name}")
- token=$(kubectl get secret $tokenName -n $namespace -o "jsonpath={.data.token}" | base64 --decode)
- certificate=$(kubectl get secret $tokenName -n $namespace -o "jsonpath={.data['ca\.crt']}")
- echo "apiVersion: v1
- kind: Config
- preferences: {}
- clusters:
- - cluster:
- certificate-authority-data: $certificate
- server: https://$endpoint
- name: $namespace-cluster
- users:
- - name: $namespace-user
- user:
- as-user-extra: {}
- client-key-data: $certificate
- token: $token
- contexts:
- - context:
- cluster: $namespace-cluster
- namespace: $namespace
- user: $namespace-user
- name: $namespace
- current-context: $namespace" > $folder/$namespace.kube.conf
2.创建对指定namespace有所有权限的kube-config(在已有的namespace中创建)
- #!/bin/bash
- BASEDIR="$(dirname "$0")"
- folder="$BASEDIR/kube_config"
- echo -e "All namespaces is here: \n$(kubectl get ns|awk 'NR!=1{print $1}')"
- echo "endpoint server if local network you can use $(kubectl cluster-info |awk '/Kubernetes/{print $NF}')"
- namespace=$1
- endpoint=$(echo "$2" | sed -e 's,https\?://,,g')
- if [[ -z "$endpoint" || -z "$namespace" ]]; then
- echo "Use "$(basename "$0")" NAMESPACE ENDPOINT";
- exit 1;
- fi
- echo "---
- apiVersion: v1
- kind: ServiceAccount
- metadata:
- name: $namespace-user
- namespace: $namespace
- ---
- kind: Role
- apiVersion: rbac.authorization.k8s.io/v1beta1
- metadata:
- name: $namespace-user-full-access
- namespace: $namespace
- rules:
- - apiGroups: ['', 'extensions', 'apps', 'metrics.k8s.io']
- resources: ['*']
- verbs: ['*']
- - apiGroups: ['batch']
- resources:
- - jobs
- - cronjobs
- verbs: ['*']
- ---
- kind: RoleBinding
- apiVersion: rbac.authorization.k8s.io/v1beta1
- metadata:
- name: $namespace-user-view
- namespace: $namespace
- subjects:
- - kind: ServiceAccount
- name: $namespace-user
- namespace: $namespace
- roleRef:
- apiGroup: rbac.authorization.k8s.io
- kind: Role
- name: $namespace-user-full-access" | kubectl apply -f -
- mkdir -p $folder
- tokenName=$(kubectl get sa $namespace-user -n $namespace -o "jsonpath={.secrets[0].name}")
- token=$(kubectl get secret $tokenName -n $namespace -o "jsonpath={.data.token}" | base64 --decode)
- certificate=$(kubectl get secret $tokenName -n $namespace -o "jsonpath={.data['ca\.crt']}")
- echo "apiVersion: v1
- kind: Config
- preferences: {}
- clusters:
- - cluster:
- certificate-authority-data: $certificate
- server: https://$endpoint
- name: $namespace-cluster
- users:
- - name: $namespace-user
- user:
- as-user-extra: {}
- client-key-data: $certificate
- token: $token
- contexts:
- - context:
- cluster: $namespace-cluster
- namespace: $namespace
- user: $namespace-user
- name: $namespace
- current-context: $namespace" > $folder/$namespace.kube.conf
3.同上,创建只读权限的
- #!/bin/bash
- BASEDIR="$(dirname "$0")"
- folder="$BASEDIR/kube_config"
- echo -e "All namespaces is here: \n$(kubectl get ns|awk 'NR!=1{print $1}')"
- echo "endpoint server if local network you can use $(kubectl cluster-info |awk '/Kubernetes/{print $NF}')"
- namespace=$1
- endpoint=$(echo "$2" | sed -e 's,https\?://,,g')
- if [[ -z "$endpoint" || -z "$namespace" ]]; then
- echo "Use "$(basename "$0")" NAMESPACE ENDPOINT";
- exit 1;
- fi
- echo "---
- apiVersion: v1
- kind: ServiceAccount
- metadata:
- name: $namespace-user-readonly
- namespace: $namespace
- ---
- kind: Role
- apiVersion: rbac.authorization.k8s.io/v1beta1
- metadata:
- name: $namespace-user-readonly-access
- namespace: $namespace
- rules:
- - apiGroups: ['', 'extensions', 'apps', 'metrics.k8s.io']
- resources: ['pods', 'pods/log']
- verbs: ['get', 'list', 'watch']
- - apiGroups: ['batch']
- resources: ['jobs', 'cronjobs']
- verbs: ['get', 'list', 'watch']
- ---
- kind: RoleBinding
- apiVersion: rbac.authorization.k8s.io/v1beta1
- metadata:
- name: $namespace-user-view-readonly
- namespace: $namespace
- subjects:
- - kind: ServiceAccount
- name: $namespace-user-readonly
- namespace: $namespace
- roleRef:
- apiGroup: rbac.authorization.k8s.io
- kind: Role
- name: $namespace-user-readonly-access" | kubectl apply -f -
- mkdir -p $folder
- tokenName=$(kubectl get sa $namespace-user-readonly -n $namespace -o "jsonpath={.secrets[0].name}")
- token=$(kubectl get secret $tokenName -n $namespace -o "jsonpath={.data.token}" | base64 --decode)
- certificate=$(kubectl get secret $tokenName -n $namespace -o "jsonpath={.data['ca\.crt']}")
- echo "apiVersion: v1
- kind: Config
- preferences: {}
- clusters:
- - cluster:
- certificate-authority-data: $certificate
- server: https://$endpoint
- name: $namespace-cluster-readonly
- users:
- - name: $namespace-user-readonly
- user:
- as-user-extra: {}
- client-key-data: $certificate
- token: $token
- contexts:
- - context:
- cluster: $namespace-cluster-readonly
- namespace: $namespace
- user: $namespace-user-readonly
- name: $namespace
- current-context: $namespace" > $folder/$namespace-readonly.kube.conf
4.最后,来一个多个集群配置融合的创建,这个在多集群管理方面非常有用,这里只以创建只读权限配置作为演示
- #!/bin/bash
- # describe: create k8s cluster all namespaces resources with readonly clusterrole, no exec 、delete ...
- # look system default to study:
- # kubectl describe clusterrole view
- # restore all change:
- #kubectl -n kube-system delete sa all-readonly-${clustername}
- #kubectl delete clusterrolebinding all-readonly-${clustername}
- #kubectl delete clusterrole all-readonly-${clustername}
- clustername=$1
- Help(){
- echo "Use "$(basename "$0")" ClusterName(example: k8s1|k8s2|k8s3|delk8s1|delk8s2|delk8s3|3in1)";
- exit 1;
- }
- if [[ -z "${clustername}" ]]; then
- Help
- fi
- case ${clustername} in
- k8s1)
- endpoint="https://x.x.x.x:123456"
- ;;
- k8s2)
- endpoint="https://x.x.x.x:123456"
- ;;
- k8s3)
- endpoint="https://x.x.x.x:123456"
- ;;
- delk8s1)
- kubectl -n kube-system delete sa all-readonly-k8s1
- kubectl delete clusterrolebinding all-readonly-k8s1
- kubectl delete clusterrole all-readonly-k8s1
- echo "${clustername} successful."
- exit 0
- ;;
- delk8s2)
- kubectl -n kube-system delete sa all-readonly-k8s2
- kubectl delete clusterrolebinding all-readonly-k8s2
- kubectl delete clusterrole all-readonly-k8s2
- echo "${clustername} successful."
- exit 0
- ;;
- delk8s3)
- kubectl -n kube-system delete sa all-readonly-k8s3
- kubectl delete clusterrolebinding all-readonly-k8s3
- kubectl delete clusterrole all-readonly-k8s3
- echo "${clustername} successful."
- exit 0
- ;;
- 3in1)
- KUBECONFIG=./all-readonly-k8s1.conf:all-readonly-k8s2.conf:all-readonly-k8s3.conf kubectl config view --flatten > ./all-readonly-3in1.conf
- kubectl --kubeconfig=./all-readonly-3in1.conf config use-context "k8s3"
- kubectl --kubeconfig=./all-readonly-3in1.conf config set-context "k8s3" --namespace="default"
- kubectl --kubeconfig=./all-readonly-3in1.conf config get-contexts
- echo -e "\n\n\n"
- cat ./all-readonly-3in1.conf |base64 -w 0
- exit 0
- ;;
- *)
- Help
- esac
- echo "---
- apiVersion: rbac.authorization.k8s.io/v1
- kind: ClusterRole
- metadata:
- name: all-readonly-${clustername}
- rules:
- - apiGroups:
- - ''
- resources:
- - configmaps
- - endpoints
- - persistentvolumes
- - persistentvolumeclaims
- - pods
- - replicationcontrollers
- - replicationcontrollers/scale
- - serviceaccounts
- - services
- - nodes
- verbs:
- - get
- - list
- - watch
- - apiGroups:
- - ''
- resources:
- - bindings
- - events
- - limitranges
- - namespaces/status
- - pods/log
- - pods/status
- - replicationcontrollers/status
- - resourcequotas
- - resourcequotas/status
- verbs:
- - get
- - list
- - watch
- - apiGroups:
- - ''
- resources:
- - namespaces
- verbs:
- - get
- - list
- - watch
- - apiGroups:
- - apps
- resources:
- - controllerrevisions
- - daemonsets
- - deployments
- - deployments/scale
- - replicasets
- - replicasets/scale
- - statefulsets
- - statefulsets/scale
- verbs:
- - get
- - list
- - watch
- - apiGroups:
- - autoscaling
- resources:
- - horizontalpodautoscalers
- verbs:
- - get
- - list
- - watch
- - apiGroups:
- - batch
- resources:
- - cronjobs
- - jobs
- verbs:
- - get
- - list
- - watch
- - apiGroups:
- - extensions
- resources:
- - daemonsets
- - deployments
- - deployments/scale
- - ingresses
- - networkpolicies
- - replicasets
- - replicasets/scale
- - replicationcontrollers/scale
- verbs:
- - get
- - list
- - watch
- - apiGroups:
- - policy
- resources:
- - poddisruptionbudgets
- verbs:
- - get
- - list
- - watch
- - apiGroups:
- - networking.k8s.io
- resources:
- - networkpolicies
- verbs:
- - get
- - list
- - watch
- - apiGroups:
- - metrics.k8s.io
- resources:
- - pods
- verbs:
- - get
- - list
- - watch" | kubectl apply -f -
- kubectl -n kube-system create sa all-readonly-${clustername}
- kubectl create clusterrolebinding all-readonly-${clustername} --clusterrole=all-readonly-${clustername} --serviceaccount=kube-system:all-readonly-${clustername}
- tokenName=$(kubectl -n kube-system get sa all-readonly-${clustername} -o "jsonpath={.secrets[0].name}")
- token=$(kubectl -n kube-system get secret $tokenName -o "jsonpath={.data.token}" | base64 --decode)
- certificate=$(kubectl -n kube-system get secret $tokenName -o "jsonpath={.data['ca\.crt']}")
- echo "apiVersion: v1
- kind: Config
- preferences: {}
- clusters:
- - cluster:
- certificate-authority-data: $certificate
- server: $endpoint
- name: all-readonly-${clustername}-cluster
- users:
- - name: all-readonly-${clustername}
- user:
- as-user-extra: {}
- client-key-data: $certificate
- token: $token
- contexts:
- - context:
- cluster: all-readonly-${clustername}-cluster
- user: all-readonly-${clustername}
- name: ${clustername}
- current-context: ${clustername}" > ./all-readonly-${clustername}.conf
5.命令测试
- [root@k8s-m01 rbac]# kubectl --kubeconfig=./kube_config/web.kube.conf get pod
- No resources found in web namespace.
- [root@k8s-m01 rbac]#
- [root@k8s-m01 rbac]#
- [root@k8s-m01 rbac]# kubectl --kubeconfig=./kube_config/web.kube.conf get pod -A
- Error from server (Forbidden): pods is forbidden: User "system:serviceaccount:web:web-user" cannot list resource "pods" in API group "" at the cluster scope
- [root@k8s-m01 rbac]# kubectl -n web get sa
- NAME SECRETS AGE
- default 1 119m
- web-user 1 42m
- [root@k8s-m01 rbac]#
- [root@k8s-m01 rbac]# kubectl -n web get role
- NAME CREATED AT
- web-user-full-access 2022-07-28T15:09:05Z
- [root@k8s-m01 rbac]#
- [root@k8s-m01 rbac]# kubectl -n web get rolebindings.rbac.authorization.k8s.io
- NAME ROLE AGE
- web-user-view Role/web-user-full-access 42m
- [root@k8s-m01 rbac]#
6.rules 中的参数说明如下:
apiGroups: 支持的API组列表,例如”apiVersion: batch/v1”、”apiVersion: extensions”、”apiVersion: apps”
resources: 支持的资源对象列表,例如 pods、deployments、secrets、jobs、configmaps、endpoints、persistentvolumeclaims、replicationcontrollers、statefulsets、namespaces等。
verbs: 对资源对象 的操作方法列表, 例如get获取, list列表, watch监视, patch修补, delete删除, update更新, create创建 ,deletecollection级联删除, redirect重定向,replace代替...等。九、k8s业务日志收集上节介绍、下节实战
日志收集
现在市面上大多数课程都是以EFK来作来K8s项目的日志解决方案,它包括三个组件:Elasticsearch, Fluentd(filebeat), Kibana;Elasticsearch 是日志存储和日志搜索引擎,Fluentd 负责把k8s集群的日志发送给 Elasticsearch, Kibana 则是可视化界面查看和检索存储在 Elasticsearch 的数据。
但根据生产中实际使用情况来看,它有以下弊端:
1、日志收集系统 EFK是在每个kubernetes的NODE节点以daemonset的形式启动一个fluentd的pod,来收集NODE节点上的日志,如容器日志(/var/log/containers/*.log),但里面无法作细分,想要的和不想要的都收集进来了,带来的后面就是磁盘IO压力会比较大,日志过滤麻烦。
2、无法收集对应POD里面的业务日志 上面第1点只能收集pod的stdout日志,但是pod内如有需要收集的业务日志,像pod内的/tmp/datalog/*.log,那EFK是无能为力的,只能是在pod内启动多个容器(filebeat)去收集容器内日志,但这又会带来的是pod多容器性能的损耗,这个接下来会详细讲到。
3、fluentd的采集速率性能较低,只能不到filebeat的1/10的性能。
基于此,我通过调研发现了阿里开源的智能容器采集工具 Log-Pilot,github地址:
https://github.com/AliyunContainerService/log-pilot下面以sidecar 模式和log-pilot这两种方式的日志收集形式做个详细对比说明:
第一种模式是 sidecar 模式,这种需要我们在每个 Pod 中都附带一个 logging 容器来进行本 Pod 内部容器的日志采集,一般采用共享卷的方式,但是对于这一种模式来说,很明显的一个问题就是占用的资源比较多,尤其是在集群规模比较大的情况下,或者说单个节点上容器特别多的情况下,它会占用过多的系统资源,同时也对日志存储后端占用过多的连接数。当我们的集群规模越大,这种部署模式引发的潜在问题就越大。

另一种模式是 Node 模式,这种模式是我们在每个 Node 节点上仅需部署一个 logging 容器来进行本 Node 所有容器的日志采集。这样跟前面的模式相比最明显的优势就是占用资源比较少,同样在集群规模比较大的情况下表现出的优势越明显,同时这也是社区推荐的一种模式

经过多方面测试,log-pilot对现有业务pod侵入性很小,只需要在原有pod的内传入几行env环境变量,即可对此pod相关的日志进行收集,已经测试了后端接收的工具有logstash、elasticsearch、kafka、redis、file,均OK,下面开始部署整个日志收集环境。
我们这里用一个tomcat服务来模拟业务服务,用log-pilot分别收集它的stdout以及容器内的业务数据日志文件到指定后端存储(这里分别以elasticsearch、kafka的这两种企业常用的接收工具来做示例)
准备好相应的yaml配置
vi tomcat-test.yaml
- apiVersion: apps/v1
- kind: Deployment
- metadata:
- labels:
- app: tomcat
- name: tomcat
- spec:
- replicas: 1
- selector:
- matchLabels:
- app: tomcat
- template:
- metadata:
- labels:
- app: tomcat
- spec:
- tolerations:
- - key: "node-role.kubernetes.io/master"
- effect: "NoSchedule"
- containers:
- - name: tomcat
- image: "tomcat:7.0"
- env: # 注意点一,添加相应的环境变量(下面收集了两块日志1、stdout 2、/usr/local/tomcat/logs/catalina.*.log)
- - name: aliyun_logs_tomcat-syslog # 如日志发送到es,那index名称为 tomcat-syslog
- value: "stdout"
- - name: aliyun_logs_tomcat-access # 如日志发送到es,那index名称为 tomcat-access
- value: "/usr/local/tomcat/logs/catalina.*.log"
- volumeMounts: # 注意点二,对pod内要收集的业务日志目录需要进行共享,可以收集多个目录下的日志文件
- - name: tomcat-log
- mountPath: /usr/local/tomcat/logs
- volumes:
- - name: tomcat-log
- emptyDir: {}
#运行ym
kubectl apply -f tomcat-test.yaml#查看pod
kubectl get pod#查看日志
kubectl logs tomcat-7cd6957667-bjx9r#进入容器看看日志文件
kubectl exec -it tomcat-7cd6957667-bjx9r /bin/bashls -l /usr/local/tomcat/logs/
exitvi elasticsearch.6.8.13-statefulset.yaml
- apiVersion: apps/v1
- kind: StatefulSet
- metadata:
- labels:
- addonmanager.kubernetes.io/mode: Reconcile
- k8s-app: elasticsearch-logging
- version: v6.8.13
- name: elasticsearch-logging
- # namespace: logging
- spec:
- replicas: 1
- revisionHistoryLimit: 10
- selector:
- matchLabels:
- k8s-app: elasticsearch-logging
- version: v6.8.13
- serviceName: elasticsearch-logging
- template:
- metadata:
- labels:
- k8s-app: elasticsearch-logging
- version: v6.8.13
- spec:
- # nodeSelector:
- # esnode: "true" ## 注意给想要运行到的node打上相应labels
- containers:
- - env:
- - name: NAMESPACE
- valueFrom:
- fieldRef:
- apiVersion: v1
- fieldPath: metadata.namespace
- - name: cluster.name
- value: elasticsearch-logging-0
- - name: ES_JAVA_OPTS
- value: "-Xms512m -Xmx512m"
- image: elastic/elasticsearch:6.8.13
- name: elasticsearch-logging
- ports:
- - containerPort: 9200
- name: db
- protocol: TCP
- - containerPort: 9300
- name: transport
- protocol: TCP
- volumeMounts:
- - mountPath: /usr/share/elasticsearch/data
- name: elasticsearch-logging
- dnsConfig:
- options:
- - name: single-request-reopen
- initContainers:
- - command:
- - /bin/sysctl
- - -w
- - vm.max_map_count=262144
- image: busybox
- imagePullPolicy: IfNotPresent
- name: elasticsearch-logging-init
- resources: {}
- securityContext:
- privileged: true
- - name: fix-permissions
- image: busybox
- command: ["sh", "-c", "chown -R 1000:1000 /usr/share/elasticsearch/data"]
- securityContext:
- privileged: true
- volumeMounts:
- - name: elasticsearch-logging
- mountPath: /usr/share/elasticsearch/data
- volumes:
- - name: elasticsearch-logging
- hostPath:
- path: /esdata
- ---
- apiVersion: v1
- kind: Service
- metadata:
- labels:
- k8s-app: elasticsearch-logging
- name: elasticsearch
- # namespace: logging
- spec:
- ports:
- - port: 9200
- protocol: TCP
- targetPort: db
- selector:
- k8s-app: elasticsearch-logging
- type: ClusterIP
kubectl apply -f elasticsearch.6.8.13-statefulset.yaml
kubectl get pod
vim kibana.6.8.13.yaml
- apiVersion: apps/v1
- kind: Deployment
- metadata:
- name: kibana
- # namespace: logging
- labels:
- app: kibana
- spec:
- selector:
- matchLabels:
- app: kibana
- template:
- metadata:
- labels:
- app: kibana
- spec:
- containers:
- - name: kibana
- image: elastic/kibana:6.8.13
- resources:
- limits:
- cpu: 1000m
- requests:
- cpu: 100m
- env:
- - name: ELASTICSEARCH_URL
- value: http://elasticsearch:9200
- ports:
- - containerPort: 5601
- ---
- apiVersion: v1
- kind: Service
- metadata:
- name: kibana
- # namespace: logging
- labels:
- app: kibana
- spec:
- ports:
- - port: 5601
- protocol: TCP
- targetPort: 5601
- type: ClusterIP
- selector:
- app: kibana
- ---
- apiVersion: extensions/v1beta1
- kind: Ingress
- metadata:
- name: kibana
- # namespace: logging
- spec:
- rules:
- - host: kibana.boge.com
- http:
- paths:
- - path: /
- backend:
- serviceName: kibana
- servicePort: 5601
vi log-pilot.yml # 后端输出的elasticsearch
- apiVersion: apps/v1
- kind: DaemonSet
- metadata:
- name: log-pilot
- labels:
- app: log-pilot
- # 设置期望部署的namespace
- # namespace: ns-elastic
- spec:
- selector:
- matchLabels:
- app: log-pilot
- updateStrategy:
- type: RollingUpdate
- template:
- metadata:
- labels:
- app: log-pilot
- annotations:
- scheduler.alpha.kubernetes.io/critical-pod: ''
- spec:
- # 是否允许部署到Master节点上
- #tolerations:
- #- key: node-role.kubernetes.io/master
- # effect: NoSchedule
- containers:
- - name: log-pilot
- # 版本请参考https://github.com/AliyunContainerService/log-pilot/releases
- image: registry.cn-hangzhou.aliyuncs.com/acs/log-pilot:0.9.7-filebeat
- resources:
- limits:
- memory: 500Mi
- requests:
- cpu: 200m
- memory: 200Mi
- env:
- - name: "NODE_NAME"
- valueFrom:
- fieldRef:
- fieldPath: spec.nodeName
- ##--------------------------------
- # - name: "LOGGING_OUTPUT"
- # value: "logstash"
- # - name: "LOGSTASH_HOST"
- # value: "logstash-g1"
- # - name: "LOGSTASH_PORT"
- # value: "5044"
- ##--------------------------------
- - name: "LOGGING_OUTPUT"
- value: "elasticsearch"
- ## 请确保集群到ES网络可达
- - name: "ELASTICSEARCH_HOSTS"
- value: "elasticsearch:9200"
- ## 配置ES访问权限
- #- name: "ELASTICSEARCH_USER"
- # value: "{es_username}"
- #- name: "ELASTICSEARCH_PASSWORD"
- # value: "{es_password}"
- ##--------------------------------
- ## https://github.com/AliyunContainerService/log-pilot/blob/master/docs/filebeat/docs.md
- ## to file need configure 1
- # - name: LOGGING_OUTPUT
- # value: file
- # - name: FILE_PATH
- # value: /tmp
- # - name: FILE_NAME
- # value: filebeat.log
- volumeMounts:
- - name: sock
- mountPath: /var/run/docker.sock
- - name: root
- mountPath: /host
- readOnly: true
- - name: varlib
- mountPath: /var/lib/filebeat
- - name: varlog
- mountPath: /var/log/filebeat
- - name: localtime
- mountPath: /etc/localtime
- readOnly: true
- ## to file need configure 2
- # - mountPath: /tmp
- # name: mylog
- livenessProbe:
- failureThreshold: 3
- exec:
- command:
- - /pilot/healthz
- initialDelaySeconds: 10
- periodSeconds: 10
- successThreshold: 1
- timeoutSeconds: 2
- securityContext:
- capabilities:
- add:
- - SYS_ADMIN
- terminationGracePeriodSeconds: 30
- volumes:
- - name: sock
- hostPath:
- path: /var/run/docker.sock
- - name: root
- hostPath:
- path: /
- - name: varlib
- hostPath:
- path: /var/lib/filebeat
- type: DirectoryOrCreate
- - name: varlog
- hostPath:
- path: /var/log/filebeat
- type: DirectoryOrCreate
- - name: localtime
- hostPath:
- path: /etc/localtime
- ## to file need configure 3
- # - hostPath:
- # path: /tmp/mylog
- # type: ""
- # name: mylog
kubectl apply -f log-pilot.yml
kubectl get pod
节点加入hosts解析
echo “20.6.100.226 kibana.boge.com” >> /etc/hosts
4.进入页面

5.定义日志名称

6.创建日期

7.查看日志展示

删除测试环境
kubectl delete -f log-pilot.yml
kubectl delete -f kibana.6.8.13.yaml
kubectl delete -f elasticsearch.6.8.13-statefulset.yaml
kubectl delete -f tomcat-test.yaml8.第2种:#后端输出到kafka
kubectl apply -f tomcat-test.yaml
vi log-pilot2-kafka.yaml
- ---
- apiVersion: v1
- kind: ConfigMap
- metadata:
- name: log-pilot2-configuration
- #namespace: ns-elastic
- data:
- logging_output: "kafka"
- kafka_brokers: "10.0.1.204:9092"
- kafka_version: "0.10.0"
- # configure all valid topics in kafka
- # when disable auto-create topic
- kafka_topics: "tomcat-syslog,tomcat-access"
- ---
- apiVersion: apps/v1
- kind: DaemonSet
- metadata:
- name: log-pilot2
- #namespace: ns-elastic
- labels:
- k8s-app: log-pilot2
- spec:
- selector:
- matchLabels:
- k8s-app: log-pilot2
- updateStrategy:
- type: RollingUpdate
- template:
- metadata:
- labels:
- k8s-app: log-pilot2
- spec:
- tolerations:
- - key: node-role.kubernetes.io/master
- effect: NoSchedule
- containers:
- - name: log-pilot2
- #
- # wget https://github.com/AliyunContainerService/log-pilot/archive/v0.9.7.zip
- # unzip log-pilot-0.9.7.zip
- # vim ./log-pilot-0.9.7/assets/filebeat/config.filebeat
- # ...
- # output.kafka:
- # hosts: [$KAFKA_BROKERS]
- # topic: '%{[topic]}'
- # codec.format:
- # string: '%{[message]}'
- # ...
- image: registry.cn-hangzhou.aliyuncs.com/acs/log-pilot:0.9.7-filebeat
- env:
- - name: "LOGGING_OUTPUT"
- valueFrom:
- configMapKeyRef:
- name: log-pilot2-configuration
- key: logging_output
- - name: "KAFKA_BROKERS"
- valueFrom:
- configMapKeyRef:
- name: log-pilot2-configuration
- key: kafka_brokers
- - name: "KAFKA_VERSION"
- valueFrom:
- configMapKeyRef:
- name: log-pilot2-configuration
- key: kafka_version
- - name: "NODE_NAME"
- valueFrom:
- fieldRee:
- fieldPath: spec.nodeName
- volumeMounts:
- - name: sock
- mountPath: /var/run/docker.sock
- - name: logs
- mountPath: /var/log/filebeat
- - name: state
- mountPath: /var/lib/filebeat
- - name: root
- mountPath: /host
- readOnly: true
- - name: localtime
- mountPath: /etc/localtime
- # configure all valid topics in kafka
- # when disable auto-create topic
- - name: config-volume
- mountPath: /etc/filebeat/config
- securityContext:
- capabilities:
- add:
- - SYS_ADMIN
- terminationGracePeriodSeconds: 30
- volumes:
- - name: sock
- hostPath:
- path: /var/run/docker.sock
- type: Socket
- - name: logs
- hostPath:
- path: /var/log/filebeat
- type: DirectoryOrCreate
- - name: state
- hostPath:
- path: /var/lib/filebeat
- type: DirectoryOrCreate
- - name: root
- hostPath:
- path: /
- type: Directory
- - name: localtime
- hostPath:
- path: /etc/localtime
- type: File
- # kubelet sync period
- - name: config-volume
- configMap:
- name: log-pilot2-configuration
- items:
- - key: kafka_topics
- path: kafka_topics
9.准备一个测试用的kafka服务
- # 部署前准备
- # 0. 先把代码pull到本地
- # https://github.com/wurstmeister/kafka-docker
- # 修改docker-compose.yml为:
- #——------------------------------
- version: '2'
- services:
- zookeeper:
- image: wurstmeister/zookeeper
- ports:
- - "2181:2181"
- kafka:
- #build: .
- image: wurstmeister/kafka
- ports:
- - "9092:9092"
- environment:
- KAFKA_ADVERTISED_HOST_NAMe: 10.0.1.204 # docker运行的机器IP
- KAFKA_ZOOKEEPER_CONNECT: zookeeper:2181
- volumes:
- - /var/run/docker.sock:/var/run/docker.sock
- - /nfs_storageclass/kafka:/kafka
- #——------------------------------
- #启动
- # docker-compose up -d
- #删除
- #docker-compose down -v
- #重启
- #docker-compose up -d
- # 2. result look:
- #查看启动进程
- # docker ps |grep zook
- #docker ps |grep ka
- #进入kafka
- bash-4.4# docker run --rm -v /var/run/docker.sock:/var/run/docker.sock -e HOST_IP=10.0.1.204 -e ZK=10.0.1.204:2181 -i -t wurstmeister/kafka /bin/bash
- # 4. list topic
- bash-4.4# kafka-topics.sh --zookeeper 10.0.1.204:2181 --list
- tomcat-access
- tomcat-syslog
- # 5. consumer topic data:
- bash-4.4# kafka-console-consumer.sh --bootstrap-server 10.0.1.204:9092 --topic tomcat-access --from-beginning
十、k8s的Prometheus监控实战
- 链接:https://pan.baidu.com/s/1O-RQd3n2HJrOdRbElidnEA?pwd=hoqv
- 提取码:hoqv
1.导入上传tar包
sudo docker load -i alertmanager-v0.21.0.tar
sudo docker load -i grafana-7.3.4.tar
sudo docker load -i k8s-prometheus-adapter-v0.8.2.tar
sudo docker load -i kube-rbac-proxy-v0.8.0.tar
sudo docker load -i kube-state-metrics-v1.9.7.tar
sudo docker load -i node-exporter-v1.0.1.tar
sudo docker load -i prometheus-config-reloader-v0.43.2.tar
sudo docker load -i prometheus_demo_service.tar
sudo docker load -i prometheus-operator-v0.43.2.tar
sudo docker load -i prometheus-v2.22.1.tar2.解压下载的代码包
sudo unzip kube-prometheus-master.zip
sudo rm -f kube-prometheus-master.zip && cd kube-prometheus-master3.这里建议先看下有哪些镜像,便于在下载镜像快的节点上先收集好所有需要的离线docker镜像
- find ./ -type f |xargs grep 'image: '|sort|uniq|awk '{print $3}'|grep ^[a-zA-Z]|grep -Evw 'error|kubeRbacProxy'|sort -rn|uniq
4.开始创建所有服务
- kubectl create -f manifests/setup
- kubectl create -f manifests/
- #过一会查看创建结果:
- kubectl -n monitoring get all
- # 附:清空上面部署的prometheus所有服务:
- # kubectl delete --ignore-not-found=true -f manifests/ -f manifests/setup
5.访问下prometheus的UI
- # 修改下prometheus UI的service模式,便于我们访问
- # kubectl -n monitoring patch svc prometheus-k8s -p '{"spec":{"type":"NodePort"}}'
- service/prometheus-k8s patched
- # kubectl -n monitoring get svc prometheus-k8s
- NAME TYPE CLUSTER-IP EXTERNAL-IP PORT(S) AGE
- prometheus-k8s NodePort 10.68.23.79
9090:22129/TCP 7m43s
6.然后因为K8s的这两上核心组件我们是以二进制形式部署的,为了能让K8s上的prometheus能发现,我们还需要来创建相应的service和endpoints来将其关联起来
注意:我们需要将endpoints里面的mast IP换成我们实际情况的- apiVersion: v1
- kind: Service
- metadata:
- namespace: kube-system
- name: kube-controller-manager
- labels:
- k8s-app: kube-controller-manager
- spec:
- type: ClusterIP
- clusterIP: None
- ports:
- - name: http-metrics
- port: 10252
- targetPort: 10252
- protocol: TCP
- ---
- apiVersion: v1
- kind: Endpoints
- metadata:
- labels:
- k8s-app: kube-controller-manager
- name: kube-controller-manager
- namespace: kube-system
- subsets:
- - addresses:
- - ip: 10.0.1.201
- - ip: 10.0.1.202
- ports:
- - name: http-metrics
- port: 10252
- protocol: TCP
- ---
- apiVersion: v1
- kind: Service
- metadata:
- namespace: kube-system
- name: kube-scheduler
- labels:
- k8s-app: kube-scheduler
- spec:
- type: ClusterIP
- clusterIP: None
- ports:
- - name: http-metrics
- port: 10251
- targetPort: 10251
- protocol: TCP
- ---
- apiVersion: v1
- kind: Endpoints
- metadata:
- labels:
- k8s-app: kube-scheduler
- name: kube-scheduler
- namespace: kube-system
- subsets:
- - addresses:
- - ip: 10.0.1.201
- - ip: 10.0.1.202
- ports:
- - name: http-metrics
- port: 10251
- protocol: TCP
7.将上面的yaml配置保存为repair-prometheus.yaml,然后创建它
kubectl apply -f repair-prometheus.yaml
8.记得还要修改一个地方
# kubectl -n monitoring edit servicemonitors.monitoring.coreos.com kube-scheduler
# 将下面两个地方的https换成http
port: https-metrics
scheme: https# kubectl -n monitoring edit servicemonitors.monitoring.coreos.com kube-controller-manager
# 将下面两个地方的https换成http
port: https-metrics
scheme: https9.然后再返回prometheus UI处,耐心等待几分钟,就能看到已经被发现了
monitoring/kube-controller-manager/0 (2/2 up)
monitoring/kube-scheduler/0 (2/2 up)10.使用prometheus来监控ingress-nginx
我们前面部署过ingress-nginx,这个是整个K8s上所有服务的流量入口组件很关键,因此把它的metrics指标收集到prometheus来做好相关监控至关重要,因为前面ingress-nginx服务是以daemonset形式部署的,并且映射了自己的端口到宿主机上,那么我可以直接用pod运行NODE上的IP来看下metrics
curl 10.0.1.201:10254/metrics
11.创建 servicemonitor配置让prometheus能发现ingress-nginx的metrics
- # vim servicemonitor.yaml
- apiVersion: monitoring.coreos.com/v1
- kind: ServiceMonitor
- metadata:
- labels:
- app: ingress-nginx
- name: nginx-ingress-scraping
- namespace: ingress-nginx
- spec:
- endpoints:
- - interval: 30s
- path: /metrics
- port: metrics
- jobLabel: app
- namespaceSelector:
- matchNames:
- - ingress-nginx
- selector:
- matchLabels:
- app: ingress-nginx
12.创建它
# kubectl apply -f servicemonitor.yaml
servicemonitor.monitoring.coreos.com/nginx-ingress-scraping created
# kubectl -n ingress-nginx get servicemonitors.monitoring.coreos.com
NAME AGE
nginx-ingress-scraping 8s13.指标一直没收集上来,看看proemtheus服务的日志,发现报错如下:
# kubectl -n monitoring logs prometheus-k8s-0 -c prometheus |grep error
level=error ts=2020-12-13T09:52:35.565Z caller=klog.go:96 component=k8s_client_runtime func=ErrorDepth msg="/app/discovery/kubernetes/kubernetes.go:426: Failed to watch *v1.Endpoints: failed to list *v1.Endpoints: endpoints is forbidden: User \"system:serviceaccount:monitoring:prometheus-k8s\" cannot list resource \"endpoints\" in API group \"\" in the namespace \"ingress-nginx\""
14.需要修改prometheus的clusterrole
# kubectl edit clusterrole prometheus-k8s
#------ 原始的rules -------
rules:
- apiGroups:
- ""
resources:
- nodes/metrics
verbs:
- get
- nonResourceURLs:
- /metrics
verbs:
- get
#---------------------------apiVersion: rbac.authorization.k8s.io/v1
kind: ClusterRole
metadata:
name: prometheus-k8s
rules:
- apiGroups:
- ""
resources:
- nodes
- services
- endpoints
- pods
- nodes/proxy
verbs:
- get
- list
- watch
- apiGroups:
- ""
resources:
- configmaps
- nodes/metrics
verbs:
- get
- nonResourceURLs:
- /metrics
verbs:
- get
15.再到prometheus UI上看下,发现已经有了
ingress-nginx/nginx-ingress-scraping/0 (1/1 up)
16.使用Prometheus来监控二进制部署的ETCD集群
作为K8s所有资源存储的关键服务ETCD,我们也有必要把它给监控起来,正好借这个机会,完整的演示一次利用Prometheus来监控非K8s集群服务的步骤
在前面部署K8s集群的时候,我们是用二进制的方式部署的ETCD集群,并且利用自签证书来配置访问ETCD,正如前面所说,现在关键的服务基本都会留有指标metrics接口支持prometheus的监控,利用下面命令,我们可以看到ETCD都暴露出了哪些监控指标出来
curl --cacert /etc/kubernetes/ssl/ca.pem --cert /etc/kubeasz/clusters/test/ssl/etcd.pem --key /etc/kubeasz/clusters/test/ssl/etcd-key.pem https://10.0.1.201:2379/metrics
17.上面查看没问题后,接下来我们开始进行配置使ETCD能被prometheus发现并监控
# 首先把ETCD的证书创建为secret
kubectl -n monitoring create secret generic etcd-certs --from-file=/etc/kubeasz/clusters/test/ssl/etcd.pem --from-file=/etc/kubeasz/clusters/test/ssl/etcd-key.pem --from-file=/etc/kubeasz/clusters/test/ssl/ca.pem# 接着在prometheus里面引用这个secrets
kubectl -n monitoring edit prometheus k8sspec:
...
secrets:
- etcd-certs# 保存退出后,prometheus会自动重启服务pod以加载这个secret配置,过一会,我们进pod来查看下是不是已经加载到ETCD的证书了
# kubectl -n monitoring exec -it prometheus-k8s-0 -c prometheus -- sh
/prometheus $ ls /etc/prometheus/secrets/etcd-certs/
ca.pem etcd-key.pem etcd.pem18.接下来准备创建service、endpoints以及ServiceMonitor的yaml配置
注意替换下面的NODE节点IP为实际ETCD所在NODE内网IP
# vim prometheus-etcd.yaml
apiVersion: v1
kind: Service
metadata:
name: etcd-k8s
namespace: monitoring
labels:
k8s-app: etcd
spec:
type: ClusterIP
clusterIP: None
ports:
- name: api
port: 2379
protocol: TCP
---
apiVersion: v1
kind: Endpoints
metadata:
name: etcd-k8s
namespace: monitoring
labels:
k8s-app: etcd
subsets:
- addresses:
- ip: 10.0.1.201
- ip: 10.0.1.202
- ip: 10.0.1.203
ports:
- name: api
port: 2379
protocol: TCP
---
apiVersion: monitoring.coreos.com/v1
kind: ServiceMonitor
metadata:
name: etcd-k8s
namespace: monitoring
labels:
k8s-app: etcd-k8s
spec:
jobLabel: k8s-app
endpoints:
- port: api
interval: 30s
scheme: https
tlsConfig:
caFile: /etc/prometheus/secrets/etcd-certs/ca.pem
certFile: /etc/prometheus/secrets/etcd-certs/etcd.pem
keyFile: /etc/prometheus/secrets/etcd-certs/etcd-key.pem
#use insecureSkipVerify only if you cannot use a Subject Alternative Name
insecureSkipVerify: true
selector:
matchLabels:
k8s-app: etcd
namespaceSelector:
matchNames:
- monitoring19.开始创建上面的资源
kubectl apply -f prometheus-etcd.yaml
#过一会,就可以在prometheus UI上面看到ETCD集群被监控了
monitoring/etcd-k8s/0 (3/3 up)
20.接下来我们用grafana来展示被监控的ETCD指标
查看grafana端口
kubectl -n monitoring get svc |grep grafana1. 在grafana官网模板中心搜索etcd,下载这个json格式的模板文件
https://grafana.com/dashboards/30702.然后打开自己先部署的grafana首页,
点击左边菜单栏四个小正方形方块HOME --- Manage
再点击右边 Import dashboard ---
点击Upload .json File 按钮,上传上面下载好的json文件 etcd_rev3.json,
然后在prometheus选择数据来源
点击Import,即可显示etcd集群的图形监控信息21.prometheus监控数据以及grafana配置持久化存储配置
这节实战课给大家讲解下如果配置prometheus以及grafana的数据持久化。prometheus数据持久化配置
# 注意这下面的statefulset服务就是我们需要做数据持久化的地方
# kubectl -n monitoring get statefulset,pod|grep prometheus-k8s
statefulset.apps/prometheus-k8s 2/2 5h41m
pod/prometheus-k8s-0 2/2 Running 1 19m
pod/prometheus-k8s-1 2/2 Running 1 19m# 看下我们之前准备的StorageClass动态存储
# kubectl get sc
NAME PROVISIONER RECLAIMPOLICY VOLUMEBINDINGMODE ALLOWVOLUMEEXPANSION AGE
nfs-boge nfs-provisioner-01 Retain Immediate false 4d# 准备prometheus持久化的pvc配置
# kubectl -n monitoring edit prometheus k8sspec:
......
storage:
volumeClaimTemplate:
spec:
accessModes: [ "ReadWriteOnce" ]
storageClassName: "nfs-boge"
resources:
requests:
storage: 1Gi# 上面修改保存退出后,过一会我们查看下pvc创建情况,以及pod内的数据挂载情况
# kubectl -n monitoring get pvc
NAME STATUS VOLUME CAPACITY ACCESS MODES STORAGECLASS AGE
prometheus-k8s-db-prometheus-k8s-0 Bound pvc-055e6b11-31b7-4503-ba2b-4f292ba7bd06 1Gi RWO nfs-boge 17s
prometheus-k8s-db-prometheus-k8s-1 Bound pvc-249c344b-3ef8-4a5d-8003-b8ce8e282d32 1Gi RWO nfs-boge 17s
# kubectl -n monitoring exec -it prometheus-k8s-0 -c prometheus -- sh
/prometheus $ df -Th
......
10.0.1.201:/nfs_dir/monitoring-prometheus-k8s-db-prometheus-k8s-0-pvc-055e6b11-31b7-4503-ba2b-4f292ba7bd06/prometheus-db
nfs4 97.7G 9.4G 88.2G 10% /prometheus22.grafana配置持久化存储配置
# 保存pvc为grafana-pvc.yaml
kind: PersistentVolumeClaim
apiVersion: v1
metadata:
name: grafana
namespace: monitoring
spec:
storageClassName: nfs-boge
accessModes:
- ReadWriteMany
resources:
requests:
storage: 1Gi# 开始创建pvc
# kubectl apply -f grafana-pvc.yaml# 看下创建的pvc
# kubectl -n monitoring get pvc
NAME STATUS VOLUME CAPACITY ACCESS MODES STORAGECLASS AGE
grafana Bound pvc-394a26e1-3274-4458-906e-e601a3cde50d 1Gi RWX nfs-boge 3s
prometheus-k8s-db-prometheus-k8s-0 Bound pvc-055e6b11-31b7-4503-ba2b-4f292ba7bd06 1Gi RWO nfs-boge 6m46s
prometheus-k8s-db-prometheus-k8s-1 Bound pvc-249c344b-3ef8-4a5d-8003-b8ce8e282d32 1Gi RWO nfs-boge 6m46s
# 编辑grafana的deployment资源配置
# kubectl -n monitoring edit deployments.apps grafana# 旧的配置
volumes:
- emptyDir: {}
name: grafana-storage
# 替换成新的配置
volumes:
- name: grafana-storage
persistentVolumeClaim:
claimName: grafana# 同时加入下面的env环境变量,将登陆密码进行固定修改
spec:
containers:
- containerPort: 3000
name: http
protocol: TCP
......
env:
- name: GF_SECURITY_ADMIN_USER
value: admin
- name: GF_SECURITY_ADMIN_PASSWORD
value: admin321# 过一会,等grafana重启完成后,用上面的新密码进行登陆
# kubectl -n monitoring get pod -w|grep grafana
grafana-5698bf94f4-prbr2 0/1 Running 0 3s
grafana-5698bf94f4-prbr2 1/1 Running 0 4s# 因为先前的数据并未持久化,所以会发现先导入的ETCD模板已消失,这时重新再导入一次,后面重启也不会丢了
22 prometheus发送报警
早期我们经常用邮箱接收报警邮件,但是报警不及时,而且目前各云平台对邮件发送限制还比较严格,所以目前在生产中用得更为多的是基于webhook来转发报警内容到企业中用的聊天工具中,比如钉钉、企业微信、飞书等。
prometheus的报警组件是Alertmanager,它支持自定义webhook的方式来接受它发出的报警,它发出的日志json字段比较多,我们需要根据需要接收的app来做相应的日志清洗转发
这里博哥将用golang结合Gin网络框架来编写一个日志清洗转发工具,分别对这几种常用的报警方式作详细地说明及实战
下载boge-webhook.zip
https://cloud.189.cn/t/B3EFZvnuMvuu (访问码:h1wx)首先看下报警规则及报警发送配置是什么样的
prometheus-operator的规则非常齐全,基本属于开箱即用类型,大家可以根据日常收到的报警,对里面的rules报警规则作针对性的调整,比如把报警观察时长缩短一点等
#进入压缩包
cd /data/k8s/prometheus/webhookcat Dockerfile
#打包镜像
docker build -t dockerck.e21.cn/product/alertmanaer-webhook:1.0 .#推送镜像
docker push dockerck.e21.cn/product/alertmanaer-webhook:1.0kubectl apply -f alertmanaer-webhook.yaml
find / -name "prometheus-rules.yaml"
监控报警规划修改 vim /data/k8s/prometheus/kube-prometheus-master/manifests/prometheus-rules.yaml
修改完成记得更新 kubectl apply -f /data/k8s/prometheus/kube-prometheus-master/manifests/prometheus-rules.yaml
# 通过这里可以获取需要创建的报警配置secret名称
# kubectl -n monitoring edit statefulsets.apps alertmanager-main
...
volumes:
- name: config-volume
secret:
defaultMode: 420
secretName: alertmanager-main
...# 注意事先在配置文件 alertmanager.yaml 里面编辑好收件人等信息 ,再执行下面的命令
kubectl -n monitoring get secrets alertmanager-main
kubectl -n monitoring delete secrets alertmanager-main
kubectl create secret generic alertmanager-main --from-file=alertmanager.yaml -n monitoring
kubectl -n monitoring delete pod alertmanager-main-0
kubectl -n monitoring delete pod alertmanager-main-1
kubectl -n monitoring delete pod alertmanager-main-2#查看svc
kubectl get svc |grep alertmanaer-dingtalk-svc#测试串
curl -X POST -H 'Content-type: application/json' -d '{"name": "boge","titlea": "'"$(id)"'", "texta": "'"$(whoami)--$(hostname)"'"}' 10.68.64.119/5e00fc1a/prometheus/weixin十一、k8s安装kuboard图形化界面
1.安装-获取部署 Kuboard 所需的 YAML 文件:
curl -o kuboard-v3.yaml https://addons.kuboard.cn/kuboard/kuboard-v3-storage-class.yaml
编辑 kuboard-v3.yaml 文件中的配置,该部署文件中,有1处配置必须修改:
storageClassName
volumeClaimTemplates:
- metadata:
name: data
spec:
# 请填写一个有效的 StorageClass name
storageClassName: please-provide-a-valid-StorageClass-name-here
accessModes: [ "ReadWriteMany" ]
resources:
requests:
storage: 5Gi2.部署到 Kubernetes 集群
kubectl create -f kuboard-v3.yaml
访问 Kuboard
在浏览器中打开链接 http://your-node-ip-address:30080
输入初始用户名和密码,并登录
用户名: admin
密码: Kuboard1233.卸载
执行 Kuboard v3 的卸载
kubectl delete -f https://addons.kuboard.cn/kuboard/kuboard-v3-storage-class.yaml
4.进入页面,导入集群
4.1、名称和描述,自己定义
4.2、将 cat /root/.kube/config 内容复制 kubeconfig中
11.离线安装下载:
https://cloud.189.cn/t/qiaMzyvU3Aj2 (访问码:6ngs)
十二、 k8s架构师课程基于gitlab的CICD自动化
1.这节课我们先来部署gitlab私有代码仓库所需要的数据库postgresql和redis。
需要注意的是,如果大家的nfs-server的地址和挂载目录不是按博哥前面课程讲得来定义的话,那么下面的yaml配置中需要记得替换。
mkdir -p /nfs_dir/{gitlab_etc_ver130806,gitlab_log_ver130806,gitlab_opt_ver130806,gitlab_postgresql_data_ver130806}
#创建表空间
kubectl create namespace gitlab-ver130806kubectl get ns
2.部署postgresql
vi 3postgres.yaml
- # pv 3postgres.yaml
- ---
- apiVersion: v1
- kind: PersistentVolume
- metadata:
- name: gitlab-postgresql-data-ver130806
- labels:
- type: gitlab-postgresql-data-ver130806
- spec:
- capacity:
- storage: 10Gi
- accessModes:
- - ReadWriteOnce
- persistentVolumeReclaimPolicy: Retain
- storageClassName: nfs
- nfs:
- path: /nfs_dir/gitlab_postgresql_data_ver130806
- server: 10.0.1.201
- # pvc
- ---
- kind: PersistentVolumeClaim
- apiVersion: v1
- metadata:
- name: gitlab-postgresql-data-ver130806-pvc
- spec:
- accessModes:
- - ReadWriteOnce
- resources:
- requests:
- storage: 10Gi
- storageClassName: nfs
- selector:
- matchLabels:
- type: gitlab-postgresql-data-ver130806
- ---
- apiVersion: v1
- kind: Service
- metadata:
- name: postgresql
- labels:
- app: gitlab
- tier: postgreSQL
- spec:
- ports:
- - port: 5432
- selector:
- app: gitlab
- tier: postgreSQL
- ---
- apiVersion: apps/v1
- kind: Deployment
- metadata:
- name: postgresql
- labels:
- app: gitlab
- tier: postgreSQL
- spec:
- replicas: 1
- selector:
- matchLabels:
- app: gitlab
- tier: postgreSQL
- strategy:
- type: Recreate
- template:
- metadata:
- labels:
- app: gitlab
- tier: postgreSQL
- spec:
- #nodeSelector:
- # gee/disk: "500g"
- containers:
- - image: postgres:12.6-alpine
- #- image: harbor.boge.com/library/postgres:12.6-alpine
- name: postgresql
- env:
- - name: POSTGRES_USER
- value: gitlab
- - name: POSTGRES_DB
- value: gitlabhq_production
- - name: POSTGRES_PASSWORD
- value: bogeusepg
- - name: TZ
- value: Asia/Shanghai
- ports:
- - containerPort: 5432
- name: postgresql
- livenessProbe:
- exec:
- command:
- - sh
- - -c
- - exec pg_isready -U gitlab -h 127.0.0.1 -p 5432 -d gitlabhq_production
- initialDelaySeconds: 110
- timeoutSeconds: 5
- failureThreshold: 6
- readinessProbe:
- exec:
- command:
- - sh
- - -c
- - exec pg_isready -U gitlab -h 127.0.0.1 -p 5432 -d gitlabhq_production
- initialDelaySeconds: 20
- timeoutSeconds: 3
- periodSeconds: 5
- # resources:
- # requests:
- # cpu: 100m
- # memory: 512Mi
- # limits:
- # cpu: "1"
- # memory: 1Gi
- volumeMounts:
- - name: postgresql
- mountPath: /var/lib/postgresql/data
- volumes:
- - name: postgresql
- persistentVolumeClaim:
- claimName: gitlab-postgresql-data-ver130806-pvc
3,创建pod
kubectl -n gitlab-ver130806 apply -f 3postgres.yaml
#检查pod
kubectl -n gitlab-ver130806 get pod4.部署redis
vi 4redis.yaml
- ---
- apiVersion: v1
- kind: Service
- metadata:
- name: redis
- labels:
- app: gitlab
- tier: backend
- spec:
- ports:
- - port: 6379
- targetPort: 6379
- selector:
- app: gitlab
- tier: backend
- ---
- apiVersion: apps/v1
- kind: Deployment
- metadata:
- name: redis
- labels:
- app: gitlab
- tier: backend
- spec:
- replicas: 1
- selector:
- matchLabels:
- app: gitlab
- tier: backend
- strategy:
- type: Recreate
- template:
- metadata:
- labels:
- app: gitlab
- tier: backend
- spec:
- #nodeSelector:
- # gee/disk: "500g"
- containers:
- - image: redis:6.2.0-alpine3.13
- #- image: harbor.boge.com/library/redis:6.2.0-alpine3.13
- name: redis
- command:
- - "redis-server"
- args:
- - "--requirepass"
- - "bogeuseredis"
- # resources:
- # requests:
- # cpu: "1"
- # memory: 2Gi
- # limits:
- # cpu: "1"
- # memory: 2Gi
- ports:
- - containerPort: 6379
- name: redis
- livenessProbe:
- exec:
- command:
- - sh
- - -c
- - "redis-cli ping"
- initialDelaySeconds: 30
- periodSeconds: 10
- timeoutSeconds: 5
- successThreshold: 1
- failureThreshold: 3
- readinessProbe:
- exec:
- command:
- - sh
- - -c
- - "redis-cli ping"
- initialDelaySeconds: 5
- periodSeconds: 10
- timeoutSeconds: 1
- successThreshold: 1
- failureThreshold: 3
- initContainers:
- - command:
- - /bin/sh
- - -c
- - |
- ulimit -n 65536
- mount -o remount rw /sys
- echo never > /sys/kernel/mm/transparent_hugepage/enabled
- mount -o remount rw /proc/sys
- echo 2000 > /proc/sys/net/core/somaxconn
- echo 1 > /proc/sys/vm/overcommit_memory
- image: registry.cn-beijing.aliyuncs.com/acs/busybox:v1.29.2
- imagePullPolicy: IfNotPresent
- name: init-redis
- resources: {}
- securityContext:
- privileged: true
- procMount: Default
#创建pod
kubectl -n gitlab-ver130806 apply -f 4redis.yaml
#检查pod
kubectl -n gitlab-ver130806 get pod5.开始部署gitlab服务。
先定制一下镜像
Dockerfile
- FROM gitlab/gitlab-ce:13.8.6-ce.0
- RUN rm /etc/apt/sources.list \
- && echo 'deb http://apt.postgresql.org/pub/repos/apt/ xenial-pgdg main' > /etc/apt/sources.list.d/pgdg.list \
- && wget --no-check-certificate -O - https://www.postgresql.org/media/keys/ACCC4CF8.asc | apt-key add -
- COPY sources.list /etc/apt/sources.list
- RUN apt-get update -yq && \
- apt-get install -y vim iproute2 net-tools iputils-ping curl wget software-properties-common unzip postgresql-client-12 && \
- rm -rf /var/cache/apt/archives/*
- RUN ln -svf /usr/bin/pg_dump /opt/gitlab/embedded/bin/pg_dump
- #---------------------------------------------------------------
- # docker build -t gitlab/gitlab-ce:13.8.6-ce.1 .
sources.list
- deb http://mirrors.aliyun.com/ubuntu/ xenial main
- deb-src http://mirrors.aliyun.com/ubuntu/ xenial main
- deb http://mirrors.aliyun.com/ubuntu/ xenial-updates main
- deb-src http://mirrors.aliyun.com/ubuntu/ xenial-updates main
- deb http://mirrors.aliyun.com/ubuntu/ xenial universe
- deb-src http://mirrors.aliyun.com/ubuntu/ xenial universe
- deb http://mirrors.aliyun.com/ubuntu/ xenial-updates universe
- deb-src http://mirrors.aliyun.com/ubuntu/ xenial-updates universe
- deb http://mirrors.aliyun.com/ubuntu xenial-security main
- deb-src http://mirrors.aliyun.com/ubuntu xenial-security main
- deb http://mirrors.aliyun.com/ubuntu xenial-security universe
- deb-src http://mirrors.aliyun.com/ubuntu xenial-security universe
6.打包推送镜像
docker tag gitlab/gitlab-ce:13.8.6-ce.1 dockerck.e21.cn/library/gitlab-ce:13.8.6-ce.1
docker push dockerck.e21.cn/library/gitlab-ce:13.8.6-ce.17.开始部署5gitlab.yaml
vi 5gitlab.yaml
- # restore gitlab data command example:
- # kubectl -n gitlab-ver130806 exec -it $(kubectl -n gitlab-ver130806 get pod|grep -v runner|grep gitlab|awk '{print $1}') -- gitlab-rake gitlab:backup:restore BACKUP=1602889879_2020_10_17_12.9.2
- # kubectl -n gitlab-ver130806 exec -it $(kubectl -n gitlab-ver130806 get pod|grep -v runner|grep gitlab|awk '{print $1}') -- gitlab-ctl reconfigure
- # kubectl -n gitlab-ver130806 exec -it $(kubectl -n gitlab-ver130806 get pod|grep -v runner|grep gitlab|awk '{print $1}') -- gitlab-ctl status
- # pv
- ---
- apiVersion: v1
- kind: PersistentVolume
- metadata:
- name: gitlab-etc-ver130806
- labels:
- type: gitlab-etc-ver130806
- spec:
- capacity:
- storage: 1Gi
- accessModes:
- - ReadWriteOnce
- persistentVolumeReclaimPolicy: Retain
- storageClassName: nfs
- nfs:
- path: /nfs_dir/gitlab_etc_ver130806
- server: 10.0.1.201
- # pvc
- ---
- kind: PersistentVolumeClaim
- apiVersion: v1
- metadata:
- name: gitlab-etc-ver130806-pvc
- spec:
- accessModes:
- - ReadWriteOnce
- resources:
- requests:
- storage: 1Gi
- storageClassName: nfs
- selector:
- matchLabels:
- type: gitlab-etc-ver130806
- # pv
- ---
- apiVersion: v1
- kind: PersistentVolume
- metadata:
- name: gitlab-log-ver130806
- labels:
- type: gitlab-log-ver130806
- spec:
- capacity:
- storage: 1Gi
- accessModes:
- - ReadWriteOnce
- persistentVolumeReclaimPolicy: Retain
- storageClassName: nfs
- nfs:
- path: /nfs_dir/gitlab_log_ver130806
- server: 10.0.1.201
- # pvc
- ---
- kind: PersistentVolumeClaim
- apiVersion: v1
- metadata:
- name: gitlab-log-ver130806-pvc
- spec:
- accessModes:
- - ReadWriteOnce
- resources:
- requests:
- storage: 1Gi
- storageClassName: nfs
- selector:
- matchLabels:
- type: gitlab-log-ver130806
- # pv
- ---
- apiVersion: v1
- kind: PersistentVolume
- metadata:
- name: gitlab-opt-ver130806
- labels:
- type: gitlab-opt-ver130806
- spec:
- capacity:
- storage: 1Gi
- accessModes:
- - ReadWriteOnce
- persistentVolumeReclaimPolicy: Retain
- storageClassName: nfs
- nfs:
- path: /nfs_dir/gitlab_opt_ver130806
- server: 10.0.1.201
- # pvc
- ---
- kind: PersistentVolumeClaim
- apiVersion: v1
- metadata:
- name: gitlab-opt-ver130806-pvc
- spec:
- accessModes:
- - ReadWriteOnce
- resources:
- requests:
- storage: 1Gi
- storageClassName: nfs
- selector:
- matchLabels:
- type: gitlab-opt-ver130806
- ---
- apiVersion: v1
- kind: Service
- metadata:
- name: gitlab
- labels:
- app: gitlab
- tier: frontend
- spec:
- ports:
- - name: gitlab-ui
- port: 80
- protocol: TCP
- targetPort: 80
- - name: gitlab-ssh
- port: 22
- protocol: TCP
- targetPort: 22
- nodePort: 32155
- selector:
- app: gitlab
- tier: frontend
- type: NodePort
- ---
- apiVersion: v1
- kind: ServiceAccount
- metadata:
- name: gitlab
- ---
- apiVersion: rbac.authorization.k8s.io/v1
- kind: ClusterRoleBinding
- metadata:
- name: gitlab-cb-ver130806
- roleRef:
- apiGroup: rbac.authorization.k8s.io
- kind: ClusterRole
- name: cluster-admin
- subjects:
- - kind: ServiceAccount
- name: gitlab
- namespace: gitlab-ver130806
- ---
- apiVersion: apps/v1
- kind: Deployment
- metadata:
- name: gitlab
- labels:
- app: gitlab
- tier: frontend
- spec:
- replicas: 1
- selector:
- matchLabels:
- app: gitlab
- tier: frontend
- strategy:
- type: Recreate
- template:
- metadata:
- labels:
- app: gitlab
- tier: frontend
- spec:
- serviceAccountName: gitlab
- containers:
- - image: harbor.boge.com/library/gitlab-ce:13.8.6-ce.1
- name: gitlab
- # resources:
- # requests:
- # cpu: 400m
- # memory: 4Gi
- # limits:
- # cpu: "800m"
- # memory: 8Gi
- securityContext:
- privileged: true
- env:
- - name: TZ
- value: Asia/Shanghai
- - name: GITLAB_OMNIBUS_CONFIG
- value: |
- postgresql['enable'] = false
- gitlab_rails['db_username'] = "gitlab"
- gitlab_rails['db_password'] = "bogeusepg"
- gitlab_rails['db_host'] = "postgresql"
- gitlab_rails['db_port'] = "5432"
- gitlab_rails['db_database'] = "gitlabhq_production"
- gitlab_rails['db_adapter'] = 'postgresql'
- gitlab_rails['db_encoding'] = 'utf8'
- redis['enable'] = false
- gitlab_rails['redis_host'] = 'redis'
- gitlab_rails['redis_port'] = '6379'
- gitlab_rails['redis_password'] = 'bogeuseredis'
- gitlab_rails['gitlab_shell_ssh_port'] = 22
- external_url 'http://git.boge.com/'
- nginx['listen_port'] = 80
- nginx['listen_https'] = false
- #-------------------------------------------
- gitlab_rails['gitlab_email_enabled'] = true
- gitlab_rails['gitlab_email_from'] = 'admin@boge.com'
- gitlab_rails['gitlab_email_display_name'] = 'boge'
- gitlab_rails['gitlab_email_reply_to'] = 'gitlab@boge.com'
- gitlab_rails['gitlab_default_can_create_group'] = true
- gitlab_rails['gitlab_username_changing_enabled'] = true
- gitlab_rails['smtp_enable'] = true
- gitlab_rails['smtp_address'] = "smtp.exmail.qq.com"
- gitlab_rails['smtp_port'] = 465
- gitlab_rails['smtp_user_name'] = "gitlab@boge.com"
- gitlab_rails['smtp_password'] = "bogesendmail"
- gitlab_rails['smtp_domain'] = "exmail.qq.com"
- gitlab_rails['smtp_authentication'] = "login"
- gitlab_rails['smtp_enable_starttls_auto'] = true
- gitlab_rails['smtp_tls'] = true
- #-------------------------------------------
- # 关闭 promethues
- prometheus['enable'] = false
- # 关闭 grafana
- grafana['enable'] = false
- # 减少内存占用
- unicorn['worker_memory_limit_min'] = "200 * 1 << 20"
- unicorn['worker_memory_limit_max'] = "300 * 1 << 20"
- # 减少 sidekiq 的并发数
- sidekiq['concurrency'] = 16
- # 减少 postgresql 数据库缓存
- postgresql['shared_buffers'] = "256MB"
- # 减少 postgresql 数据库并发数量
- postgresql['max_connections'] = 8
- # 减少进程数 worker=CPU核数+1
- unicorn['worker_processes'] = 2
- nginx['worker_processes'] = 2
- puma['worker_processes'] = 2
- # puma['per_worker_max_memory_mb'] = 850
- # 保留3天备份的数据文件
- gitlab_rails['backup_keep_time'] = 259200
- #-------------------------------------------
- ports:
- - containerPort: 80
- name: gitlab
- livenessProbe:
- exec:
- command:
- - sh
- - -c
- - "curl -s http://127.0.0.1/-/health|grep -w 'GitLab OK'"
- initialDelaySeconds: 120
- periodSeconds: 10
- timeoutSeconds: 5
- successThreshold: 1
- failureThreshold: 3
- readinessProbe:
- exec:
- command:
- - sh
- - -c
- - "curl -s http://127.0.0.1/-/health|grep -w 'GitLab OK'"
- initialDelaySeconds: 120
- periodSeconds: 10
- timeoutSeconds: 5
- successThreshold: 1
- failureThreshold: 3
- volumeMounts:
- - mountPath: /etc/gitlab
- name: gitlab1
- - mountPath: /var/log/gitlab
- name: gitlab2
- - mountPath: /var/opt/gitlab
- name: gitlab3
- - mountPath: /etc/localtime
- name: tz-config
- volumes:
- - name: gitlab1
- persistentVolumeClaim:
- claimName: gitlab-etc-ver130806-pvc
- - name: gitlab2
- persistentVolumeClaim:
- claimName: gitlab-log-ver130806-pvc
- - name: gitlab3
- persistentVolumeClaim:
- claimName: gitlab-opt-ver130806-pvc
- - name: tz-config
- hostPath:
- path: /usr/share/zoneinfo/Asia/Shanghai
- securityContext:
- runAsUser: 0
- fsGroup: 0
8.创建pod
kubectl -n gitlab-ver130806 apply -f 5gitlab.yaml
kubectl -n gitlab-ver130806 get pod
9.部署gitlab-tls
vi 6gitlab-tls
- # old version
- #apiVersion: extensions/v1beta1
- #kind: Ingress
- #metadata:
- # name: gitlab
- # annotations:
- # nginx.ingress.kubernetes.io/force-ssl-redirect: "true"
- # nginx.ingress.kubernetes.io/proxy-body-size: "20m"
- #spec:
- # tls:
- # - hosts:
- # - git.boge.com
- # secretName: mytls
- # rules:
- # - host: git.boge.com
- # http:
- # paths:
- # - path: /
- # backend:
- # serviceName: gitlab
- # servicePort: 80
- # Add tls
- # openssl genrsa -out tls.key 2048
- # openssl req -new -x509 -key tls.key -out tls.cert -days 360 -subj /CN=*.boge.com
- # kubectl -n gitlab-ver130806 create secret tls mytls --cert=tls.cert --key=tls.key
- # new version
- ## https://kubernetes.io/docs/concepts/services-networking/ingress/
- apiVersion: networking.k8s.io/v1
- kind: Ingress
- metadata:
- name: gitlab
- annotations:
- nginx.ingress.kubernetes.io/force-ssl-redirect: "false"
- nginx.ingress.kubernetes.io/proxy-body-size: "20m"
- spec:
- tls:
- - hosts:
- - git.boge.com
- secretName: mytls
- rules:
- - host: git.boge.com
- http:
- paths:
- - path: /
- pathType: Prefix
- backend:
- service:
- name: gitlab
- port:
- number: 80
- ---
10.#创建pod
kubectl -n gitlab-ver130806 apply -f 6gitlab-tls.yamlkubectl -n gitlab-ver130806 get pod
11.在安装服务器上增加ssh端口转发
我们要保持所有开发人员能使用默认的22端口来通过ssh拉取代码,那么就需要做如下端口转发配置
vim /etc/ssh/sshd_config
Port 10022
systemctl restart sshd# 注意配置此转发前,需要将对应NODE的本身ssh连接端口作一下修改,以防后面登陆不了该机器
#kubectl get svc -n gitlab-ver130806 |grep git
iptables -t nat -A PREROUTING -d 10.0.1.204 -p tcp --dport 22 -j DNAT --to-destination 10.0.1.204:31755#↑ 删除上面创建的这一条规则,将-A换成-D即可
#iptables -t nat -D PREROUTING -d 10.0.1.204 -p tcp --dport 22 -j DNAT --to-destination 10.0.1.204:31755
iptables -t nat -nvL PREROUTING
#将需要拉去仓库代码的服务器密钥(cat /root/.ssh/id_rsa.pub) 加入git页面(SSH Keys)12.这节课我们来讲gitlab里面的runner,gitlab的CI/CD自动化,都是由gitlab下发指令,依靠runner这个组件去执行的,我们这里也是把runner运行在k8s上面。
runner按字面意思就是奔跑者的意思,它在整个自动化流程里面的角色也相当于一个外卖小哥,它接收gitlab下发的自动化指令,来去做相应的操作,从而实现整个CI/CD的效果。
部署gitlab-runner- mkdir -p /nfs_dir/{gitlab-runner1-ver130806-docker,gitlab-runner2-ver130806-share}
- # gitlab-ci-multi-runner register
- # Active √ Paused Runners don't accept new jobs
- # Protected This runner will only run on pipelines triggered on protected branches
- # Run untagged jobs Indicates whether this runner can pick jobs without tags
- # Lock to current projects When a runner is locked, it cannot be assigned to other projects
- # pv
- ---
- apiVersion: v1
- kind: PersistentVolume
- metadata:
- name: gitlab-runner1-ver130806-docker
- labels:
- type: gitlab-runner1-ver130806-docker
- spec:
- capacity:
- storage: 0.1Gi
- accessModes:
- - ReadWriteMany
- persistentVolumeReclaimPolicy: Retain
- storageClassName: nfs
- nfs:
- path: /nfs_dir/gitlab-runner1-ver130806-docker
- server: 10.0.1.201
- # pvc
- ---
- kind: PersistentVolumeClaim
- apiVersion: v1
- metadata:
- name: gitlab-runner1-ver130806-docker
- namespace: gitlab-ver130806
- spec:
- accessModes:
- - ReadWriteMany
- resources:
- requests:
- storage: 0.1Gi
- storageClassName: nfs
- selector:
- matchLabels:
- type: gitlab-runner1-ver130806-docker
- ---
- # https://docs.gitlab.com/runner/executors
- #concurrent = 30
- #check_interval = 0
- #[session_server]
- # session_timeout = 1800
- #[[runners]]
- # name = "gitlab-runner1-ver130806-docker"
- # url = "http://git.boge.com"
- # token = "xxxxxxxxxxxxxxxxxxxxxx"
- # executor = "kubernetes"
- # [runners.kubernetes]
- # namespace = "gitlab-ver130806"
- # image = "docker:stable"
- # helper_image = "gitlab/gitlab-runner-helper:x86_64-9fc34d48-pwsh"
- # privileged = true
- # [[runners.kubernetes.volumes.pvc]]
- # name = "gitlab-runner1-ver130806-docker"
- # mount_path = "/mnt"
- ---
- apiVersion: apps/v1
- kind: Deployment
- metadata:
- name: gitlab-runner1-ver130806-docker
- namespace: gitlab-ver130806
- spec:
- replicas: 1
- selector:
- matchLabels:
- name: gitlab-runner1-ver130806-docker
- template:
- metadata:
- labels:
- name: gitlab-runner1-ver130806-docker
- spec:
- hostAliases:
- #kubectl -n gitlab-ver130806 get svc |grep git
- - ip: "10.68.140.109"
- hostnames:
- - "git.boge.com"
- serviceAccountName: gitlab
- containers:
- - args:
- - run
- image: gitlab/gitlab-runner:v13.10.0
- name: gitlab-runner1-ver130806-docker
- volumeMounts:
- - mountPath: /etc/gitlab-runner
- name: config
- - mountPath: /etc/ssl/certs
- name: cacerts
- readOnly: true
- restartPolicy: Always
- volumes:
- - persistentVolumeClaim:
- claimName: gitlab-runner1-ver130806-docker
- name: config
- - hostPath:
- path: /usr/share/ca-certificates/mozilla
- name: cacerts

13.部署
kubectl -n gitlab-ver130806 apply -f 7gitlab-runner-docker.yaml
kubectl -n gitlab-ver130806 exec -it gitlab-runner1-ver130806-docker-7cc8c bash
# 进入git 注册
root@gitlab-runner1-ver130806-docker-7cc8cc7595-nqcmc:/# gitlab-ci-multi-runner register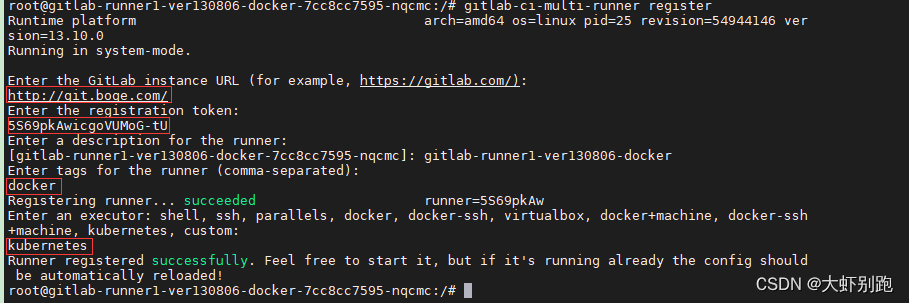
14 vi /nfs_dir/gitlab-runner1-ver130806-docker/config.toml
- concurrent = 30
- check_interval = 0
- [session_server]
- session_timeout = 1800
- [[runners]]
- name = "gitlab-runner1-ver130806-docker"
- url = "http://git.boge.com/"
- token = "2sU_GyKpbgVisPNmp-Fb" #这个是系统自动生成的不动
- executor = "kubernetes"
- [runners.kubernetes]
- namespace = "gitlab-ver130806"
- image = "docker:stable"
- helper_image = "gitlab/gitlab-runner-helper:x86_64-9fc34d48-pwsh"
- privileged = true
- [[runners.kubernetes.volumes.pvc]]
- name = "gitlab-runner1-ver130806-docker"
- mount_path = "/mnt"
15.#查看pod
- kubectl -n gitlab-ver130806 get pod
- #删除runne的pod ,等它重启
- kubectl -n gitlab-ver130806 delete pod gitlab-runner1-ver130806-docker-7cc8cc7595-nqcmc
进入gti页面 ,去掉第4个√,保留第一个√,保存退出

share
- # gitlab-ci-multi-runner register
- # Active √ Paused Runners don't accept new jobs
- # Protected This runner will only run on pipelines triggered on protected branches
- # Run untagged jobs √ Indicates whether this runner can pick jobs without tags
- # Lock to current projects When a runner is locked, it cannot be assigned to other projects
- # pv
- ---
- apiVersion: v1
- kind: PersistentVolume
- metadata:
- name: gitlab-runner2-ver130806-share
- labels:
- type: gitlab-runner2-ver130806-share
- spec:
- capacity:
- storage: 0.1Gi
- accessModes:
- - ReadWriteMany
- persistentVolumeReclaimPolicy: Retain
- storageClassName: nfs
- nfs:
- path: /nfs_dir/gitlab-runner2-ver130806-share
- server: 10.0.1.201
- # pvc
- ---
- kind: PersistentVolumeClaim
- apiVersion: v1
- metadata:
- name: gitlab-runner2-ver130806-share
- namespace: gitlab-ver130806
- spec:
- accessModes:
- - ReadWriteMany
- resources:
- requests:
- storage: 0.1Gi
- storageClassName: nfs
- selector:
- matchLabels:
- type: gitlab-runner2-ver130806-share
- ---
- # https://docs.gitlab.com/runner/executors
- #concurrent = 30
- #check_interval = 0
- #[session_server]
- # session_timeout = 1800
- #[[runners]]
- # name = "gitlab-runner2-ver130806-share"
- # url = "http://git.boge.com"
- # token = "xxxxxxxxxxxxxxxx"
- # executor = "kubernetes"
- # [runners.kubernetes]
- # namespace = "gitlab-ver130806"
- # image = "registry.cn-beijing.aliyuncs.com/acs/busybox/busybox:v1.29.2"
- # helper_image = "gitlab/gitlab-runner-helper:x86_64-9fc34d48-pwsh"
- # privileged = false
- # [[runners.kubernetes.volumes.pvc]]
- # name = "gitlab-runner2-ver130806-share"
- # mount_path = "/mnt"
- ---
- apiVersion: apps/v1
- kind: Deployment
- metadata:
- name: gitlab-runner2-ver130806-share
- namespace: gitlab-ver130806
- spec:
- replicas: 1
- selector:
- matchLabels:
- name: gitlab-runner2-ver130806-share
- template:
- metadata:
- labels:
- name: gitlab-runner2-ver130806-share
- spec:
- hostAliases:
- #kubectl -n gitlab-ver130806 get svc |grep git
- - ip: "10.68.140.109"
- hostnames:
- - "git.boge.com"
- serviceAccountName: gitlab
- containers:
- - args:
- - run
- image: gitlab/gitlab-runner:v13.10.0
- name: gitlab-runner2-ver130806-share
- volumeMounts:
- - mountPath: /etc/gitlab-runner
- name: config
- - mountPath: /etc/ssl/certs
- name: cacerts
- readOnly: true
- restartPolicy: Always
- volumes:
- - persistentVolumeClaim:
- claimName: gitlab-runner2-ver130806-share
- name: config
- - hostPath:
- path: /usr/share/ca-certificates/mozilla
- name: cacerts
16.执行yaml
kubectl -n gitlab-ver130806 apply -f 8gitlab-runner-share.yaml
kubectl -n gitlab-ver130806 get pod
#进入pod
kubectl -n gitlab-ver130806 exec -it gitlab-runner2-ver130806-share-555695cf9 bash
#gitlab-ci-multi-runner register
17#修改配置
vi /nfs_dir/gitlab-runner2-ver130806-share/config.toml- concurrent = 30
- check_interval = 0
- [session_server]
- session_timeout = 1800
- [[runners]]
- name = "gitlab-runner2-ver130806-share"
- url = "http://git.boge.com/"
- token = "yj5tWzuaAB8xjP4kfbKQ"#使用系统自动生成的,不修改
- executor = "kubernetes"
- [runners.kubernetes]
- namespace = "gitlab-ver130806"
- image = "registry.cn-beijing.aliyuncs.com/acs/busybox/busybox:v1.29.2"
- helper_image = "gitlab/gitlab-runner-helper:x86_64-9fc34d48-pwsh"
- privileged = false
- [[runners.kubernetes.volumes.pvc]]
- name = "gitlab-runner2-ver130806-share"
- mount_path = "/mnt"
18.执行
kubectl -n gitlab-ver130806 get pod
kubectl -n gitlab-ver130806 delete pod gitlab-runner2-ver130806-share-555695cf99-7nhp2
进入gti页面 ,保留第一个√,第三个√保存退出

19.这节课我们继续来配置gitlab相关的服务。
增加gitlab在k8s的内部解析为什么这么做呢,博哥这里总结了两点原因:
优化gitlab网络通信,对于runner要调用gitlab服务来说,直接走内部地址速度更快
如果是在用阿里云的同学,采用在k8s上部署gitlab的话,那么k8s内部服务比如runner是不能通过同集群前面的公网入口SLB来请求访问的,这里阿里云自身网络架构原因,这个时候我们只需要做如下配置即可完美解决#编辑
kubectl -n kube-system edit configmaps coredns# kubectl -n kube-system get configmaps coredns -o yaml
apiVersion: v1
data:
Corefile: |
.:53 {
errors
health
ready
log
rewrite stop {
name regex git.boge.com gitlab.gitlab-ver130806.svc.cluster.local
answer name gitlab.gitlab-ver130806.svc.cluster.local git.boge.com
}kubernetes cluster.local in-addr.arpa ip6.arpa {
pods verified
fallthrough in-addr.arpa ip6.arpa
}
autopath @kubernetes
prometheus :9153
forward . /etc/resolv.conf
cache 30
loop
reload
loadbalance
}
kind: ConfigMap
metadata:
name: coredns
namespace: kube-system20.#查看pod
#查看pod
kubectl -n kube-system get pod |grep coredns#删除pod
kubectl -n kube-system delete pod coredns-5787695b7f-vzfm621. 我们现在在k8s来部署dind服务,提供整个CI(持续集成)的功能。
- 我们现在在k8s来部署dind服务,提供整个CI(持续集成)的功能。
- 我们看看docker version列出的结果 Docker采取的是C/S架构 Docker进程默认不监听任何端口,它会生成一个socket(/var/run/docker.sock)文件来进行本地进程通信 Docker C/S 之间采取Rest API作为通信协议,我们可以让Docker daemon进程监听一个端口,这就为我们用docker client调用远程调用docker daemon进程执行镜像构建提供了可行性
- 
- > docker in docker
- ```bash
- # dind pip instll staus : kill -9 code 137(128+9) ,may be limits(cpu,memory) resources need change
- # only have docker client ,use dind can be use normal
- #dindSvc=$(kubectl -n kube-system get svc dind |awk 'NR==2{print $3}')
- #export DOCKER_HOST="tcp://${dindSvc}:2375/"
- #export DOCKER_DRIVER=overlay2
- #export DOCKER_TLS_CERTDIR=""
- ---
- # SVC
- kind: Service
- apiVersion: v1
- metadata:
- name: dind
- namespace: kube-system
- spec:
- selector:
- app: dind
- ports:
- - name: tcp-port
- port: 2375
- protocol: TCP
- targetPort: 2375
- ---
- # Deployment
- apiVersion: apps/v1
- kind: Deployment
- metadata:
- name: dind
- namespace: kube-system
- labels:
- app: dind
- spec:
- replicas: 1
- selector:
- matchLabels:
- app: dind
- template:
- metadata:
- labels:
- app: dind
- spec:
- hostNetwork: true
- containers:
- - name: dind
- #image: docker:19-dind
- image: harbor.boge.com/library/docker:19-dind
- lifecycle:
- postStart:
- exec:
- command: ["/bin/sh", "-c", "docker login harbor.boge.com -u 'admin' -p 'boge666'"]
- # 3. when delete this pod , use this keep kube-proxy to flush role done
- preStop:
- exec:
- command: ["/bin/sh", "-c", "sleep 5"]
- ports:
- - containerPort: 2375
- # resources:
- # requests:
- # cpu: 200m
- # memory: 256Mi
- # limits:
- # cpu: 0.5
- # memory: 1Gi
- readinessProbe:
- tcpSocket:
- port: 2375
- initialDelaySeconds: 10
- periodSeconds: 30
- livenessProbe:
- tcpSocket:
- port: 2375
- initialDelaySeconds: 10
- periodSeconds: 30
- securityContext:
- privileged: true
- env:
- - name: DOCKER_HOST
- value: tcp://localhost:2375
- - name: DOCKER_DRIVER
- value: overlay2
- - name: DOCKER_TLS_CERTDIR
- value: ''
- volumeMounts:
- - name: docker-graph-storage
- mountPath: /var/lib/docker
- - name: tz-config
- mountPath: /etc/localtime
- # kubectl -n kube-system create secret generic harbor-ca --from-file=harbor-ca=/data/harbor/ssl/tls.cert
- - name: harbor-ca
- mountPath: /etc/docker/certs.d/harbor.boge.com/ca.crt
- subPath: harbor-ca
- # kubectl create secret docker-registry boge-secret --docker-server=harbor.boge.com --docker-username=admin --docker-password=boge666 --docker-email=admin@boge.com
- hostAliases:
- - hostnames:
- - harbor.boge.com
- ip: 10.0.1.204
- imagePullSecrets:
- - name: bogeharbor
- volumes:
- # - emptyDir:
- # medium: ""
- # sizeLimit: 10Gi
- - hostPath:
- path: /var/lib/container/docker
- name: docker-graph-storage
- - hostPath:
- path: /usr/share/zoneinfo/Asia/Shanghai
- name: tz-config
- - name: harbor-ca
- secret:
- secretName: harbor-ca
- defaultMode: 0600
- #
- # kubectl taint node 10.0.1.201 Ingress=:NoExecute
- # kubectl describe node 10.0.1.201 |grep -i taint
- # kubectl taint node 10.0.1.201 Ingress:NoExecute-
- nodeSelector:
- kubernetes.io/hostname: "10.0.1.201"
- tolerations:
- - operator: Exists
22。#创建证书
kubectl -n kube-system create secret generic harbor-ca --from-file=harbor-ca=/data/harbor/ssl/tls.cert#执行yaml
kubectl apply -f 10bind.yaml#git 添加ssh
cat /root/.ssh/id_rsa.pub
- #Git global setup Git全局设置
- git config --global user.name "Administrator"
- git config --global user.email "admin@example.com"
- #Create a new repository 创建新存储库
- git clone git@git.boge.com:root/test.git
- cd test
- touch README.md
- #添加上传文件
- git add README.md
- #添加描述
- git commit -m "add README"
- #推送
- git push -u origin master
- #Push an existing folder 推送现有文件夹
- cd existing_folder
- git init
- git remote add origin git@git.boge.com:root/test.git
- git add .
- git commit -m "Initial commit"
- git push -u origin master
- #Push an existing Git repository 推送现有Git存储库
- cd existing_repo
- git remote rename origin old-origin
- git remote add origin git@git.boge.com:root/test.git
- git push -u origin --all
- git push -u origin --tags
接着我们找一台机器,这里我们选取10.0.1.201这台机器,加一条本地hosts 10.0.1.204 git.boge.com,来试下推送gitlab代码仓库有无问题,详细操作见本节同名视频课程,希望大家能对着视频自己动手操作一遍,理解上面这些配置的含义,后面可以举一反三,在k8s的其他服务也可以这么来做,达到访问更优的效果。
添加ssh key:
在git客户端执行(我是在linux服务器上):
# ssh-keygen -t ed25519 -C "123123@qq.com" 一直回车
# cd ~/.ssh/
# cat id_ed25519.pub
在git客户端克隆,注意端口号。不需要输入密码:
#git clone ssh://git@git.boge.com:32155/zoujiaojiao/it.git
十三、k8s安装kubesphere3.3
1.部署kubesphere时需要默认 StorageClass
kubectl edit sc nfs-boge
metadata:
annotations:
storageclass.beta.kubernetes.io/is-default-class: "true"2.下载yaml
wget https://github.com/kubesphere/ks-installer/releases/download/v3.3.0/kubesphere-installer.yaml
wget https://github.com/kubesphere/ks-installer/releases/download/v3.3.0/cluster-configuration.yaml
#将ectd下的 endpointIps改为你的master节点的私有IP地址。
endpointIps: 20.120.100.220
#运行yaml
kubectl apply -f kubesphere-installer.yaml
kubectl apply -f cluster-configuration.yaml
3.查看日志
kubectl logs -n kubesphere-system $(kubectl get pod -n kubesphere-system -l 'app in (ks-install, ks-installer)' -o jsonpath='{.items[0].metadata.name}') -f
#访问任意机器的 30880端口
#账号 : admin
#密码 : P@88w0rd4.解决etcd监控证书找不到问题
kubectl -n kubesphere-monitoring-system create secret generic kube-etcd-client-certs --from-file=etcd-client-ca.crt=/etc/kubernetes/pki/etcd/ca.crt --from-file=etcd-client.crt=/etc/kubernetes/pki/apiserver-etcd-client.crt --from-file=etcd-client.key=/etc/kubernetes/pki/apiserver-etcd-client.key
5.文件未删除干净
failed: [localhost] (item={'ns': 'kubesphere-system', 'kind': 'users.iam.kubesphere.io', 'resource': 'admin', 'release': 'ks-core'}) => {"ansible_loop_var": "item", "changed": true, "cmd": "/usr/local/bin/kubectl -n kubesphere-system annotate --overwrite users.iam.kubesphere.io admin meta.helm.sh/release-name=ks-core && /usr/local/bin/kubectl -n kubesphere-system annotate --overwrite users.iam.kubesphere.io admin meta.helm.sh/release-namespace=kubesphere-system && /usr/local/bin/kubectl -n kubesphere-system label --overwrite users.iam.kubesphere.io admin app.kubernetes.io/managed-by=Helm\n", "delta": "0:00:00.675675", "end": "2022-02-10 04:53:09.022419", "failed_when_result": true, "item": {"kind": "users.iam.kubesphere.io", "ns": "kubesphere-system", "release": "ks-core", "resource": "admin"}, "msg": "non-zero return code", "rc": 1, "start": "2022-02-10 04:53:08.346744", "stderr": "Error from server (InternalError): Internal error occurred: failed calling webhook \"users.iam.kubesphere.io\": Post \"https://ks-controller-manager.kubesphere-system.svc:443/validate-email-iam-kubesphere-io-v1alpha2?timeout=30s\": service \"ks-controller-manager\" not found", "stderr_lines": ["Error from server (InternalError): Internal error occurred: failed calling webhook \"users.iam.kubesphere.io\": Post \"https://ks-controller-manager.kubesphere-system.svc:443/validate-email-iam-kubesphere-io-v1alpha2?timeout=30s\": service \"ks-controller-manager\" not found"], "stdout": "", "stdout_lines": []}参考 https://github.com/kubesphere/ks-installer/blob/master/scripts/kubesphere-delete.sh 将sh文件下载到master节点,然后删除后重新安装
del.sh
- #!/usr/bin/env bash
- function delete_sure(){
- cat << eof
- $(echo -e "\033[1;36mNote:\033[0m")
- Delete the KubeSphere cluster, including the module kubesphere-system kubesphere-devops-system kubesphere-devops-worker kubesphere-monitoring-system kubesphere-logging-system openpitrix-system.
- eof
- read -p "Please reconfirm that you want to delete the KubeSphere cluster. (yes/no) " ans
- while [[ "x"$ans != "xyes" && "x"$ans != "xno" ]]; do
- read -p "Please reconfirm that you want to delete the KubeSphere cluster. (yes/no) " ans
- done
- if [[ "x"$ans == "xno" ]]; then
- exit
- fi
- }
- delete_sure
- # delete ks-installer
- kubectl delete deploy ks-installer -n kubesphere-system 2>/dev/null
- # delete helm
- for namespaces in kubesphere-system kubesphere-devops-system kubesphere-monitoring-system kubesphere-logging-system openpitrix-system kubesphere-monitoring-federated
- do
- helm list -n $namespaces | grep -v NAME | awk '{print $1}' | sort -u | xargs -r -L1 helm uninstall -n $namespaces 2>/dev/null
- done
- # delete kubefed
- kubectl get cc -n kubesphere-system ks-installer -o jsonpath="{.status.multicluster}" | grep enable
- if [[ $? -eq 0 ]]; then
- # delete kubefed types resources
- for kubefed in `kubectl api-resources --namespaced=true --api-group=types.kubefed.io -o name`
- do
- kubectl delete -n kube-federation-system $kubefed --all 2>/dev/null
- done
- for kubefed in `kubectl api-resources --namespaced=false --api-group=types.kubefed.io -o name`
- do
- kubectl delete $kubefed --all 2>/dev/null
- done
- # delete kubefed core resouces
- for kubefed in `kubectl api-resources --namespaced=true --api-group=core.kubefed.io -o name`
- do
- kubectl delete -n kube-federation-system $kubefed --all 2>/dev/null
- done
- for kubefed in `kubectl api-resources --namespaced=false --api-group=core.kubefed.io -o name`
- do
- kubectl delete $kubefed --all 2>/dev/null
- done
- # uninstall kubefed chart
- helm uninstall -n kube-federation-system kubefed 2>/dev/null
- fi
- helm uninstall -n kube-system snapshot-controller 2>/dev/null
- # delete kubesphere deployment & statefulset
- kubectl delete deployment -n kubesphere-system `kubectl get deployment -n kubesphere-system -o jsonpath="{.items[*].metadata.name}"` 2>/dev/null
- kubectl delete statefulset -n kubesphere-system `kubectl get statefulset -n kubesphere-system -o jsonpath="{.items[*].metadata.name}"` 2>/dev/null
- # delete monitor resources
- kubectl delete prometheus -n kubesphere-monitoring-system k8s 2>/dev/null
- kubectl delete Alertmanager -n kubesphere-monitoring-system main 2>/dev/null
- kubectl delete DaemonSet -n kubesphere-monitoring-system node-exporter 2>/dev/null
- kubectl delete statefulset -n kubesphere-monitoring-system `kubectl get statefulset -n kubesphere-monitoring-system -o jsonpath="{.items[*].metadata.name}"` 2>/dev/null
- # delete grafana
- kubectl delete deployment -n kubesphere-monitoring-system grafana 2>/dev/null
- kubectl --no-headers=true get pvc -n kubesphere-monitoring-system -o custom-columns=:metadata.namespace,:metadata.name | grep -E kubesphere-monitoring-system | xargs -n2 kubectl delete pvc -n 2>/dev/null
- # delete pvc
- pvcs="kubesphere-system|openpitrix-system|kubesphere-devops-system|kubesphere-logging-system"
- kubectl --no-headers=true get pvc --all-namespaces -o custom-columns=:metadata.namespace,:metadata.name | grep -E $pvcs | xargs -n2 kubectl delete pvc -n 2>/dev/null
- # delete rolebindings
- delete_role_bindings() {
- for rolebinding in `kubectl -n $1 get rolebindings -l iam.kubesphere.io/user-ref -o jsonpath="{.items[*].metadata.name}"`
- do
- kubectl -n $1 delete rolebinding $rolebinding 2>/dev/null
- done
- }
- # delete roles
- delete_roles() {
- kubectl -n $1 delete role admin 2>/dev/null
- kubectl -n $1 delete role operator 2>/dev/null
- kubectl -n $1 delete role viewer 2>/dev/null
- for role in `kubectl -n $1 get roles -l iam.kubesphere.io/role-template -o jsonpath="{.items[*].metadata.name}"`
- do
- kubectl -n $1 delete role $role 2>/dev/null
- done
- }
- # remove useless labels and finalizers
- for ns in `kubectl get ns -o jsonpath="{.items[*].metadata.name}"`
- do
- kubectl label ns $ns kubesphere.io/workspace-
- kubectl label ns $ns kubesphere.io/namespace-
- kubectl patch ns $ns -p '{"metadata":{"finalizers":null,"ownerReferences":null}}'
- delete_role_bindings $ns
- delete_roles $ns
- done
- # delete clusterroles
- delete_cluster_roles() {
- for role in `kubectl get clusterrole -l iam.kubesphere.io/role-template -o jsonpath="{.items[*].metadata.name}"`
- do
- kubectl delete clusterrole $role 2>/dev/null
- done
- for role in `kubectl get clusterroles | grep "kubesphere" | awk '{print $1}'| paste -sd " "`
- do
- kubectl delete clusterrole $role 2>/dev/null
- done
- }
- delete_cluster_roles
- # delete clusterrolebindings
- delete_cluster_role_bindings() {
- for rolebinding in `kubectl get clusterrolebindings -l iam.kubesphere.io/role-template -o jsonpath="{.items[*].metadata.name}"`
- do
- kubectl delete clusterrolebindings $rolebinding 2>/dev/null
- done
- for rolebinding in `kubectl get clusterrolebindings | grep "kubesphere" | awk '{print $1}'| paste -sd " "`
- do
- kubectl delete clusterrolebindings $rolebinding 2>/dev/null
- done
- }
- delete_cluster_role_bindings
- # delete clusters
- for cluster in `kubectl get clusters -o jsonpath="{.items[*].metadata.name}"`
- do
- kubectl patch cluster $cluster -p '{"metadata":{"finalizers":null}}' --type=merge
- done
- kubectl delete clusters --all 2>/dev/null
- # delete workspaces
- for ws in `kubectl get workspaces -o jsonpath="{.items[*].metadata.name}"`
- do
- kubectl patch workspace $ws -p '{"metadata":{"finalizers":null}}' --type=merge
- done
- kubectl delete workspaces --all 2>/dev/null
- # make DevOps CRs deletable
- for devops_crd in $(kubectl get crd -o=jsonpath='{range .items[*]}{.metadata.name}{"\n"}{end}' | grep "devops.kubesphere.io"); do
- for ns in $(kubectl get ns -ojsonpath='{.items..metadata.name}'); do
- for devops_res in $(kubectl get $devops_crd -n $ns -oname); do
- kubectl patch $devops_res -n $ns -p '{"metadata":{"finalizers":[]}}' --type=merge
- done
- done
- done
- # delete validatingwebhookconfigurations
- for webhook in ks-events-admission-validate users.iam.kubesphere.io network.kubesphere.io validating-webhook-configuration resourcesquotas.quota.kubesphere.io
- do
- kubectl delete validatingwebhookconfigurations.admissionregistration.k8s.io $webhook 2>/dev/null
- done
- # delete mutatingwebhookconfigurations
- for webhook in ks-events-admission-mutate logsidecar-injector-admission-mutate mutating-webhook-configuration
- do
- kubectl delete mutatingwebhookconfigurations.admissionregistration.k8s.io $webhook 2>/dev/null
- done
- # delete users
- for user in `kubectl get users -o jsonpath="{.items[*].metadata.name}"`
- do
- kubectl patch user $user -p '{"metadata":{"finalizers":null}}' --type=merge
- done
- kubectl delete users --all 2>/dev/null
- # delete helm resources
- for resource_type in `echo helmcategories helmapplications helmapplicationversions helmrepos helmreleases`; do
- for resource_name in `kubectl get ${resource_type}.application.kubesphere.io -o jsonpath="{.items[*].metadata.name}"`; do
- kubectl patch ${resource_type}.application.kubesphere.io ${resource_name} -p '{"metadata":{"finalizers":null}}' --type=merge
- done
- kubectl delete ${resource_type}.application.kubesphere.io --all 2>/dev/null
- done
- # delete workspacetemplates
- for workspacetemplate in `kubectl get workspacetemplates.tenant.kubesphere.io -o jsonpath="{.items[*].metadata.name}"`
- do
- kubectl patch workspacetemplates.tenant.kubesphere.io $workspacetemplate -p '{"metadata":{"finalizers":null}}' --type=merge
- done
- kubectl delete workspacetemplates.tenant.kubesphere.io --all 2>/dev/null
- # delete federatednamespaces in namespace kubesphere-monitoring-federated
- for resource in $(kubectl get federatednamespaces.types.kubefed.io -n kubesphere-monitoring-federated -oname); do
- kubectl patch "${resource}" -p '{"metadata":{"finalizers":null}}' --type=merge -n kubesphere-monitoring-federated
- done
- # delete crds
- for crd in `kubectl get crds -o jsonpath="{.items[*].metadata.name}"`
- do
- if [[ $crd == *kubesphere.io ]] || [[ $crd == *kubefed.io ]] ; then kubectl delete crd $crd 2>/dev/null; fi
- done
- # delete relevance ns
- for ns in kube-federation-system kubesphere-alerting-system kubesphere-controls-system kubesphere-devops-system kubesphere-devops-worker kubesphere-logging-system kubesphere-monitoring-system kubesphere-monitoring-federated openpitrix-system kubesphere-system
- do
- kubectl delete ns $ns 2>/dev/null
- done
6.修改镜像拉去规则
kubectl -n kubesphere-system edit deployments.apps ks-apiserver
kubectl -n kubesphere-system edit deployments.apps ks-console
kubectl -n kubesphere-system edit deployments.apps ks-controller-manager
IfNotPresent只有当镜像在本地不存在时才会拉取
-
相关阅读:
Python分享之数学与随机数 (math包,random包)
java计算机毕业设计vue健身食谱系统源码+mysql数据库+系统+lw文档+部署
BEVFusion:A Simple and Robust LiDAR-Camera Fusion Framework 论文笔记
Android 13 - Media框架(11)- MediaCodec(一)
【网络层介绍】
Vue_el挂载点
力扣1148. 文章浏览 I
GaussDB技术解读丨高级压缩
达到学习前端的一种心流状态
第1章_瑞萨MCU零基础入门系列教程之单片机程序的设计模式
- 原文地址:https://blog.csdn.net/qq_35583325/article/details/126950754