-
Open3D官方文档学习笔记
Open3D官方文档学习笔记
- 第一部分——点云
- 1 可视化点云
- 2 体素降采样
- 3 顶点法线评估
- 4 访问顶点法线
- 补充:Numpy在Open3D中的应用
- 5 裁剪点云
- 补充1:获取点云坐标
- 补充2: [交互式可视化](http://www.open3d.org/docs/release/tutorial/visualization/interactive_visualization.html)
- 补充3:[自定义可视化](http://www.open3d.org/docs/release/tutorial/visualization/customized_visualization.html#customized-visualization)
- 补充4: 点云旋转
- 补充5:Open3D可视化窗口的指令/事件
- 6 为点云上色
- 7 点云测距
- 8 边界容器
- 9 凸包Convex hull
- 10 DBSCAN聚类
- 11 平面分割
- 12 隐藏点消除
- 第二部分——Mesh
- 附录
第一部分——点云
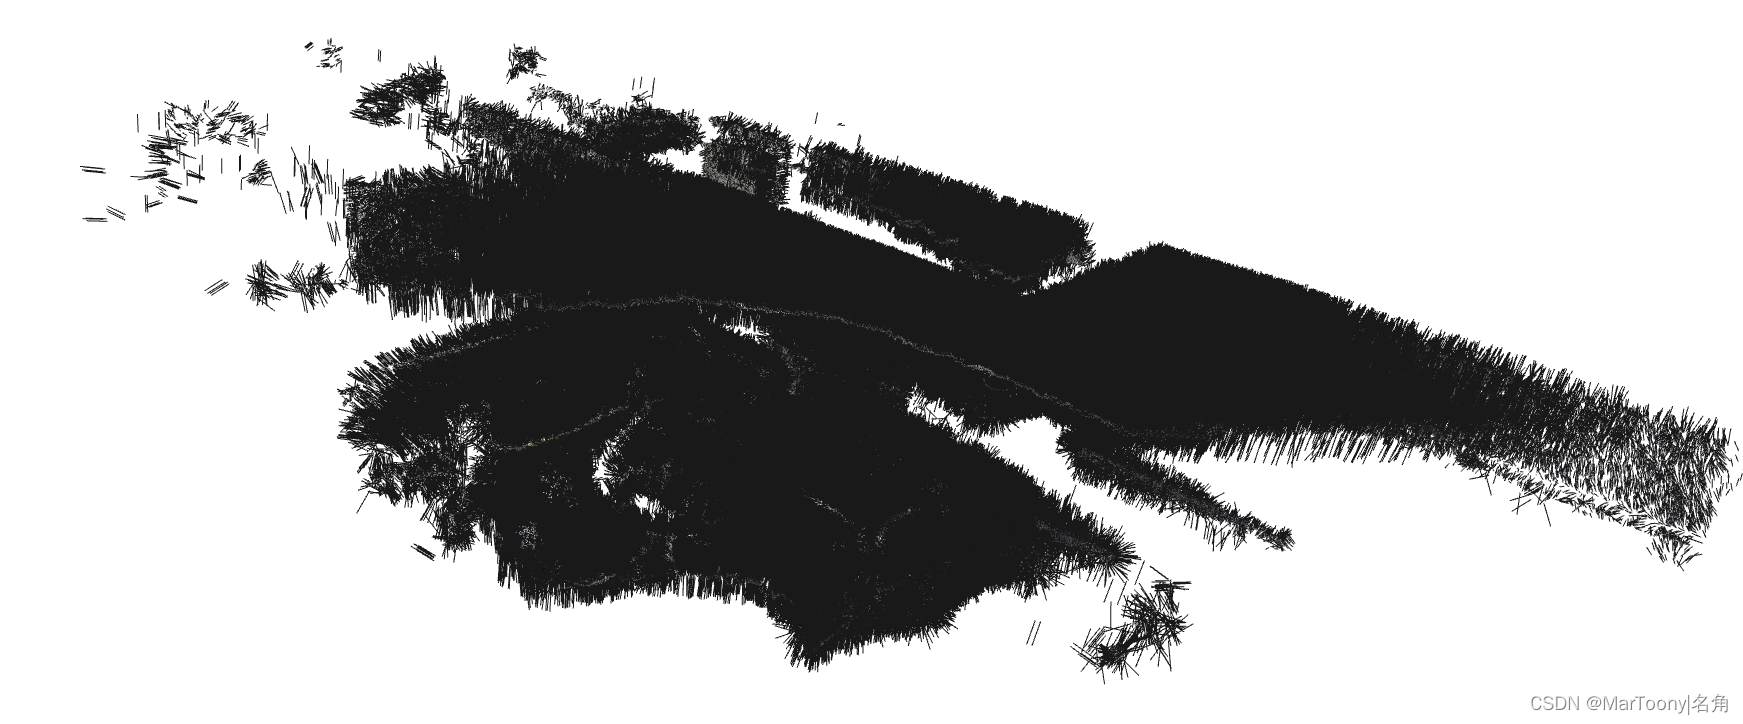
1 可视化点云
o3d.visualization.draw_geometries方法是一个被重载的方法,它有两组参数,对应不同的功能。具体的功能差异没有实践。- PCL_viewer以及上述API打开的窗口,如果按小键盘的减号可以使得点云中点的大小变小,相反会变大。
(1)原始图像:

(2)加号后的图像:

2 体素降采样
- 体素下采样经常使用一个常规的体素网格以生成均匀的降采样点云数据。它经常被用作许多点云处理任务的预处理过程。
- 点云体素降采样的过程:首先,点云被置于指定尺寸的体素之中;最后,计算每个体素中的点云均值作为该体素代表点。
pcd.voxel_down_sample(voxel_size=0.05)其中参数voxel_size值越大,采样得到的点云数量越稀少。
3 顶点法线评估
(1) 经过降采样处理后的效果图。

(2)未经过降采样的效果图。
estimate_normals方法会计算每个点的法线。它会查找相邻点并使用协方差分析计算相邻点的主轴。需要注意的是,协方差分析算法会产生两个相反的方向作为正常候选。在不知道几何体全局结构的情况下,两种方向都有可能是正确的。一般地,Open3D会随机猜测,但是如果研究的内容将方向作为研究内容之一,则用户需要调用其他的方向函数用于计算。estimate_normals方法以o3d.geometry.KDTreeSearchParamHybrid类的实例作为参数。该类有两个关键参数,radius = 0.1,max_nn = 30。表示该类实例具有10厘米的搜索半径,且该范围内仅考虑30个邻居点。
4 访问顶点法线
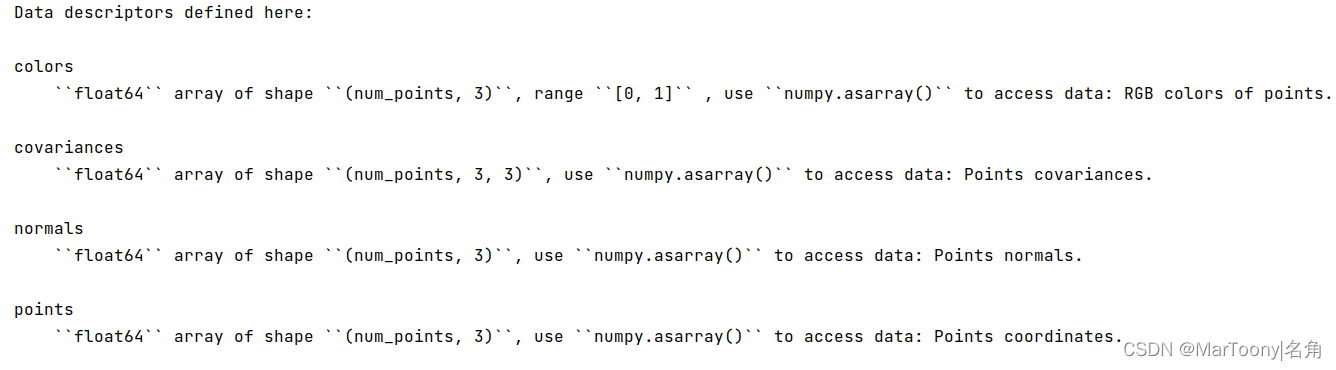
- 估计的法向量可以从pointcloud对象的normals属性中获取。
downpcd.normals - 查看pointcloud对象的其他的属性,help(downpcd)。
补充:Numpy在Open3D中的应用
- Open3D中的所有数据结构都与Numpy的缓冲区原生兼容。
- norm归一化值的计算公式(min-max版):( x - min )/ ( max - min )
- 使用
o3d.utility.Vector3dVector函数,可以将Numpy矩阵直接分配给open3d.PointCloud对象的points属性。相似地,colors和normals属性同样可以通过这样的方式被赋值。需要注意的是,需要预先定义一个PointCloud对象,比如这样pcd = o3d.geometry.PointCloud()。示例:
pcd = o3d.geometry.PointCloud() pcd.points = o3d.utility.Vector3dVector(xyz) o3d.io.write_point_cloud("../../test_data/sync.ply", pcd)- 1
- 2
- 3
- 使用
np.asarray可以将PointCloud对象的四个属性转换为numpy数组的类型。
# Load saved point cloud and visualize it pcd_load = o3d.io.read_point_cloud("../../test_data/sync.ply") # Convert Open3D.o3d.geometry.PointCloud to numpy array xyz_load = np.asarray(pcd_load.points) print('xyz_load') print(xyz_load) o3d.visualization.draw_geometries([pcd_load])- 1
- 2
- 3
- 4
- 5
- 6
- 7
- 8
5 裁剪点云
print("Load a polygon volume and use it to crop the original point cloud") demo_crop_data = o3d.data.DemoCropPointCloud() print(demo_crop_data.point_cloud_path) pcd = o3d.io.read_point_cloud(demo_crop_data.point_cloud_path) vol = o3d.visualization.read_selection_polygon_volume(demo_crop_data.cropped_json_path) chair = vol.crop_point_cloud(pcd) o3d.visualization.draw_geometries([chair], zoom=0.7, front=[0.5439, -0.2333, -0.8060], lookat=[2.4615, 2.1331, 1.338], up=[-0.1781, -0.9708, 0.1608]) ----------------------------------------------------------------------------------- /home/cold/open3d_data/extract/DemoCropPointCloud/fragment.ply- 1
- 2
- 3
- 4
- 5
- 6
- 7
- 8
- 9
- 10
- 11
- 12
- 13
- 从代码中可以看出,裁剪点云功能的执行过程类似于将numpy数组转换为点云数据,都需要 预先定义一个容器 。
- 裁剪点云的核心函数是
o3d.visualization.read_selection_polygon_volume类。该类通过指定的多边形选择区域的json文件进行初始化,而后类实例对象调用crop_point_cloud函数处理PointCloud对象。 - json文件要求指定20个点以构成包围被裁剪物体的截面。其内容如下所示。
{ "axis_max" : 4.022921085357666, "axis_min" : -0.76341366767883301, "bounding_polygon" : [ [ 2.6509309513852526, 0.0, 1.6834473132326844 ], [ 2.5786428246917148, 0.0, 1.6892074266735244 ], [ 2.4625790337552154, 0.0, 1.6665777078297999 ], [ 2.2228544982251655, 0.0, 1.6168160446813649 ], [ 2.166993206001413, 0.0, 1.6115495157201662 ], [ 2.1167895865303286, 0.0, 1.6257706054969348 ], [ 2.0634657721747383, 0.0, 1.623021658624539 ], [ 2.0568612343437236, 0.0, 1.5853892911207643 ], [ 2.1605399001237027, 0.0, 0.96228993255083017 ], [ 2.1956669387205228, 0.0, 0.95572746049785073 ], [ 2.2191318790575583, 0.0, 0.88734449982108754 ], [ 2.2484881847925919, 0.0, 0.87042807267013633 ], [ 2.6891234157295827, 0.0, 0.94140677988967603 ], [ 2.7328692490470647, 0.0, 0.98775740674840251 ], [ 2.7129337547575547, 0.0, 1.0398850034649203 ], [ 2.7592174072415405, 0.0, 1.0692940558509485 ], [ 2.7689216419453428, 0.0, 1.0953914441371593 ], [ 2.6851455625455669, 0.0, 1.6307334122162018 ], [ 2.6714776099981239, 0.0, 1.675524657088997 ], [ 2.6579576128816544, 0.0, 1.6819127849749496 ] ], "class_name" : "SelectionPolygonVolume", "orthogonal_axis" : "Y", "version_major" : 1, "version_minor" : 0 }- 1
- 2
- 3
- 4
- 5
- 6
- 7
- 8
- 9
- 10
- 11
- 12
- 13
- 14
- 15
- 16
- 17
- 18
- 19
- 20
- 21
- 22
- 23
- 24
- 25
- 26
- 27
- 28
- 29
- 30
- 31
- 如何获取到点的坐标呢?见一节补充。
补充1:获取点云坐标
- 通过调用
o3d.visualization.VisualizerWithEditing类实例化对象,创建窗口处理PointCloud对象;挑选的有效节点坐标可以通过访问vis实例对象的get_picked_points()方法获取。 - 节点采集结束后,使用Q退出窗口。
pcd9 = o3d.io.read_point_cloud('fragment_018.pcd') vis = o3d.visualization.VisualizerWithEditing() vis.create_window() vis.add_geometry(pcd9) # 激活窗口。此函数将阻止当前线程,直到窗口关闭。 vis.run() # 等待用户拾取点 shift + 鼠标左键 点云坐标显示在终端。 vis.destroy_window() ----------------------------------------------------------- [Open3D INFO] Picked point #907348 (5.9, -0.54, 1.2) to add in queue. [Open3D INFO] No point has been picked. [Open3D INFO] No point has been picked. [Open3D INFO] Picked point #215377 (4.0, -0.28, 0.92) to add in queue. [Open3D INFO] Picked point #311899 (2.4, -1.5, 0.0042) to add in queue. [Open3D INFO] Picked point #689267 (1.9, 3.8, -0.3) to add in queue.- 1
- 2
- 3
- 4
- 5
- 6
- 7
- 8
- 9
- 10
- 11
- 12
- 13
- 14

补充2: 交互式可视化
代码见文末代码a。
- 裁剪几何体。不包含生成裁剪框的节点坐标。
def demo_crop_geometry(): print("Demo for manual geometry cropping") print("1) Press 'Y' twice to align geometry with negative direction of y-axis") print("2) Press 'K' to lock screen and to switch to selection mode") print("3) Drag for rectangle selection,") print(" or use ctrl + left click for polygon selection") print("4) Press 'C' to get a selected geometry and to save it") print("5) Press 'F' to switch to freeview mode") pcd_data = o3d.data.DemoICPPointClouds() pcd = o3d.io.read_point_cloud(pcd_data.paths[0]) o3d.visualization.draw_geometries_with_editing([pcd])- 1
- 2
- 3
- 4
- 5
- 6
- 7
- 8
- 9
- 10
- 11
首先,预定义一个创建一个PoitnCloud实例对象。
其次,调用o3d.visualization.draw_geometries_with_editing方法处理PointCloud对象。按照上述函数print得到的指令进行几何体的裁剪。
裁剪小技巧:选择区域的实际步骤是使用正交投影模型将几何图形与任意轴对齐。 这个技巧使选择更容易,因为它避免了由于透视投影而引起的自遮挡麻烦。
2. 手动选择点云坐标用于P2PICP算法点云配准def pick_points(pcd): print("") print("1) Please pick at least three correspondences using [shift + left click]") print(" Press [shift + right click] to undo point picking") print("2) After picking points, press 'Q' to close the window") vis = o3d.visualization.VisualizerWithEditing() vis.create_window() vis.add_geometry(pcd) vis.run() # user picks points vis.destroy_window() print("") return vis.get_picked_points()- 1
- 2
- 3
- 4
- 5
- 6
- 7
- 8
- 9
- 10
- 11
- 12
该段代码与
补充1:获取点云坐标内容相似。def draw_registration_result(source, target, transformation): source_temp = copy.deepcopy(source) target_temp = copy.deepcopy(target) source_temp.paint_uniform_color([1, 0.706, 0]) target_temp.paint_uniform_color([0, 0.651, 0.929]) source_temp.transform(transformation) o3d.visualization.draw_geometries([source_temp, target_temp])- 1
- 2
- 3
- 4
- 5
- 6
- 7
该段代码会根据两段点云的转换矩阵进行配准。需要注意的是,如果转换矩阵是一个4 x 4的单位矩阵,那么点云坐标将不会发生任何变换。
print("Demo for manual ICP") pcd_data = o3d.data.DemoICPPointClouds() source = o3d.io.read_point_cloud(pcd_data.paths[0]) target = o3d.io.read_point_cloud(pcd_data.paths[2]) print("Visualization of two point clouds before manual alignment") draw_registration_result(source, target, np.identity(4)) # pick points from two point clouds and builds correspondences picked_id_source = pick_points(source) picked_id_target = pick_points(target) assert (len(picked_id_source) >= 3 and len(picked_id_target) >= 3) assert (len(picked_id_source) == len(picked_id_target)) corr = np.zeros((len(picked_id_source), 2)) corr[:, 0] = picked_id_source corr[:, 1] = picked_id_target # estimate rough transformation using correspondences print("Compute a rough transform using the correspondences given by user") p2p = o3d.pipelines.registration.TransformationEstimationPointToPoint() trans_init = p2p.compute_transformation(source, target, o3d.utility.Vector2iVector(corr)) # point-to-point ICP for refinement print("Perform point-to-point ICP refinement") threshold = 0.03 # 3cm distance threshold reg_p2p = o3d.pipelines.registration.registration_icp( source, target, threshold, trans_init, o3d.pipelines.registration.TransformationEstimationPointToPoint()) draw_registration_result(source, target, reg_p2p.transformation) print("")- 1
- 2
- 3
- 4
- 5
- 6
- 7
- 8
- 9
- 10
- 11
- 12
- 13
- 14
- 15
- 16
- 17
- 18
- 19
- 20
- 21
- 22
- 23
- 24
- 25
- 26
- 27
- 28
- 29
- 30
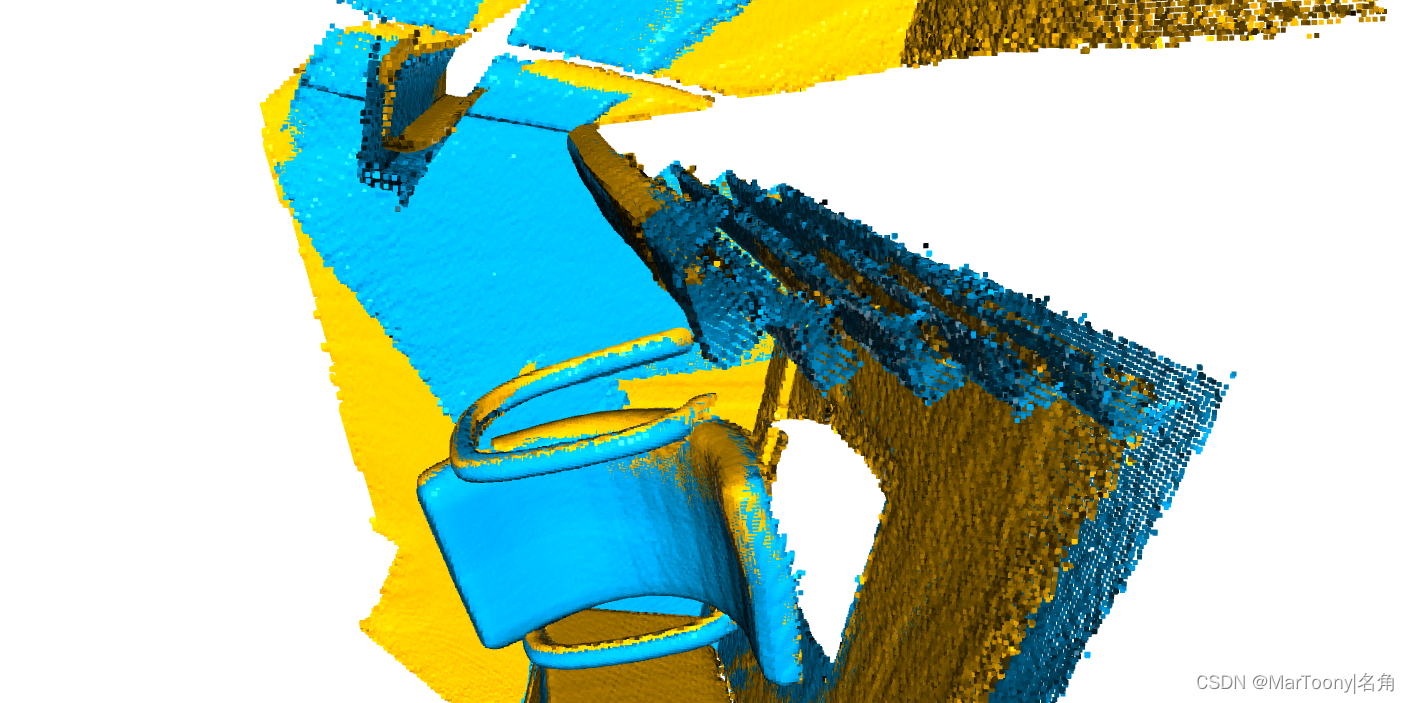
该段代码是实现点到点ICP算法点云配准的主函数。
-
首先,获取两个PointCloud对象,显示两段点云数据的相对位置;
-
其次,为计算转换矩阵,需要将预先获取每段点云中处于相同位置的多个点的坐标。
这里使用的是o3d.pipelines.registration.TransformationEstimationPointToPoint类,调用其compute_transformation方法,实现对转换矩阵的粗略估计。
-
最后,基于粗略估计得到转换矩阵、PointToPoint类以及阈值threshold,使用ICP算法微调转换矩阵。
需要注意,要获得良好的配准结果,请尝试选择场景中分布良好的三个以上的点。 在拐角区域使用顶点是轻松选择正确对应关系的好方法。同时尽量保证顺序一致(文档未说这一点,但是感觉应该需要注意)

补充3:自定义可视化
- Visualizer类可以实现对
draw_geometries()方法所有功能的模拟。 - 获取 可视化器中显示的点云数据的FOV视野角度。其中,
change_field_of_view方法中参数step每增加0.45,FOV就会增加2.25度。
pcd = o3d.io.read_point_cloud('/home/cold/PycharmProjects/scenceReconstruct/combine4.pcd') vis = o3d.visualization.Visualizer() vis.create_window() vis.add_geometry(pcd) ctr = vis.get_view_control() print("Field of view (before changing) %.2f" % ctr.get_field_of_view()) ctr.change_field_of_view(step=13.3) print("Field of view (after changing) %.2f" % ctr.get_field_of_view()) vis.run() vis.destroy_window()- 1
- 2
- 3
- 4
- 5
- 6
- 7
- 8
- 9
- 10
事实上,视角更改后,呈现出的效果并没有什么变化,并不清楚改变FOV的目的是什么?
3. 点云数据持续旋转。def custom_draw_geometry_with_rotation(pcd): def rotate_view(vis): ctr = vis.get_view_control() ctr.rotate(10.0, 0.0) return False o3d.visualization.draw_geometries_with_animation_callback([pcd], rotate_view) pcd_flipped = o3d.io.read_point_cloud('/home/cold/PycharmProjects/scenceReconstruct/source/Money3.pcd') R = pcd_flipped.get_rotation_matrix_from_xyz([- np.pi / 2, 0, np.pi / 2]) pcd_flipped.rotate(R, center=(0, 0, 0)) custom_draw_geometry_with_rotation(pcd_flipped)- 1
- 2
- 3
- 4
- 5
- 6
- 7
- 8
- 9
- 10
- 11
需要注意的是,回调函数中的
rotate函数的参数意义:第一个参数为点云数据以屏幕的水平方向上旋转的速度(以屏幕垂直方向为轴);第二个参数为点云数据以屏幕的垂直方向上旋转的速度(以屏幕水平方向为轴)。
4. 自定义可视化窗口下的Key事件。def custom_draw_geometry_with_key_callback(pcd): def change_background_to_black(vis): opt = vis.get_render_option() opt.background_color = np.asarray([0, 0, 0]) return False def load_render_option(vis): vis.get_render_option().load_from_json( os.path.join(test_data_path, 'renderoption.json')) return False def capture_depth(vis): depth = vis.capture_depth_float_buffer() plt.imshow(np.asarray(depth)) plt.show() return False def capture_image(vis): image = vis.capture_screen_float_buffer() plt.imshow(np.asarray(image)) plt.show() return False key_to_callback = {} key_to_callback[ord("K")] = change_background_to_black key_to_callback[ord("R")] = load_render_option key_to_callback[ord(",")] = capture_depth key_to_callback[ord(".")] = capture_image o3d.visualization.draw_geometries_with_key_callbacks([pcd], key_to_callback)- 1
- 2
- 3
- 4
- 5
- 6
- 7
- 8
- 9
- 10
- 11
- 12
- 13
- 14
- 15
- 16
- 17
- 18
- 19
- 20
- 21
- 22
- 23
- 24
- 25
- 26
- 27
- 28
- 29
- 30
这里仅关注
change_background_to_black函数。其他函数暂无需求。补充4: 点云旋转
仅仅介绍
get_rotation_matrix_from_xyz方法。get_rotation_matrix_from_xyz它接受一个三维向量,三个元素依次对应XYZ三个轴。- Open3D的可视化窗口显示的点云的初始位姿:z轴向屏幕;x轴向右;y轴向上。如果想要实现正常的视角(z轴向上;x轴向内;y轴向左),三维向量参数应该为[ -np.pi / 2, 0, np.pi / 2 ],表示位姿以X轴逆向旋转90度后,在以Z轴正向旋转90度。需要注意的是,右手四指向掌内,大拇指上指,大拇指方向为轴正向,四指的方向为该轴的正向。通过这种方式判断轴的旋转正方向。
- 如果
get_rotation_matrix_from_axis_angle接受的向量是[ -np.pi / 2, 0, np.pi / 2 ],则效果达不到get_rotation_matrix_from_xyz的效果。目前不清楚为什么。 - 参考文章Open3d学习计划(3)变换,使用
o3d.geometry.TriangleMesh.create_coordinate_frame()方法,测试各种旋转方法的使用。

补充5:Open3D可视化窗口的指令/事件
- 参考附录B以及链接。
- 当前窗口下保存视角。
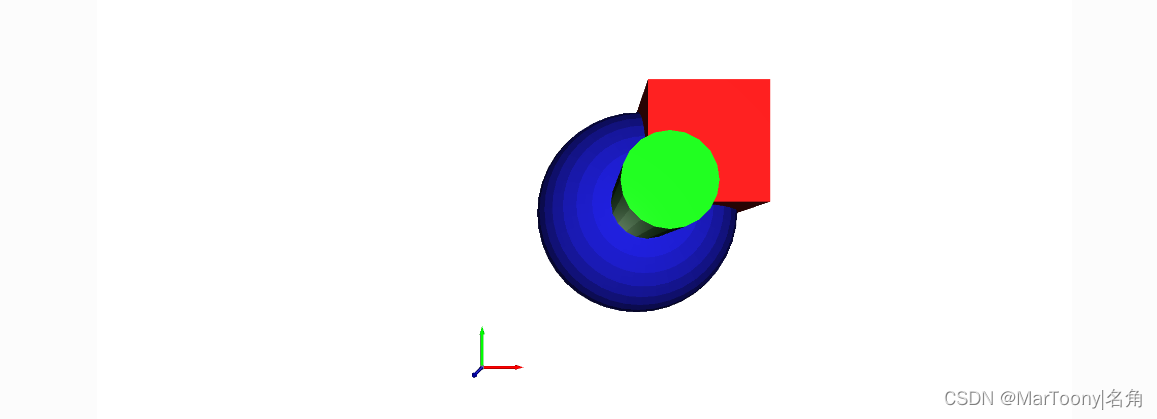
Ctrl+C保存当前视角,当移动点云到不同的视角,按Ctrl+V可以归位。 - 创建几何实体(球、方块以及圆柱体)
print("Let's define some primitives") mesh_box = o3d.geometry.TriangleMesh.create_box(width=1.0, height=1.0, depth=1.0) mesh_box.compute_vertex_normals() mesh_box.paint_uniform_color([0.9, 0.1, 0.1]) mesh_sphere = o3d.geometry.TriangleMesh.create_sphere(radius=1.0) mesh_sphere.compute_vertex_normals() mesh_sphere.paint_uniform_color([0.1, 0.1, 0.7]) mesh_cylinder = o3d.geometry.TriangleMesh.create_cylinder(radius=0.3, height=4.0) mesh_cylinder.compute_vertex_normals() mesh_cylinder.paint_uniform_color([0.1, 0.9, 0.1]) mesh_frame = o3d.geometry.TriangleMesh.create_coordinate_frame( size=0.6, origin=[-2, -2, -2]) print("We draw a few primitives using collection.") o3d.visualization.draw_geometries( [mesh_box, mesh_sphere, mesh_cylinder, mesh_frame]) print("We draw a few primitives using + operator of mesh.") o3d.visualization.draw_geometries( [mesh_box + mesh_sphere + mesh_cylinder + mesh_frame])- 1
- 2
- 3
- 4
- 5
- 6
- 7
- 8
- 9
- 10
- 11
- 12
- 13
- 14
- 15
- 16
- 17
- 18
- 19
- 20
- 21
- 22
- 23
这里需要注意的是,
draw_geometries内部的多个点云/mesh可以以列表的形式一起显示,也支持通过+号将多个点云合并成一个整体后再显示。
4. 画线集print("Let's draw a box using o3d.geometry.LineSet.") points = [ [0, 0, 0], [1, 0, 0], [0, 1, 0], [1, 1, 0], [0, 0, 1], [1, 0, 1], [0, 1, 1], [1, 1, 1], ] lines = [ [0, 1], [0, 2], [1, 3], [2, 3], [4, 5], [4, 6], [5, 7], [6, 7], [0, 4], [1, 5], [2, 6], [3, 7], ] colors = [[1, 0, 0] for i in range(len(lines))] line_set = o3d.geometry.LineSet( points=o3d.utility.Vector3dVector(points), lines=o3d.utility.Vector2iVector(lines), ) line_set.colors = o3d.utility.Vector3dVector(colors) o3d.visualization.draw_geometries([line_set], zoom=0.8)- 1
- 2
- 3
- 4
- 5
- 6
- 7
- 8
- 9
- 10
- 11
- 12
- 13
- 14
- 15
- 16
- 17
- 18
- 19
- 20
- 21
- 22
- 23
- 24
- 25
- 26
- 27
- 28
- 29
- 30
- 31
- 32

6 为点云上色
chair.paint_uniform_color([1, 0.706, 0]),该函数将为所有的点喷上统一的颜色,三维向量代表RGB值,范围在01之间。
7 点云测距
- 点云测距的官方描述为:
compute_point_cloud_distance方法计算源点云中每个点距离目标点云中最近点的距离(距离的数目对应源点云的数目)。但是它的作用却不简单,它使用计算得到的距离,可以做一些有意思的事情。 - 示例:源点云中裁剪出一块立体点云,但是裁剪并不精确,使得被裁剪的几何体在源点云中仍有所残留。如果一点点对源点云中残留的点进行裁剪可能会比较麻烦,为了更快地处理,可以首先计算被裁减后的点云距离裁剪几何体点云的距离,然后设定阈值,规定源点云中距离小于设定阈值的点被省略,最后,将大于阈值的点保留即为干净的裁剪后的点云。
(1) 原图

(2)阈值等于0.01;
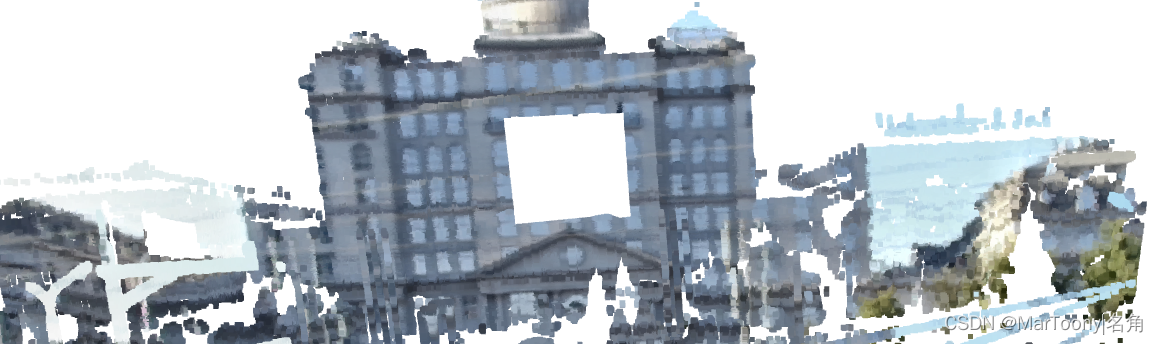
(3) 阈值为1时。

代码如下:
import open3d as o3d import numpy as np pcd = o3d.io.read_point_cloud('/home/cold/PycharmProjects/scenceReconstruct/source/Money3.pcd') # 获取到money_crop.ply点云文件。 o3d.visualization.draw_geometries_with_editing([pcd]) pcd = o3d.io.read_point_cloud('/home/cold/PycharmProjects/scenceReconstruct/source/Money3.pcd') crop = o3d.io.read_point_cloud('/home/cold/PycharmProjects/scenceReconstruct/source/money_crop.ply') dists = pcd.compute_point_cloud_distance(crop) dists = np.asarray(dists) ind = np.where(dists > 0.01)[0] pcd_without_crop = pcd.select_by_index(ind) o3d.visualization.draw_geometries([pcd_without_crop], zoom=0.3412, front=[0.4257, -0.2125, -0.8795], lookat=[2.6172, 2.0475, 1.532], up=[-0.0694, -0.9768, 0.2024])- 1
- 2
- 3
- 4
- 5
- 6
- 7
- 8
- 9
- 10
- 11
- 12
- 13
- 14
- 15
- 16
- 17
- 18
- 19
8 边界容器
- PointCloud对象通过调用边界框计算函数可以计算几何体的边界框。
- 示例如下所示:
pcd = o3d.io.read_point_cloud('/home/cold/PycharmProjects/scenceReconstruct/source/Money3.pcd') aabb = pcd.get_axis_aligned_bounding_box() aabb.color = (1, 0, 0) obb = pcd.get_oriented_bounding_box() obb.color = (0, 1, 0) o3d.visualization.draw_geometries([pcd, aabb, obb], zoom=0.7, front=[0.5439, -0.2333, -0.8060], lookat=[2.4615, 2.1331, 1.338], up=[-0.1781, -0.9708, 0.1608])- 1
- 2
- 3
- 4
- 5
- 6
- 7
- 8
- 9
- 10
- 11

9 凸包Convex hull
- 点云的凸包是包含点云所有点的最小凸集。Open3D 包含compute_convex_hull方法计算点云凸包。
- 示例如下:
代码:
# 1 从pointcloud对象中构建凸包 pcd = o3d.io.read_point_cloud('/home/cold/PycharmProjects/scenceReconstruct/source/Money3.pcd') hull, _ = pcd.compute_convex_hull() hull_ls = o3d.geometry.LineSet.create_from_triangle_mesh(hull) hull_ls.paint_uniform_color((1, 0, 0)) o3d.visualization.draw_geometries([pcd, hull_ls]) # 2 从mesh中构建凸包 bunny = o3d.data.BunnyMesh() mesh = o3d.io.read_triangle_mesh(bunny.path) mesh.compute_vertex_normals() pcl = mesh.sample_points_poisson_disk(number_of_points=2000) hull, _ = pcl.compute_convex_hull() hull_ls = o3d.geometry.LineSet.create_from_triangle_mesh(hull) hull_ls.paint_uniform_color((1, 0, 0)) o3d.visualization.draw_geometries([pcl, hull_ls])- 1
- 2
- 3
- 4
- 5
- 6
- 7
- 8
- 9
- 10
- 11
- 12
- 13
- 14
- 15
- 16

10 DBSCAN聚类
- DBSCAN聚类,用于将点云中的局部集群分组。它是一种基于密度的聚类算法。该算法的两个重要参数是:
- eps,定义为两个样本之间的最大距离,其中一个样本被视为另一个样本的邻域。这不是簇内点距离的最大界限。这是为数据集和距离函数选择的最重要的DBSCAN参数。
- min_points,定义为形成集群所需的最小点数。
- 函数返回labels,其中标签-1表示噪声。
- 示例如下:(如果eps设置为2,程序会预先计算半径为2内的所有邻居,计算量会非常巨大,同时很容易自动结束。)
pcd = o3d.io.read_point_cloud('/home/cold/PycharmProjects/scenceReconstruct/source/Money3.pcd') with o3d.utility.VerbosityContextManager( o3d.utility.VerbosityLevel.Debug) as cm: labels = np.array(pcd.cluster_dbscan(eps=1, min_points=10, print_progress=True)) max_label = labels.max() print(f"point cloud has {max_label + 1} clusters") colors = plt.get_cmap("tab20")(labels / (max_label if max_label > 0 else 1)) colors[labels < 0] = 0 pcd.colors = o3d.utility.Vector3dVector(colors[:, :3]) o3d.visualization.draw_geometries([pcd], zoom=0.455, front=[-0.4999, -0.1659, -0.8499], lookat=[2.1813, 2.0619, 2.0999], up=[0.1204, -0.9852, 0.1215])- 1
- 2
- 3
- 4
- 5
- 6
- 7
- 8
- 9
- 10
- 11
- 12
- 13
- 14
- 15

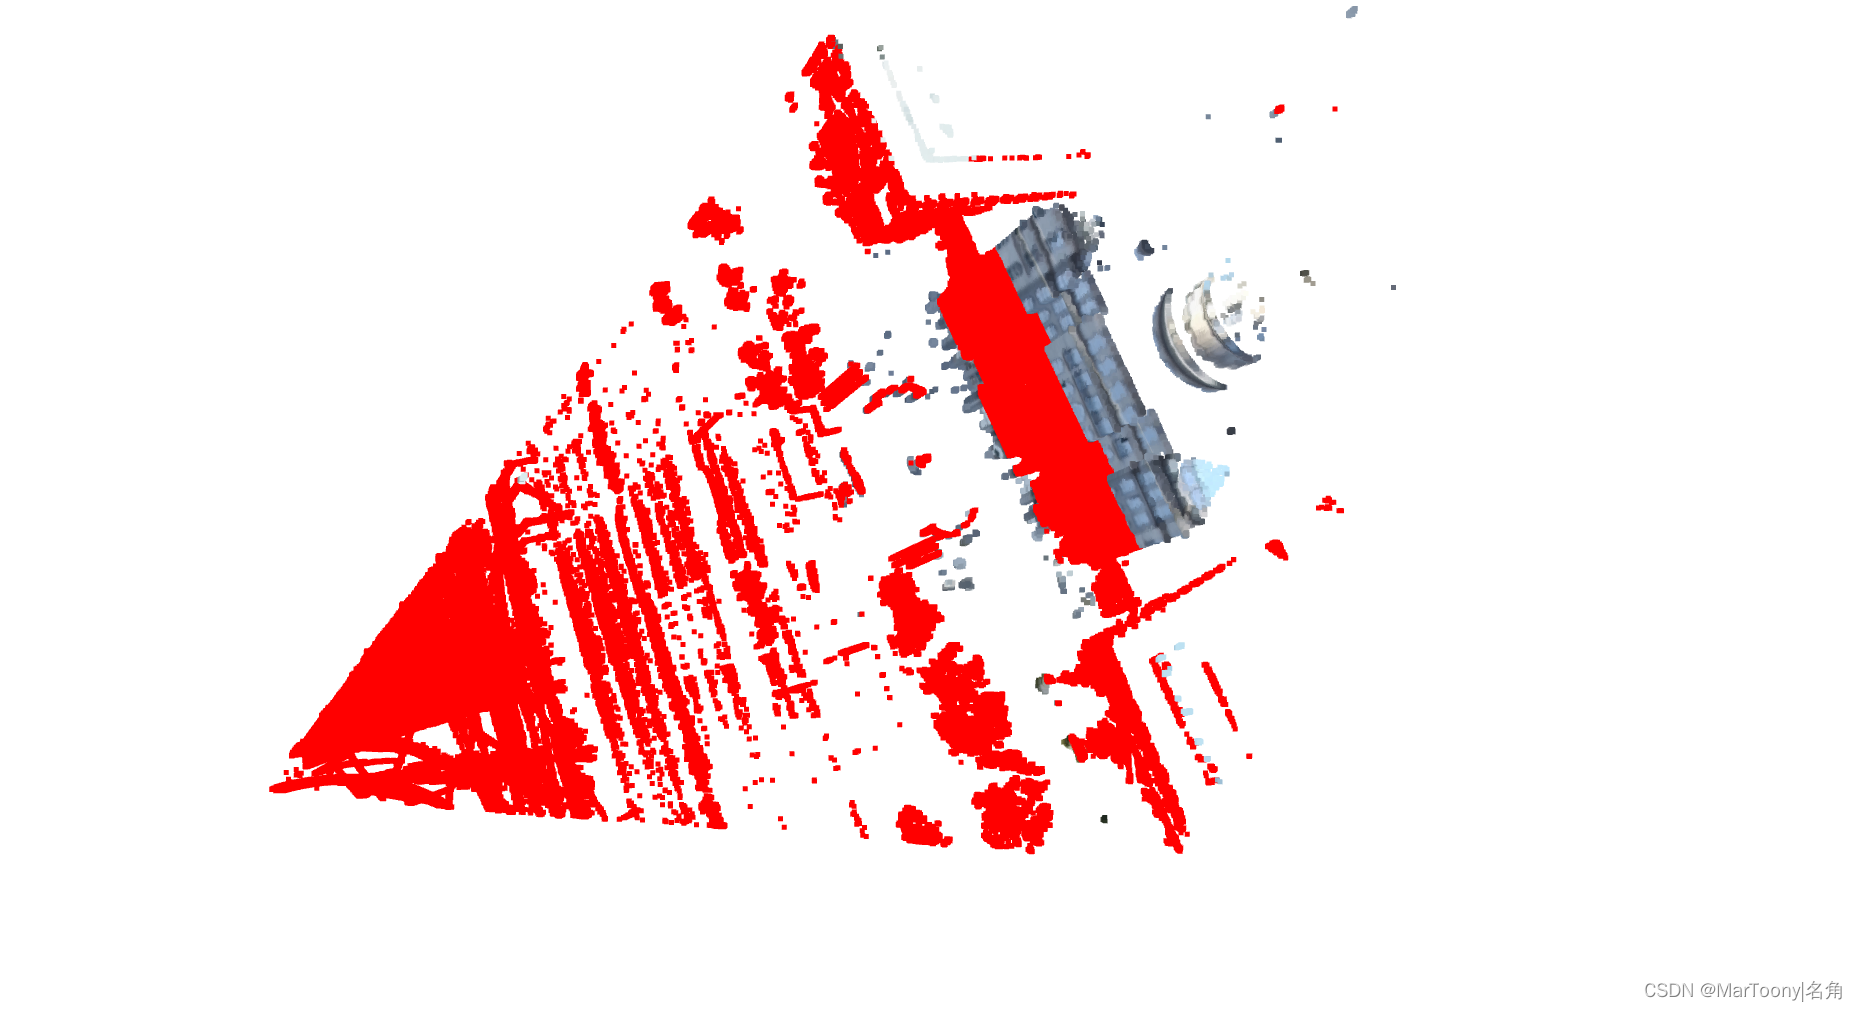
11 平面分割
- Open3D支持使用RANSAC从PointCloud对象中分割出几何实体。为了找到具备最大支持度的平面,我们可以使用
segment_plane。该函数需要三个参数:
- distance_threshold:它定义了一个被认为是被估计平面内的点到该平面的最大距离。
- ransac_n:它定义了用于估计一个平面的点数。其中用于估计的点是通过随机采样得到的。
- num_iterations:它被定义为多久对一个随机的平面进行采样以及评估验证。
- 示例如下:
pcd = o3d.io.read_point_cloud('/home/cold/PycharmProjects/scenceReconstruct/source/Money3.pcd') plane_model, inliers = pcd.segment_plane(distance_threshold=10, ransac_n=100, num_iterations=1000) [a, b, c, d] = plane_model print(f"Plane equation: {a:.2f}x + {b:.2f}y + {c:.2f}z + {d:.2f} = 0") inlier_cloud = pcd.select_by_index(inliers) inlier_cloud.paint_uniform_color([1.0, 0, 0]) outlier_cloud = pcd.select_by_index(inliers, invert=True) o3d.visualization.draw_geometries([inlier_cloud, outlier_cloud], zoom=0.8, front=[-0.4999, -0.1659, -0.8499], lookat=[2.1813, 2.0619, 2.0999], up=[0.1204, -0.9852, 0.1215])- 1
- 2
- 3
- 4
- 5
- 6
- 7
- 8
- 9
- 10
- 11
- 12
- 13
- 14
- 15
- 16
12 隐藏点消除
hidden_point_removal函数的作用是:Removes hidden points from a point cloud and returns a mesh of the remaining points.其中参数的意思是:
- camera_location:所有在该位置不可见的点将被移除。
- radius:The radius of the sperical projection(特殊投影的半径)。
- 示例如下:
radius = diameter * 10000中的10000是一个比较重要的参数。
pcd = o3d.io.read_point_cloud('/home/cold/PycharmProjects/scenceReconstruct/source/Money3.pcd') R = pcd.get_rotation_matrix_from_xyz([- np.pi / 2, 0, np.pi / 2]) pcd.rotate(R, center=(0, 0, 0)) pcd.voxel_down_sample(voxel_size=0.05) diameter = np.linalg.norm(np.asarray(pcd.get_max_bound()) - np.asarray(pcd.get_min_bound())) o3d.visualization.draw_geometries([pcd]) print("Define parameters used for hidden_point_removal") camera = [0, 0, diameter] radius = diameter * 10000 print("Get all points that are visible from given view point") _, pt_map = pcd.hidden_point_removal(camera, radius) print("Visualize result") pcd = pcd.select_by_index(pt_map) o3d.visualization.draw_geometries([pcd])- 1
- 2
- 3
- 4
- 5
- 6
- 7
- 8
- 9
- 10
- 11
- 12
- 13
- 14
- 15
- 16
- 17
- 18
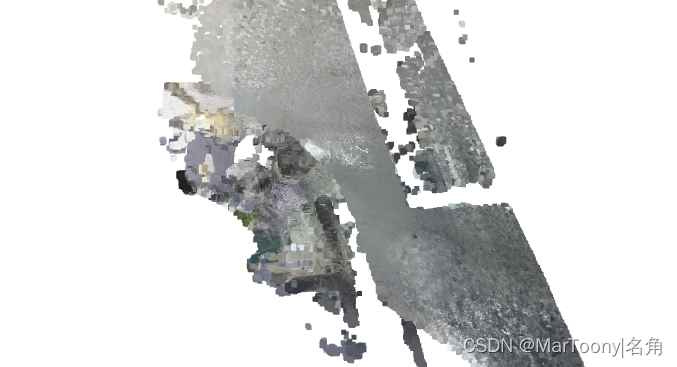
第二部分——Mesh
Open3D有一个用于3D三角形网格的数据结构,成为triangleMesh。它有两个属性:vertices和triangles。与PointCloud对象的points属性一样,可以通过numpy赋值。
import open3d as o3d import numpy as np mesh_path = "/home/cold/PycharmProjects/scenceReconstruct/source/textured_mesh.ply" mesh = o3d.io.read_triangle_mesh(mesh_path) print(mesh) print('Vertices:') print(np.asarray(mesh.vertices)) print('Triangles:') print(np.asarray(mesh.triangles)) ------------------------------------------ TriangleMesh with 484508 points and 955771 triangles. Vertices: [[ 0.313584 -0.48774001 0.32519099] [ 0.30786699 -0.48847201 0.32634401] [ 0.30859101 -0.485688 0.323082 ] ... [ 3.79999304 4.95876598 1.64465201] [ 2.36481094 3.88665009 1.62592602] [ 1.73519003 4.03255796 1.64539099]] Triangles: [[ 2 1 0] [ 5 4 418737] [ 6 7 8] ... [457394 467740 259084] [457394 259084 483183] [283932 465714 288107]]- 1
- 2
- 3
- 4
- 5
- 6
- 7
- 8
- 9
- 10
- 11
- 12
- 13
- 14
- 15
- 16
- 17
- 18
- 19
- 20
- 21
- 22
- 23
- 24
- 25
- 26
- 27
- 28
- 29
1 可视化3DMesh
- 顶点法向量和顶点颜色是mesh中很重要的两个数据,因此判断mesh中有没有是必要的:
mesh.has_vertex_normals()和mesh.has_vertex_colors()。

2 表面法向量估计
- mesh中的顶点或者面增加法向量,看起来会更加立体。
代码:
import open3d as o3d import numpy as np mesh_path = "/home/cold/PycharmProjects/scenceReconstruct/source/textured_mesh.ply" mesh = o3d.io.read_triangle_mesh(mesh_path) print("Computing normal and rendering it.") mesh.compute_vertex_normals() print(np.asarray(mesh.triangle_normals)) o3d.visualization.draw_geometries([mesh])- 1
- 2
- 3
- 4
- 5
- 6
- 7
- 8
- 9
- 10

3 裁剪mesh
- 通过numpy的索引切片功能实现裁剪。
- 示例:
从效果上看其实,并没有同官网的那样切一半就是一半。因为这里使用的ply文件是自己实验室内部生成的数据,采集得到的点是散乱的。
import open3d as o3d import numpy as np import copy mesh_path = "/home/cold/PycharmProjects/scenceReconstruct/source/textured_mesh.ply" mesh = o3d.io.read_triangle_mesh(mesh_path) mesh.compute_vertex_normals() mesh1 = copy.deepcopy(mesh) mesh1.triangles = o3d.utility.Vector3iVector( np.asarray(mesh1.triangles)[:len(mesh1.triangles) // 2, :]) mesh1.triangle_normals = o3d.utility.Vector3dVector( np.asarray(mesh1.triangle_normals)[:len(mesh1.triangle_normals) // 2, :]) print(mesh1.triangles) o3d.visualization.draw_geometries([mesh1])- 1
- 2
- 3
- 4
- 5
- 6
- 7
- 8
- 9
- 10
- 11
- 12
- 13
- 14
- 15
- 16

4 Mesh上色
mesh1.paint_uniform_color([1, 0.706, 0])。

5 Mesh属性
暂时省略。
6 网格过滤
Mesh中同样存在许多噪音(三角形网格),为此Open3D提供了很多的过滤器。
6.1 平均过滤
mesh_path = "/home/cold/PycharmProjects/scenceReconstruct/source/textured_mesh.ply" mesh = o3d.io.read_triangle_mesh(mesh_path) mesh.compute_vertex_normals() o3d.visualization.draw_geometries([mesh]) print('filter with average with 1 iteration') mesh_out = mesh.filter_smooth_simple(number_of_iterations=1) mesh_out.compute_vertex_normals() o3d.visualization.draw_geometries([mesh_out]) print('filter with average with 5 iterations') mesh_out = mesh.filter_smooth_simple(number_of_iterations=5) mesh_out.compute_vertex_normals() o3d.visualization.draw_geometries([mesh_out])- 1
- 2
- 3
- 4
- 5
- 6
- 7
- 8
- 9
- 10
- 11
- 12
- 13
- 14
(1) 原始图

(2)第一次迭代

(3)第五次迭代:墙面平滑了许多,但是不构成平面的地方即使真实存在也会逐渐被过滤,缩小。

6.2 拉普拉斯算子
(1)原始图像

(2)十次迭代效果

(3)五十次迭代效果:墙面没有平均过滤第五次的效果好。

6.3 陶宾过滤器
平均滤波器和拉普拉斯滤波器的问题在于它们会导致三角形网格的收缩。[Taubin1995]表明,两个具有不同的拉普拉斯滤波器的应用λ参数可以防止网格收缩。
(1)十次迭代的效果

(2)一百次迭代效果

(3) 五十次迭代效果


7 采样
附录
a 代码
# examples/python/visualization/interactive_visualization.py import numpy as np import copy import open3d as o3d def demo_crop_geometry(): print("Demo for manual geometry cropping") print( "1) Press 'Y' twice to align geometry with negative direction of y-axis" ) print("2) Press 'K' to lock screen and to switch to selection mode") print("3) Drag for rectangle selection,") print(" or use ctrl + left click for polygon selection") print("4) Press 'C' to get a selected geometry and to save it") print("5) Press 'F' to switch to freeview mode") pcd_data = o3d.data.DemoICPPointClouds() pcd = o3d.io.read_point_cloud(pcd_data.paths[0]) o3d.visualization.draw_geometries_with_editing([pcd]) def draw_registration_result(source, target, transformation): source_temp = copy.deepcopy(source) target_temp = copy.deepcopy(target) source_temp.paint_uniform_color([1, 0.706, 0]) target_temp.paint_uniform_color([0, 0.651, 0.929]) source_temp.transform(transformation) o3d.visualization.draw_geometries([source_temp, target_temp]) def pick_points(pcd): print("") print( "1) Please pick at least three correspondences using [shift + left click]" ) print(" Press [shift + right click] to undo point picking") print("2) After picking points, press 'Q' to close the window") vis = o3d.visualization.VisualizerWithEditing() vis.create_window() vis.add_geometry(pcd) vis.run() # user picks points vis.destroy_window() print("") return vis.get_picked_points() def demo_manual_registration(): print("Demo for manual ICP") pcd_data = o3d.data.DemoICPPointClouds() source = o3d.io.read_point_cloud(pcd_data.paths[0]) target = o3d.io.read_point_cloud(pcd_data.paths[2]) print("Visualization of two point clouds before manual alignment") draw_registration_result(source, target, np.identity(4)) # pick points from two point clouds and builds correspondences picked_id_source = pick_points(source) picked_id_target = pick_points(target) assert (len(picked_id_source) >= 3 and len(picked_id_target) >= 3) assert (len(picked_id_source) == len(picked_id_target)) corr = np.zeros((len(picked_id_source), 2)) corr[:, 0] = picked_id_source corr[:, 1] = picked_id_target # estimate rough transformation using correspondences print("Compute a rough transform using the correspondences given by user") p2p = o3d.pipelines.registration.TransformationEstimationPointToPoint() trans_init = p2p.compute_transformation(source, target, o3d.utility.Vector2iVector(corr)) # point-to-point ICP for refinement print("Perform point-to-point ICP refinement") threshold = 0.03 # 3cm distance threshold reg_p2p = o3d.pipelines.registration.registration_icp( source, target, threshold, trans_init, o3d.pipelines.registration.TransformationEstimationPointToPoint()) draw_registration_result(source, target, reg_p2p.transformation) print("") if __name__ == "__main__": demo_crop_geometry() demo_manual_registration()- 1
- 2
- 3
- 4
- 5
- 6
- 7
- 8
- 9
- 10
- 11
- 12
- 13
- 14
- 15
- 16
- 17
- 18
- 19
- 20
- 21
- 22
- 23
- 24
- 25
- 26
- 27
- 28
- 29
- 30
- 31
- 32
- 33
- 34
- 35
- 36
- 37
- 38
- 39
- 40
- 41
- 42
- 43
- 44
- 45
- 46
- 47
- 48
- 49
- 50
- 51
- 52
- 53
- 54
- 55
- 56
- 57
- 58
- 59
- 60
- 61
- 62
- 63
- 64
- 65
- 66
- 67
- 68
- 69
- 70
- 71
- 72
- 73
- 74
- 75
- 76
- 77
- 78
- 79
- 80
- 81
B 可视化窗口的操作/指令
[Open3D INFO] -- Mouse view control -- [Open3D INFO] Left button + drag : Rotate. [Open3D INFO] Ctrl + left button + drag : Translate. [Open3D INFO] Wheel button + drag : Translate. [Open3D INFO] Shift + left button + drag : Roll. [Open3D INFO] Wheel : Zoom in/out. [Open3D INFO] [Open3D INFO] -- Keyboard view control -- [Open3D INFO] [/] : Increase/decrease field of view. [Open3D INFO] R : Reset view point. [Open3D INFO] Ctrl/Cmd + C : Copy current view status into the clipboard. [Open3D INFO] Ctrl/Cmd + V : Paste view status from clipboard. [Open3D INFO] [Open3D INFO] -- General control -- [Open3D INFO] Q, Esc : Exit window. [Open3D INFO] H : Print help message. [Open3D INFO] P, PrtScn : Take a screen capture. [Open3D INFO] D : Take a depth capture. [Open3D INFO] O : Take a capture of current rendering settings. [Open3D INFO] Alt + Enter : Toggle between full screen and windowed mode. [Open3D INFO] [Open3D INFO] -- Render mode control -- [Open3D INFO] L : Turn on/off lighting. [Open3D INFO] +/- : Increase/decrease point size. [Open3D INFO] Ctrl + +/- : Increase/decrease width of geometry::LineSet. [Open3D INFO] N : Turn on/off point cloud normal rendering. [Open3D INFO] S : Toggle between mesh flat shading and smooth shading. # 在网格平面着色和平滑着色之间切换。 [Open3D INFO] W : Turn on/off mesh wireframe. [Open3D INFO] B : Turn on/off back face rendering. [Open3D INFO] I : Turn on/off image zoom in interpolation. [Open3D INFO] T : Toggle among image render: [Open3D INFO] no stretch / keep ratio / freely stretch. [Open3D INFO] [Open3D INFO] -- Color control -- [Open3D INFO] 0..4,9 : Set point cloud color option. [Open3D INFO] 0 - Default behavior, render point color. [Open3D INFO] 1 - Render point color. [Open3D INFO] 2 - x coordinate as color. [Open3D INFO] 3 - y coordinate as color. [Open3D INFO] 4 - z coordinate as color. [Open3D INFO] 9 - normal as color. [Open3D INFO] Ctrl + 0..4,9: Set mesh color option. [Open3D INFO] 0 - Default behavior, render uniform gray color. [Open3D INFO] 1 - Render point color. [Open3D INFO] 2 - x coordinate as color. [Open3D INFO] 3 - y coordinate as color. [Open3D INFO] 4 - z coordinate as color. [Open3D INFO] 9 - normal as color. [Open3D INFO] Shift + 0..4 : Color map options. [Open3D INFO] 0 - Gray scale color. [Open3D INFO] 1 - JET color map. [Open3D INFO] 2 - SUMMER color map. [Open3D INFO] 3 - WINTER color map. [Open3D INFO] 4 - HOT color map. [Open3D INFO]- 1
- 2
- 3
- 4
- 5
- 6
- 7
- 8
- 9
- 10
- 11
- 12
- 13
- 14
- 15
- 16
- 17
- 18
- 19
- 20
- 21
- 22
- 23
- 24
- 25
- 26
- 27
- 28
- 29
- 30
- 31
- 32
- 33
- 34
- 35
- 36
- 37
- 38
- 39
- 40
- 41
- 42
- 43
- 44
- 45
- 46
- 47
- 48
- 49
- 50
- 51
- 52
- 53
- 54
- 55
-
相关阅读:
FPGA——三速自适应以太网设计(1)基本模块
为Android组件化项目搭建Maven私服
云服务器使用及Linux基本命令
java家政服务平台计算机毕业设计MyBatis+系统+LW文档+源码+调试部署
【编程题】【Scratch四级】2022.09 绘制图形
问道管理:股票空头是什么意思?
网络流量监控工具iftop
【LeetCode-278】第一个错误的版本
「Java核心面试系列」面试竟然连这MySQL面试核心25问,都不会?
Maven版本3.6.1环境配置安装
- 原文地址:https://blog.csdn.net/m0_38052500/article/details/126853059
