-
Linux安装ES最新版
链接:https://pan.baidu.com/s/16SOoN7ZveFu1ly9B2wudoA?pwd=8fm7
-
知识准备
https://blog.csdn.net/tongxin_tongmeng/article/details/126342599 - 下载、解压ES8

- ES8上传Linux

- ES8运行环境(☆☆☆☆☆)
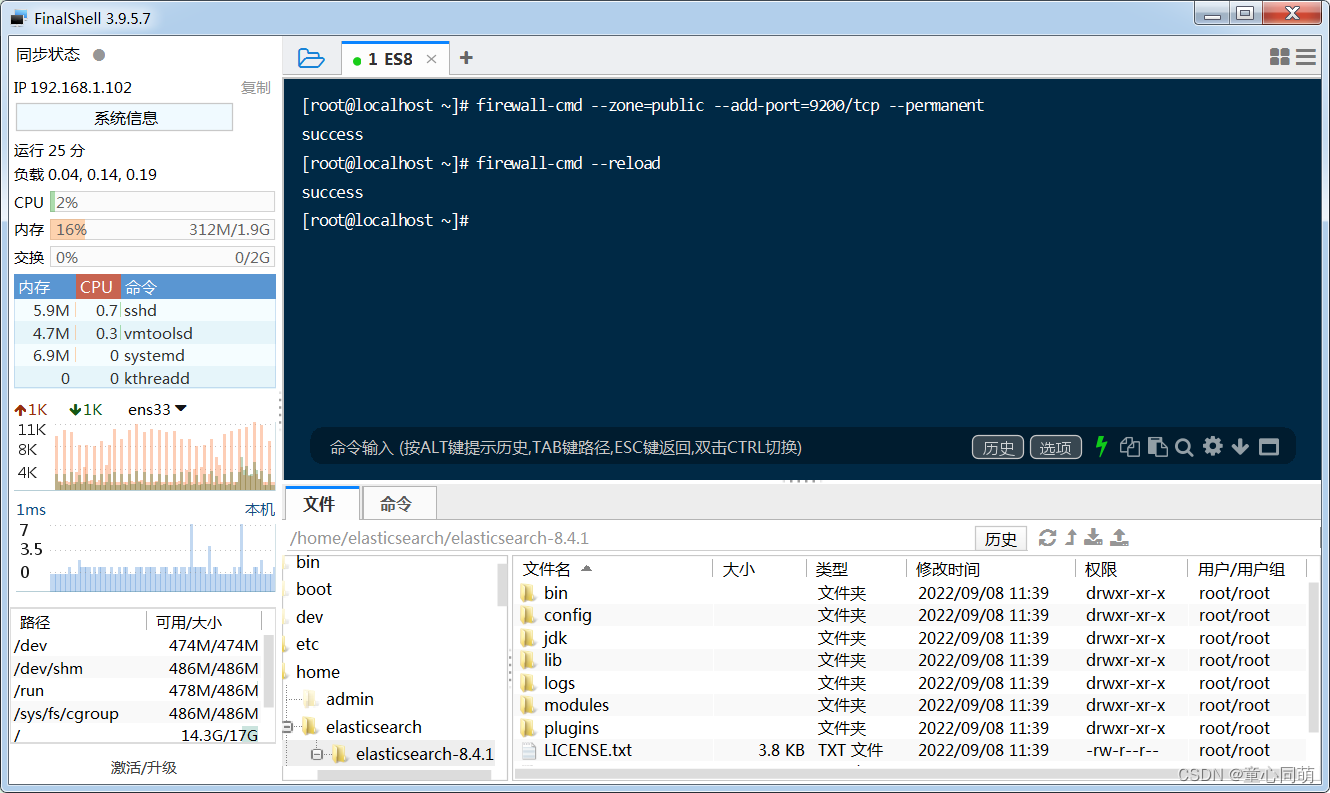
- 1.防火墙打开端口权限
- firewall-cmd --zone=public --add-port=9200/tcp --permanent
- firewall-cmd --reload
- 2.编辑/etc/security/limits.conf
- * soft nofile 65536
- * hard nofile 65536
- 3.编辑/etc/security/limits.d/20-nproc.conf
- * soft nofile 65536
- * hard nofile 65536
- * hard nproc 4096
- 4.编辑/etc/sysctl.conf
- vm.max_map_count=655360
- 重新加载:sysctl -p
- 注意:重启虚拟机确保修改生效


- ES8环境变量
- 编辑/etc/profile添加elasticsearch环境变量
- export ES_HOME=/home/elasticsearch/elasticsearch-8.4.1
- export ES_JAVA_HOME=/home/elasticsearch/elasticsearch-8.4.1/jdk
- export PATH=$PATH:$ES_HOME/bin/
- 环境变量立刻生效:source /etc/profile
- 判断环境变量生效:elasticsearch -d


- 创建新用户
- 添加用户:useradd es8
- 设置密码:passwd es8
- 用户授权:chown -R es8:es8 /home/elasticsearch
- 切换用户:su es8

- ES服务启动、查看、关闭
- 启动ES服务:elasticsearch -d
- 查看ES服务:ps -ef | grep -i elasticsearch
- 关闭ES服务:kill -9 进程号


- ES服务访问

- ES8关闭密码认证
- 编辑/home/elasticsearch/elasticsearch-8.4.1/config/elasticsearch.yml
- xpack.security.enabled: false
- xpack.security.enrollment.enabled: false
- xpack.security.http.ssl:
- enabled: false
- keystore.path: certs/http.p12


-
-
相关阅读:
基于自编译的onlyoffice镜像,关于修改字体的问题
SQL——游标
本地备份和还原 SQL Server 数据库
C++Builder:定时器Timer控件
qt响应全局热键
Delphi IdTcpServer IdTcpClient 传输简单文本
参数优化文档介绍
攻防演习防御体系构建之第三篇之建立实战化的安全体系
查看、关闭端口命令
加速汽车行业转型,云计算到底扮演了什么角色?
- 原文地址:https://blog.csdn.net/tongxin_tongmeng/article/details/126752683