-
Spring 核心与设计思想 以及 创建和使用
Spring 是什么
Spring 是指 SpringFramework,就是 Spring 框架,可以让 Java企业级 的应用程序开发起来更简单。有一句话概括起来就是:Spring 是包含了众多工具方法的 IoC 容器。容器就是容纳某种物品的装置。像 List/Map 就是数据存储的容器。Tomcat 就是 web容器。
什么是 IoC
IoC 就是 Inversion of Control ,就是 “控制反转” 。控制反转 是两个词:控制+反转。指的是:之前程序的控制权限是在我们自己手上,现在,我们把这个控制权交出去了。
- 一般情况下,我们在 A 类 中,想去调用 B 类中的方法,要去 new B 类对象,通过 对象 去调用 B类中的方法。当前 B 的控制权,是我们手上的。
- 而 控制反转,就是将我们手上的权限,交由 “其他人” 来操作这个类。这个“其他人”,就是 Spring 框架。
- 此时,我们想要 A 类中调用 B 的时候, 告诉 框架,我要在 A 中 调用 B 了。至于 B 的生命周期,和我们没有任何关系。
- 因为我们把控制权 “反转给了” Spring 框架。Spring 会帮我们管理所有的对象(Bean)。
IoC 与 传统开发的区别
传统开发
比如说要构造一辆车,传统方法是从车身开始构造,如下图:
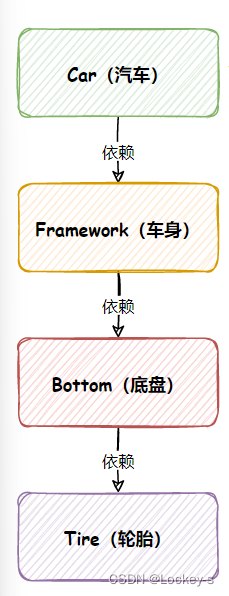
就是需要先构造车身,然后车身又需要底盘,然后底盘有需要轮胎,这样一套走完之后,一辆车才算是构造完成.- 但是一个业务程序,它整个的调用链是非常 “长” 的。在实际开发中,这种场景是非常非常常见的。
- 因为实际开发的时候,每一个业务,都会有这么长的调用链。因为实际开发的时候,业务代码是需要分层的。
- 分层分为:控制层,服务层,数据持久层,然后是数据库。
- 然后所有的接口在执行的时候,所有接口接收到 请求,都优先发送到 控制层。控制层对数据校验之后,才会轮到后面的 业务层 进行处理。
代码示例如下:
public class NewCar { public static void main(String[] args) { Car car = new Car(); car.init(); } /** * 汽车对象 */ static class Car { public void init() { // 依赖车身 Framework framework = new Framework(); framework.init(); } } /** * 车身类 */ static class Framework { public void init() { // 依赖底盘 Bottom bottom = new Bottom(); bottom.init(); } } /** * 底盘类 */ static class Bottom { public void init() { // 依赖轮胎 Tire tire = new Tire(); tire.init(); } } /** * 轮胎类 */ static class Tire { // 尺寸 private int size = 30; public void init() { System.out.println("轮胎尺寸:" + size); } } }- 1
- 2
- 3
- 4
- 5
- 6
- 7
- 8
- 9
- 10
- 11
- 12
- 13
- 14
- 15
- 16
- 17
- 18
- 19
- 20
- 21
- 22
- 23
- 24
- 25
- 26
- 27
- 28
- 29
- 30
- 31
- 32
- 33
- 34
- 35
- 36
- 37
- 38
- 39
- 40
- 41
- 42
- 43
- 44
- 45
- 46
- 47
- 48
运行结果如下:

但是上面这样的代码的耦合性会很高。假如不同的用户,对车子轮胎的大小有不同的要求,那么就需要去修改轮胎尺寸,就是通过用户输入去改变参数,但是会影响整个业务的调用链:
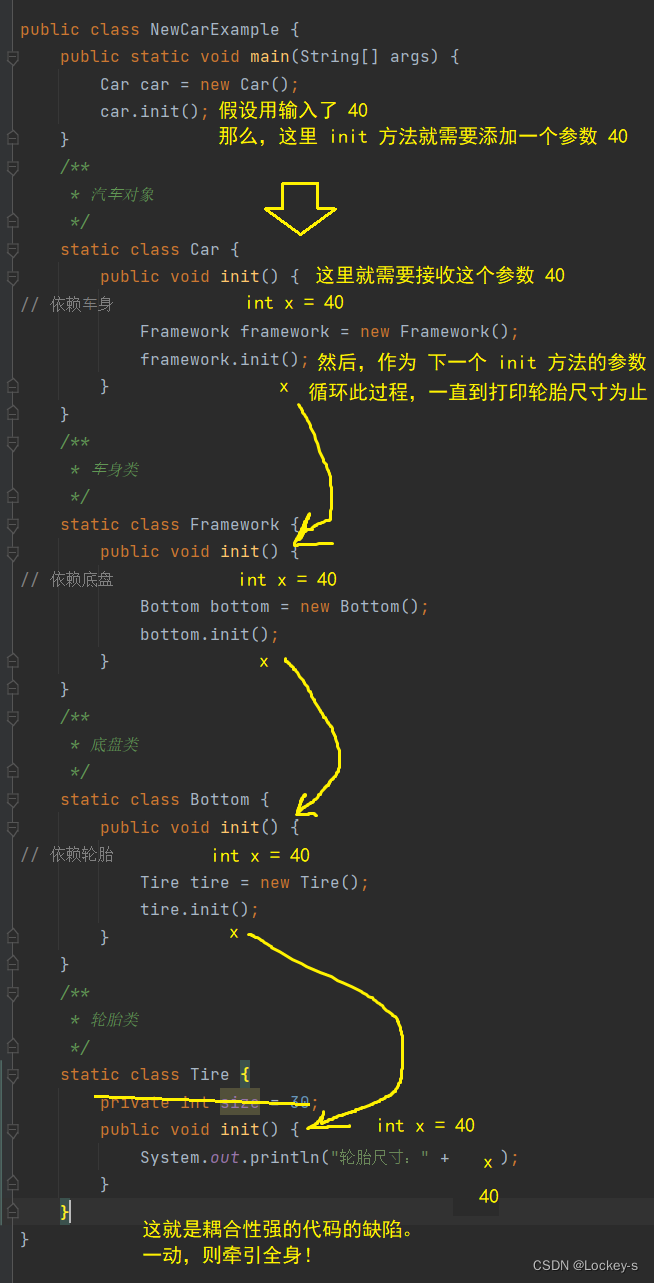
如果要增加一个轮胎颜色,那么改了 轮胎的参数之后,上面的调用类,也得继续修改对轮胎的调用类。也就是说,如果想要添加一个功能,全部程序就需要修改。这就是传统开发的弊端。
使用 IoC 控制反转
控制反转之后,就是把 关于对象的创建 的权限交给 Spring:
- 我们就不关注什么时候去 new 对象了,也不需要关注 调用方法 能不能接收多个参数。
- 直接告诉 IoC 容器,我们需要使用这个类,然后,容器把这个类给你,就可以直接使用了。
- 所有只需要将原来自己创建的下积累,改为传递的方式(也就是注入的方式)。就可以很好的解耦合了。
代码示例如下:
public class NewCar { public static void main(String[] args) { Tire tire = new Tire(50, "红色"); Bottom bottom = new Bottom(tire); Framework framework = new Framework(bottom); Car car = new Car(framework); car.run(); } static class Car { private Framework framework; public Car(Framework framework) { this.framework = framework; } public void run() { framework.init(); } } static class Framework { private Bottom bottom; public Framework(Bottom bottom) { this.bottom = bottom; } public void init() { bottom.init(); } } static class Bottom { private Tire tire; public Bottom(Tire tire) { this.tire = tire; } public void init() { tire.init(); } } static class Tire { private int size; private String color; public Tire(int size, String color) { this.size = size; this.color = color; } public void init() { System.out.println("轮胎:" + size + " | 颜色:" + color); } } }- 1
- 2
- 3
- 4
- 5
- 6
- 7
- 8
- 9
- 10
- 11
- 12
- 13
- 14
- 15
- 16
- 17
- 18
- 19
- 20
- 21
- 22
- 23
- 24
- 25
- 26
- 27
- 28
- 29
- 30
- 31
- 32
- 33
- 34
- 35
- 36
- 37
- 38
- 39
- 40
- 41
- 42
- 43
- 44
- 45
- 46
- 47
- 48
- 49
- 50
- 51
- 52
- 53
- 54
- 55
- 56
- 57
- 58
- 59
- 60
这样的话,如果要增加功能的话,就只需要对相应的类进行修改就可以了,就极大程度解耦合了。而且 对象 的生命周期就交给 IoC 来维护了。就像自己去餐厅吃饭,只管吃就行,就不用像自己做饭,买这买那很麻烦。
IoC 的创建流程:
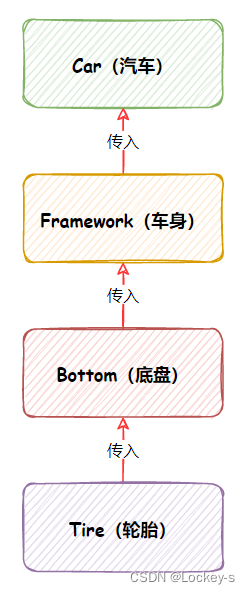
控制权就发生了反转。Spring IoC 容器的核心功能:
- 将 Bean(对象)存储到 Spring(容器)中。
- 将 Bean(对象)从 Spring(容器)中取出来。
IoC 和 DI
DI 是和 IoC 分不开的词,就是 Dependency Injection 的缩写,翻译成中文就是 :依赖注入 的意思。Dependency 和 pom.xml 里面的依赖是一个意思:
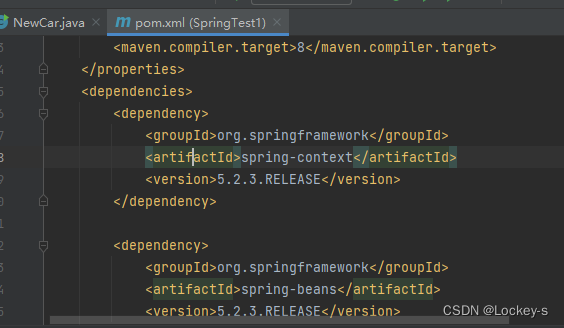
就是在 IoC 容器运行期间,动态的将某种以来关系注入到对象之中。所以,依赖注入(DI)和控制反转(IoC)讲的是一个东西,不过是角度不同罢了。IoC 和 DI 的区别:IoC 是一种思想,DI 是一种实现。就像想要吃好吃的,然后去撸串了。要吃好的就是 IoC,撸串就是 DI。
Spring 创建和使用
创建 Spring 项目
-
先创建一个 maven 项目。
a)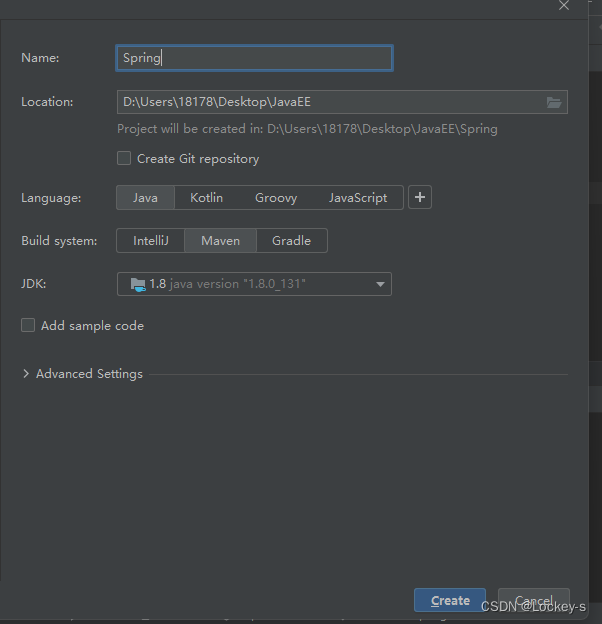
直接 Create 就好了。
b)进来之后,就可以创建 Java 类了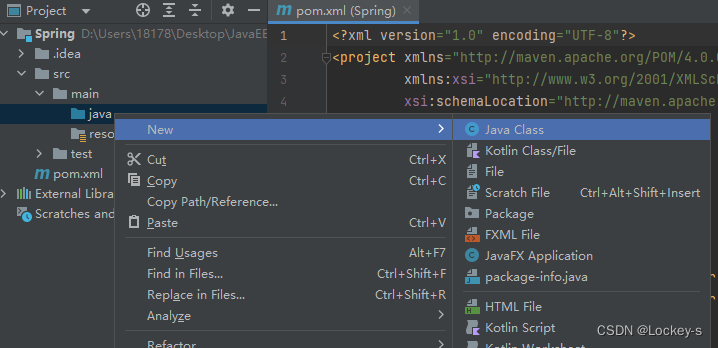
-
添加 Spring 框架支持(spring-context/spring-beans)。
a)在 pom.xml 当作加入依赖:<dependencies> <dependency> <groupId>org.springframework</groupId> <artifactId>spring-context</artifactId> <version>5.2.3.RELEASE</version> </dependency> <dependency> <groupId>org.springframework</groupId> <artifactId>spring-beans</artifactId> <version>5.2.3.RELEASE</version> </dependency> </dependencies>- 1
- 2
- 3
- 4
- 5
- 6
- 7
- 8
- 9
- 10
- 11
- 12
- 13
粘贴完之后,刷新 maven:
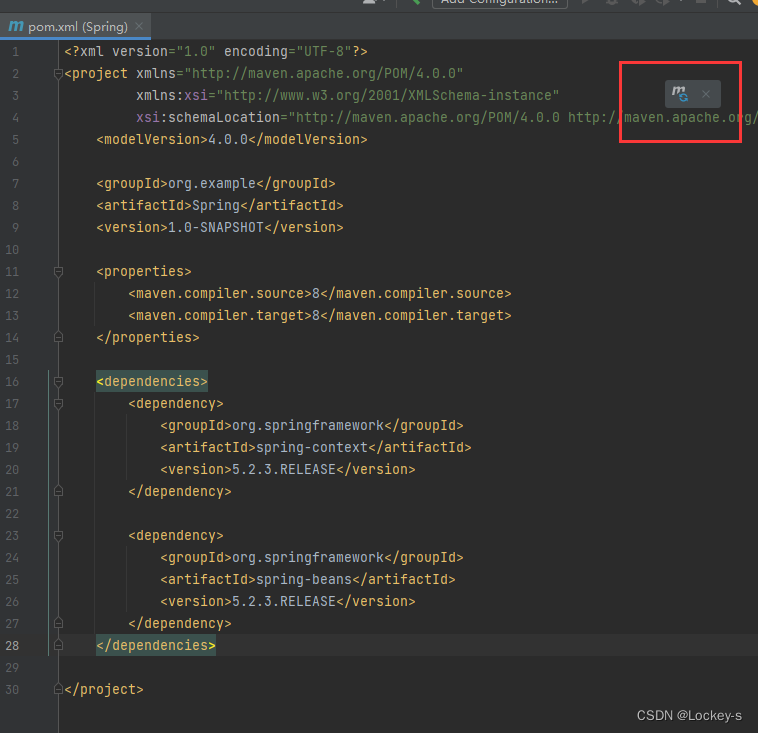
-
创建一个启动类,并且添加 main :
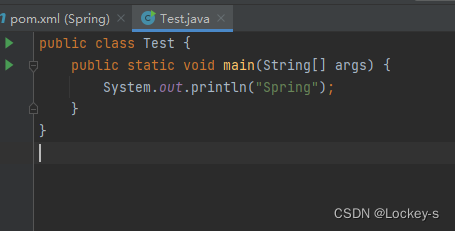
能运行出来,就说明 Spring 项目创建好了: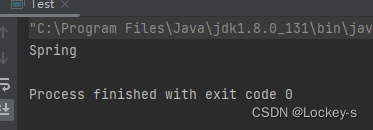
将 Bean 对象存储到容器中
-
现在 Spring 项目中添加配置文件(第一次需要这样做)。要创建一个文件,放到 resources 目录下,我们创建一个名为
spring-config.xml,然后把下面这段代码粘贴进去就好了:<?xml version="1.0" encoding="UTF-8"?> <beans xmlns="http://www.springframework.org/schema/beans" xmlns:xsi="http://www.w3.org/2001/XMLSchema-instance" xsi:schemaLocation="http://www.springframework.org/schema/beans http://www.springframework.org/schema/beans/spring-beans.xsd"> </beans>- 1
- 2
- 3
- 4
- 5
-
创建一个 Bean 对象。
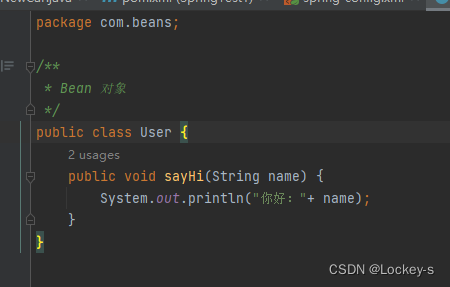
-
在配置文件中将需要保存到 Spring 中的 Bean 对象进行注册。在配置文件里面加一个 bean 标签:
<?xml version="1.0" encoding="UTF-8"?> <beans xmlns="http://www.springframework.org/schema/beans" xmlns:xsi="http://www.w3.org/2001/XMLSchema-instance" xsi:schemaLocation="http://www.springframework.org/schema/beans http://www.springframework.org/schema/beans/spring-beans.xsd"> <!--将一个对象存储到 spring 容器当中--> <bean id="user" class="com.beans.User"></bean> </beans>- 1
- 2
- 3
- 4
- 5
- 6
- 7
- 8
意思就是存的 Bean 对象的 id 是 user(可以不等于 class 里面的类名,但这样比较好记和好理解),存的对象 class 是 com.beans.User 。存储的时候,是用 Map 存储的。
从 Spring 中把 Bean 对象读取出来
-
先得到 Spring 上下文对象。通过 ApplicationContext 来获取:
public class Test1 { public static void main(String[] args) { ApplicationContext context = new ClassPathXmlApplicationContext("spring-config.xml"); } }- 1
- 2
- 3
- 4
- 5
- 6
里面的 spring-config.xml 就是配置文件的名字。
-
再通过上下文对象提供的方法获取咱们需要的 Bean 对象。通过
getBean来直接获取,需要传递一个 Bean 的名字,Bean 的名字就是我们在配置文件里面的 id:public class Test1 { public static void main(String[] args) { ApplicationContext context = new ClassPathXmlApplicationContext("spring-config.xml"); User user = (User) context.getBean("user"); } }- 1
- 2
- 3
- 4
- 5
- 6
- 7
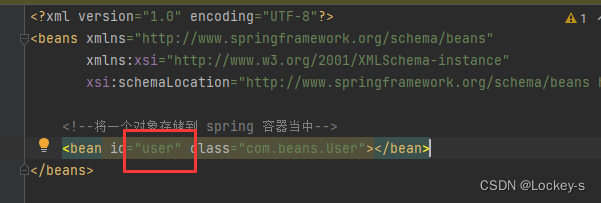
这里的 id 和 Bean 对象的名字是一样的。 -
使用 Bean 对象。直接调用 user 里面的 sayHi 方法就可以了:
public class Test1 { public static void main(String[] args) { ApplicationContext context = new ClassPathXmlApplicationContext("spring-config.xml"); User user = (User) context.getBean("user"); user.sayHi("zhangsan"); } }- 1
- 2
- 3
- 4
- 5
- 6
- 7
- 8
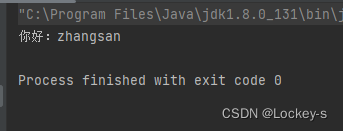
除了通过 ApplicationContext 来获取,还可以通过 BeanFactory 来得到 Bean :
public class Test1 { public static void main(String[] args) { //得到 bean 工厂 BeanFactory factory = new XmlBeanFactory(new ClassPathResource("spring-config.xml")); //获取 bean User user = (User) factory.getBean("user"); //使用 bean user.sayHi("李四"); } }- 1
- 2
- 3
- 4
- 5
- 6
- 7
- 8
- 9
- 10
- 11
运行结果如下:
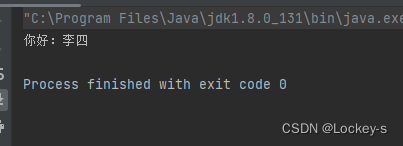
ApplicationContext 和 BeanFactory 的区别:- 相同点:都实现了从容器中获取 Bean,都提供了 getBean 方法。
- 不同点:
a)ApplicationContext 属于 BeanFactory 的子类。
b)BeanFactory 只提供了基础访问 Bean 的方法。而 ApplicationContext 除了拥有 BeanFactory 的所有功能之外,还提供了更多的方法实现,比如对国际化的支持,资源访问的支持,以及事件和传播等方面的支持。
c)从性能方面来说二者是不同的,BeanFactory 是按需加载 Bean。而 ApplicationContext 就是全部加载,以备之后使用。
再创建一个 Bean 来验证是否全部加载:
public class Article { public Article() { System.out.println("加载了 Article"); } public void sayHi() { System.out.println("hello Article"); } }- 1
- 2
- 3
- 4
- 5
- 6
- 7
- 8
- 9
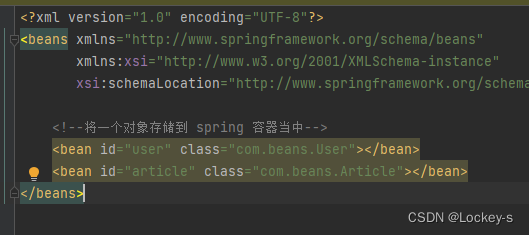
并且放到配置文件当中:
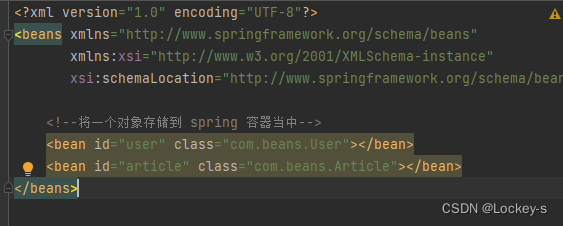
然后在 User 对象里面也加一个构造方法:
public class User { public User () { System.out.println("加载了 User"); } public void sayHi(String name) { System.out.println("你好:"+ name); } }- 1
- 2
- 3
- 4
- 5
- 6
- 7
- 8
- 9
使用 ApplicationContext 运行结果如下:
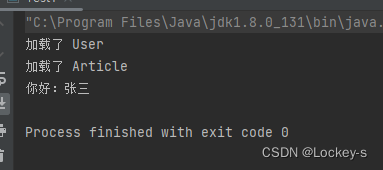
ApplicationContext 就把对象全部进行了加载。
BeanFactory 运行结果如下:
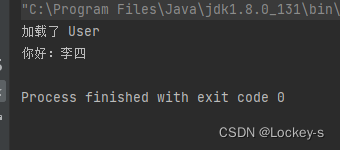
BeanFactory 就只是把需要的对象加载了。getBean 的方法重载
ApplicationContext 用的更多,所以我们来看 ApplicationContext 提供的 getBean 方法:

使用 bean name 获取 bean 对象
也就是我们上面使用的方法:
这种是需要强制类型转换的:

根据 bean 类型来获取 bean 对象
就是在 getBean 的参数里面直接使用 User.class :
public class Test1 { public static void main(String[] args) { ApplicationContext context = new ClassPathXmlApplicationContext("spring-config.xml"); User user = context.getBean(User.class); user.sayHi("张三"); } }- 1
- 2
- 3
- 4
- 5
- 6
- 7
- 8
运行结果如下:
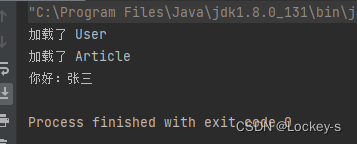
但是如果把一个对象,在 Spring 中注入多次,就会报错了:
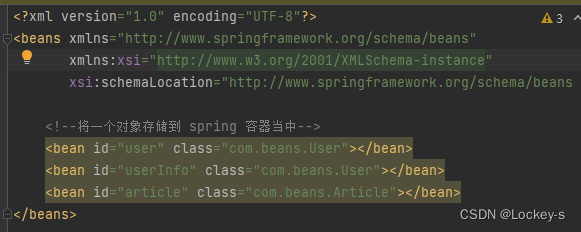
就会显示不是唯一的 Bean 对象:

根据 bean name 和类型获取 bean
就是在 getBean 当作把 name 和 类型,都写入:
public class Test1 { public static void main(String[] args) { ApplicationContext context = new ClassPathXmlApplicationContext("spring-config.xml"); User user = context.getBean("user", User.class); user.sayHi("张三"); } }- 1
- 2
- 3
- 4
- 5
- 6
- 7
- 8
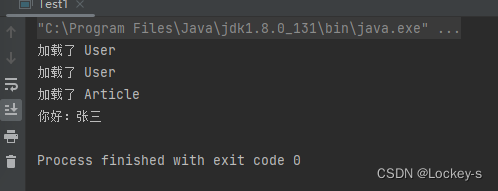
这样也没有强制类型转换,是要用一个 name 为 user ,类型为 User.class 的 bean 对象。这样的话,就算一个对象被注入多次也没事:
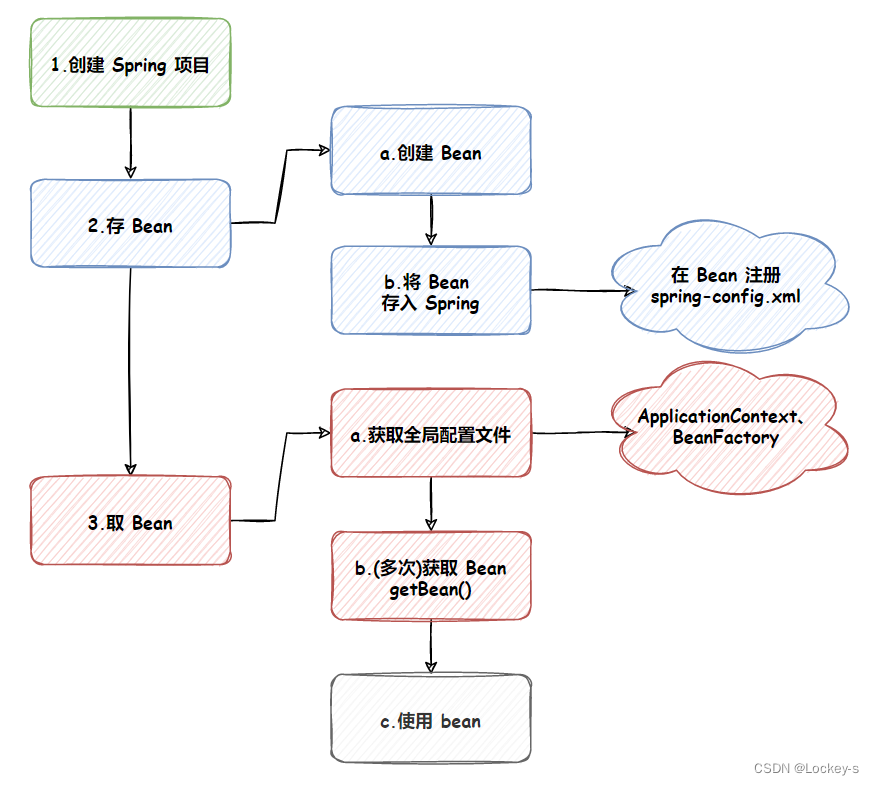
本文的操作流程图,大概就是这样:
-
相关阅读:
Linux基础 常见问题 ld链接器的那些坑
MongoDB常用的语句
Python爬虫实战,requests+parsel模块,爬取二手房房源信息数据
第18章 SpringCloud生态(三)
【深度学习】基于卷积神经网络的天气识别训练
湖州OLED透明拼接屏技术应用引领现代化旅游观光方式
呼叫中心中间件(mod_cti基于FreeSWITCH)-升级说明
软考中级(系统集成项目管理工程师)高频考点
电力系统机组组合优化调度(IEEE14节点、IEEE30节点、IEEE118节点)(Matlab代码实现)
MySQL单表数据量超1亿,根据 索引列 批量删除数据
- 原文地址:https://blog.csdn.net/sjp151/article/details/126745772
