-
【openGauss-3.0.0单节点安装】
单节点openGauss安装
一、下载CentOS7.x
- 在百度云盘中下载快些,或者直接官网上下载,地址:https://vault.centos.org/7.6.1810/isos/x86_64/
二、安装CentOS7.6操作系统
-
安装步骤读者自行完成
-
查看操作系统
cat /etc/redhat-release- 1

当前我的操作系统版本是centos7.9.2009
三、下载openGauss3.0.0安装包
- 下载安装包openGauss-3.0.0-CentOS-64bit-all.tar.gz(企业版),地址:https://opengauss.org/zh/download.html
四、系统环境设置
-
root登录虚拟,创建/opt/software/openGauss目录
systemctl stop firewalld.service #关闭防火墙 systemctl disable firewalld.service mkdir -p /opt/software/openGauss chmod 755 -R /opt/software- 1
- 2
- 3
- 4
-
由于是最小化安装centos7.6,需要安装额外的软件
yum install net-tools.x86_64 -y # 没有ifconfig命令需要安装该软件 yum install -y epel-release # 安装当yum显示没有可用软件包的时候,代表在linux系统yum源中已经没有对应的安装包了,这时,我们需要安装EPEL。EPEL(Extra Packages for Enterprise Linux),企业版Linux额外包,RHEL分布非标准包的社区类库。 yum update yum install -y bzip2 # 安装bzip2用于后面的解压openGauss安装包- 1
- 2
- 3
- 4
-
安装python3.6
检查现有的python环境
python -V- 1
结果是:python 2
安装python3
yum install -y python3- 1
检查结果:
python3 -V- 1
-
安装前检查软件环境
检查如下表格中的软件是否已经存在,如不存在则需要手动安装

执行如下命令查看
yum list libaio-devel yum list flex yum list bison yum list ncurses-devel yum list glibc-devel yum list patch yum list redhat-lsb-core yum list readline-devel- 1
- 2
- 3
- 4
- 5
- 6
- 7
- 8
结果显示如下表:
所需软甲 实际版本 建议版本 libaio-devel 0.3.109-13.el7 flex 2.5.37-6.el7 bison 3.0.4-2.el7 ncurses-devel 5.9-14.20130511.el7_4 glibc-devel 2.17-326.el7_9 patch 2.7.1-12.el7_7 redhat-lsb-core 4.1-27.el7.centos.1 readline-devel 6.2-11.el7 ( 不符合要求,我这里不用修改也可用)7.0-13 -
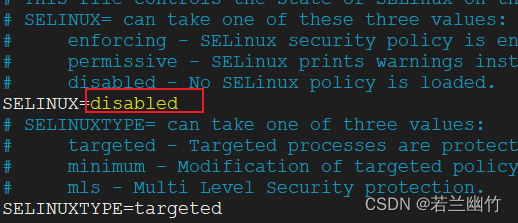
关闭SELINUX,将值改成disabled
vim /etc/selinux/config- 1
重启操作系统
-
设置时区和时间
cp /usr/share/zoneinfo/Asia/Shanghai /etc/localtime- 1
-
设置字符集参数
vi /etc/locale.conf- 1
设置为:utf-8
LANG=“en_US.UTF-8”
-
设置网卡MTU值
ifconfig ens33 mtu 8192- 1

-
允许root用户远程登陆:
vim /etc/ssh/sshd_config- 1
将“PermitRootLogin yes”前面的#号去掉
让配置生效
systemctl restart sshd.service- 1
-
创建dbgroup组和用户omm,修改/opt/software/openGauss目录用户及其用户组为omm:dbgroup
groupadd dbgroup useradd -g dbgroup omm # 可后面安装时创建 passwd omm #设置密码为Gauss_1234 chown -R omm:dbgroup /opt/software/openGauss- 1
- 2
- 3
- 4
五、安装openGauss
-
使用omm远程登录虚拟机,并上传openGauss安装包
-
解压openGauss安装包
tar -zvxf openGauss-3.0.0-CentOS-64bit-all.tar.gz- 1
-
解压
openGauss-3.0.0-CentOS-64bit-om.tar.bz2到当前目录tar -zvxf openGauss-3.0.0-CentOS-64bit-om.tar.bz2- 1
-
在当前目录下创建cluster_config.xml,下面IP、主机名等修改成你自己的环境
<ROOT> <CLUSTER> <PARAM name="clusterName" value="dbCluster" /> <PARAM name="nodeNames" value="centos76openGauss" /> <PARAM name="gaussdbAppPath" value="/opt/huawei/install/app" /> <PARAM name="gaussdbLogPath" value="/var/log/omm" /> <PARAM name="tmpMppdbPath" value="/opt/huawei/tmp" /> <PARAM name="gaussdbToolPath" value="/opt/huawei/install/om" /> <PARAM name="corePath" value="/opt/huawei/corefile" /> <PARAM name="backIp1s" value="192.168.76.150"/> CLUSTER> <DEVICELIST> <DEVICE sn="centos76openGauss"> <PARAM name="name" value="centos76openGauss"/> <PARAM name="azName" value="AZ1"/> <PARAM name="azPriority" value="1"/> <PARAM name="backIp1" value="192.168.76.150"/> <PARAM name="sshIp1" value="192.168.76.150"/> <PARAM name="dataNum" value="1"/> <PARAM name="dataPortBase" value="15400"/> <PARAM name="dataNode1" value="/opt/huawei/install/data/dn"/> <PARAM name="dataNode1_syncNum" value="0"/> DEVICE> DEVICELIST> ROOT>- 1
- 2
- 3
- 4
- 5
- 6
- 7
- 8
- 9
- 10
- 11
- 12
- 13
- 14
- 15
- 16
- 17
- 18
- 19
- 20
- 21
- 22
- 23
- 24
- 25
- 26
- 27
- 28
- 29
- 30
- 31
- 32
- 33
- 34
- 35
- 36
- 37
- 38
- 39
- 40
- 41
- 42
-
切换到root用户,修改系统参数sysctl.conf(
根据实际情况进行设置对应的属性),执行:vim /etc/sysctl.conf# add net.ipv4.tcp_keepalive_probes = 9 # add net.ipv4.tcp_retries1 = 5 net.ipv4.tcp_syn_retries = 5 net.ipv4.tcp_synack_retries = 5 # add net.ipv4.tcp_syncookies = 1 net.sctp.sctp_mem = 94500000 915000000 927000000 net.sctp.sctp_rmem = 8192 250000 16777216 net.sctp.sctp_wmem = 8192 250000 16777216 # add # net.ipv4.ip_local_port_range = 26000-65535 net.ipv4.tcp_fin_timeout = 60 net.ipv4.tcp_sack = 1 net.ipv4.tcp_timestamps = 1 # add vm.overcommit_memory = 0 vm.extfrag_threshold = 500 vm.overcommit_ratio = 90 net.ipv4.tcp_max_tw_buckets = 10000 net.ipv4.tcp_tw_reuse = 1 net.ipv4.tcp_tw_recycle = 1 net.ipv4.tcp_keepalive_time = 30 net.ipv4.tcp_keepalive_intvl = 30 net.ipv4.tcp_retries2 = 12 net.ipv4.ip_local_reserved_ports = 15400-15407,20050-20057 net.core.wmem_max = 21299200 net.core.rmem_max = 21299200 net.core.wmem_default = 21299200 net.core.rmem_default = 21299200 kernel.sem = 250 6400000 1000 25600 net.ipv4.tcp_rmem = 8192 250000 16777216 net.ipv4.tcp_wmem = 8192 250000 16777216 vm.min_free_kbytes = 193062 net.core.netdev_max_backlog = 65535 net.ipv4.tcp_max_syn_backlog = 65535 net.core.somaxconn = 65535 kernel.shmall = 1152921504606846720 kernel.shmmax = 18446744073709551615- 1
- 2
- 3
- 4
- 5
- 6
- 7
- 8
- 9
- 10
- 11
- 12
- 13
- 14
- 15
- 16
- 17
- 18
- 19
- 20
- 21
- 22
- 23
- 24
- 25
- 26
- 27
- 28
- 29
- 30
- 31
- 32
- 33
- 34
- 35
- 36
- 37
- 38
- 39
- 40
- 41
- 42
- 43
- 44
- 45
执行生效命令:
sysctl -p- 1
-
切换到root用户,进入到/home/omm/script目录下
-
执行预安装命令
cd script ./gs_preinstall -U omm -G dbgroup -X /home/omm/cluster_config.xml- 1
- 2
在执行过程中,会提示是否需要创建omm用户,如已经创建输入no,没有则输入yes
检查如果没有问题就继续下面步骤操作,如有问题,检查下是什么问题。 -
上述与安装命令执行成功后,还需要修改相应目录的所属用户组及其权限
先修改下script目录下的文件的权限为755,执行命令:chmod -R 755 /home/omm/script/- 1
然后修改如下目录及其子目录的用户及其用户组为omm和dbgroup,执行如下命令:
chown -R omm:dbgroup /home/omm/- 1
-
-
切换到omm用户,进入到/home/omm/script/目录下,执行如下命令完成安装openGauss
./gs_install -X /home/omm/cluster_config.xml --gsinit-parameter="--locale=zh_CN.utf8"- 1
命令执行过程中,会提示用户需要输入postgres数据库密码,请输入密码并记住该密码,后续需要使用该密码通过gsql方式连接数据库
-
验证结果
安装执行完成后,使用ps和gs_ctl查看进程是否正常
ps ux | grep gaussdb- 1
-
检查openGauss状态
gs_om -t status --detail- 1

六、使用openGauss
1. 基本shell 操作
-
openGauss启停服务
#分布式openGauss: gs_om -t start 启动服务 gs_om -t restart 重启服务 #集中式openGauss: gs_om -t stop 关闭服务 gs_om -t start 启动服务- 1
- 2
- 3
- 4
- 5
- 6
-
查看openGauss数据库状态
gs_om -t status --detail- 1
结果:
[omm@centos76openGauss ~]$ gs_om -t status --detail [ Cluster State ] cluster_state : Normal redistributing : No current_az : AZ_ALL [ Datanode State ] node node_ip port instance state -------------------------------------------------------------------------------------- 1 centos76openGauss 192.168.76.150 15400 6001 /opt/huawei/install/data/dn P Primary Normal- 1
- 2
- 3
- 4
- 5
- 6
- 7
- 8
- 9
- 10
- 11
- 12
-
检查数据库性能
gs_checkperf #1. 以简要格式在屏幕上显示性能统计结果。 gs_checkperf -i pmk -U omm #2. 以详细格式在屏幕上显示性能统计结果。 gs_checkperf -i pmk -U omm --detai- 1
- 2
- 3
- 4
- 5
-
查看数据库端口号
cat /opt/huawei/install/data/dn/postgresql.conf | grep port- 1
-
以omm操作系统用户登录远程服务器,然后登录openGauss数据库
gsql -d postgres -p 15400 # 你自己设置端口- 1
-
导入school.sql,执行:
\i /home/omm/simpleInstall/school.sql- 1
-
导入finance.sql,执行:
\i /home/omm/simpleInstall/finance.sql- 1
-
数据库用户增删改查
create user 用户名 with password "密码"; # 新增用户 drop user 用户名 cascade; # 删除用户,注意删前必须确保该用户下没有其他资源了,如没有所属的database- 1
- 2
-
数据库增删改查
create database testdb01 owner suben; #创建属于suben用户的数据库- 1

将数据库testdb01所属用户改成omm
alter database testdb01 owner to omm;- 1

删除数据库testdb01,执行drop database testdb01;- 1

-
表增删改查
- 创建表
create table t1(id int,name varchar(10));- 1
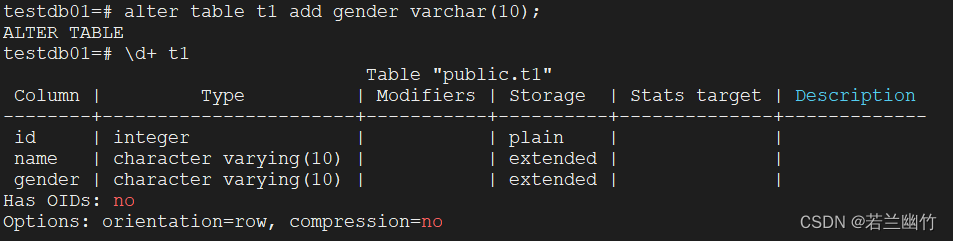
- 更改表
新增一个字段alter table t1 add gender varchar(10);- 1
- 新增数据
insert into t1 values(1,'张三','男');- 1
- 更新数据
update t1 set name='里斯' where id=1;- 1

- 查询数据
select * from t1 limit 1;- 1
- 删除数据
delete from t1;- 1

- 删除表
drop table t1;- 1

- 创建表
-
相关阅读:
Java核心编程(14)
esp32-rust-std-examples-blinky
FS2115D SOT23-6 低噪声3.3V升压IC电荷泵 DC/DC 转换器
element ui form 表单验证
SAP ABAP Function Module 的动态调用方式使用方式介绍试读版
Linux部署Tomcat踩的坑以及解决方案【8080无法访问、日志显示XX端口被占用、修改默认端口、无法提供安全连接】
git总结
老卫带你学---leetcode刷题(221. 最大正方形)
推荐系统笔记(八):推荐系统中的长尾效应
医疗器械行业迎来黄金十年,集团采购系统助力企业把握机遇,实现高质量发展
- 原文地址:https://blog.csdn.net/sujiangming/article/details/126715549