-
spring注解开发
Component注解,Repository注解,Service注解,Controller注解都是用来修饰类,表示创建一个这个类的对象,并将这个对象放到spring容器里面,也就是将类注册到容器里面
1.Componet注解:
- //等价于在beans.xml文件中new了一个User类对象
- //即等价于
- //或者说是User user=new User();反正就是创建了一个对象并且把它放到容器里面
- @Component
- public class User
- {
- public String name;
- }
如果@Component注解后面加上一个字符串,表示给这对象起一个名字(也就是作为这个bean的名称),如果没有加这个字符串,那么这个bean的名称就是类名第一个字母小写,其他字母不变,比如这个类名是User,那么在容器里这个bean的名称就是user
- @Component("test")
- //相当于User test=new User();
- public class User
- {
- public String name;
- }
Component 还有几个衍生注解(和mvc三层架构相对应)
(1)dao层的习惯用:Repository
- @Repository
- public class UserDao
- {
- }
(2)service层的,习惯用service
- @Service
- public class UserService
- {
- }
(3)controller层(Servlet层):习惯用Controller
- @Controller
- public class UserController
- {
- }
2.ComponetScan注解:
会去某个目录中或者某个类中寻找我们需要的bean(也就是说指定扫描范围),然后去指定范围里面找 @Component注解,@Controller注解,@Service注解,@Dao注解等,然后创建这些注解所指向的类的对象,并加入到容器里面
如果不设置value属性,默认扫描启动类(xxxxxApplication.java)所在的目录下的所有类
所以最好还是写这个注解,这样可以减少加载时间,提高系统启动速度
3.Bean注解:
用于将一个类中的方法产生的对象放到spring容器里面
这里Bean注解可以让test方法产生的B类的对象交给Spring容器管理
- public A
- {
- @Bean
- public B test()
- {
- return new B();
- }
- }
4.Autowired注解 当一个属性是对象属性的时候,给对象属性赋值
默认采用byType按类型进行赋值(进行装配)
常见使用场景:成员变量是一个类的对象
- public class Test
- {
- @Autowired
- private User user;
- }
再加一个Qualifier注解,两个注解组合使用,就可以实现ByName装配
- public class Test
- {
- @Autowired
- @Qualifier("user1")
- private User user;
- }
5.@Resource注解 也是给对象属性赋值
默认采用byName进行装配,byName找不到就byType
- public class Test
- {
- @Resource("user1")
- private User user;
- }
6.Value注解 设置默认值
- @Value("ouyangshuiming")
- public String name;
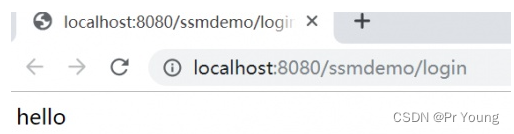
7.@ResponseBody注解表示针对某个Http请求,返回的是一个字符串,而不是一个html页面
如果是这样,看起来返回的是字符串,其实返回的并不是字符串,而是会跳转到hello.html页面,也就是说返回的其实是一个页面,而不是一个字符串
- @Controller
- public class UserController
- {
- @RequestMapping(“/login”)
- public String login()
- {
- return "hello";
- }
- }
加上@ResponseBody注解之后,返回的就真的是字符串而不是html页面了
- @Controller
- @ResponseBody
- public class UserController
- {
- @RequestMapping(“/login”)
- public String login()
- {
- return "hello";
- }
- }
如果我们返回一个对象,那么就会将这个对象转换成json数据(也就是一个一个的键值对,key1:value1,key2:value2,key3:value3),举例如下:
- public class User
- {
- private int id;
- private String username;
- private String birthday;
- private String sex;
- private String address;
- //添加get\set\构造方法
- ...
- }
- @ResponseBody
- @RequestMapping("/login3")
- public User login3()
- {
- User user = new User(1, "张三", "1990-2-1", "男", "武汉");
- return user;
- }
浏览器访问,返回的结果如下:
 @RestController注解,这个注解相当于@Controller+@ResponseBody
8.Scope
标注一个类是单例模式或者原型模式(prototype):
- @Scope("singleton")
- public class User
- {
- }
9.@Configuration 声明一个类为配置类
@Configuration注解可以用来替代传统的 XML 配置文件。在过去,Spring 应用程序的配置通常是通过编写 XML 文件来定义和配置 bean、依赖关系、切面、数据源等信息。而使用@Configuration注解可以将这些配置信息直接以 Java 代码的方式进行声明和管理,从而实现基于代码的配置,称为 Java Config。- @Configuration
- public class AppConfig {
- @Bean
- public UserService userService() {
- return new UserServiceImpl();
- }
- @Bean
- public UserController userController(UserService userService) {
- return new UserController(userService);
- }
- @Bean
- public DataSource dataSource() {
- // 配置数据源
- DataSource dataSource = new DataSource();
- dataSource.setUrl("jdbc:mysql://localhost:3306/mydb");
- dataSource.setUsername("root");
- dataSource.setPassword("password");
- return dataSource;
- }
- @Bean
- public TransactionManager transactionManager(DataSource dataSource) {
- // 配置事务管理器
- return new TransactionManager(dataSource);
- }
- }
10.@PathVariable
表示id这个参数的值等于请求路径url里面的id
- @GetMapping("/{id}")
- public R getById(@PathVariable Long id)
- {
- }
11.@RequestBody注解:
http请求长什么样?
(1)post请求 Post请求通过请求体传递参数,通过请求体传参可以分为两种类型:
第一种:当请求的内容属于表单类型的时候,类似于get请求,也是通过key-value对的形式传参的
- POST Http://localhost:9009/student/add
- Content-Type:application/x-www-form-urlencoded
- name=zhangsan&age=20
第二种:请求的内容类型是json类型 ,这个时候就是通过json串的形式进行传参的
- POST Http://localhost:9009/student/add
- Content-Type:application/json
- {
- "name":"zhangsan";
- "age":15;
- }
第一行是url行,指定了当前请求的类型(Post)和请求的url
第二行是一个请求头(包含了很多信息,比如请求的身份信息,还有很重要的请求内容的类型(比如json类型)
然后是一个空行
再然后就是请求体,也就是body的部分
(2)get请求 get请求是通过url传参,也就是url里面问号后买你的key,value对的形式传递参数
- GET http://localhost:9009/student/add?name=zhangsan&age=20
前置知识介绍完毕
- @Data
- public class Student
- {
- private String name;
- private int age;
- private int gender;
- }
- @RestController
- @RequestMapping("/student")
- public class StudentController
- {
- @RequestMapping("/add")
- public String save(@RequestBody Student student)
- {
- System.out.println(student);
- return "ok";
- }
- }
get请求传参的时候,不能用RequestBody注解,因为get请求没有请求体
post请求表单类型的时候,也不能使用RequestBody注解,因为请求体是键值对
只有post请求,而且请求体是json类型的时候,才可以使用RequestBody注解
- POST Http://localhost:9009/student/add
- Content-Type:application/json
- {
- "name":"zhangsan";
- "age":15;
- }
发现post请求中没有穿的参数就会被置为默认值
Student(name=zhangsan,age=15,gender=0)其他两种请求直接这样即可:
- @RestController
- @RequestMapping("/student")
- public class StudentController
- {
- @RequestMapping("/add")
- public String save(Student student)
- {
- System.out.println(student);
- return "ok";
- }
- }
总结:
对于post请求而言:请求体是json类型,需要加上RequestBody注解,请求体是key-value类型,不需要加上RequestBody注解
对于get请求,不需要加上RequestBody注解
12.RequestParam注解
比如你前端传过来的参数名叫做studentName,这个参数名和后端的属性名是不一样的(后端的属性名是name),为了解决前后端属性名不一致的问题,使用这个注解
下面的代码意思就是将前端传过来的studentName这个参数赋值给name这个变量
前端传过来的是studentName=“zhangsan”,将这个值赋值给save方法的name属性
- @RestController
- @RequestMapping("/student")
- public class StudentController
- {
- @RequestMapping("/add")
- public String save(@RequestParam("studentName") String name)
- {
- return "ok";
- }
- }
13.GetMapping PostMapping PutMapping DeleteMapping
(1)GetMapping 用来处理get请求
传统的RequestMapping :
- @RequestMapping(value="/get/{id}",method=RequestMethod.GET)
- public void getId(@PathVariable int id)
- {
- }
使用GetMapping:大大简化
- @GetMapping("/get/{id}")
- public void getId(@PathVariable int id)
- {
- }
(2)PostMapping 用来处理Post请求,和GetMapping同理
(3)PutMapping:它的使用方法与PostMapping几乎是一样的,没什么区别
(4)DeleteMapping 删除URL映射


-
相关阅读:
MySQL事务隔离机制 -- 必须说透
Windows FFmpeg安装
PHP is_file 和file_exists的区别
笙默考试管理系统-MyExamTest----codemirror(30)
js,jquery,vue设置html标签隐藏不显示
计算通过率逾期率并绘制通过率逾期率曲线
Xpose 拦截系统通知栏消息
手机怎么修改照片大小尺寸?这两种方法轻松解决
IQueryable和IEnumerable的区别
GraalVM java17 Windows打包
- 原文地址:https://blog.csdn.net/weixin_47414034/article/details/126653902
