-
WebSocket的使用,前后端发送消息的例子
一,什么是websocket
WebSocket 协议在2008年诞生,2011年成为国际标准。所有浏览器都已经支持了。
它的最大特点就是,服务器可以主动向客户端推送信息,客户端也可以主动向服务器发送信息,是真正的双向平等对话,属于服务器推送技术的一种。
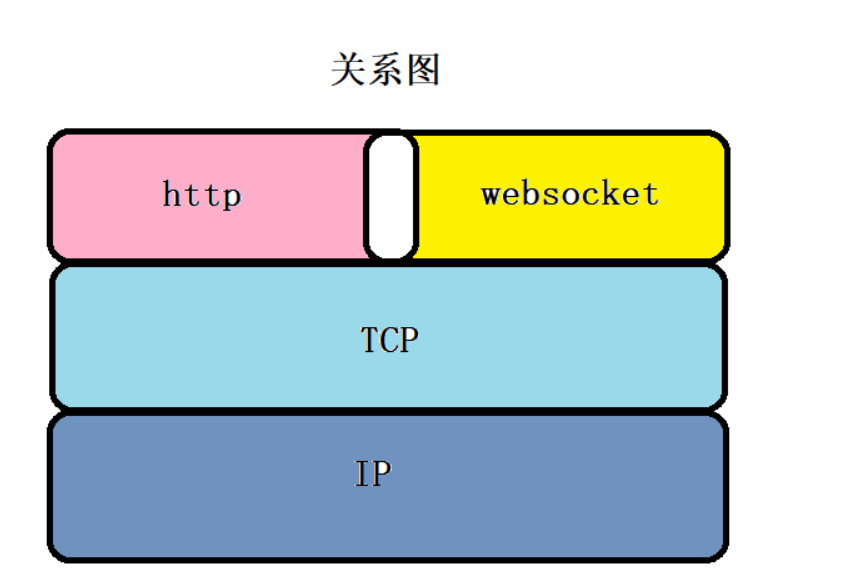
二,websocket的原理
websocket约定了一个通信的规范,通过一个握手的机制,客户端和服务器之间能建立一个类似tcp的连接,从而方便它们之间的通信
在websocket出现之前,web交互一般是基于http协议的短连接或者长连接
websocket是一种全新的协议,不属于http无状态协议,协议名为"ws"
简单案例
前端代码:
created() { // 页面创建 生命周期函数 this.initWebSocket() }, destroyed: function () { // 页面销毁生命周期函数 this.websocketclose(); }, methods: { initWebSocket: function () { // WebSocket与普通的请求所用协议有所不同,ws等同于http,wss等同于https this.websock = new WebSocket("ws://127.0.0.1:9007/websocket"); this.websock.onopen = this.websocketonopen; this.websock.onerror = this.websocketonerror; this.websock.onmessage = this.websocketonmessage; this.websock.onclose = this.websocketclose; }, websocketonopen: function () { console.log("WebSocket连接成功..."); this.websock.send("我是客户端") //发送消息 }, websocketonerror: function (e) { console.log("WebSocket连接发生错误..."); console.log(e) }, websocketonmessage: function (e) { console.log(e.data); var alarm = JSON.parse(e.data) console.log(alarm.alarmName) if (e.data !== undefined) { this.onlineUser = e.data } }, websocketclose: function (e) { console.log("connection closed (" + e.code + ")"); } }- 1
- 2
- 3
- 4
- 5
- 6
- 7
- 8
- 9
- 10
- 11
- 12
- 13
- 14
- 15
- 16
- 17
- 18
- 19
- 20
- 21
- 22
- 23
- 24
- 25
- 26
- 27
- 28
- 29
- 30
- 31
- 32
- 33
- 34
- 35
- 36
- 37
后端我使用的是springboot
依赖包:<dependency> <groupId>org.springframework.boot</groupId> <artifactId>spring-boot-starter-websocket</artifactId> </dependency>- 1
- 2
- 3
- 4
WebSocketConfig.java
@Configuration public class WebSocketConfig { @Bean public ServerEndpointExporter serverEndpointExporter() { return new ServerEndpointExporter(); } }- 1
- 2
- 3
- 4
- 5
- 6
- 7
- 8
- 9
AlarmSocket.java
package com.youming.shuiku.datacenter.provider.service.alarm; import com.alibaba.fastjson.JSON; import com.youming.shuiku.datacenter.vo.alarm.AlarmRecordVo; import org.springframework.stereotype.Component; import javax.websocket.OnClose; import javax.websocket.OnMessage; import javax.websocket.OnOpen; import javax.websocket.Session; import javax.websocket.server.ServerEndpoint; import java.util.HashMap; import java.util.Map; import java.util.concurrent.CopyOnWriteArraySet; @Component @ServerEndpoint("/websocket") public class AlarmSocket { private Session session; private static CopyOnWriteArraySet<AlarmSocket> webSockets = new CopyOnWriteArraySet<>(); private static Map<String, Session> sessionPool = new HashMap<String, Session>(); /* * @description: 有新的连接加入 * @author: wangxihao * @date:2022/8/30 15:16 * @param: session **/ @OnOpen public void onOpen(Session session) { this.session = session; webSockets.add(this); sessionPool.put(session.getId(), session); // 新的连接加入 通知客户端 sendMessageToAll(webSockets.size() + ""); System.out.println("【websocket消息】有新的连接,总数为:" + webSockets.size()); } /* * @description: websocket消息连接断开 * @author: wangxihao * @date:2022/8/30 15:16 **/ @OnClose public void onClose() { webSockets.remove(this); // 断开连接 通知客户端 sendMessageToAll(webSockets.size() + ""); System.out.println("【websocket消息】连接断开,总数为:" + webSockets.size()); } /* * @description: websocket消息收到客户端消息 * @author: wangxihao * @date:2022/8/30 15:16 * @param: message **/ @OnMessage public void onMessage(String message) { System.out.println("websocket消息收到客户端消息:" + message); } /** * 通知所有的客户端 * * @param message */ public static void sendMessageToAll(String message) { for (AlarmSocket webSocket : webSockets) { System.out.println("【websocket】通知所有的客户端:" + message); try { webSocket.session.getAsyncRemote().sendText(message); } catch (Exception e) { e.printStackTrace(); } } } /* * @description: 发送到大屏险情报警 * @author: wangxihao * @date:2022/8/30 15:18 * @param: alarmRecordVo **/ public static void sendAlarmVo(AlarmRecordVo alarmRecordVo){ for (AlarmSocket webSocket : webSockets) { System.out.println("【websocket】通知所有的客户端:" + alarmRecordVo); try { webSocket.session.getAsyncRemote().sendText(JSON.toJSONString(alarmRecordVo)); } catch (Exception e) { e.printStackTrace(); } } } }- 1
- 2
- 3
- 4
- 5
- 6
- 7
- 8
- 9
- 10
- 11
- 12
- 13
- 14
- 15
- 16
- 17
- 18
- 19
- 20
- 21
- 22
- 23
- 24
- 25
- 26
- 27
- 28
- 29
- 30
- 31
- 32
- 33
- 34
- 35
- 36
- 37
- 38
- 39
- 40
- 41
- 42
- 43
- 44
- 45
- 46
- 47
- 48
- 49
- 50
- 51
- 52
- 53
- 54
- 55
- 56
- 57
- 58
- 59
- 60
- 61
- 62
- 63
- 64
- 65
- 66
- 67
- 68
- 69
- 70
- 71
- 72
- 73
- 74
- 75
- 76
- 77
- 78
- 79
- 80
- 81
- 82
- 83
- 84
- 85
- 86
- 87
- 88
- 89
- 90
- 91
- 92
- 93
@ServerEndpoint注解和RestController的作用大差不差
使用的时候只需要调用这个方法

结果:
信息已被接收
开启Bean的注入
在注解加入:
@ServerEndpoint(value = "/websocket",configurator = SpringConfigurator.class )就可以了spring springboot websocket 不能注入( @Autowired ) service bean 报 null 错误
spring 或 springboot 的 websocket 里面使用 @Autowired 注入 service 或 bean 时,报空指针异常,service 为 null(并不是不能被注入)。
解决方法:将要注入的 service 改成 static,就不会为null了。
参考代码:@Component @ServerEndpoint(value = "/websocket") public class AlarmSocket { private static IRecordService recordService; @Autowired public void setRecordService(IRecordService recordService){ AlarmSocket.recordService = recordService; }- 1
- 2
- 3
- 4
- 5
- 6
- 7
- 8
- 9
- 10
- 11
- 12
本质原因:spring管理的都是单例(singleton),和 websocket (多对象)相冲突。
详细解释:项目启动时初始化,会初始化 websocket (非用户连接的),spring 同时会为其注入 service,该对象的 service 不是 null,被成功注入。但是,由于 spring 默认管理的是单例,所以只会注入一次 service。当新用户进入聊天时,系统又会创建一个新的 websocket 对象,这时矛盾出现了:spring 管理的都是单例,不会给第二个 websocket 对象注入 service,所以导致只要是用户连接创建的 websocket 对象,都不能再注入了。像 controller 里面有 service, service 里面有 dao。因为 controller,service ,dao 都有是单例,所以注入时不会报 null。但是 websocket 不是单例,所以使用spring注入一次后,后面的对象就不会再注入了,会报null。
-
相关阅读:
代码随想录算法训练营 动态规划part16
Flutter 笔记 | Flutter 事件与通知
了解Netty,从IO开始
c++函数指针作为std::map值
Docker中快速安装RabbitMQ
好用的vscode插件
2022年熔化焊接与热切割考试试题及答案
一次redis主从切换导致的数据丢失与陷入只读状态故障
存储基础知识入门
Python中Collections模块namedtuple用法
- 原文地址:https://blog.csdn.net/wang121213145/article/details/126606988
