-
多级缓存(笔记)
对于亿级流量的解决方案一、传统缓存问题
请求抵达tomcat后,tomcat查询redis,没有再查询数据库。
问题:
- 请求需要经过tomcat处理,tomcat性能将成为整个系统瓶颈
- redis缓存失效时,会对数据库造成冲击
二、多级缓存
利用请求处理的每个缓解,分别添加缓存,减轻tomcat压力,提升服务性能
- 浏览器客户端缓存:一般指静态数据
- nginx本地缓存:它也可以进行编程,把数据缓存到本地,没有的话直接去redis查询
- tomcat进程缓存:在服务器内部实现,没有最后才会到达数据库
因此Nginx的压力就会很大,于是就会有nginx集群
需要什么:
- JVM进程缓存
- Lua语法
- 实现多级缓存
- 缓存同步策略
三、JVM进程缓存
3.1 准备
创建一个数据库镜像的数据挂载目录,进入目录后执行docker命令
docker run -p 3306:3306 --name mysql -v $PWD/conf:/etc/mysql/conf.d -v $PWD/logs:/logs -v $PWD/data:/var/lib/mysql -e MYSQL_ROOT_PASSWORD=123 --privileged -d mysql:5.7.25- 1
创建mysql的默认配置
touch /tmp/mysql/conf/my.cnf skip-name-resolve character_set_server=utf8 datadir=/var/lib/mysql server-id=1000 docker restart mysql- 1
- 2
- 3
- 4
- 5
- 6
- 7
- 8
随后用数据库工具连接远端数据库
如果没有办法连接,检查是否开了端口、防火墙,或者重启docker


创建两张表CREATE TABLE `tb_item` ( `id` bigint(20) NOT NULL AUTO_INCREMENT COMMENT '商品ID', `title` varchar(268) NOT NULL COMMENT '商品标题', `name` varchar(128) NOT NULL DEFAULT '' COMMENT '商品名称', `price` bigint(20) NOT NULL COMMENT '价格,单位分', `image` varchar(200) DEFAULT NULL COMMENT '商品图片', `category` varchar(200) DEFAULT NULL COMMENT '类目名称', `brand` varchar(100) DEFAULT NULL COMMENT '品牌名称', `spec` varchar(200) DEFAULT NULL COMMENT '规格', `status` int(1) DEFAULT '1' COMMENT '商品状态 1-正常 2-下架 3-删除', `create_time` datetime DEFAULT NULL COMMENT '创建时间', `update_time` datetime DEFAULT NULL COMMENT '更新时间', PRIMARY KEY (`id`) USING BTREE, KEY `status` (`status`) USING BTREE, KEY `updated` (`update_time`) USING BTREE ) ENGINE=InnoDB AUTO_INCREMENT=50008 DEFAULT CHARSET=utf8 ROW_FORMAT=COMPACT;- 1
- 2
- 3
- 4
- 5
- 6
- 7
- 8
- 9
- 10
- 11
- 12
- 13
- 14
- 15
- 16
CREATE TABLE `tb_item_stock`( `item_id` BIGINT(20) AUTO_INCREMENT COMMENT '商品ID', `stock` BIGINT(20) NOT NULL COMMENT '库存', `sold` BIGINT(20) NOT NULL COMMENT '卖出', PRIMARY KEY (`item_id`) USING BTREE )ENGINE=INNODB AUTO_INCREMENT=50002 DEFAULT CHARSET=utf8 ROW_FORMAT=COMPACT- 1
- 2
- 3
- 4
- 5
- 6
搭建项目
首先创建完成结构后,用mybatis-plus解析数据库package com.yjx23332.item; import com.baomidou.mybatisplus.generator.FastAutoGenerator; import com.baomidou.mybatisplus.generator.config.OutputFile; import com.baomidou.mybatisplus.generator.engine.FreemarkerTemplateEngine; import java.util.Collections; public class generator { public static void main(String[] args){ FastAutoGenerator.create("jdbc:mysql://IP地址:3306/test?useUnicode=true&characterEncoding=UTF-8&&useSSL=false", "root", "123") .globalConfig(builder -> { builder.author("yjx23332") // 设置作者 .enableSwagger() // 开启 swagger 模式 .fileOverride() // 覆盖已生成文件 .outputDir("D:\\tool\\item-service\\src\\main\\java"); // 指定输出目录 }) .packageConfig(builder -> { builder.parent("com.yjx23332.item") // 设置父包名 .moduleName("") // 设置父包模块名 .pathInfo(Collections.singletonMap(OutputFile.xml, "D:\\tool\\item-service\\src\\main\\resources")); // 设置mapperXml生成路径 }) .strategyConfig(builder -> { builder.addInclude("tb_item") // 设置需要生成的表名 .addTablePrefix("t_", "c_"); // 设置过滤表前缀 }) .templateEngine(new FreemarkerTemplateEngine()) // 使用Freemarker引擎模板,默认的是Velocity引擎模板 .execute(); } }- 1
- 2
- 3
- 4
- 5
- 6
- 7
- 8
- 9
- 10
- 11
- 12
- 13
- 14
- 15
- 16
- 17
- 18
- 19
- 20
- 21
- 22
- 23
- 24
- 25
- 26
- 27
- 28
- 29
- 30
- 31
- 32
- 33

添加分页的拦截器@Configuration @MapperScan("com.yjx23332.item.mapper") public class MybatisConfig { @Bean public MybatisPlusInterceptor mybatisPlusInterceptor() { MybatisPlusInterceptor interceptor = new MybatisPlusInterceptor(); //物理分页 interceptor.addInnerInterceptor(new PaginationInnerInterceptor(DbType.MYSQL)); //防止恶意全表操作 interceptor.addInnerInterceptor(new BlockAttackInnerInterceptor()); return interceptor; } }- 1
- 2
- 3
- 4
- 5
- 6
- 7
- 8
- 9
- 10
- 11
- 12
- 13
新建一个控制层,它用于管理商品信息
package com.yjx23332.item.controller; import com.yjx23332.item.entity.ItemDTO; import com.yjx23332.item.entity.TbItemStock; import com.yjx23332.item.service.ITbItemStockService; import com.yjx23332.item.service.ItemService; import io.swagger.annotations.Api; import io.swagger.annotations.ApiOperation; import org.springframework.beans.factory.annotation.Autowired; import org.springframework.web.bind.annotation.*; @RestController @RequestMapping("/item") @Api(tags = "商品相关") public class ItemController { @Autowired private ItemService itemService; @Autowired private ITbItemStockService iTbItemStockService; @ApiOperation("分页查询") @GetMapping("/list") public List<ItemDTO> queryItemPage(@RequestParam(value = "page",defaultValue = "1")Integer page, @RequestParam(value = "size",defaultValue = "5")Integer size){ return itemService.queryItemPage(page,size); } @PostMapping @ApiOperation("保存商品") public void saveItem(@RequestBody ItemDTO itemDTO){ itemService.saveItem(itemDTO); } @PutMapping @ApiOperation("更新商品信息") public void updateItem(@RequestBody ItemDTO itemDTO){ itemService.updateItem(itemDTO); } @PutMapping("/stock") @ApiOperation("更新商品库存") public void updateStock(@RequestBody TbItemStock tbItemStock){ iTbItemStockService.updateById(tbItemStock); } @DeleteMapping("/{id}") @ApiOperation("用ID删除商品") public void deleteById(@PathVariable("id") Long id){ itemService.deleteById(id); } @GetMapping("/{id}") @ApiOperation("用ID查询商品") public ItemDTO findById(@PathVariable("id") Long id){ return itemService.findById(id); } @GetMapping("/stock/{id}") @ApiOperation("用ID查询库存") public TbItemStock findStockById(@PathVariable("id") Long id){ return iTbItemStockService.getById(id); } }- 1
- 2
- 3
- 4
- 5
- 6
- 7
- 8
- 9
- 10
- 11
- 12
- 13
- 14
- 15
- 16
- 17
- 18
- 19
- 20
- 21
- 22
- 23
- 24
- 25
- 26
- 27
- 28
- 29
- 30
- 31
- 32
- 33
- 34
- 35
- 36
- 37
- 38
- 39
- 40
- 41
- 42
- 43
- 44
- 45
- 46
- 47
- 48
- 49
- 50
- 51
- 52
- 53
- 54
- 55
- 56
- 57
- 58
- 59
- 60
- 61
- 62
- 63
- 64
新建一个DTO,用于将两个表的数据合在一起
package com.yjx23332.item.entity; import io.swagger.annotations.ApiModel; import io.swagger.annotations.ApiModelProperty; import lombok.Data; @ApiModel("商品信息") @Data public class ItemDTO { @ApiModelProperty("商品信息") TbItem tbItem; @ApiModelProperty("商品库存") TbItemStock tbItemStock; }- 1
- 2
- 3
- 4
- 5
- 6
- 7
- 8
- 9
- 10
- 11
- 12
- 13
- 14
- 15
- 16
- 17
- 18
- 19
创建一个ItemService抽象类以及实现,用于处理两表一起的操作
package com.yjx23332.item.service.impl; import com.baomidou.mybatisplus.core.conditions.query.LambdaQueryWrapper; import com.baomidou.mybatisplus.extension.plugins.pagination.Page; import com.yjx23332.item.entity.ItemDTO; import com.yjx23332.item.entity.TbItem; import com.yjx23332.item.entity.TbItemStock; import com.yjx23332.item.service.ITbItemService; import com.yjx23332.item.service.ITbItemStockService; import com.yjx23332.item.service.ItemService; import kotlin.jvm.internal.Lambda; import lombok.extern.slf4j.Slf4j; import org.springframework.beans.factory.annotation.Autowired; import org.springframework.stereotype.Service; import java.util.List; import java.util.stream.Collectors; @Service @Slf4j public class ItemServiceImpl implements ItemService { @Autowired ITbItemStockService iTbItemStockService; @Autowired ITbItemService iTbItemService; @Override public List<ItemDTO> queryItemPage(Integer page, Integer size) { List<ItemDTO> result = iTbItemService.page(new Page<TbItem>(page,size),new LambdaQueryWrapper<TbItem>().ne(TbItem::getStatus,3)) .getRecords().stream().map(e->{ ItemDTO itemDTO = new ItemDTO(); itemDTO.setTbItem(e); //查询Stock表 TbItemStock tbItemStock = iTbItemStockService.getById(itemDTO.getTbItem().getId()); itemDTO.setTbItemStock(tbItemStock); return itemDTO; }).collect(Collectors.toList()); return result; } @Override public void saveItem(ItemDTO itemDTO) { iTbItemService.save(itemDTO.getTbItem()); iTbItemStockService.save(itemDTO.getTbItemStock()); } @Override public void updateItem(ItemDTO itemDTO) { iTbItemService.updateById(itemDTO.getTbItem()); iTbItemStockService.updateById(itemDTO.getTbItemStock()); } @Override public void deleteById(Long id) { iTbItemService.removeById(id); iTbItemStockService.removeById(id); } @Override public ItemDTO findById(Long id) { ItemDTO itemDTO = new ItemDTO(); itemDTO.setTbItem(iTbItemService.getById(id)); itemDTO.setTbItemStock(iTbItemStockService.getById(id)); return itemDTO; } }- 1
- 2
- 3
- 4
- 5
- 6
- 7
- 8
- 9
- 10
- 11
- 12
- 13
- 14
- 15
- 16
- 17
- 18
- 19
- 20
- 21
- 22
- 23
- 24
- 25
- 26
- 27
- 28
- 29
- 30
- 31
- 32
- 33
- 34
- 35
- 36
- 37
- 38
- 39
- 40
- 41
- 42
- 43
- 44
- 45
- 46
- 47
- 48
- 49
- 50
- 51
- 52
- 53
- 54
- 55
- 56
- 57
- 58
- 59
- 60
- 61
- 62
- 63
- 64
- 65
- 66
3.2 本地缓存与分布式缓存
分布式缓存(redis)
- 优点:存储容量大、可靠性更好、可以在集群间共享
- 缺点:访问缓存有网络开销
- 场景:缓存数据量大,可靠性要求较高,需要在集群见共享
进程本地缓存(HashMap,GuavaCache)
- 优点:读取本地内存,没有网络开销,速度更快
- 缺点:存储容量有限,可靠性较低、无法共享
- 场景:性能要求较高,存储数据量小
3.3 Cafeine
基于Java8开发的,提供了近乎最佳命中率的高性能的本地缓存库。Spring内部使用的就是Cafeine。
相关具体使用方式请参考Cafeine-官方地址
引入如下依赖<dependency> <groupId>com.github.ben-manes.caffeinegroupId> <artifactId>caffeineartifactId> <version>3.1.1version> dependency>- 1
- 2
- 3
- 4
- 5
- 6
3.3.1 手动加载
public class test { @Test void testBasicOpe(){ //构建 Cache<String, String> cache = Caffeine.newBuilder() .expireAfterWrite(10, TimeUnit.MINUTES) .maximumSize(10_000)//"_"分割符,无意义,方便阅读 .build(); //存储 cache.put("test","测试"); // 查找一个缓存元素, 没有查找到的时候返回null String test = cache.getIfPresent("test"); System.out.println("test="+test); // 查找缓存,如果缓存不存在则生成缓存元素, 如果无法生成则返回null test = cache.get("test2", key -> { //可在此处写数据库业务 return "test2"; }); System.out.println("test="+test); // 移除一个缓存元素 cache.invalidate("test"); System.out.println(cache.getIfPresent("test")); } }- 1
- 2
- 3
- 4
- 5
- 6
- 7
- 8
- 9
- 10
- 11
- 12
- 13
- 14
- 15
- 16
- 17
- 18
- 19
- 20
- 21
- 22
- 23
- 24
- 25
- 26

3.3.2 自动加载
@Test void testBasicOpe() throws ExecutionException, InterruptedException { LoadingCache<String, String> cache = Caffeine.newBuilder() .maximumSize(10_000) .expireAfterWrite(10, TimeUnit.MINUTES) .build(key -> {return "test1";}); // 查找缓存,如果缓存不存在则生成缓存元素, 如果无法生成则返回null String test = cache.get("test1"); List<String> tests = new ArrayList<String>(); tests.add("test2"); tests.add("test3"); // 批量查找缓存,如果缓存不存在则生成缓存元素 Map<String, String> test2 = cache.getAll(tests); System.out.println(test); System.out.println(test2.toString()); }- 1
- 2
- 3
- 4
- 5
- 6
- 7
- 8
- 9
- 10
- 11
- 12
- 13
- 14
- 15
- 16
- 17
- 18

3.3.3 异步手动加载
@Test void testBasicOpe() throws ExecutionException, InterruptedException, TimeoutException { AsyncCache<String, String> cache = Caffeine.newBuilder() .expireAfterWrite(10, TimeUnit.MINUTES) .maximumSize(10_000) .buildAsync(); // 查找缓存元素,如果不存在,则异步生成 CompletableFuture<String> test = cache.get("test", k -> {return "test3";}); System.out.println(test.get()); // 查找一个缓存元素, 没有查找到的时候返回null test = cache.getIfPresent("test"); //会卡在此处,等待有结果后,再继续执行,超时时间为10分钟 System.out.println(test.get(10,TimeUnit.MINUTES)); // 添加或者更新一个缓存元素 cache.put("test", test); // 移除一个缓存元素,synchronous()会强制进入同步状态,待到异步执行完成后才会执行invalidate //我们可以为操作增加synchronous来保证同步 cache.synchronous().invalidate("test"); }- 1
- 2
- 3
- 4
- 5
- 6
- 7
- 8
- 9
- 10
- 11
- 12
- 13
- 14
- 15
- 16
- 17
- 18
- 19
3.3.4 异步自动加载
@Test void testBasicOpe() throws ExecutionException, InterruptedException, TimeoutException { AsyncLoadingCache<String, String> cache = Caffeine.newBuilder() .maximumSize(10_000) .expireAfterWrite(10, TimeUnit.MINUTES) // 你可以选择: 去异步的封装一段同步操作来生成缓存元素 .buildAsync(key -> {return "test1";}); // 你也可以选择: 构建一个异步缓存元素操作并返回一个future // .buildAsync((key, executor) -> createExpensiveGraphAsync(key, executor)); // 查找缓存元素,如果其不存在,将会异步进行生成 CompletableFuture<String> test = cache.get("test1"); List<String> tests = new ArrayList<String>(); tests.add("test2"); tests.add("test3"); // 批量查找缓存元素,如果其不存在,将会异步进行生成 CompletableFuture<Map<String, String>> test2 = cache.getAll(tests); System.out.println(test.get()); System.out.println(test2.get().toString()); }- 1
- 2
- 3
- 4
- 5
- 6
- 7
- 8
- 9
- 10
- 11
- 12
- 13
- 14
- 15
- 16
- 17
- 18
- 19
3.3.5 驱逐策略
驱逐是需要时间的,即使我们maximumSize设为1,我们一次性放入3个然后独处,它一样存在。
- 基于时间
- expireAfterAccess(long, TimeUnit): 一个元素在上一次读写操作后一段时间之后,在指定的时间后没有被再次访问将会被认定为过期项。在当被缓存的元素时被绑定在一个session上时,当session因为不活跃而使元素过期的情况下,这是理想的选择。
- expireAfter(Expiry): 一个元素将会在指定的时间后被认定为过期项。当被缓存的元素过期时间收到外部资源影响的时候,这是理想的选择
- expireAfterWrite(long, TimeUnit): 一个元素将会在其创建或者最近一次被更新之后的一段时间后被认定为过期项。在对被缓存的元素的时效性存在要求的场景下,这是理想的选择。
- 基于容量:
- 最大容量:如果你的缓存容量不希望超过某个特定的大小,那么记得使用Caffeine.maximumSize(long)。缓存将会尝试通过基于就近度和频率的算法来驱逐掉不会再被使用到的元素。
- 最大权重:可以借助Caffeine.weigher(Weigher) 方法来界定每个元素的权重。并通过 Caffeine.maximumWeight(long) 方法来界定缓存中元素的总权重来实现。
- 在基于权重驱逐的策略下,一个缓存元素的权重计算是在其创建和更新时,此后其权重值都是静态存在的,在两个元素之间进行权重的比较的时候,并不会根据进行相对权重的比较。
- 基于引用:Caffeine 允许你配置你的缓存去让GC去帮助清理缓存当中的元素,其中key支持弱引用,而value则支持弱引用和软引用。记住 AsyncCache不支持软引用和弱引用。
-
Caffeine.weakKeys() 在保存key的时候将会进行弱引用。这允许在GC的过程中,当key没有被任何强引用指向的时候去将缓存元素回收。由于GC只依赖于引用相等性。这导致在这个情况下,缓存将会通过引用相等(==)而不是对象相等 equals()去进行key之间的比较。
-
Caffeine.weakValues() 在保存value的时候将会使用弱引用。这允许在GC的过程中,当value没有被任何强引用指向的时候去将缓存元素回收。由于GC只依赖于引用相等性。这导致在这个情况下,缓存将会通过引用相等(==)而不是对象相等 equals()去进行value之间的比较。
-
Caffeine.softValues() 在保存value的时候将会使用软引用。为了相应内存的需要,在GC过程中被软引用的对象将会被通过LRU算法回收。由于使用软引用可能会影响整体性能,我们还是建议通过使用基于缓存容量的驱逐策略代替软引用的使用。同样的,使用 softValues() 将会通过引用相等(==)而不是对象相等 equals()去进行value之间的比较。
-
3.4 整合
- 为根据ID查询商品的业务添加缓存
- 为根据ID查询库存的业务添加缓存
在一个Config里面创建两个缓存即可
package com.yjx23332.item.config; import com.github.benmanes.caffeine.cache.Cache; import com.github.benmanes.caffeine.cache.Caffeine; import com.yjx23332.item.entity.ItemDTO; import com.yjx23332.item.entity.TbItemStock; import org.springframework.context.annotation.Bean; import org.springframework.context.annotation.Configuration; @Configuration public class CaffeineConfig { @Bean public Cache<Long, ItemDTO> itemCache(){ return Caffeine.newBuilder() .initialCapacity(100) .maximumSize(10_000) .build(); } @Bean public Cache<Long, TbItemStock> stockCache(){ return Caffeine.newBuilder() .initialCapacity(100) .maximumSize(10_000) .build(); } }- 1
- 2
- 3
- 4
- 5
- 6
- 7
- 8
- 9
- 10
- 11
- 12
- 13
- 14
- 15
- 16
- 17
- 18
- 19
- 20
- 21
- 22
- 23
- 24
- 25
- 26
- 27
我们接下来,再ItemSerivice中修改
@Autowired private Cache<Long,ItemDTO> itemDTOCache; @Override public ItemDTO findById(Long id) { return itemDTOCache.get(id,key->{ ItemDTO itemDTO = new ItemDTO(); itemDTO.setTbItem(iTbItemService.getById(key)); itemDTO.setTbItemStock(iTbItemStockService.getById(key)); log.info(itemDTO.toString()); return itemDTO; }); }- 1
- 2
- 3
- 4
- 5
- 6
- 7
- 8
- 9
- 10
- 11
- 12
itemControll中修改
@Autowired private Cache<Long,TbItemStock> tbItemStockCache; @GetMapping("/stock/{id}") @ApiOperation("用ID查询库存") public TbItemStock findStockById(@PathVariable("id") Long id){ return tbItemStockCache.get(id,key->{ log.info("查询了数据库"); return iTbItemStockService.getById(key); }); }- 1
- 2
- 3
- 4
- 5
- 6
- 7
- 8
- 9
- 10
- 11
我们通过日志就可以明白是否查询了数据库。
四、LUA脚本
类似于Tomcat+Java
Nginx+LUA4.1 LUA
一种轻量级的小巧的脚本语言。用标准C语言编写,并以源码形式开放,其设计目的是为了嵌入应用程序中,从而为应用程序提供灵活的扩展核定制功能(常用于游戏开发)。
LUA-官方地址
请依据手册进行安装-安装步骤curl -R -O http://www.lua.org/ftp/lua-5.4.4.tar.gz
tar zxf lua-5.4.4.tar.gz
cd lua-5.4.4
make all test4.2 快速开始
可以参考LUA-官方文档
touch hello.lua
运行
在文件中添加
print(“hello world!”);
它不需要编译,直接就可以运行
lua hello.lua

数据类型
数据类型 描述 nil 只有值nil属于该类,表示一个无效值(表达式中类似于false) boolean 包含两个值true,false number 数值类型,双精度实浮点数 string 字符串由一对双引号或者单引号来表示 function 由C或者Lua编写的函数 table Lua中的表(table)其实是一个“关联数组”,数组索引可以是数字,字符串或者表类型。在LUA里面,table的创建是通过“构造表达式”来完成,最简单的构造表达式"{}" ,来创建要给空表 type(): 用来测试给定变量或者值的类型
直接输入Lua可以进入lua控制台。


声明变量
他是弱类型语言
local代表局部变量,控制台中一行结束就没了local str = 'hello' local num = 21 local flag = true local arr = {'arr','python','lua'} local map = {name='Jack',age=21}- 1
- 2
- 3
- 4
- 5
访问table
print(arr[1]) print(map['name']) print(map.name)- 1
- 2
- 3
字符串拼接
local str = 'hello' local str1 = str..' world' print(str1)- 1

循环
local arr = {'java','python','lua'} local map = {name='Jack',age=21} for index,value in ipairs(arr) do print(index,value) end for key,value in pairs(map) do print(key,value) end- 1
- 2
- 3
- 4
- 5
- 6
- 7
- 8
- 9

函数
function 函数名称(参数1,参数2,...,参数n) --函数体 return 返回值 end- 1
- 2
- 3
- 4
function printArr(arr) for index,value in ipairs(arr) do print(index,value) end end local arrTest = {'java','c++','python','lua'} printArr(arrTest)- 1
- 2
- 3
- 4
- 5
- 6
- 7
- 8

条件控制
lua中与或非用的是单词and、or、not
if 表达式 then 语句块 elseif then 语句块 else 语句块 end- 1
- 2
- 3
- 4
- 5
- 6
- 7
- 8
- 9
function printArr(arr) for index,value in ipairs(arr) do if(value == 'java') then print('条件1') elseif(value == 'c++') then print('条件2') else print('条件3,4') end print(index,value) end end local arrTest = {'java','c++','python','lua'} printArr(arrTest)- 1
- 2
- 3
- 4
- 5
- 6
- 7
- 8
- 9
- 10
- 11
- 12
- 13
- 14
- 15
- 16
- 17

4.3 OpenResty
一个基于Nginx的高性能Web平台,用于方便的地搭建能够处理超高并发、扩展性极高的动态Web应用、Web服务和动态网关。
- 具备Nginx的完整功能
- 基于Lua语言进行扩展,集成了大量精良的Lua库,第三方模块
- 允许使用Lua自定义业务逻辑、自定义库
4.3.1 安装
依赖库安装
yum install -y pcre-devel openssl-devel gcc --skip-broken
添加仓库地址
yum-config-manager --add-repo https://openresty.org/package/centos/openresty.repo
如过命令不存在,则运行如下命令后,在执行上面语句
yum install -y yum-utils
安装OpenResty
yum install -y openresty
安装opm工具,OpenResty的管理工具
yum install -y openresty-opm
目录默认在
/usr/local/openresty

vim /etc/profile
加入
export NGINX_HOME=/usr/local/openresty/nginx export PATH=${NGINX_HOME}/sbin:$PATH- 1
- 2
输入命令,让配置生效
source /etc/profile
修改
vim /usr/local/openresty/nginx/conf/nginx.conf
#user nobody worker_processes 1; error_log logs/error.log; events { worker_connections 1024; } http { include mime.types; default_type application/octet-stream; sendfile on; keepalive_timeout 65; server { listen 8081; server_name localhost; location / { root html; index index.html index.htm; } error_page 500 502 503 504 /50x.html; location = /50x.html { root html; } } }- 1
- 2
- 3
- 4
- 5
- 6
- 7
- 8
- 9
- 10
- 11
- 12
- 13
- 14
- 15
- 16
- 17
- 18
- 19
- 20
- 21
- 22
- 23
- 24
- 25
- 26
- 27
- 28
- 29
- 30
- 31
- 32
- 33
- 34
- 35
- 36
开放对应端口,并重新载入
firewall-cmd --zone=public --add-port=8081/tcp --permanent
firewall-cmd --reload
服务管理平台端口放行

4.3.2 命令
启动
nginx
重新加载配置
nginx -s reload
停止
nginx -s stop


4.3.3 配置LUA
在nginx.conf的http下面,添加对OpenResty的LUA模块的加载:
# 加载lua模块 lua_package_path "/usr/local/openresty/lualib/?.lua;;"; # 加载C模块 lua_package_cpath "/usr/local/openresty/lualib/?.so;;";- 1
- 2
- 3
- 4
在nginx.conf的Server下面,添加对/api/item这个路径的监听:
location /api/item { # 响应类型 default_type application/json; #响应数据由 lua/.item.lua这个文件决定 content_by_lua_file lua/item.lua; }- 1
- 2
- 3
- 4
- 5
- 6
接下来我们在nginx目录中,新建一个lua目录,在其下创建一个item.lua。
我们不先不写业务,而是写一个假数据返回。
ngx.say('{"id":10001,"name":"SSALSA AIR"}')- 1
接着,我们在本地windows安装nginx,
进入nginx.conf
添加一个配置http{ ... # 集群名称 以及内部的服务器 upstream nginx-cluster{ server 服务器地址:8081; } server{ ... location /api { proxy_pass http://nginx-cluster; } } }- 1
- 2
- 3
- 4
- 5
- 6
- 7
- 8
- 9
- 10
- 11
- 12
- 13
我们接着用POSTMAN发送消息,可以看到如下结果。

4.3.4 获取不同类型的请求参数
参数格式 参数示例 参数解析代码示例 参数格式 参数示例 参数解析代码示例 路径占位符 /item/1001 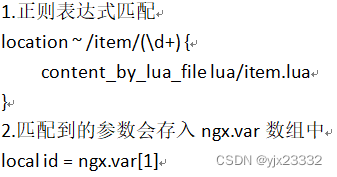
请求头 id:1001 local headers = ngx.req.get_headers() Get请求参数 ?id=1001 local getParams=ngx.req.get_uri_args() Post表单参数 id=1001 ngx.req.read_body() ; local postParams = ngx.req.get_post_args() Json参数 {“id”:1001} ngx.req.read_body() ; local jsonBody= ngx.req.get_body_data() 4.3.5 nginx到tomcat
我们修改nginx.conf,为占位符获取参数,并reload配置
location ~ /api/item/(\d+) { # 响应类型 default_type application/json; #响应数据由 lua/.item.lua这个文件决定 content_by_lua_file lua/item.lua; }- 1
- 2
- 3
- 4
- 5
- 6
lua脚本修改
-- 获取路径参数 local id = ngx.var[1] -- 返回结果 ngx.say('{"id":'..id..',"name":"SSALSA AIR"}')- 1
- 2
- 3
- 4

接下来我们从lua发送请求到tomcat
local resp = ngx.location.capture("/item",{ method = ngx.HTTP_GET, --请求方式 args = {a=1,b=2}, --get方式传参数 body = "a=3&d=4 -- post方式传参数 })- 1
- 2
- 3
- 4
- 5
- 6
我们请求地址,会被nginx截获,因此我们需要再次反向代理,让nginx反向代理到我们的tomcat即可。
location /item{ # 注意端口是否开放 proxy_pass http://IP地址:8081; }- 1
- 2
- 3
- 4
对于Lua的请求方法,我们可以封装为一个函数,放到OpenResty函数库中。
位置就是我们之前配置的位置vim /usr/local/openresty/lualib/common.lua
-- 封装函数,发送Http请求,并解析响应 local function read_http(path,params) local resp = ngx.location.capture(path,{ method = ngx.HTTP_GET, args = params, }) if not resp then -- 记录错误信息,返回404 ngx.log(ngx.ERR,"http not found , path:",path,"args:",args) ngx.exit(404) end return resp.body end -- 将方法导出 local _M = { read_http = read_http } return _M- 1
- 2
- 3
- 4
- 5
- 6
- 7
- 8
- 9
- 10
- 11
- 12
- 13
- 14
- 15
- 16
- 17
- 18
修改lua
-- 导入common函数库 -- 导入我们刚写的请求函数 local common = require('common') local read_http = common.read_http -- 导入cjson库 local cjson = require('cjson') -- 获取路径参数 local id = ngx.var[1] -- 查询商品信息 local itemJSON = read_http("/item/"..id,nil) -- 查询库存信息 local stockJSON = read_http("/item/stock/"..id,nil) -- 解析JSON,将它反序列化为table类型 local item = cjson.decode(itemJSON) local stock = cjson.decode(stockJSON) -- 组合数据 item.stock = stock.stock item.sold = stock.sold -- 返回结果,序列化回去 ngx.say(cjson.encode(item))- 1
- 2
- 3
- 4
- 5
- 6
- 7
- 8
- 9
- 10
- 11
- 12
- 13
- 14
- 15
- 16
- 17
- 18
- 19
- 20
- 21
- 22
- 23
- 24
- 25
tomcat集群
在server中配置location /item { proxy_pass http://tomcat-cluster; }- 1
- 2
- 3
在http中配置
upstream tomcat-cluster{ server IP:端口1 server IP:端口2 }- 1
- 2
- 3
- 4
因为我们tomcat有进程缓存,那么如果过同一个商品在集群中的各个服务器都被访问了,那么就会冗余。为了避免冗余,可以依据访问路径来产生Hash值,来确保,路径不变时,那么使用的服务器不变。
- 当然也有问题,就是如果过服务器挂掉,会很麻烦。
upstream tomcat-cluster{ hash $request_uri; server IP:端口1 server IP:端口2 }- 1
- 2
- 3
- 4
- 5
4.3.6 nginx到redis
- 冷启动:服务器刚刚启动时,Redis中并没有缓存,如果所有商品数据在第一次查询时添加缓存,可能会给数据库带来较大的压力
- 缓存预热:在实际开发中,我们可以利用大数据统计技术,只需要在项目启动时,提前查询热点数据并保存在Redis
我们先进行缓存预热
现在服务器中部署redisdocker run --name redis -p 6379:6379 -d redis redis-server --appendonly yes
再在项目中导入
<dependency> <groupId>org.springframework.bootgroupId> <artifactId>spring-boot-starter-data-redisartifactId> dependency> <dependency> <groupId>com.alibabagroupId> <artifactId>fastjsonartifactId> <version>2.0.7version> dependency>- 1
- 2
- 3
- 4
- 5
- 6
- 7
- 8
- 9
在yml文件中,配置redis地址
spring: redis: host: IP port: 6379- 1
- 2
- 3
- 4
package com.yjx23332.item.config; import com.alibaba.fastjson2.JSON; import com.yjx23332.item.entity.TbItem; import com.yjx23332.item.entity.TbItemStock; import com.yjx23332.item.service.ITbItemService; import com.yjx23332.item.service.ITbItemStockService; import org.springframework.beans.factory.InitializingBean; import org.springframework.beans.factory.annotation.Autowired; import org.springframework.context.annotation.Configuration; import org.springframework.data.redis.core.StringRedisTemplate; import java.util.List; @Configuration public class RedisHandler implements InitializingBean { @Autowired private StringRedisTemplate redisTemplate; @Autowired private ITbItemService itemService; @Autowired private ITbItemStockService iTbItemStockService; /** * 初始化缓存,在RedisHandler初始化且成员变量完成后,执行 * 此处我们直接将所有数据放入 * */ @Override public void afterPropertiesSet() throws Exception { List<TbItem> itemList = itemService.list(); for(TbItem item:itemList){ String json = JSON.toJSONString(item); redisTemplate.opsForValue().set("item:id:"+item.getId().toString(),json); } List<TbItemStock> itemStocks = iTbItemStockService.list(); for(TbItemStock itemStock: itemStocks){ String json = JSON.toJSONString(itemStock); redisTemplate.opsForValue().set("itemStock:id:"+itemStock.getItemId().toString(),json); } } }- 1
- 2
- 3
- 4
- 5
- 6
- 7
- 8
- 9
- 10
- 11
- 12
- 13
- 14
- 15
- 16
- 17
- 18
- 19
- 20
- 21
- 22
- 23
- 24
- 25
- 26
- 27
- 28
- 29
- 30
- 31
- 32
- 33
- 34
- 35
- 36
- 37
- 38
- 39
- 40
- 41
- 42
- 43
去redis中查看

我们在看lua部分
连接部分-- 引入Redis模块 local redis = require("resty.redis") -- 初始化Redis对象,创建对象 local red = redis:new() --设置Redis超时时间单位毫秒,建立连接的超时时间、发送请求的超时时间、响应结果的超时时间 red:set_timeouts(1000,1000,1000)- 1
- 2
- 3
- 4
- 5
- 6
关闭连接的函数,用来把连接放在连接池中,避免每次都新建
-- 关闭redis连接的工具方法,实则是放入连接池 local function close_redis(red) local pool_max_idle_time = 10000 -- 连接空闲时间,单位为毫秒 local pool_size = 100 -- 连接池大小 -- 设置保存时间,并放入连接池 local ok,err = red:set_keepalive(pool_max_idle_time,pool_size) if not ok then ngx.log(ngx.ERR,"放入Redis连接池失败:",err) end end- 1
- 2
- 3
- 4
- 5
- 6
- 7
- 8
- 9
- 10
查询部分
-- 查询redis的方法,ip和port是redis地址,key为查询的key local function read_redis(ip,port,key) -- 获取一个连接 local ok,err = red:connect(ip,port) if not ok then ngx.log(ngx.ERR,"连接redis失败:",err) return nil end -- 查询 redis local resp ,err = red:get(key) -- 查询失败处理 if not resp then ngx.log(ngx.ERR,"查询Redis失败:",err,",key = ",key) end -- 得到的数据为空处理 if resp == ngx.null then resp = nil ngx.log(ngx.ERR,"查询Redis数据为空,key = ",key) end close_redis(red) return resp end- 1
- 2
- 3
- 4
- 5
- 6
- 7
- 8
- 9
- 10
- 11
- 12
- 13
- 14
- 15
- 16
- 17
- 18
- 19
- 20
- 21
- 22
我们将上述所有组合在一起,就是我们可用的方法,将它放入我们之前写得工具类Common中
local redis = require("resty.redis") -- 初始化Redis对象,创建对象 local red = redis:new() --设置Redis超时时间单位毫秒,建立连接的超时时间、发送请求的超时时间、响应结果的超时时间 red:set_timeouts(1000,1000,1000) -- 关闭redis连接的工具方法,实则是放入连接池 local function close_redis(red) local pool_max_idle_time = 10000 -- 连接空闲时间,单位为毫秒 local pool_size = 100 -- 连接池大小 -- 设置保存时间,并放入连接池 local ok,err = red:set_keepalive(pool_max_idle_time,pool_size) if not ok then ngx.log(ngx.ERR,"放入Redis连接池失败:",err) end end -- 查询redis的方法,ip和port是redis地址,key为查询的key local function read_redis(ip,port,key) -- 获取一个连接 local ok,err = red:connect(ip,port) if not ok then ngx.log(ngx.ERR,"连接redis失败:",err) return nil end -- 查询 redis local resp ,err = red:get(key) -- 查询失败处理 if not resp then ngx.log(ngx.ERR,"查询Redis失败:",err,",key = ",key) end -- 得到的数据为空处理 if resp == ngx.null then resp = nil ngx.log(ngx.ERR,"查询Redis数据为空,key = ",key) end close_redis(red) return resp end -- 封装函数,发送Http请求,并解析响应 local function read_http(path,params) local resp = ngx.location.capture(path,{ method = ngx.HTTP_GET, args = params, }) if not resp then -- 记录错误信息,返回404 ngx.log(ngx.ERR,"http not found , path:",path,"args:",args) ngx.exit(404) end return resp.body end -- 将方法导出 local _M = { read_http = read_http, read_redis = read_redis } return _M- 1
- 2
- 3
- 4
- 5
- 6
- 7
- 8
- 9
- 10
- 11
- 12
- 13
- 14
- 15
- 16
- 17
- 18
- 19
- 20
- 21
- 22
- 23
- 24
- 25
- 26
- 27
- 28
- 29
- 30
- 31
- 32
- 33
- 34
- 35
- 36
- 37
- 38
- 39
- 40
- 41
- 42
- 43
- 44
- 45
- 46
- 47
- 48
- 49
- 50
- 51
- 52
- 53
- 54
- 55
- 56
- 57
- 58
- 59
- 60
- 61
- 62
- 63
- 64
- 65
- 66
随后修改我们的item.lua
-- 导入common函数库 -- 导入我们刚写的请求函数 local common = require('common') local read_http = common.read_http local read_redis = common.read_redis -- 导入cjson库 local cjson = require('cjson') -- 封装查询函数 function read_data(key,path,params) -- 查询redis local resp = read_redis("127.0.0.1",6379,key) if not resp then ngx.log(ngx.ERR,"redis查询失败,尝试查询http,key:",key) -- redis查询失败,去查询http resp = read_http(path,params) end return resp; end -- 获取路径参数 local id = ngx.var[1] -- 查询商品信息 local itemJSON = read_data("item:id:"..id,"/item/"..id,nil) -- 查询库存信息 local stockJSON = read_data("itemStock:id:"..id,"/item/stock/"..id,nil) -- 解析JSON,将它反序列化为table类型 local item = cjson.decode(itemJSON) local stock = cjson.decode(stockJSON) -- 组合数据 item.stock = stock.stock item.sold = stock.sold -- 返回结果,序列化回去 ngx.say(cjson.encode(item))- 1
- 2
- 3
- 4
- 5
- 6
- 7
- 8
- 9
- 10
- 11
- 12
- 13
- 14
- 15
- 16
- 17
- 18
- 19
- 20
- 21
- 22
- 23
- 24
- 25
- 26
- 27
- 28
- 29
- 30
- 31
- 32
- 33
- 34
- 35
- 36
- 37
- 38
随后nginx重载配置。

4.3.7 共享词典
OpenResty为Nginx提供了shared dict的功能,可以在ngxin的多个work之间共享数据,实现缓存。
在nginx.conf 的http下添加配置
# 共享词典也就是本地缓存,名称叫作:item_cache,大小150m lua_shared_dict item_cache 150m- 1
- 2
操作共享词典
local item_cache = ngx.shared.item_cache -- 存储,指定key,value,过期时间,单位s,默认为0代表永不过期 item_cache:set('key','value',1000) -- 读取 local val = item_cache:get('key')- 1
- 2
- 3
- 4
- 5
五、缓存同步
解决数据一致性问题。
5.1 同步策略
- 设置有效期:给缓存设置有效期,到期后自动删除。再次查询时更新。
- 优势:简单、方便
- 缺点:时效性差,缓存过期之前可能不一致
- 场景:更新频率较低,时效性要求低的业务
- 同步双写:在修改数据库的同时,直接修改缓存
- 优点:时效性强,缓存与数据库强一致
- 缺点:有代码侵入,耦合度高
- 场景:对一致性、时效性要求较高的缓存数据
- 异步通知:修改数据库时发送事件通知,相关服务监听到通知后修改缓存数据
- 优点:低耦合,可以同时通知多个缓存服务
- 缺点:时效性一般,可能存在中间不一致状态
- 场景:时效性要求一般,有多个服务需求同步
MQ模型
基于Canal的异步通知
5.2 canal
利用MySQL的主从同步原理,将自己作为MySQL的一个从服务节点,然后通知相关节点,以此完成同步。
5.2.1 MySQL主从配置
修改
vim /tmp/mysql/conf/my.cnf
添加内容
- binlog位置以及监控哪一个数据库
log-bin=/var/lib/mysql/mysql-bin
binlog-do-db=test重启数据库
docker restart mysql
会有如下文件

没有则考虑- 是否有读写权限
- 是否有**[mysqld]**标志或者其他未配置的基础信息
 接下来创建一个用户,用于canal的操作
create user canal@'%' IDENTIFIED by 'canal'; GRANT SELECT ,REPLICATION SLAVE,REPLICATION CLIENT,SUPER ON *.* TO 'canal'@'%' IDENTIFIED by 'canal'; FLUSH PRIVILEGES;- 1
- 2
- 3
随后重启
docker restart mysql
可在查看自己用户

查看当前binlogshow master status; 或者 show binary logs;- 1
- 2
- 3
通过主库与从库的Position对比,从库小于主库则说明要更新了

为它们创建一个网络
docker network create masterslave
随后让mysql加入这个wangluo
docker network connect masterslave mysql
5.2.2 安装
docker pull canal/canal-server:latest
部署镜像
docker run -p 11111:11111 --name canal -e canal.destinations=test -e canal.instance.master.address=mysql:3306 -e canal.instance.dbUsername=canal -e canal.instance.dbPassword=canal -e canal.instance.connectionCharset=UTF-8 -e canal.instance.tsdb.enable=true -e canal.instance.gtidon=false -e canal.instance.filter.regex=test\\..* --network masterslave -d canal/canal-server:latest- 1
接下来开放对应端口即可。
成功启动后。
我们进入容器docker exec -it canal bash
可以查看运行日志
tail -f canal-server/logs/canal/canal.log
通过
可以看到同步信息tail -f canal-server/logs/test/test.log

5.2.3 监听后更新Redis
导入该依赖
<dependency> <groupId>top.javatoolgroupId> <artifactId>canal-spring-boot-starterartifactId> <version>1.2.1-RELEASEversion> dependency>- 1
- 2
- 3
- 4
- 5
配置yml
canal: destination: test #要与canal-server运行时设置的名称一致 server: IP地址:11111- 1
- 2
- 3
笔者这里图方便,直接写在一起了
修改RedisHandler
package com.yjx23332.item.config; import com.alibaba.fastjson2.JSON; import com.alibaba.fastjson2.JSONException; import com.yjx23332.item.entity.TbItem; import com.yjx23332.item.entity.TbItemStock; import com.yjx23332.item.service.ITbItemService; import com.yjx23332.item.service.ITbItemStockService; import org.springframework.beans.factory.InitializingBean; import org.springframework.beans.factory.annotation.Autowired; import org.springframework.context.annotation.Configuration; import org.springframework.data.redis.core.StringRedisTemplate; import java.util.List; @Configuration public class RedisHandler implements InitializingBean { @Autowired private StringRedisTemplate redisTemplate; @Autowired private ITbItemService itemService; @Autowired private ITbItemStockService iTbItemStockService; /** * 初始化缓存,在RedisHandler初始化且成员变量完成后,执行 * 此处我们直接将所有数据放入 * */ @Override public void afterPropertiesSet() throws Exception { List<TbItem> itemList = itemService.list(); for(TbItem item:itemList){ String json = JSON.toJSONString(item); redisTemplate.opsForValue().set("item:id:"+item.getId().toString(),json); } List<TbItemStock> itemStocks = iTbItemStockService.list(); for(TbItemStock itemStock: itemStocks){ String json = JSON.toJSONString(itemStock); redisTemplate.opsForValue().set("itemStock:id:"+itemStock.getItemId().toString(),json); } } public void saveItem(TbItem item){ try { String json = JSON.toJSONString(item); redisTemplate.opsForValue().set("item:id:" + item.getId(), json); } catch (JSONException ex){ throw new RuntimeException(ex); } } public void deleteItemById(Long id){ redisTemplate.delete("item:id:" + id); } }- 1
- 2
- 3
- 4
- 5
- 6
- 7
- 8
- 9
- 10
- 11
- 12
- 13
- 14
- 15
- 16
- 17
- 18
- 19
- 20
- 21
- 22
- 23
- 24
- 25
- 26
- 27
- 28
- 29
- 30
- 31
- 32
- 33
- 34
- 35
- 36
- 37
- 38
- 39
- 40
- 41
- 42
- 43
- 44
- 45
- 46
- 47
- 48
- 49
- 50
- 51
- 52
- 53
- 54
- 55
- 56
这里实体类的标记与Mybatis-plus类似
- @Id:注解来标记ID
- @Column:注解来标记表中与属性名不一致的字段
- @Transient:标记不属于表中的字段
全部更新操作同理,此处省略。
package com.yjx23332.item.listener; import com.yjx23332.item.config.RedisHandler; import com.yjx23332.item.entity.TbItem; import org.springframework.beans.factory.annotation.Autowired; import org.springframework.stereotype.Component; import top.javatool.canal.client.annotation.CanalTable; import top.javatool.canal.client.handler.EntryHandler; @CanalTable("tb_item") @Component public class ItemHandler implements EntryHandler<TbItem> { @Autowired private RedisHandler redisHandler; @Override public void delete(TbItem tbItem) { redisHandler.deleteItemById(tbItem.getId()); } @Override public void insert(TbItem tbItem) { redisHandler.saveItem(tbItem); } @Override public void update(TbItem before, TbItem after) { redisHandler.saveItem(after); } }- 1
- 2
- 3
- 4
- 5
- 6
- 7
- 8
- 9
- 10
- 11
- 12
- 13
- 14
- 15
- 16
- 17
- 18
- 19
- 20
- 21
- 22
- 23
- 24
- 25
- 26
- 27
- 28
- 29
- 30
参考文献
[1]黑马程序员Java微服务
[2]Cafeine-官方地址
[3]LUA-官方地址
[4]OpenResty官网 -
相关阅读:
修改iframe生成的pdf的比例
利用鸿蒙系统硬件实现音乐播放功能之优秀
java计算机毕业设计VUE商场库存管理系统MyBatis+系统+LW文档+源码+调试部署
流的过滤器串链
飞驰的高铁-第15届蓝桥杯第一次STEMA测评Scratch真题精选
Yii post()追加数据,模块之间的调用runAction
【Java】Java核心API概述
Modbus TCP转Profinet网关集中采集电源能耗数据到中控西门子1200plc
数据结构与算法——16.二叉树
Java集合实现(一) ArrayList源码以及手写ArrayList
- 原文地址:https://blog.csdn.net/weixin_46949627/article/details/126574704
