-
猿创征文|Highgo Database安全版安装指导手册

目录
Highgo Database安全版安装指导手册
通用机使用的是国产芯片,操作系统为中标麒麟7.0,未做三权分立,作为普通Linux服务器使用。
本文演示过程使用的操作系统是RedHat7,与中标麒麟安装过程完全一致。
一、安装检查
1.1、要验证系统是否满足要求
要验证系统是否满足要求 Highgo Database4.x数据库的最低要求,以 root 用户身份登录并运行以下命令。要查看可用 RAM 和交换空间大小,运行以下命令:
- df -h
- free -h
- grep MemTotal /proc/meminfo
- grep SwapTotal /proc/meminfo
- # grep MemTotal /proc/meminfo
- MemTotal:512236 kB
- # grep SwapTotal /proc/meminfo
- SwapTotal:1574360 kB
内存及对应swap建议值参照表:
MemTotal
SwapTotal
8G
2~4G
8~16G
16~64G
8~32G
>=64G
32G
1.2、检查内核参数
- cat /proc/sys/kernel/shmmax
- cat /proc/sys/kernel/shmall
- cat /proc/sys/kernel/shmmni
- 这个参数(系统共享内存段的最大数量)数据库自动修改
内存大小及对应内核参数建议值:
MemTotal
shmall
shmmax
8G
7~8G
4G
8~64G
M*50%
M*90~95%
>=64G
32G
M*90%~95%
二、安装前准备
2.1、关闭防火墙
在NeoKylin 6.X执行如下命令
- service iptables stop
- chkconfig iptables off
- service iptables status
- service NetworkManager stop
- chkconfig NetworkManager off
- service NetworkManager status
在NeoKylin 7.X(当前项目中的通用机大部分为7.x)执行如下命令
- systemctl stop firewalld.service
- systemctl disable firewalld.service
- systemctl status firewalld.service
- systemctl stop NetworkManager.service
- systemctl disable NetworkManager.service
- systemctl status NetworkManager.service
2.2、关闭SELINUX
- sed -i "s/SELINUX=enforcing/SELINUX=disabled/g" /etc/selinux/config
- setenforce 0
- cat /etc/selinux/config | grep SELINUX=disabled
- getenforce
2.3、检查主机名
- [root@hgdb ~]# hostnamectl status
- Static hostname: hgdb
- Icon name: computer-vm
- Chassis: vm
- Machine ID: 5c7b0775b96044209a3858d9773a5b83
- Boot ID: a379f124abc746c190aca4932ee34fe1
- Virtualization: vmware
- Operating System: Red Hat Enterprise Linux Server 7.3 (Maipo)
- CPE OS Name: cpe:/o:redhat:enterprise_linux:7.3:GA:server
- Kernel: Linux 3.10.0-514.el7.x86_64
- Architecture: x86-64
2.4、检查时间和时区
- [root@hgdb ~]$ timedatectl
- Local time: Fri 2018-10-19 18:52:17 CST
- Universal time: Fri 2018-10-19 10:52:17 UTC
- RTC time: Fri 2018-10-19 10:52:18
- Time zone: Asia/Shanghai (CST, +0800)
- NTP enabled: no
- NTP synchronized: no
- RTC in local TZ: no
- DST active: n/a
NeoKylin 7.X下如何修改时区
- [root@hgdb ~]# timedatectl list-timezones
- [root@hgdb ~]# timedatectl set-timezone Asia/Shanghai
- 修改时间
- [root@hgdb ~]# date -s "20170622 10:26:00"
2.5、安装系统软件包
配置yum源
- [root@hgdb ~]# cat /etc/yum.repos.d/highgo.repo
- [rhel]
- name=rhel
- baseurl=file:///media/cdrom
- enabled=1
- gpgcheck=0
- [root@hgdb ~]# mkdir /media/cdrom
- [root@hgdb ~]# mount /dev/cdrom /media/cdrom
- mount: /dev/sr0 is write-protected, mounting read-only
安装依赖包
- [root@hgdb ~]# yum clean all
- [root@hgdb ~]# yum list
- [root@hgdb ~]# yum install vim wget readline readline-devel zlib zlib-devel
- openssl openssl-devel pam-devel libxml2-devel libxslt-devel python-devel
- tcl-devel gcc gcc-c++ rsync -y
2.6、配置hosts
- [root@hgdb ~]# cat /etc/hosts
- 127.0.0.1 localhost localhost.localdomain localhost4 localhost4.localdomain4
- ::1 localhost localhost.localdomain localhost6 localhost6.localdomain6
- 192.168.80.10 hgdb
2.7、创建highgo用户并修改密码
- [root@hgdb ~]# groupadd -g 5866 highgo
- [root@hgdb ~]# useradd -u 5866 -g highgo highgo
- [root@hgdb ~]# passwd highgo
2.8、创建数据库安装目录
数据库安装目录建议使用单独的磁盘或者lv卷组。
- [root@hgdb ~]# mkdir -p /data/highgo/4.3.4 -p
- [root@hgdb ~]# chown -R highgo:highgo /data
- #归档目录
- [root@hgdb ~]# mkdir /hgdbbak/archive -p
- #备份目录
- [root@hgdb ~]# chown -R highgo:highgo /hgdbbak/
2.9、配置操作系统limits
- [root@hgdb ~]# vi /etc/security/limits.conf
- #for highgo db 4.3.4
- highgo soft core unlimited
- highgo hard nproc unlimited
- highgo soft nproc unlimited
- highgo hard memlock unlimited
- highgo hard nofile 1024000
- highgo soft memlock unlimited
- highgo soft nofile 1024000
- highgo hard stack 65536
- highgo soft stack 65536
2.10、设置highgo用户环境变量
- [root@hgdb ~]# vi /home/highgo/.bashrc
- export PGHOME=/data/highgo/4.3.4
- export PGUSER=highgo
- export PGPORT=5866
- export PGDATA=$PGHOME/data
- export PATH=$PGHOME/bin:$PATH:$HOME/bin
- export LD_LIBRARY_PATH=$PGHOME/lib:$LD_LIBRARY_PATH
2.11、上传并解压HGDB安装包
- [root@hgdb upload]# tar -zxvf hgdb4.3.4-sec-rhel7.x-x86-64-20190130_195124.tar.gz
- [root@hgdb upload]# chown -R highgo:highgo hgdb_install4.3.4_redhat7.x_Enterprise_64/
- [root@hgdb upload]# ll
- drwxr-xr-x. 4 highgo highgo 50 Jul 7 17:49 hgdb_install4.3.4_redhat7.x_Enterprise_64
三、安装Highgo Database软件
3.1、图形化安装
1、 首先应确保可以开启图形化界面,如果未安装图形界面使用如下命令进行安装
- NeoKylin 6.X
- yum groupinstall "X Window System" "Desktop"
- NeoKylin 7.X
- [root@hgdb ~]# yum -y groupinstall "Server with GUI"
2、 进入highgo用户执行安装程序
图形界面登录服务器
请按照如下步骤:- [root@hgdb 4.3.4]# xhost +
- access control disabled, clients can connect from any host
- su - highgo
- [highgo @hgdb ~]# export DISPLAY=:0.0
- [highgo @ hgdb 4.3.4]# ./runinstall


使用root用户执行以上脚本,然后点击“OK”。
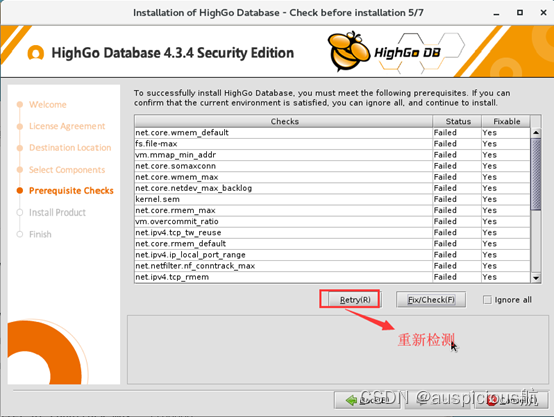

上图中的两个问题是由于关闭防火墙导致找不到参数,可以直接忽略。
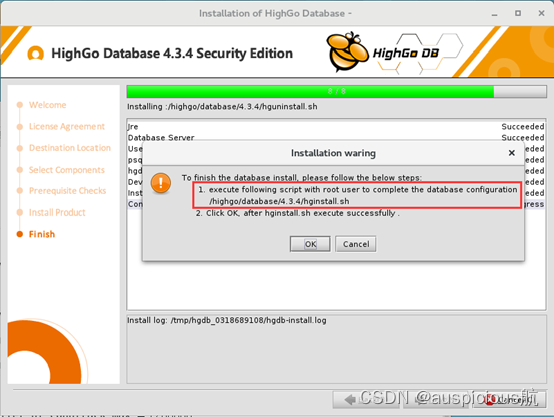
root用户执行上面脚本后,点击“OK”
- [root@localhost ~]# sh /highgo/database/4.3.4/hginstall.sh
- Starting HighGo Database Server:
- waiting for server to start.... done
- server started
- HighGo Database Server started successfully

3.2、字符界面安装
- [highgo@hgdb hgdb_enterprise_4.3.4_redhat7.x_x86-64_install_20180919]$ ./runinstall
- Welcome to the installation of HighGo Database 4.3.4 Enterprise Edition !
- press 1 to continue, 2 to quit, 3 to redisplay
- 1
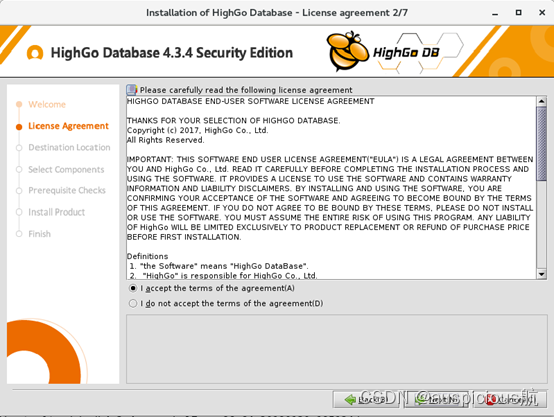
- HIGHGO DATABASE END-USER SOFTWARE LICENSE AGREEMENT
- THANKS FOR YOUR SELECTION OF HIGHGO DATABASE.
- Copyright (c) 2017, HighGo Co., Ltd.
- All Rights Reserved.
- IMPORTANT: THIS SOFTWARE END USER LICENSE AGREEMENT("EULA") IS A LEGAL AGREEMENT BETWEEN YOU AND HighGo Co., Ltd. READ IT CAREFULLY BEFORE COMPLETING THE INSTALLATION PROCESS AND USING THE SOFTWARE. IT PROVIDES A LICENSE TO USE THE SOFTWARE AND CONTAINS WARRANTY INFORMATION AND LIABILITY DISCLAIMERS. BY INSTALLING AND USING THE SOFTWARE, YOU ARE CONFIRMING YOUR ACCEPTANCE OF THE SOFTWARE AND AGREEING TO BECOME BOUND BY THE TERMS OF THIS AGREEMENT. IF YOU DO NOT AGREE TO BE BOUND BY THESE TERMS, PLEASE DO NOT INSTALL OR USE THE SOFTWARE. YOU MUST ASSUME THE ENTIRE RISK OF USING THIS PROGRAM. ANY LIABILITY OF HighGo WILL BE LIMITED EXCLUSIVELY TO PRODUCT REPLACEMENT OR REFUND OF PURCHASE PRICE BEFORE FIRST INSTALLATION.
- Definitions
- 1. "the Software" means "HighGo DataBase".
- 2. "HighGo" is responsible for HighGo Co., Ltd.
- License Grants
- 1. You may use the Software for free for non-commercial use under the License Restrictions.
- 2. You may use the Software for commercial use after purchasing the commercial license. Moreover, according to the license you purchased you may get specified term, manner and content of technical support from HighGo.
- License Restrictions
- 1. You may not use the Software for commercial use or profit use, unless you have been licensed to. To purchase the license , please visit http://www.highgo.com for more information.
- 2. You may not rent, lease, sublicense, sell, assign, pledge the Software and its services.
- 3. You may not modify the Software to create derivative works for redistribution based upon the Software.
- 4. In the event that you fail to comply with this agreement, your license will be terminated.
- LIMITED WARRANTY AND DISCLAIMER
- 1. THE SOFTWARE AND THE ACCOMPANYING FILES ARE SOLD "AS IS" AND WITHOUT WARRANTIES AS TO PERFORMANCE OF MERCHANTABILITY OR ANY OTHER WARRANTIED WHETHER EXPRESSED OR IMPLIED.
- 2. You must assume the entire risk of using the Software. ANY LIABILITY OF HIGHGO WILL BE LIMITED EXCLUSIVELY TO PRODUCT REPLACEMENT, REFUND OF PURCHASE PRICE BEFORE YOUR FIRST INSTALLATION.
- press 1 to accept, 2 to reject, 3 to redisplay
- 1
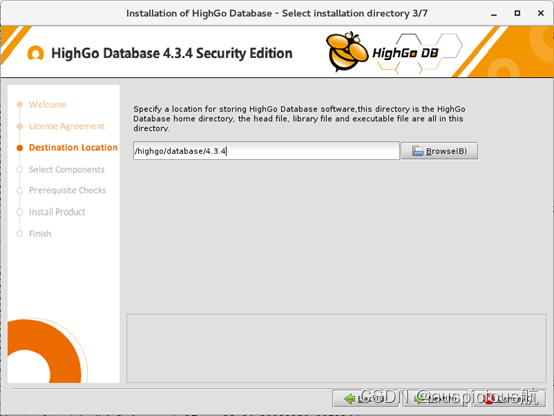
- Select target path [/data/hgdb/4.3.4]
- /data/highgo/4.3.4
- press 1 to continue, 2 to quit, 3 to redisplay
- 1
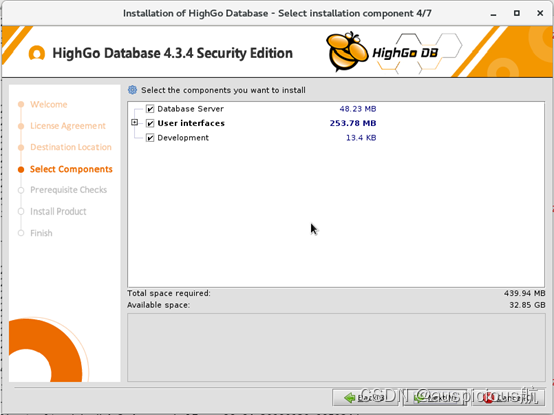
- TreePacksPanel
- [JDK_JRE] [required]
- [hgdb.dbserverPack] [Already Selected]
- [hgdb.userInterfacePack] [Already Selected]
- psql [Already Selected]
- hgdbAdmin [Already Selected]
- [hgdb.developmentPack] [Already Selected]
- [hgdb.installPack] [Already Selected]
- init and configure database [Already Selected]
- uninstalldata [required]
- [tempExecutableFiles] [required]
- ...pack selection done.
- press 1 to continue, 2 to quit, 3 to redisplay
- 1
- To check the dependent packs.
- press 1 to check, 2 to skip, 3 to exit
- 1
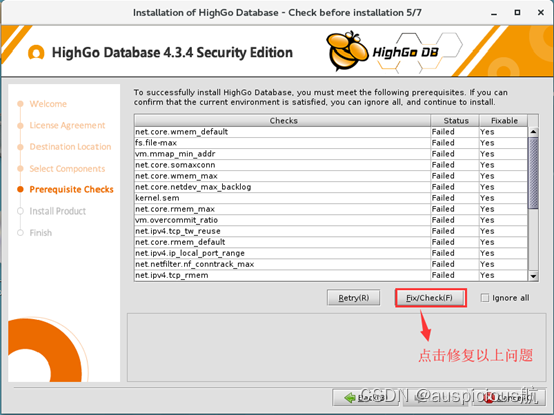
- Checks Status Fixable
- net.netfilter.nf_conntrack_max Failed Yes
- net.nf_conntrack_max Failed Yes
- Use the root user to execute the following script to modify the system parameters.
- /tmp/hgdb_2050248256/kernelParameterSets.sh
- 检测是否需要执行修复脚本,如果只剩此处两个则可直接忽略,其它情况则执行修复脚本
- press 1 to ignore, 2 to reject, 3 to recheck
- 1
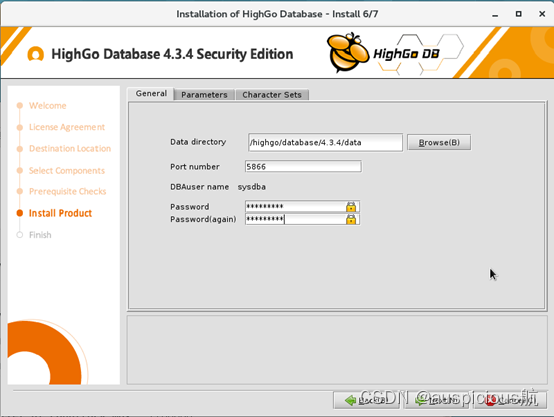
- Data directory [/data/highgo/4.3.4/data] #按回车
- Port number [5866] #按回车
- Superuser name [highgo] #按回车
- Password []
- 第一次输入密码,必须超出六位且包含数字字母,不可含有特殊字符-@*&…%¥#()
- Password(again) []
- [x] Whether to start automatically.
- input 1 to select, 0 to deselect:
- datatype
- 0 [x] OLTP
- 1 [ ] OLAP
- 2 [ ] HTAP
- 3 [ ] Web
- 4 [ ] Desktop
- input selection:
- Total Memory (GB) [2]
- connectionNumber [300]
- Locale
- 0 [ ] aa_DJ
- 1 [ ] aa_DJ.iso88591
- 2 [ ] aa_DJ.utf8
- 3 [ ] aa_ER
- 4 [ ] aa_ER@saaho
- ……
- 环境语言根据客户要求选择,通常选择C或者zh_CN.utf8
- 773 [ ] zh_CN.gbk
- 774 [x] zh_CN.utf8
- 775 [ ] zh_HK
- 776 [ ] zh_HK.big5hkscs
- 777 [ ] zh_HK.utf8
- 778 [ ] zh_SG
- 779 [ ] zh_SG.gb2312
- 780 [ ] zh_SG.gbk
- 781 [ ] zh_SG.utf8
- 782 [ ] zh_TW
- 783 [ ] zh_TW.big5
- 784 [ ] zh_TW.euctw
- 785 [ ] zh_TW.utf8
- 786 [ ] zu_ZA
- 787 [ ] zu_ZA.iso88591
- 788 [ ] zu_ZA.utf8
- input selection:
- Encoding
- 0 [ ] EUC_JP
- 1 [ ] EUC_KR
- 2 [ ] ISO_8859_5
- 3 [ ] ISO_8859_6
- 4 [ ] ISO_8859_7
- 5 [ ] ISO_8859_8
- 6 [ ] JOHAB
- 7 [ ] KOI8-R
- 8 [ ] LATIN1
- 9 [ ] LATIN2
- 10 [ ] LATIN3
- 11 [ ] LATIN4
- 12 [ ] LATIN5
- 13 [ ] LATIN9
- 14 [ ] MULE_INTERNAL
- 15 [ ] SQL_ASCII
- 16 [ ] WIN866
- 17 [ ] WIN874
- 18 [ ] WIN1250
- 19 [ ] WIN1251
- 20 [ ] WIN1252
- 21 [ ] WIN1256
- 22 [ ] WIN1258
- 23 [x] UTF8
- input selection:
- Installation path: /highgo/database/4.3.4.
- press 1 to continue, 2 to quit, 3 to redisplay
- 1
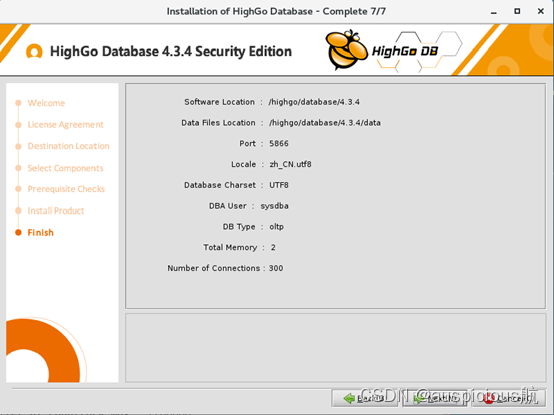
- Installation path: /highgo/database/4.3.4.
- Data directory: /highgo/database/4.3.4/data.
- Database port: 5866.
- Database Locale: zh_CN.utf8.
- Server Encoding: UTF8.
- DBA User: sysdba.
- Database Type: oltp
- Total Memory: 2
- Connections: 300
- press 1 to continue, 2 to quit, 3 to redisplay
- 1
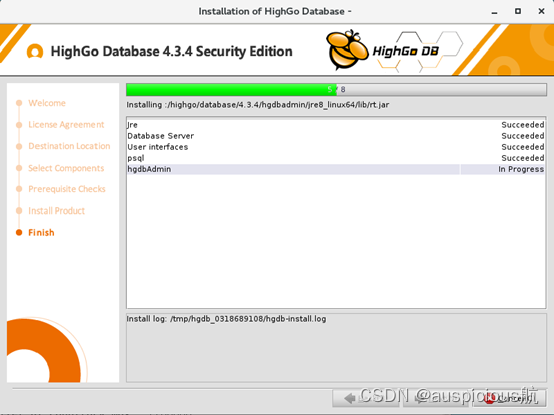
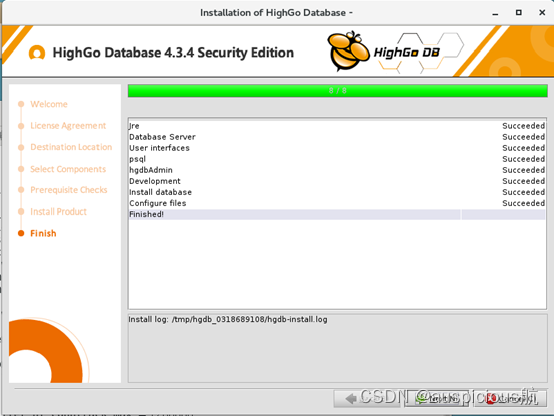
- [ Starting to unpack ]
- [ Processing package: Jre (1/8) ]
- [ Processing package: Database Server (2/8) ]
- [ Processing package: User interfaces (3/8) ]
- [ Processing package: psql (4/8) ]
- [ Processing package: hgdbAdmin (5/8) ]
- [ Processing package: Development (6/8) ]
- [ Processing package: Install database (7/8) ]
- [ Processing package: Initial the database (8/8) ]
- To finish the database install, please follow the below steps:
- 1. execute following script with root user to complete the database self-starting configuration
- /data/highgo/4.3.4/hginstall.sh
- 2. Press enter to continue, after hginstall.sh execute successfully .
- [Press enter to continue!]
- 另开新窗口root用户执行
- [root@hgdb highgo]# /data/highgo/4.3.4/hginstall.sh
- Starting HighGo Database Server:
- waiting for server to start.... done
- server started
- HighGo Database Server started successfully
- 重新回到刚才的窗口:
- [Press enter to continue!]
- [ Unpacking finished ]
- Begin create shorcut:
- [x]Create additional shortcuts on the desktop
- input 1 to select, 0 to deselect:
- 1
- [x]Create shortcuts in the StartMenu
- input 1 to select, 0 to deselect:
- 1
- Select which user the program will create shortcut for:
- 0 [ ] current user
- 1 [x] all users
- input selection:
- Name of programgroup [HighgoDB V4.3.4]
- press 1 to continue, 2 to quit, 3 to redisplay
- 1
- Install was successful
- application installed on /highgo/database/4.3.4
- [ Console installation done ]
四、收尾工作
4.1、修改数据库默认参数
- #使用sysdba登录设置参数
- --设置*表示所有ip都可以访问数据库
- alter system set listen_addresses = '*';
- --修改数据库的最大连接数
- alter system set max_connections = 2000;
- --修改shared_buffers,建议设置为物理内存的25%,最大不超过40%,通用机一般为32G,设置为10G
- alter system set shared_buffers = '10240MB';
- alter system set checkpoing_timeout=30min;
- alter system set checkpoint_completion_target = 0.8;
- --设置hgdb生成的日志格式
- alter system set log_destination = 'csvlog';
- --开启日志
- alter system set logging_collector = on;
- --修改日志存放路径
- alter system set log_directory = 'hgdb_log';
- --修改日志文件名称格式
- alter system set log_filename = 'highgodb_%d.log';
- --设置每天生成一个新的日志文件
- alter system set log_rotation_age = '1d';
- --不限制单个日志文件大小
- alter system set log_rotation_size = 0;
- --覆盖同名文件
- alter system set log_truncate_on_rotation = on;
- --设置记录ddl语句
- alter system set log_statement = 'ddl';
- --开启归档
- alter system set wal_level = replica;
- alter system set archive_mode = on;
- --红色字体部分为归档存放路径
- alter system set archive_command = 'test ! -f /hgdbbak/archive/%f && cp %p /hgdbbak/archive/%f'
- --设置用户连接与断开数据库的信息
- alter system set log_connections=on;
- alter system set log_disconnections=on;
- alter system set maintenance_work_mem=’1GB’;
- #如果应用不支持ssl,使用如下命令关闭
- alter system set ssl=off;
注:log_filename定义了日志名称为highgodb_%d,%d表示当月几号生成的,例如10月20号,生成的日志为highgodb_20.log。log_rotation_age设定每天生成一个日志文件。log_rotation_size不限定日志大小。log_truncate_on_rotation设定如果存在相同文件名的日志会进行覆盖。以上四个参数共同设定了日志只能保存一个月。
安全版数据库默认开启ssl加密,现场实施过程需要确认应用是否支持ssl,若不支持,则使用上面命令关闭。4.2、修改pg_hba.conf文件
添加访问许可
- # IPv4 local connections:
- host all all 0.0.0.0/0 md5
- hostssl all all 0.0.0.0/0 md5
注:0.0.0.0/0表示允许所有网段访问数据库,md5表示使用md5加密的密码。
安全版数据库默认开启ssl,若已在数据库中关闭ssl功能,需要将上面“hostssl”对应的那列注释。
参数修改完成后重新启动数据库- [highgo@hgdb archive]$ pg_ctl -m fast stop
- [highgo@hgdb archive]$ pg_ctl start
4.3、安装license
注意:
1、 激活license之前一定要确认合同中是测试license还是永久license
2、 使用license之前请确保是否与当前数据库版本匹配
未安装license,数据库启动时会显示剩余时间:[highgo@hgdb ~]$ 日志: 00000: This is a trial edition, validate until 2018-11-21 21:58:57, database will not be able to start up after that time,please apply an official license by that time.上传license并复制到data目录修改名称为hgdb.lic
- [root@hgdb uplaod]# cp hgdb_476_3m.lic /data/highgo/4.3.4/data/hgdb.lic
- [root@hgdb uplaod]# chown highgo:highgo -R /data/highgo/4.3.4/data/hgdb.lic
- [root@hgdb uplaod]# ls -l /data/highgo/4.3.4/data/hgdb.lic
- -rw-r--r-- 1 highgo highgo 239 Oct 22 22:21 /data/highgo/4.3.4/data/hgdb.lic
激活license
- [highgo@hgdb data]$ pg_ctl reload
- server signaled
日志: 00000: 接收到 SIGHUP, 重载配置文件
日志: 00000: 注意 :检测到授权文件已更改,该license为试用版授权,有效期截止到2019-01-20 21:58:57
检查license- [highgo@hgdb data]$ check_lic -D $PGDATA
- ############## HIGHGODB LICENSE ###################
- License status:Normal
- License validity:2019-1-21
- Database Version:Highgo Database 4.3.4 Trail Edition
- ###################################################
4.4、修改用户密码及密码到期时间
Highgo Database安全版遵循三权分立的设计,sysdba(数据库管理员)、syssso(安全管理员)、syssao(审计管理员)
数据库安装完成后,必须修改syssso用户的密码,否则syssso超期或密码输入错误次数过多会被锁定,且无法恢复。
用户密码及密码期限修改语句如下,每个用户只能修改自己的密码(例如:syssso只能修改自己的密码,不能修改sysdba及其他用户密码)。密码期限需使用syssso用户进行修改
#各个用户分别登录数据库,使用如下命令修改密码- alter user sysdba with password 'highgo123456';
- alter user syssso with password 'highgo123456';
- alter user syssao with password 'highgo123456';
- #使用syssso用户登录数据库,使用如下命令修改密码到期时间
- alter user sysdba valid until '2999-1-1';
- alter user syssao valid until '2999-1-1';
- alter user syssso valid until '2999-1-1';
五、卸载HGDB
5.1、图形化卸载
确保数据库服务已经完全关闭,使用highgo用户进入$PGHOME/bin,执行以下命令
./uninstall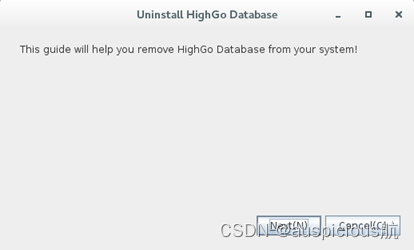
选择是否删除数据文件

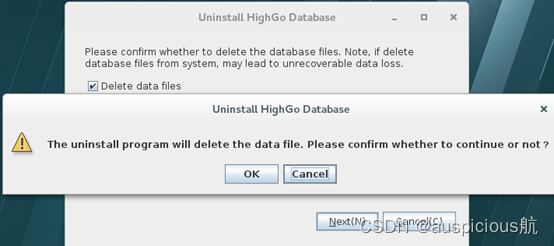
使用root执行上面的脚本
- [root@hgdb ~]# /data/highgo/4.3.4/hguninstall.sh
- Execute Success !

卸载完成 。5.2、非图形化卸载
确保数据库服务已经完全关闭,使用highgo用户进入$PGHOME/bin,执行以下命令
- [highgo@sds1 4.3.4]$ ./uninstall
- Command line uninstaller.
- Force the deletion of /data/highgo/4.3.4/data [y/n]y
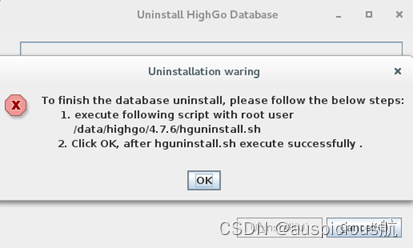
- To finish the database uninstall, please follow the below steps:
- 1. execute following script with root user
- /data/highgo/4.3.4/hguninstall.sh
- 2. Press enter to continue, after hguninstall.sh execute successfully .
- [Press enter to continue!]
使用root用户执行脚本hguninstall.sh后按回车继续
- [root@hgdb data]# /data/highgo/4.3.4/hguninstall.sh
- Execute Success !
注:如果执行./uninstall时选择n,将只删除HGDB软件,保留data目录
-
相关阅读:
Debug C++之opencv下Mat的data赋值问题,出现段错误(核心已转储)
新建第一个HBuilder项目
linux系统-----------搭建LNMP 架构
控制器功能端口说明
2023 收入最高的十大编程语言
Maven-依赖管理机制
批量上传文件,以input上传文件,后端以List<MultipartFile>类型接收
JetsonNano部署yolo5 c++ onnx
【构造】构造题汇总
图像处理Scharr 算子
- 原文地址:https://blog.csdn.net/Auspicious_air/article/details/126597417
