-
xdebug 远程调试 vsCode
上一篇说了宝塔 xdebug idea调试本地代码,但是用idea php插件调试服务器上的代码时,有一些问题,断点可以监听到,但是可能是php插件版本的问题,idea进入断点状态后,没有正在运行行的高亮显示,按下一步也没有反应,只能按全部放过,来执行完毕,所以又用vsCode来试,结果是可以的
安装宝塔 安装xdebug插件 修改配置文件 重新加载php配置,在上一篇文章中的一样,这里就不在重复了
宝塔 xdebug idea 调试 php_qq_31683775的博客-CSDN博客
需要注意的是 php.ini 文件的配置,和前面的文章中有一项不同
- xdebug.remote_connect_back= 1
这里需要将 1 改为 0 , 因为1是访问web服务开启xdebug,连接本地idea/vscode时,连接idea/vscode的ip从web服务器的请求来源中获取,而我们本地的 idea/vscode公网ip没有端口映射,拿着公网ip,是访问不到我们的idea/vscode服务的,
所以要改成0,使用xdebug.remote_host = 127.0.0.1,来配置指定的xdebug调试服务端的ip,
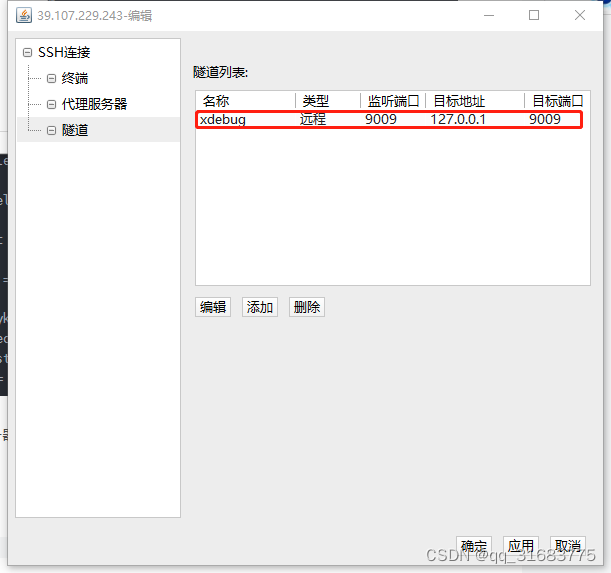
之后,我们会配置一个隧道,把服务器上的指定端口,映射到我们本机idea/vscode调试服务的端口,这样,访问服务器的指定端口,比如9009,就等于直接访问idea/vscode调试服务的端口,这样就能进行调试服务的通信了
php.ini xdebug的配置片段
- [XDebug]
- ;xdebug.profiler_append = 0
- ;xdebug.profiler_enable = 1
- ;xdebug.profiler_enable_trigger = 0
- ;xdebug.profiler_output_dir ="D:\BtSoft\temp\xdebug"
- ;xdebug.trace_output_dir ="D:\BtSoft\temp\xdebug"
- ;xdebug.profiler_output_name = "cache.out.%t-%s"
- ;xdebug.remote_enable = 1
- ;xdebug.remote_handler = "dbgp"
- ;xdebug.remote_host = "127.0.0.1"
- ;zend_extension=php_xdebug.dll
- ;zend_extension=php_xdebug.dll
- ;用来显示错误信息
- display_errors = On
- html_errors = On
- ;显示堆栈信息
- xdebug.show_local_vars = 1
- xdebug.max_nesting_level = 50
- xdebug.var_display_max_depth = 6
- xdebug.dump_once = On
- xdebug.dump_globals = On
- xdebug.dump_undefined = On
- xdebug.dump.REQUEST = *
- xdebug.cli_color = 2
- ;显示性能信息
- xdebug.profiler_enable_trigger = on
- xdebug.collect_params = On
- xdebug.collect_return = On
- xdebug.profiler_enable = On
- xdebug.profiler_output_name = cachegrind.out.%t.%p
- xdebug.trace_output_dir = "\www\server\temp\xdebug"
- xdebug.profiler_output_dir ="\www\server\temp\xdebug"
- ;远程调试配置信息
- ;开启远程调试
- xdebug.remote_enable = On
- ;远程处理协议
- xdebug.remote_handel = dbgp
- ;IDE所在机器IP
- ;xdebug.remote_host = 127.0.0.1
- ;端口号
- xdebug.remote_port = 9009
- ;IDE KEY
- xdebug.idekey = "mykey"
- xdebug.remote_connect_back= 0
- xdebug.remote_autostart=1
- xdebug.remote_log = "\tmp\xdebug.log"
安装 FinalShell 连接服务器 配置一条隧道

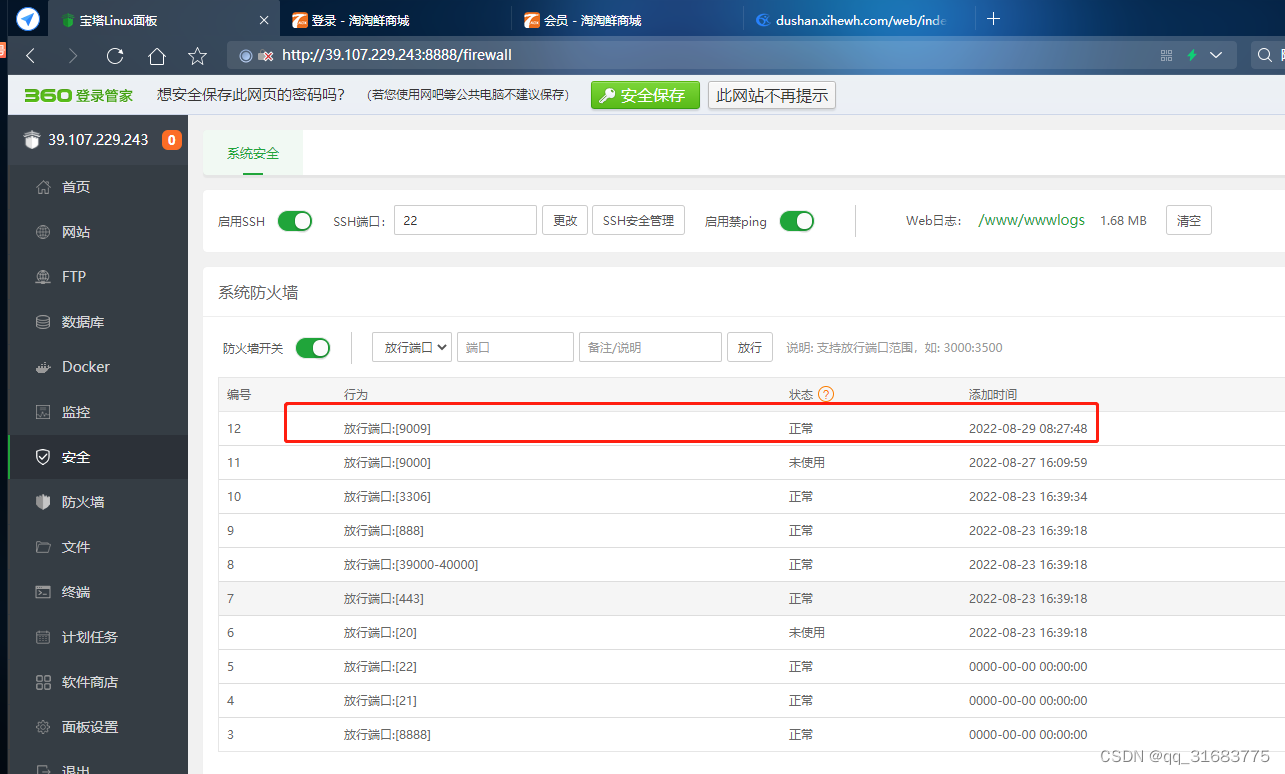
宝塔 和 服务器 开放端口

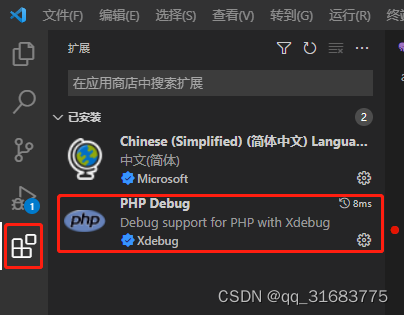
vscode安装php插件

配置 launch.json 文件,在php项目/.vscode/launch.json 没有该文件则新建
- {
- // 使用 IntelliSense 了解相关属性。
- // 悬停以查看现有属性的描述。
- // 欲了解更多信息,请访问: https://go.microsoft.com/fwlink/?linkid=830387
- "version": "0.2.0",
- "configurations": [
- {
- "name": "Listen for Xdebug",
- "type": "php",
- "request": "launch",
- "port": 9009,
- "pathMappings": {
- "/www/wwwroot/dushan.xihewh.com":"${workspaceRoot}"
- }
- }
- ]
- }
这里的9009,就是我们在php.ini文件中配置的 xdebug.remote_port = 9009,vscode为开启一个监听9009端口的服务,等待服务器的xdebug服务来连接
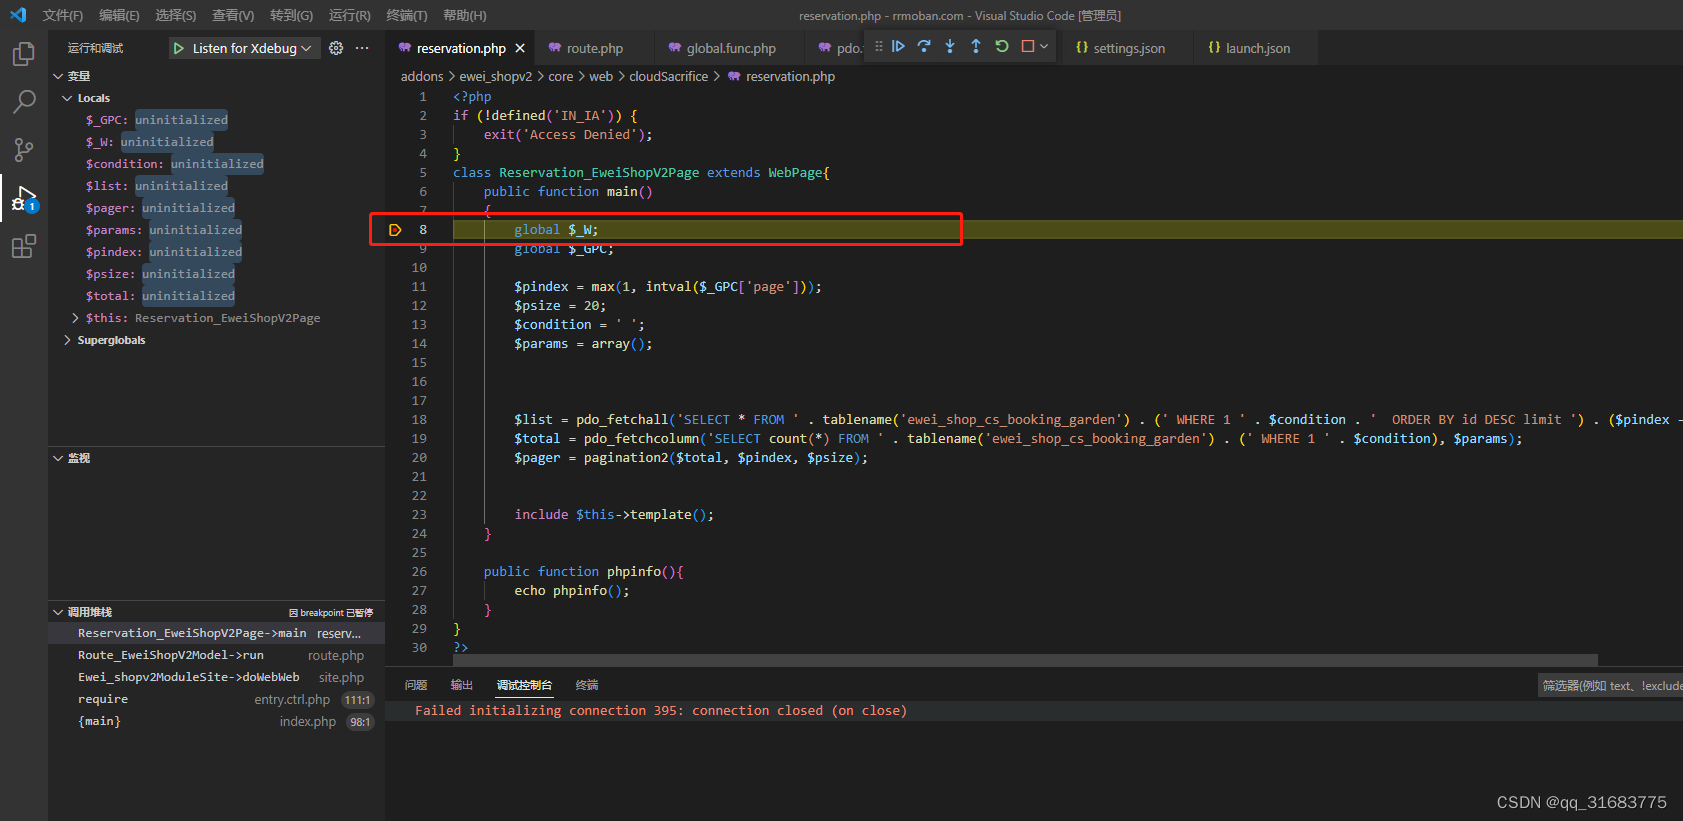
打上断点,刷新页面,进入断点


-
相关阅读:
java内存地址
剑指 Offer 41. 数据流中的中位数
树与二叉树(二叉树前传、数据结构初阶、C语言)
Image,cv2读取图片的numpy数组的转换和尺寸resize变化
专家称 AI 有望接管人类的所有工作
【7 Vue3 – Composition API】
http跨源资源共享(CORS)
CDH断电后cloudera-scm-server启动报错
在Jetson Nano上安装Caffe
217页12万字某智慧城市政务云平台项目建设方案2022年
- 原文地址:https://blog.csdn.net/qq_31683775/article/details/126578490
