-
【计网实验】选择重发 ARQ 算法模拟

选择重发 ARQ 算法模拟 —— 基于真实硬件线路
开源地址:framist/ARQEmulator: 计算机网络 - 选择重发ARQ算法模拟 - 基于真实硬件线路 (github.com)
fork from :framist/STemWinForHAL: 移植emWin与HAL库结合。(github.com)
实验要求
要求:写两个程序,一个发送方S一个接收方R。S程序从上层拿到数据包后要组装成帧,缓存、发送、定时,可以接收ACK应答,删除数据帧,停止定时器。R程序可以接收数据帧,回应ACK,上传数据帧到上层。S程序和R程序需要能模拟所有异常的处理过程,例如数据帧或ACK的丢失、损坏、超时。编程语言不做要求,软硬件平台也不做要求。要求程序可以正常运行,要求可以用输入和输出表明程序的成帧、流控、差控这三个功能。
时间:2021年12月31日23:59之前,统一汇总给课代表,copy给老师。
占分:总分10分。完成要求中基本功能可得1~7分,如果程序有界面且能演示数据帧的发送、传输、异常处理等,额外加1~3分。
原理示意图:

实验原理


Figure 11.21 Selective Repeat ARQ, window size 窗口大小

选择性重传ARQ,发送和接收窗口必须小于等于 2 m − 1 2^{m-1} 2m−1。
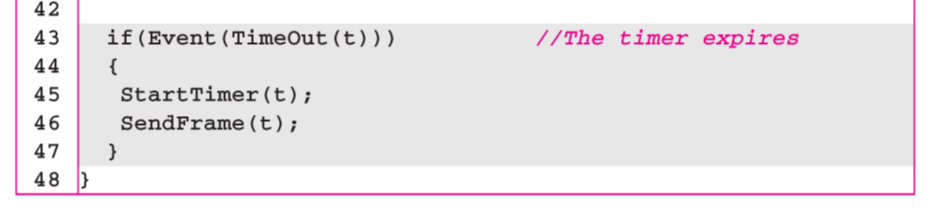
Algorithm 11.9 Sender-site Selective Repeat algorithm 发送方算法


Algorithm 11.10 Receiver-site Selective Repeat algorithm 接收方算法


Figure 11.23 Flow diagram for Example 11.8 帧丢失情况和NAK帧的情况

实现方案
实现平台
-
发送方S
- python3 基于个人PC x86_64 Windows 11
-
接收方R
- C语言 基于 STM32F407ZGT6 32bit 无操作系统 ARM
-
物理层和介质
- 普通杜邦线 USB-TTL 串口 波特率9600 字长8 停止1
Q: 为什么选择硬件实现?
A: 因为在实际的生产生活中,任何基于算法的代码都是要依托于硬件进行实现的,通过硬件进行模拟我们可以手动干扰甚至切断传输线,模拟真实情况,可以从更接近生产的方式来体会算法的模拟
物理层
使用全双工串口作为物理层通讯协议
通讯端口配置
接收方(下位机,C语言)
//UART 初始化设置 UART1_Handler.Instance=USART1; //USART1 UART1_Handler.Init.BaudRate=bound; //波特率 UART1_Handler.Init.WordLength=UART_WORDLENGTH_8B; //字长为8位数据格式 UART1_Handler.Init.StopBits=UART_STOPBITS_1; //一个停止位 UART1_Handler.Init.Parity=UART_PARITY_NONE; //无奇偶校验位 UART1_Handler.Init.HwFlowCtl=UART_HWCONTROL_NONE; //无硬件流控 UART1_Handler.Init.Mode=UART_MODE_TX_RX; //收发模式 HAL_UART_Init(&UART1_Handler); //HAL_UART_Init()会使能UART1 HAL_UART_Receive_IT(&UART1_Handler, (u8 *)aRxBuffer, RXBUFFERSIZE);//该函数会开启接收中断:标志位UART_IT_RXNE,并且设置接收缓冲以及接收缓冲接收最大数据量- 1
- 2
- 3
- 4
- 5
- 6
- 7
- 8
- 9
- 10
- 11
- 12
发送方(上位机,python)
sl = show_serial() port = 'COM' + input('找到串口:'+str(sl)+' 请输入串口号:COM') if len(sl) != 1 else sl[0] baudrate = 9600 ser = serial.Serial(port, baudrate, timeout=0.5)- 1
- 2
- 3
- 4
数据链路层
接收方主逻辑
为方便调试,先实现接收方
为简化设计,部分采用了一点简化的办法
注意到这里发现书上的伪代码中多个错误,比如少了反括号和程序流程方面的错误
# 选择性重传ARQ发送方算法 def ARQ_send(ser:serial.Serial): console = Console() console.print(Panel(' === Selective Repeat ARQ experiment ===\nby framsit'),justify='center') S_w = 2**4//2 # 8 注意这是窗口大小的两倍 S_f = 0 S_n = 0 frames = ['']*S_w framesTime = [0]*S_w while True: # Repeat forever # frame = input('请输入发送(q退出):') frame = console.input(Text('\n请输入发送(q退出):',style='green bold')) if frame == '': console.print('[!] 输入为空',style='red bold') continue if frame == 'q': console.print(Panel(' === experiment end ==='),justify='center') break # 有包要发送 if(abs(S_n - S_f) == S_w//2): # 窗口满 console.print(Text('[!] 窗口满,等待空,丢弃输入',style='red bold')) else: # 发送 frames[S_n] = frame SendFrame(ser,MakeFrame(frame,S_n)) framesTime[S_n] = 0 S_n += 1 S_n %= S_w # 接收 while True: read_frame = read_serial(ser) if corrupted(read_frame): console.print('[!] 接收到的数据有误或丢失',style='red bold') else: print('接收到数据正确:',read_frame) ackNo = int(read_frame[5],16) if read_frame[:3] == 'NAK' and isInWindow(ackNo+1,S_n,S_f,S_w): console.print('接收到NAK,重传',style='yellow') SendFrame(ser,MakeFrame(frames[ackNo],ackNo)) framesTime[ackNo] = 0 continue if read_frame[:3] == 'ACK': console.print(f'接收到ACK:{ackNo}',style='blue') if isInWindow(ackNo,S_n,S_f,S_w): while(ackNo != S_f): frames[S_f] = '' # purge framesTime[S_f] = 0 S_f += 1 S_f %= S_w # 超时 这里的时间抽象为经过循环的次数(方便测试) for i in range(S_w): if frames[i] != '': if framesTime[i] > 4: console.print(f'超时重传 No.{i}: {frames[i]}',style='yellow') SendFrame(ser,MakeFrame(frames[i],i)) framesTime[i] = 0 break else: framesTime[i] += 1 else: break # 都没要再发再接受的,退出接收循环- 1
- 2
- 3
- 4
- 5
- 6
- 7
- 8
- 9
- 10
- 11
- 12
- 13
- 14
- 15
- 16
- 17
- 18
- 19
- 20
- 21
- 22
- 23
- 24
- 25
- 26
- 27
- 28
- 29
- 30
- 31
- 32
- 33
- 34
- 35
- 36
- 37
- 38
- 39
- 40
- 41
- 42
- 43
- 44
- 45
- 46
- 47
- 48
- 49
- 50
- 51
- 52
- 53
- 54
- 55
- 56
- 57
- 58
- 59
- 60
- 61
- 62
- 63
- 64
- 65
- 66
- 67
- 68
- 69
- 70
发送方主逻辑
int host_ARQ_R(void) { static int R_n = 0; static bool NakSent = FALSE; static bool AckNeeded = FALSE; char frame[USART_REC_LEN]; // [序列号][数据帧*n][校验字段][\r\n->\0] 可见字符空间 static struct WINDOW window[WINDOW_SIZE] = {NULL,FALSE}; // marked all solt = false // while(1) { 不用while因为外部有主循环 if(_WaitForEvent(frame)) { // 数据帧到达事件 if(_corrupeted(frame) ) { // 这边书上的示例逻辑貌似也是错的 if(! NakSent) _SendNAK(R_n); NakSent = TRUE; mainLogPrintf("\n corrupeted frame!"); return 0;//sleep } if(_seqNo(frame) != R_n && (! NakSent) ){ _SendNAK(R_n); NakSent = TRUE; } // 书上的伪代码中没有这个反括号 if(TRUE &&(! window[_seqNo(frame)].f)){ //肯定in Window 因为取最大的窗口 window[_seqNo(frame)].f = TRUE; // window[_seqNo(frame)].s = frame + 1; window[_seqNo(frame)].s = window[_seqNo(frame)].data; memcpy(window[_seqNo(frame)].s,frame+1,strlen(frame)-1); mainLogPrintf("\nget:%d: %s", _seqNo(frame),window[_seqNo(frame)].s); while (window[R_n].f) { mainLogPrintf("\n[+] DeliverData:%.*s",strlen(window[R_n].s)-1, window[R_n].s); showPrintf("\n%.*s",strlen(window[R_n].s)-1, window[R_n].s); //purge Rn window[R_n].s = NULL; window[R_n].f = FALSE; R_n ++; R_n %= WINDOW_SIZE; AckNeeded = TRUE; } if(AckNeeded){ _SendAck(R_n); AckNeeded = FALSE; NakSent = FALSE; } _printWindow(window); } } // } return 0; }- 1
- 2
- 3
- 4
- 5
- 6
- 7
- 8
- 9
- 10
- 11
- 12
- 13
- 14
- 15
- 16
- 17
- 18
- 19
- 20
- 21
- 22
- 23
- 24
- 25
- 26
- 27
- 28
- 29
- 30
- 31
- 32
- 33
- 34
- 35
- 36
- 37
- 38
- 39
- 40
- 41
- 42
- 43
- 44
- 45
- 46
- 47
- 48
- 49
- 50
- 51
- 52
- 53
- 54
int main(void) { HAL_Init(); //初始化HAL库 Stm32_Clock_Init(336,8,2,7); //设置时钟,168Mhz delay_init(168); //初始化延时函数 uart_init(9600); //初始化USART TIM3_Init(999,83); //1KHZ 定时器3设置为1ms TIM4_Init(999,839); //触摸屏扫描速度,100HZ. LED_Init(); //初始化LED KEY_Init(); //初始化KEY TFTLCD_Init(); //初始化LCD FSMC接口 TP_Init(); //触摸屏初始化 my_mem_init(SRAMIN); //初始化内部内存池 //my_mem_init(SRAMEX); //不使用外部内存池 my_mem_init(SRAMCCM); //初始化CCM内存池 __HAL_RCC_CRC_CLK_ENABLE();//使能CRC时钟,否则STemWin不能使用 WM_SetCreateFlags(WM_CF_MEMDEV);//为重绘操作自动使用存储设备 GUI_Init(); WM_HWIN CreatemainFramewin(void); CreatemainFramewin(); mainLogPrint("\ninit OK!"); mainLogPrint("\n === Selective Repeat ARQ experiment ==="); //printf("init over\r\n"); host_ARQ_R(); while(1) { // GUI_Delay(100); GUI_Exec(); host_ARQ_R(); LED0 = !LED0; } }- 1
- 2
- 3
- 4
- 5
- 6
- 7
- 8
- 9
- 10
- 11
- 12
- 13
- 14
- 15
- 16
- 17
- 18
- 19
- 20
- 21
- 22
- 23
- 24
- 25
- 26
- 27
- 28
- 29
- 30
- 31
- 32
- 33
- 34
- 35
- 36
- 37
- 38
- 39
- 40
- 41
- 42
- 43
成帧
成帧格式为
[ 序列号 | 数据帧*n | 校验字段 | 帧尾:\r\n ],为方便调试与查看,除了校验字段都是可见字符char frame[USART_REC_LEN]; // [序列号][数据帧*n][校验字段][\r\n->\0] 可见字符空间- 1
发送方成帧:
def MakeFrame(data:str,S_n:int) -> bytes: data += chr(len(data)) data += '\r\n' data = str(S_n) + data print('发送RAW:',bytes(data, encoding='utf-8')) return bytes(data, encoding='utf-8')- 1
- 2
- 3
- 4
- 5
- 6
接收方拆帧
static bool _corrupeted(char * frame) { //实现最简单的:字符串最后一个字节做长度校验(不包括校验和序号) int len = strlen(frame); if((int)(frame[len-1]) != len-2) { return TRUE; } else { return FALSE; } } //十六进制的序号 m=4 取第一位 static int _seqNo(char * frame) { int i; if('0' <= frame[0] && frame[0] <= '9'){ i = (int)((frame[0] - '0')); //十六进制的序号 } else { i = (int)((frame[0] - 'A')); //十六进制的序号 i += 10; } return i; } …… ……- 1
- 2
- 3
- 4
- 5
- 6
- 7
- 8
- 9
- 10
- 11
- 12
- 13
- 14
- 15
- 16
- 17
- 18
- 19
- 20
- 21
- 22
- 23
- 24
接收方回应帧
static void _SendNAK(int R_n){ printf("NAK: %01X\r\n",R_n); } static void _SendAck(int R_n){ printf("ACK: %01X\r\n",R_n); }- 1
- 2
- 3
- 4
- 5
- 6
接收方读取回应帧
# 读取串口数据 def read_serial(ser: serial.Serial) -> str: data = b'' data += ser.readline() if data[-2:] == b'\r\n': print('接收RAW: ',data) return str(data[:-2], encoding='utf-8')- 1
- 2
- 3
- 4
- 5
- 6
- 7
另外在物理层的串口部分还有额外的成帧协议,不再叙述。
流控
if(abs(S_n - S_f) == S_w//2): # 窗口满 console.print(Text('[!] 窗口满,等待空',style='red bold'))- 1
- 2
另外在物理层的串口部分还有额外的流控,不再叙述。

可以看到图中的窗口已经充满,此时由于流量控制的机制,我们并不能继续发送,
此时的接收窗口已经满了,所以我们再发送的时候帧就会被丢弃,从而实现流量控制的目的差控
static bool _corrupeted(char * frame) { //实现最简单的:字符串最后一个字节做长度校验(不包括校验和序号) int len = strlen(frame); if((int)(frame[len-1]) != len-2) { return TRUE; } else { return FALSE; } }- 1
- 2
- 3
- 4
- 5
- 6
- 7
- 8
- 9
- 10
另外在物理层的串口部分还有额外的奇偶校验。


超时重传:

实现效果
测试样例:
接收方可触控UI界面:


发送方UI界面:

附录
源代码文件树及关键文件
├─CORE ├─DSP_LIB │ └─Include ├─EMWIN │ └─STemWin │ ├─Config │ ├─inc │ ├─Lib │ └─OS ├─GUIBulder ├─HALLIB │ └─STM32F4xx_HAL_Driver │ ├─Inc │ │ └─Legacy │ └─Src ├─HARDWARE │ ├─24CXX │ ├─ADC │ ├─DAC │ ├─DMA │ ├─GPIO │ ├─HOSTPC │ ├─IIC │ ├─KEY │ ├─LCD │ ├─LED │ ├─SPI │ ├─SRAM │ ├─TIM │ ├─TIMER │ ├─TOUCH │ └─W25QXX ├─MALLOC ├─OBJ ├─STemWinForHAL ├─SYSTEM │ ├─delay │ ├─sys │ └─usart └─USER ├─.vscode └─DebugConfig- 1
- 2
- 3
- 4
- 5
- 6
- 7
- 8
- 9
- 10
- 11
- 12
- 13
- 14
- 15
- 16
- 17
- 18
- 19
- 20
- 21
- 22
- 23
- 24
- 25
- 26
- 27
- 28
- 29
- 30
- 31
- 32
- 33
- 34
- 35
- 36
- 37
- 38
- 39
- 40
- 41
- 42
参考资料
[1] 数据通信与网络(原书第4版)作者:(美)佛罗赞,(美)费根 著,吴时霖 等译
【转载】Keil中的USE MicroLib说明 - 编程浪子_ - 博客园 (cnblogs.com)
学习心得
- 书上的伪代码逻辑错误很多,下次写还是需要跟着自己理解的逻辑来。
- 通过stm32单片机从发送每一帧到每一帧的解封装,从物理层到数据链路层选择重发ARQ的模拟看似教材上的算法简单易懂,但是具体实现起来才会发现诸多的问题,通过这次实验,我们较为权,面的了解到了,实际的数据链路传输中的各种各样的情形以及应对方案
-
-
相关阅读:
【Android Jetpack】理解ViewModel
网络基础原理概述
计算机中的数字与模拟
9月第1周榜单丨哔哩哔哩飞瓜数据B站UP主排行榜发布!
集合_Collection_LinkedHashSet简述
springboot毕设项目(智慧化工MES)质量管理系统f4i11(java+VUE+Mybatis+Maven+Mysql)
新型masked勒索病毒袭击工控行业
mysql多启动
call apply bind 区别与联系
SpringBoot-容器功能
- 原文地址:https://blog.csdn.net/weixin_47102975/article/details/126549409
