-
Swagger配置
Spring Boot配置Swagger
1、导入相关依赖
<dependency> <groupId>io.springfoxgroupId> <artifactId>springfox-swagger2artifactId> <version>2.7.0version> dependency> <dependency> <groupId>io.springfoxgroupId> <artifactId>springfox-swagger-uiartifactId> <version>2.7.0version> dependency>- 1
- 2
- 3
- 4
- 5
- 6
- 7
- 8
- 9
- 10
2、添加配置类(其中的package需要找到自己的controller)
package com.example.redis.config; import org.springframework.context.annotation.Bean; import org.springframework.context.annotation.Configuration; import springfox.documentation.builders.ApiInfoBuilder; import springfox.documentation.builders.PathSelectors; import springfox.documentation.builders.RequestHandlerSelectors; import springfox.documentation.service.ApiInfo; import springfox.documentation.service.Contact; import springfox.documentation.spi.DocumentationType; import springfox.documentation.spring.web.plugins.Docket; import springfox.documentation.swagger2.annotations.EnableSwagger2; @Configuration @EnableSwagger2 public class SwaggerConfig { /** * 创建API应用 * apiInfo() 增加API相关信息 * 通过select()函数返回一个ApiSelectorBuilder实例,用来控制哪些接口暴露给Swagger来展现, * 本例采用指定扫描的包路径来定义指定要建立API的目录。 * * @return */ @Bean public Docket restApi() { return new Docket(DocumentationType.SWAGGER_2) .groupName("标准接口") //.apiInfo(apiInfo("Spring Boot中使用Swagger2构建RESTful APIs", "1.0")) .useDefaultResponseMessages(true) .forCodeGeneration(false) .select() .apis(RequestHandlerSelectors.basePackage("com.example.redis.controller")) .paths(PathSelectors.any()) .build(); } /** * 创建该API的基本信息(这些基本信息会展现在文档页面中) * 访问地址:http://ip:port/swagger-ui.html * * @return /* *//* 与上面注释.apiInfo相关,可以添加相关描述信息 private ApiInfo apiInfo(String title, String version) { return new ApiInfoBuilder() .title(title) .description("") .termsOfServiceUrl("") .contact(new Contact("")) .version(version) .build(); }*/ }- 1
- 2
- 3
- 4
- 5
- 6
- 7
- 8
- 9
- 10
- 11
- 12
- 13
- 14
- 15
- 16
- 17
- 18
- 19
- 20
- 21
- 22
- 23
- 24
- 25
- 26
- 27
- 28
- 29
- 30
- 31
- 32
- 33
- 34
- 35
- 36
- 37
- 38
- 39
- 40
- 41
- 42
- 43
- 44
- 45
- 46
- 47
- 48
- 49
- 50
- 51
- 52
- 53
- 54
- 55
- 56
3、编写controller
注意添加注解
@RequestMapping(“/api2”)
@Api(tags = “标准演示接口2”)package com.example.redis.controller; import com.example.redis.pojo.User; import com.example.redis.service.UserService; import io.swagger.annotations.Api; import org.springframework.beans.factory.annotation.Autowired; import org.springframework.stereotype.Controller; import org.springframework.web.bind.annotation.*; /** * @ClassName: UserController * @author: 鹏 * @date: 2022/8/26 9:41 */ @Controller @RequestMapping("/api2") @Api(tags = "标准演示接口2") public class UserController { @Autowired private UserService userService; @ResponseBody @PostMapping("/insert") public String addUser(User user){ boolean b = userService.addUser(user); if (b){ return "ok"; }else { return "error"; } } }- 1
- 2
- 3
- 4
- 5
- 6
- 7
- 8
- 9
- 10
- 11
- 12
- 13
- 14
- 15
- 16
- 17
- 18
- 19
- 20
- 21
- 22
- 23
- 24
- 25
- 26
- 27
- 28
- 29
- 30
- 31
- 32
4、访问网址(http://ip:port/swagger-ui.html)
5、可能遇到的问题
1.yml文件缺少配置(与版本不对应有关)

找到yml文件配置如下
spring: mvc: pathmatch: matching-strategy: ant_path_matcher- 1
- 2
- 3
- 4
重启解决
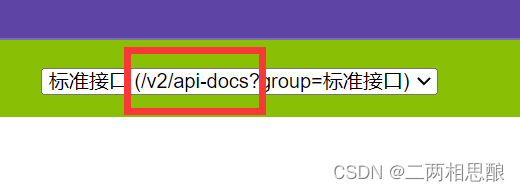
2.关于默认的这个url很丑想自定义

在yml文件配置
springfox: documentation: swagger: v2: path: /my/docs- 1
- 2
- 3
- 4
- 5
重启发现更改完成

-
相关阅读:
NPM私服搭建(verdaccio)
Meta Learning
setTimeout和setInterval区别,以及定时器的传参功能
基于Xilinx平台MicroBlaze的SPI方式FatFs移植
CPSE深圳充换电展开幕,飞凌嵌入式引领智能充储技术新潮流
LeetCode 309. 最佳买卖股票时机含冷冻期
Clusterpedia 使用心得
手把手实现 CSS 加载动画(一)
python基于图卷积神经网络GCN模型开发构建文本数据分类模型(以论文领域数据为例)
《剑来》语句摘录(七)
- 原文地址:https://blog.csdn.net/qq_45720234/article/details/126543237