-
总结万字长文笔记webpack5打包资源优化
webpack如何打包资源优化你有了解吗?或者一个经常被问的面试题,首屏加载如何优化,其实无非就是从http请求、文件资源、图片加载、路由懒加载、预请求,缓存这些方向来优化,通常在使用脚手架中,成熟的脚手架已经给你做了最大的优化,比如压缩资源,代码的tree shaking等。本文是笔者根据以往经验以及阅读官方文档总结的一篇关于
webpack打包方面的长文笔记,希望在项目中有所帮助。正文开始…
在阅读之前,本文将从以下几个点去探讨webpack的打包优化
1、
webpack如何做treeShaking2、
webpack的gizp压缩3、
css如何做treeShaking,4、入口依赖文件
拆包5、
图片资源加载优化treeShaking
在官网中有提到treeShaking[1],从名字上中文解释就是摇树,就是利用
esModule的特性,删除上下文未引用的代码。因为webpack可以根据esModule做静态分析,本身来说它是打包编译前输出,所以webpack在编译esModule的代码时就可以做上下文未引用的删除操作。那么如何做
treeshaking?我们来分析下快速初始化一个webpack项目
在之前我们都是手动配置搭建
webpack项目,webpack官方提供了cli快速构建基本模版,无需像之前一样手动配置entry、plugins、loader等首先安装
npm i webpack webpack-cli,命令行执行`npx webpack init- 1
一系列初始化操作后,就生成以下代码了
// Generated using webpack-cli https://github.com/webpack/webpack-cli const path = require("path"); const HtmlWebpackPlugin = require("html-webpack-plugin"); const MiniCssExtractPlugin = require("mini-css-extract-plugin"); const WorkboxWebpackPlugin = require("workbox-webpack-plugin"); const isProduction = process.env.NODE_ENV == "production"; const stylesHandler = MiniCssExtractPlugin.loader; const config = { entry: "./src/index.js", output: { path: path.resolve(__dirname, "dist"), }, devServer: { open: true, host: "localhost", }, plugins: [ new HtmlWebpackPlugin({ template: "index.html", }), new MiniCssExtractPlugin(), // Add your plugins here // Learn more about plugins from https://webpack.js.org/configuration/plugins/ ], module: { rules: [ { test: /.(js|jsx)$/i, loader: "babel-loader", }, { test: /.less$/i, use: [stylesHandler, "css-loader", "postcss-loader", "less-loader"], }, { test: /.css$/i, use: [stylesHandler, "css-loader", "postcss-loader"], }, { test: /.(eot|svg|ttf|woff|woff2|png|jpg|gif)$/i, type: "asset", }, // Add your rules for custom modules here // Learn more about loaders from https://webpack.js.org/loaders/ ], }, }; module.exports = () => { if (isProduction) { config.mode = "production"; config.plugins.push(new WorkboxWebpackPlugin.GenerateSW()); } else { config.mode = "development"; } return config; };- 1
- 2
- 3
- 4
- 5
- 6
- 7
- 8
- 9
- 10
- 11
- 12
- 13
- 14
- 15
- 16
- 17
- 18
- 19
- 20
- 21
- 22
- 23
- 24
- 25
- 26
- 27
- 28
- 29
- 30
- 31
- 32
- 33
- 34
- 35
- 36
- 37
- 38
- 39
- 40
- 41
- 42
- 43
- 44
- 45
- 46
- 47
- 48
- 49
- 50
- 51
- 52
- 53
- 54
- 55
- 56
- 57
- 58
- 59
- 60
- 61
运行命令
npm run serve
现在修改一下
index.js,并在src中增加utils目录// utils/index.js export function add(a, b) { return a + b } export function square(x) { return x * x; }- 1
- 2
- 3
- 4
- 5
- 6
- 7
index.js import { add } from './utils' console.log("Hello World!"); console.log(add(1, 2))- 1
- 2
- 3
- 4
在
index.js中我只引入了add,相当于square这个函数在上下文中并未引用。usedExports
不过我还需要改下
webpack.config.js... module.exports = () => { if (isProduction) { config.mode = "production"; config.plugins.push(new WorkboxWebpackPlugin.GenerateSW()); } else { config.mode = "development"; config.devtool = 'source-map' config.optimization = { usedExports: true } } return config; };- 1
- 2
- 3
- 4
- 5
- 6
- 7
- 8
- 9
- 10
- 11
- 12
- 13
- 14
注意我只增加了
devtool:source-map与optimization.usedExports = true我们看下
package.json"scripts": { "test": "echo "Error: no test specified" && exit 1", "build": "webpack --mode=production --node-env=production", "build:dev": "webpack --mode=development", "build:prod": "webpack --mode=production --node-env=production", "watch": "webpack --watch", "serve": "webpack serve" },- 1
- 2
- 3
- 4
- 5
- 6
- 7
- 8
默认初始化已经给们预设了多个不同的打包环境,因此我只需要运行下面命令就可以选择开发环境了
npm run build:dev- 1
/* unused harmony export square */ function add(a, b) { return a + b; } function square(x) { return x * x; }- 1
- 2
- 3
- 4
- 5
- 6
- 7
square上下文未引用,虽然给了标记,但是未真正清除。光使用
usedExports:true还不行,usedExports 依赖于 terser 去检测语句中的副作用,因此需要借助terser插件一起使用,官方webpack5提供了TerserWebpackPlugin这样一个插件在
webpack.config.js中引入... const TerserPlugin = require("terser-webpack-plugin"); ... module.exports = () => { if (isProduction) { config.mode = "production"; config.plugins.push(new WorkboxWebpackPlugin.GenerateSW()); } else { config.mode = "development"; config.devtool = 'source-map' config.optimization = { usedExports: true, // 设置为true 告诉webpack会做treeshaking minimize: true, // 开启terser minimizer: [new TerserPlugin({ extractComments: false, // 是否将注释剥离到单独文件,默认是true })] } } return config; };- 1
- 2
- 3
- 4
- 5
- 6
- 7
- 8
- 9
- 10
- 11
- 12
- 13
- 14
- 15
- 16
- 17
- 18
- 19
- 20
你会发现,那个
square函数就没有了官方解释,当我们设置
optimization.usedExports必须为true,当我们设置usedExports:true,且必须开起minimize: true,这样才会把上下文未使用的代码给清除掉,如果minimize: false,那么压缩插件将会失效。当我们设置
usedExports: true此时生成打包的代码会有一个这样的魔法注释,
square未使用/* unused harmony export square */ function add(a, b) { return a + b; } function square(x) { return x * x; }- 1
- 2
- 3
- 4
- 5
- 6
- 7
当我们设置
minimize: true时,webpack5会默认开启terser压缩,然后发现有这样的unused harmony export square就会删掉对应未引入的代码。sideEffects
这个是
usedExports摇树的另一种方案,usedExports是检查上下文有没有引用,如果没有引用,就会注入魔法注释,通过terser压缩进行去除未引入的代码而
slideEffects是对没有副作用的代码进行去除首先什么是
副作用,这是一个不太好理解的词,在react中经常有听到其实
副作用就是一个纯函数中存在可变依赖的因变量,因为某个因变量会造成纯函数产生不可控的结果举个例子
没有副作用的函数,输入输出很明确
function watchEnv(env) { return env === 'prd' ? 'product': 'development' } watchEnv('prd')- 1
- 2
- 3
- 4
有副作用,函数体内有不确定性因素
export function watchEnv(env) { const num = Math.ceil(Math.random() * 10); if (num < 5) { env = 'development' } return env === 'production' ? '生产环境' : '测试开发环境' }- 1
- 2
- 3
- 4
- 5
- 6
- 7
我们在
index.js中引入watch.jsimport { add } from './utils' import './utils/watch.js'; console.log("Hello World!"); console.log(add(1, 2))- 1
- 2
- 3
- 4
- 5
然后运行
npm run build:dev,打包后的文件有watch的引入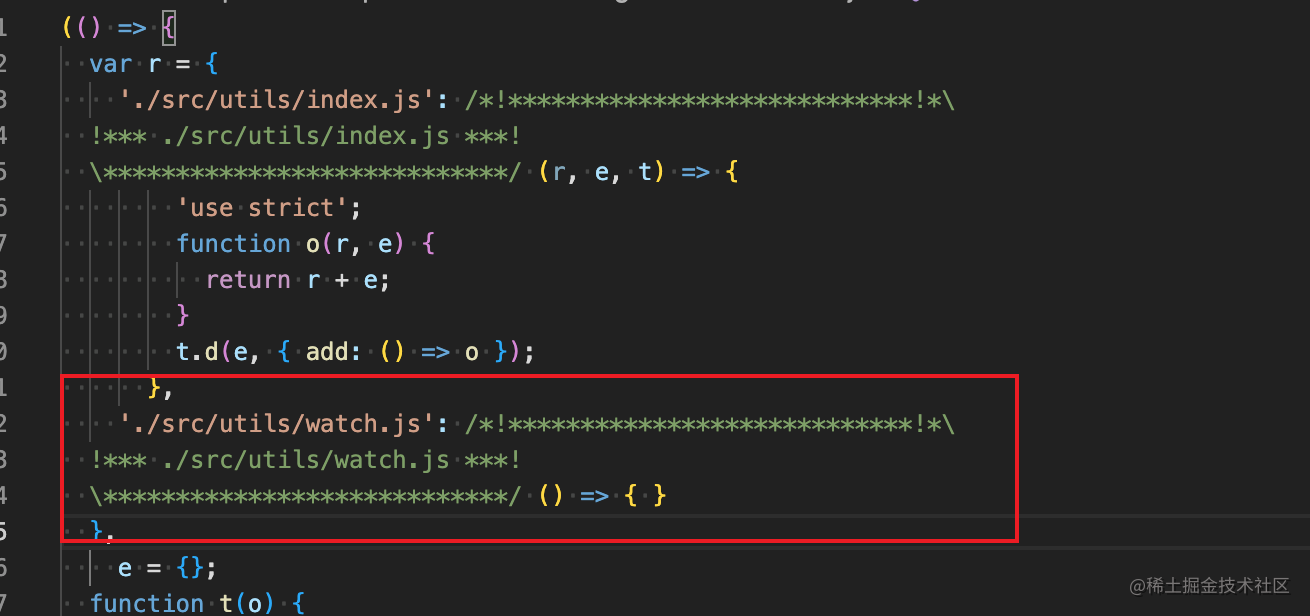
在
index.js中引入watch.js并没有什么使用,但是我们仍然打包了进去为了去除这引入但未被使用的代码,因此你需要在
optimization.sideEffects: true,并且要在package.json中设置sideEffects: false,在optimization.sideEffects设置true,告知webpack根据package.json中的sideEffects标记的副作用或者规则,从而告知webpack跳过一些引入但未被使用的模块代码。具体参考optimization.sideEffects[2]module.exports = () => { if (isProduction) { config.mode = "production"; config.plugins.push(new WorkboxWebpackPlugin.GenerateSW()); } else { config.mode = "development"; config.devtool = 'source-map', config.optimization = { sideEffects: true, // 开启sideEffects usedExports: true, minimize: true, // 开启terser minimizer: [new TerserPlugin({ extractComments: false, // 是否将注释剥离到单独文件,默认是true })] } } return config; };- 1
- 2
- 3
- 4
- 5
- 6
- 7
- 8
- 9
- 10
- 11
- 12
- 13
- 14
- 15
- 16
- 17
- 18
- 19
{ "name": "my-webpack-project", "version": "1.0.0", "description": "My webpack project", "main": "index.js", "sideEffects": false, ... }- 1
- 2
- 3
- 4
- 5
- 6
- 7
- 8
此时你运行命令
npm run build:dev,查看打包文件在官方中有这么一段话
使用 mode 为 "production" 的配置项以启用更多优化项,包括压缩代码与 tree shaking。因此在
webpack5中只要你设置mode:production那些代码压缩、tree shaking通通默认给你做了做了最大的优化,你就无需操心代码是否有被压缩,或者tree shaking了。
对于能否被
tree shaking还补充几点1、一定是
esModule方式,也就是export xxx或者import xx from 'xxx'的方式2、
cjs方式不能被tree shaking3、线上打包生产环境
mode:production自动开启多项优化,可以参考生产环境的构建production[3]gizp压缩
首先是是在
devServer下提供了一个开发环境的compress:true{ devServer: { open: true, host: "localhost", compress: true // 启用zip压缩 } }- 1
- 2
- 3
- 4
- 5
- 6
- 7
- CompressionWebpackPlugin 插件gizp[4]压缩
需要安装对应插件
npm i compression-webpack-plugin --save-dev- 1
webpack.config.js中引入插件// Generated using webpack-cli https://github.com/webpack/webpack-cli ... const CompressionWebpackPlugin = require('compression-webpack-plugin'); const config = { ... plugins: [ new HtmlWebpackPlugin({ template: "index.html", }), new MiniCssExtractPlugin(), new CompressionWebpackPlugin(), // Add your plugins here // Learn more about plugins from https://webpack.js.org/configuration/plugins/ ], ... };- 1
- 2
- 3
- 4
- 5
- 6
- 7
- 8
- 9
- 10
- 11
- 12
- 13
- 14
- 15
- 16
当你运行命令后,你就会发现打包后的文件有
gzip的文件了官方提供了一个
exclude,可以排除某些文件不被gizp压缩{ plugins: [ new HtmlWebpackPlugin({ template: "index.html", }), new MiniCssExtractPlugin(), new CompressionWebpackPlugin({ exclude: /.(html|map)$/i // 排除html,map文件 }) // Add your plugins here // Learn more about plugins from https://webpack.js.org/configuration/plugins/ ], }- 1
- 2
- 3
- 4
- 5
- 6
- 7
- 8
- 9
- 10
- 11
- 12
- 13
- 14

对比开启
gizp压缩与未压缩,加载时间很明显有提升
css tree shaking
主要删除未使用的样式,如果样式未使用,就删除掉。
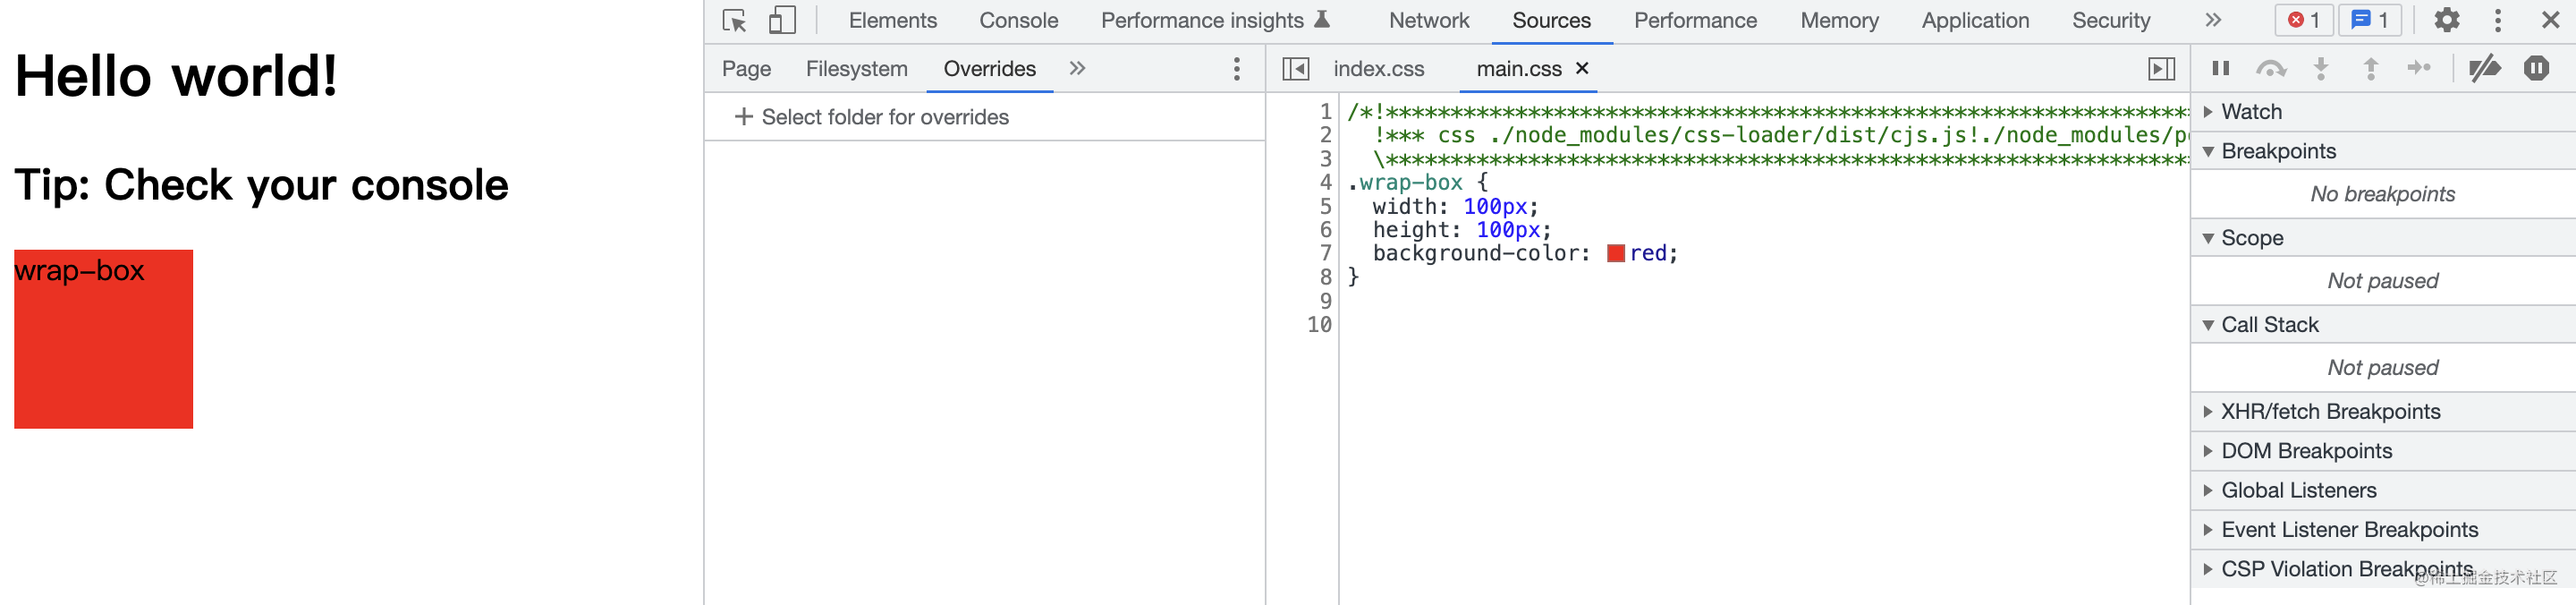
现在修改下
index.js我在body中插入一个classimport { add } from './utils' import './utils/watch'; import './css/index.css' console.log("Hello World!"); console.log(add(1, 2)) // /*#__PURE__*/ watchEnv(process.env.NODE_ENV) const bodyDom = document.getElementsByTagName('body')[0] const divDom = document.createElement('div'); divDom.setAttribute('class', 'wrap-box'); bodyDom.appendChild(divDom);- 1
- 2
- 3
- 4
- 5
- 6
- 7
- 8
- 9
- 10
- 11
- 12
对应的css如下
.wrap-box { width: 100px; height: 100px; background-color: red; }- 1
- 2
- 3
- 4
- 5
执行
npm run serve于是苦思瞑想,不得其解,于是一顿排查,当我们把
sideEffects: false时,神奇的是,样式没有被删掉// package.json { "sideEffects": [ "**/*.css" ], }- 1
- 2
- 3
- 4
- 5
- 6
当你设置完后,页面就可以正常显示css了
官方也提供了另外一种方案,你可以在
module.rules中设置{ module: { rules: [ { test: /.css$/i, sideEffects: true, use: [stylesHandler, "css-loader", "postcss-loader"], }, ] } }- 1
- 2
- 3
- 4
- 5
- 6
- 7
- 8
- 9
- 10
- 11
以上与在
package.json设置一样的效果,都是让webpack不要误删了无副作用的css的代码但是现在有这样的
css代码.wrap-box { width: 100px; height: 100px; background-color: red; } .title { color: green; }- 1
- 2
- 3
- 4
- 5
- 6
- 7
- 8
title页面没有被引用,但是也被打包进去了此时需要一个插件来帮助我们来完成css的摇树purgecss-webpack-plugin[5]
const path = require("path"); ... const glob = require('glob'); const PurgeCSSPlugin = require('purgecss-webpack-plugin'); const PATH = { src: path.resolve(__dirname, 'src') } const config = { ... plugins: [ ... new PurgeCSSPlugin({ paths: glob.sync(`${PATH.src}/**/*`, { nodir: true }), }) // Add your plugins here // Learn more about plugins from https://webpack.js.org/configuration/plugins/ ], ... };- 1
- 2
- 3
- 4
- 5
- 6
- 7
- 8
- 9
- 10
- 11
- 12
- 13
- 14
- 15
- 16
- 17
- 18
- 19
- 20
未引用的css就已经被删除了
分包
主要是减少入口依赖文件包的体积,如果不进行拆包,那么我们根据
entry的文件打包就很大。那么也会影响首页加载的性能。官方提供了两种方案:
- entry 分多个文件,举个栗子
引入
loadsh// index.js import { add } from './utils'; import _ from 'loadsh'; import './utils/watch'; import './css/index.css'; console.log("Hello World!"); console.log(add(1, 2)) // /*#__PURE__*/ watchEnv(process.env.NODE_ENV) const bodyDom = document.getElementsByTagName('body')[0] const divDom = document.createElement('div'); divDom.setAttribute('class', 'wrap-box'); divDom.innerText = 'wrap-box'; bodyDom.appendChild(divDom); console.log(_.last(['Maic', 'Web技术学苑']));- 1
- 2
- 3
- 4
- 5
- 6
- 7
- 8
- 9
- 10
- 11
- 12
- 13
- 14
- 15
- 16
- 17
我们现在利用
entry进行分包const config = { entry: { main: { import: ['./src/index'], dependOn: 'loadsh-vendors' }, 'loadsh-vendors': ['loadsh'] }, }- 1
- 2
- 3
- 4
- 5
- 6
此时我们再次运行
npm run build:dev此时main.js的大小1kb,但是loadsh已经被分离出来了可以看下打包后的
index.htmlWebpack App Hello world!
Tip: Check your console
- 1
- 2
- 3
- 4
- 5
- 6
- 7
- 8
- 9
- 10
- 11
- 12
- 13
- 14
- 15
- 16
- 17
- 18
- 19
- 20
- 21
- 22
- 23
- 24
- 25
- 26
- 27
- splitChunks 主要是在
optimzation.splitChunks对于动态导入模块,在webpack4+就默认采取分块策略
const config = { // entry: { // main: { import: ['./src/index'], dependOn: 'loadsh-vendors' }, // 'loadsh-vendors': ['loadsh'] // }, entry: './src/index.js', ... } module.exports = () => { if (isProduction) { config.mode = "production"; config.plugins.push(new WorkboxWebpackPlugin.GenerateSW()); } else { config.mode = "development"; config.devtool = 'source-map', config.optimization = { splitChunks: { chunks: 'all' // 支持异步和非异步共享chunk }, sideEffects: true, usedExports: true, minimize: true, // 开启terser minimizer: [new TerserPlugin({ extractComments: false, // 是否将注释剥离到单独文件,默认是true })] } } return config; };- 1
- 2
- 3
- 4
- 5
- 6
- 7
- 8
- 9
- 10
- 11
- 12
- 13
- 14
- 15
- 16
- 17
- 18
- 19
- 20
- 21
- 22
- 23
- 24
- 25
- 26
- 27
- 28
- 29
当
optimization.splitChunks.chunks:'all',此时可以把loash分包出来了
关于
optimization.splitChunks的设置非常之多,有对缓存的设置,有对chunk大小的限制,最常用的还是设置chunks:all,建议SplitChunksPlugin[6]多读几遍,一定会找到不少收获。- runtimeChunk 主要减少依赖入口文件打包体积,当我们设置
optimization.runtimeChunk时,运行时依赖的代码会独立打包成一个runtime.xxx.js
... config.optimization = { runtimeChunk: true, // 减少入口文件打包的体积,运行时代码会独立抽离成一个runtime的文件 splitChunks: { minChunks: 1, // 默认是1,可以不设置 chunks: 'all', // 支持异步和非异步共享chunk }, sideEffects: true, usedExports: true, minimize: true, // 开启terser minimizer: [new TerserPlugin({ extractComments: false, // 是否将注释剥离到单独文件,默认是true })] }- 1
- 2
- 3
- 4
- 5
- 6
- 7
- 8
- 9
- 10
- 11
- 12
- 13
- 14
main.js有一部分代码移除到一个独立的runtime.js中
- Externals 外部扩展 第三种方案就是,
webpack提供了一个外部扩展,将输出的bundle.js排除第三方的依赖,参考Externals[7]
const config = { // entry: { // main: { import: ['./src/index'], dependOn: 'loadsh-vendors' }, // 'loadsh-vendors': ['loadsh'] // }, entry: './src/index.js', ..., externals: /^(loadsh)$/i, /* or externals: { loadsh: '_' } */ }; module.exports = () => { if (isProduction) { config.mode = "production"; config.plugins.push(new WorkboxWebpackPlugin.GenerateSW()); } else { config.mode = "development"; config.devtool = 'source-map', config.optimization = { runtimeChunk: true, // 减少入口文件打包的体积,运行时代码会独立抽离成一个runtime的文件 // splitChunks: { // minChunks: 1, // chunks: 'all', // 支持异步和非异步共享chunk // }, sideEffects: true, usedExports: true, minimize: true, // 开启terser minimizer: [new TerserPlugin({ extractComments: false, // 是否将注释剥离到单独文件,默认是true })] } } return config; };- 1
- 2
- 3
- 4
- 5
- 6
- 7
- 8
- 9
- 10
- 11
- 12
- 13
- 14
- 15
- 16
- 17
- 18
- 19
- 20
- 21
- 22
- 23
- 24
- 25
- 26
- 27
- 28
- 29
- 30
- 31
- 32
- 33
- 34
- 35
- 36
- 37
但是此时
loash已经被我们移除了,我们还需在HtmlWebpackPlugin中加入引入的cdn地址... plugins: [ new HtmlWebpackPlugin({ template: "index.html", inject: 'body', // 插入到body中 cdn: { basePath: 'https://cdn.bootcdn.net/ajax/libs', js: [ '/lodash.js/4.17.21/lodash.min.js' ] } }), ]- 1
- 2
- 3
- 4
- 5
- 6
- 7
- 8
- 9
- 10
- 11
- 12
- 13
修改模版,由于模版内容是ejs[8],所以我们循环取出
js数组中的数据Webpack App Hello world!
Tip: Check your console
<% for (var i in htmlWebpackPlugin.options.cdn && htmlWebpackPlugin.options.cdn.js) { %> <% } %>- 1
- 2
- 3
- 4
- 5
- 6
- 7
- 8
- 9
- 10
- 11
- 12
- 13
- 14
- 15
- 16
- 17
- 18
- 19
- 20
- 21
- 22
- 23
- 24
- 25
- 26
- 27
此时你运行命令
npm run build:dev,然后打开html页面
但是我们发现当我们运行
npm run serve启动本地服务,此时页面还是会引入loadsh,在开发环境,其实并不需要引入,本身生成的bundle.js就是在内存中加载的,很显然不是我们需要的此时我需要做几件事
1、开发环境我不允许引入
externals2、模版
html中需要根据环境判断是否需要插入cdnconst isProduction = process.env.NODE_ENV == "production"; const stylesHandler = MiniCssExtractPlugin.loader; const PATH = { src: path.resolve(__dirname, 'src') } const config = { // entry: { // main: { import: ['./src/index'], dependOn: 'loadsh-vendors' }, // 'loadsh-vendors': ['loadsh'] // }, entry: './src/index.js', output: { path: path.resolve(__dirname, "dist"), }, devServer: { open: true, host: "localhost", compress: true }, plugins: [ new HtmlWebpackPlugin({ env: process.env.NODE_ENV, // 传入模版中的环境 template: "index.html", inject: 'body', // 插入到body中 cdn: { basePath: 'https://cdn.bootcdn.net/ajax/libs', js: [ '/lodash.js/4.17.21/lodash.min.js' ] } }), new MiniCssExtractPlugin(), new CompressionWebpackPlugin({ exclude: /.(html|map)$/i // 排除html,map文件不做gizp压缩 }), new PurgeCSSPlugin({ paths: glob.sync(`${PATH.src}/**/*`, { nodir: true }), }) // Add your plugins here // Learn more about plugins from https://webpack.js.org/configuration/plugins/ ], ... // externals: /^(loadsh)$/i, externals: isProduction ? { loadsh: '_' } : {} };- 1
- 2
- 3
- 4
- 5
- 6
- 7
- 8
- 9
- 10
- 11
- 12
- 13
- 14
- 15
- 16
- 17
- 18
- 19
- 20
- 21
- 22
- 23
- 24
- 25
- 26
- 27
- 28
- 29
- 30
- 31
- 32
- 33
- 34
- 35
- 36
- 37
- 38
- 39
- 40
- 41
- 42
- 43
- 44
- 45
- 46
- 47
- 48
- 49
- 50
- 51
根据传入模版的
env判断是否需要插入cdn... <% if (htmlWebpackPlugin.options.env === 'production') { %> <% for (var i in htmlWebpackPlugin.options.cdn && htmlWebpackPlugin.options.cdn.js) { %> <% } %> <% } %>- 1
- 2
- 3
- 4
- 5
- 6
图片资源压缩
主要是有选择的压缩图片资源,我们可以看下
module.rules.parser- module.rules.parser.dataUrlCondition 对应的资源文件可以限制图片的输出,比如静态资源模块类型
module: { rules: [ { test: /.(png|svg|jpg|jpeg|gif)$/i, type: 'asset/resource', parser: { dataUrlCondition: { maxSize: 4 * 1024 // 小于4kb将会base64输出 } } }, ], },- 1
- 2
- 3
- 4
- 5
- 6
- 7
- 8
- 9
- 10
- 11
- 12
- 13
官方提供了一个ImageMinimizerWebpackPlugin[9] 我们需要安装
npm i image-minimizer-webpack-plugin imagemin --save-dev- 1
在
webpack.config.js中引入image-minimizer-webpack-plugin,并且在plugins中引入这个插件,注意webpack5官网那份文档很旧,参考npm上npm-image-minimizer-webpack-plugin[10]按照官网的,就直接报错一些配置参数不存在,我估计文档没及时更新
... const ImageMinimizerPlugin = require('image-minimizer-webpack-plugin'); const config = { plugins: [ ... new ImageMinimizerPlugin({ minimizer: { // Implementation implementation: ImageMinimizerPlugin.squooshMinify, }, }) // Add your plugins here // Learn more about plugins from https://webpack.js.org/configuration/plugins/ ], }- 1
- 2
- 3
- 4
- 5
- 6
- 7
- 8
- 9
- 10
- 11
- 12
- 13
- 14
- 15
- 16
未压缩前
这个插件可以将图片转成
webp格式,具体参考官方文档效果测试一下总结
1、
webpack如何做treeShaking,主要是两种- optimization中设置
usedExports:true,但是要配合terser压缩插件才会生效 - optimization中设置
sideEffects: true,在package.json中设置sideEffects:false去除无副作用的代码,但是注意css引入会当成无副作用的代码,此时需要在rules的css规则中标记sideEffects: true,这样就不会删除css了
2、
webpack的gizp压缩 主要是利用CompressionWebpackPlugin官方提供的这个插件3、
css如何做treeShaking, 主要是利用PurgeCSSPlugin这个插件,会将没有引用css删除4、入口依赖文件拆包
- 第一种是在入口文件
entry中分包处理,将依赖的第三方库独立打包成一个公用的bundle.js,入口文件不会把第三方包打包到里面去 - 第二种利用
optimization.splitChunks设置chunks:'all'将同步或者异步的esModule方式的代码进行分包处理,会单独打成一个公用的js - 利用外置扩展
externals将第三方包分离出去,此时第三方包不会打包到入口文件中去,不过注意要在ejs模版中进行单独引入 5、图片资源加载优化 - 主要是利用静态资源模块对文件体积小的可以进行base64
- 利用社区插件
image-minimizer-webpack-plugin做图片压缩处理 6、本文示例code-example[11]
最后,看完觉得有收获的,鼓励下作者,点个赞,在看,转发,收藏等于学会,
专注前端web技术,分享web技术,关注公众号Web技术学苑,好好学习,天天向上! -
相关阅读:
ISIS-ISIS高级特性—05
ASPICE标准快速掌握「5.2. ASPICE与V模型」
shein面试:nacos无入侵配置,做过吗,怎么做?
用于预训练词嵌入的数据集
java基础巩固10
FPGA 20个例程篇:13.千兆网口实现ARP通信协议(上)
设计模式 - 中介者模式
GIGE 协议摘录 —— 引导寄存器(四)
Django项目使用uwsgi+nginx部署上线
Go语言程序编译注入版本信息,提升Debug速度!
- 原文地址:https://blog.csdn.net/pfourfire/article/details/126505335
