-
AI计算机视觉进阶项目(一)——带口罩识别检测(4)
独热编码官方合作微信:gldz_super
本专栏《AI计算机视觉进阶项目》主要以计算机视觉实战项目为主,第一个项目为口罩检测:该项目将分为几个模块进行展示。本项目已完成链接:
1.AI计算机视觉进阶项目(一)——带口罩识别检测(1)_AI炮灰的博客-CSDN博客
2.AI计算机视觉进阶项目(一)——带口罩识别检测(2)_AI炮灰的博客-CSDN博客
3.AI计算机视觉进阶项目(一)——带口罩识别检测(3)_AI炮灰的博客-CSDN博客
一、本节概述
对AI计算机视觉进阶项目(一)——带口罩识别检测(3)中训练好的模型进行预测。
二、任务实现
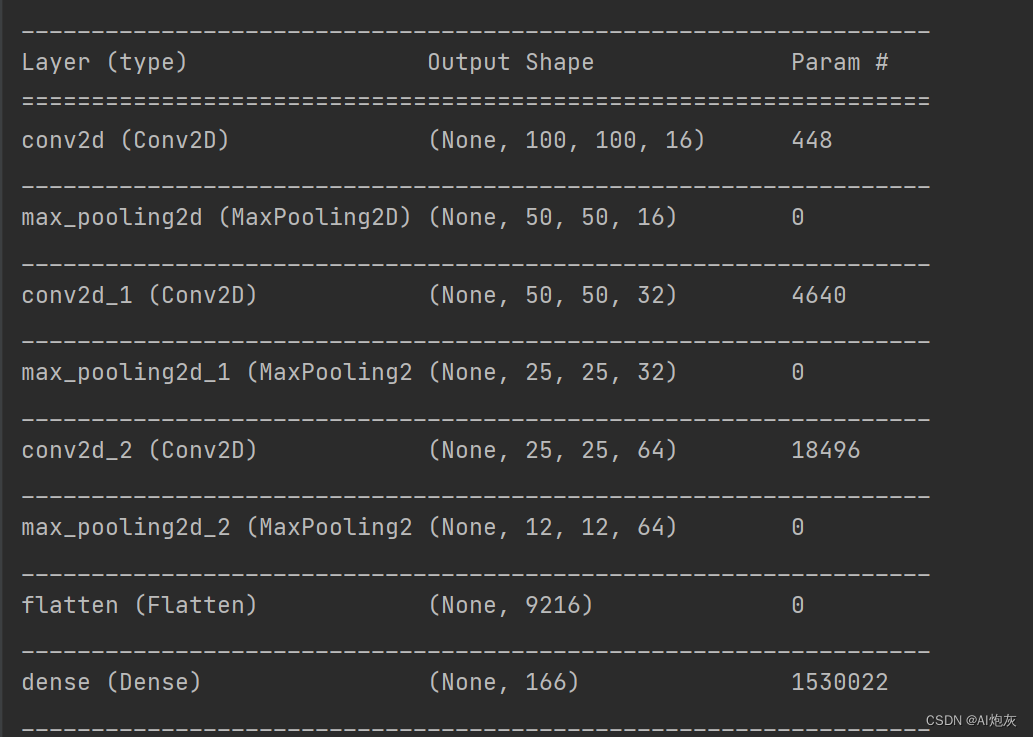
2.1.加载模型
- # 加载模型
- model = keras.models.load_model('./face_mask_model.h5')
- model.summary()
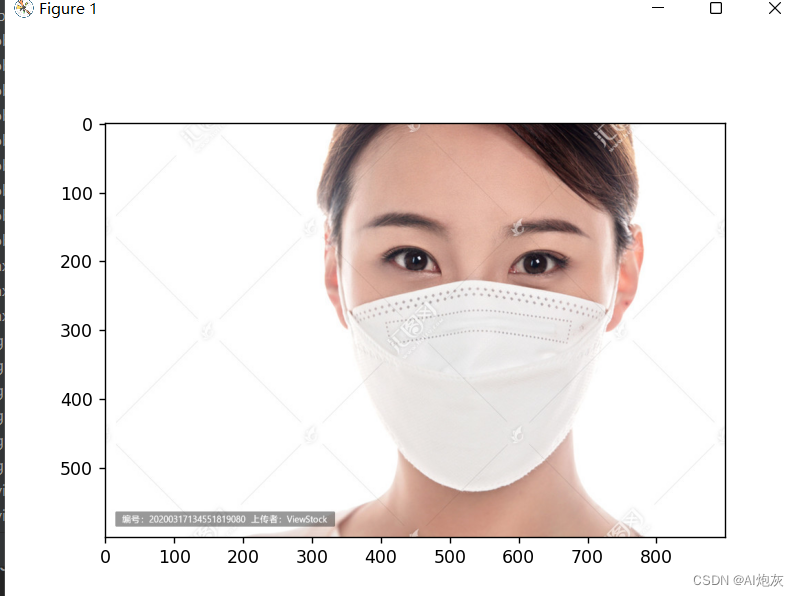
2.2选取测试图像
- # 挑选一个测试图像
- img = cv2.imread('img.png')
- plt.imshow(cv2.cvtColor(img, cv2.COLOR_BGR2RGB))
- plt.show()
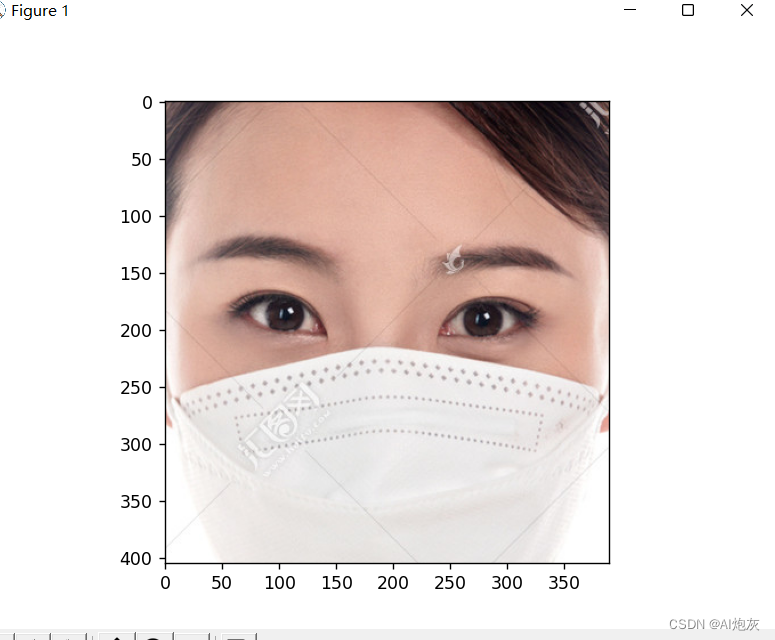
2.3对测试数据进行裁剪和Blob
- """
- 由于在训练的时候将图像进行了裁剪以及blob变换,因此在测试的时候同样需要如此处理
- """
- # 加载SSD模型:将人脸剪切出来
- face_detector = cv2.dnn.readNetFromCaffe('./weights/deploy.prototxt.txt',
- 'weights/res10_300x300_ssd_iter_140000.caffemodel')
- img_crop = face_detect(img)
- plt.imshow(cv2.cvtColor(img_crop, cv2.COLOR_BGR2RGB))
- plt.show()
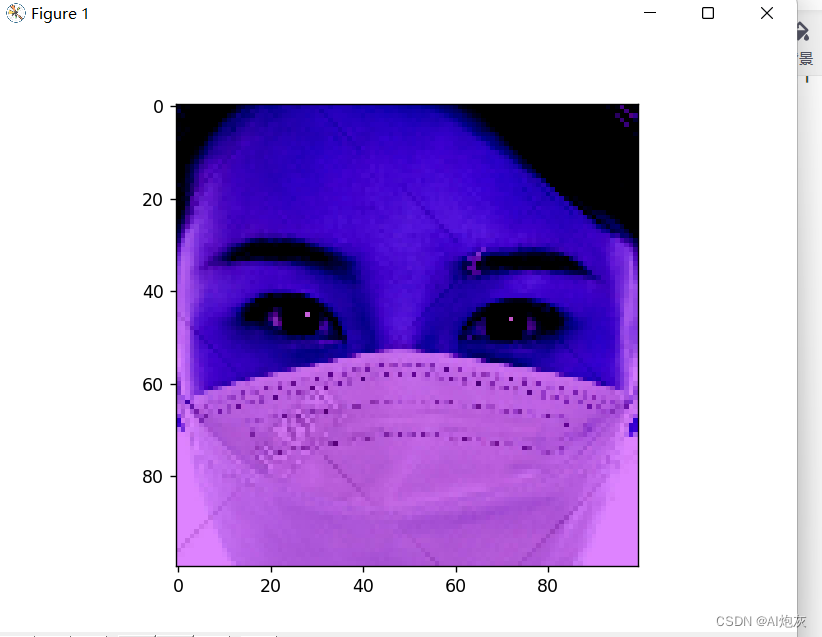
- img_blob = imgBlob(img_crop)
- plt.imshow(cv2.cvtColor(img_blob, cv2.COLOR_BGR2RGB))
- plt.show()
裁剪和blob函数如下所示:
- def face_detect(img):
- # 转为blob:进行均值相减,加快运算
- img_blob = cv2.dnn.blobFromImage(img, 1, (300, 300), (104, 177, 123), swapRB=True)
- # 输入
- face_detector.setInput(img_blob)
- # 推理
- detections = face_detector.forward()
- # print(detections.shape)
- # 遍历结果
- # 获取原图大小
- img_h, img_w = img.shape[:2]
- # 人数
- person_count = detections.shape[2]
- for face_index in range(person_count):
- # 置信度
- confidence = detections[0, 0, face_index, 2]
- # print(confidence) # 发现大部分置信度都是比较小,我们这挑选比较大的置信度
- if confidence >0.5: # 表示检测到人脸
- locations = detections[0, 0, face_index, 3:7]*np.array([img_w, img_h, img_w, img_h]) # 由于之前归一化了,所以拿到位置要乘以宽高返回到原图大小
- # 用矩形框画出人脸:由于画矩形框不能有小数,所以需要取整
- l, t, r, b = locations.astype('int')
- # cv2.rectangle(img, (l, t), (r, b), (0, 255, 0), 5)
- # plt.imshow(cv2.cvtColor(img,cv2.COLOR_BGR2RGB))
- # plt.show()
- return img[t:b, l:r]
- return None
- # 转为Blob图像
- def imgBlob(img):
- img_blob = cv2.dnn.blobFromImage(img, 1, (100, 100), (104, 177, 123), swapRB=True)
- # 转变后图像由三维会变为四维,所以需要进行维度压缩:变为:(1, 3, 300, 300)
- img_squeeze = np.squeeze(img_blob) # 变为(3, 300, 300)所以需要转置将3放在后面
- img_squeeze = img_squeeze.T # 输出人倒立横着的,所以需要旋转90度
- # 旋转
- img_rotate = cv2.rotate(img_squeeze, cv2.ROTATE_90_CLOCKWISE)
- # 再进行镜像翻转图像就和原图位置一样
- img_flip = cv2.flip(img_rotate, 1)
- # 去除负数:将小于0设置为0,大于0不变
- img_flip = np.maximum(img_flip, 0)
- # 归一化
- img_blob = img_flip / img_flip.max()
- return img_blob
2.4进行预测
- # 进行预测:
- print(img_blob.shape) # 由于模型的输入要是四维的,而本数据是(100, 100, 3),所以需要升高维度
- img_input = img_blob.reshape(1, 100, 100, 3)
- # 得到对应属于每一类别的概率
- result = model.predict(img_input) # 输出是一个二维的,我们要变为一维的
- print(result) # 输出的结果看不出谁大谁小,所以需要将其利用softmax变为0-1
- print(result[0]) # 变为一维的
- result = softmax(result[0]) # 很明显可以看出属于哪个类别概率大
- print(result)
- # 找到最大值的索引就是属于某个类别的概率
- max_index = result.argmax()
- max_value = result[max_index]
- print(max_value) # 输出最大值的概率
- label = os.listdir('images')
- # 预测图像所属类别
- pre_label = label[max_index]
- print(pre_label)

3.完整代码
- from tensorflow.python import keras
- import cv2
- import numpy as np
- import matplotlib.pyplot as plt
- from scipy.special import softmax
- import os
- def face_detect(img):
- # 转为blob:进行均值相减,加快运算
- img_blob = cv2.dnn.blobFromImage(img, 1, (300, 300), (104, 177, 123), swapRB=True)
- # 输入
- face_detector.setInput(img_blob)
- # 推理
- detections = face_detector.forward()
- # print(detections.shape)
- # 遍历结果
- # 获取原图大小
- img_h, img_w = img.shape[:2]
- # 人数
- person_count = detections.shape[2]
- for face_index in range(person_count):
- # 置信度
- confidence = detections[0, 0, face_index, 2]
- # print(confidence) # 发现大部分置信度都是比较小,我们这挑选比较大的置信度
- if confidence >0.5: # 表示检测到人脸
- locations = detections[0, 0, face_index, 3:7]*np.array([img_w, img_h, img_w, img_h]) # 由于之前归一化了,所以拿到位置要乘以宽高返回到原图大小
- # 用矩形框画出人脸:由于画矩形框不能有小数,所以需要取整
- l, t, r, b = locations.astype('int')
- # cv2.rectangle(img, (l, t), (r, b), (0, 255, 0), 5)
- # plt.imshow(cv2.cvtColor(img,cv2.COLOR_BGR2RGB))
- # plt.show()
- return img[t:b, l:r]
- return None
- # 转为Blob图像
- def imgBlob(img):
- img_blob = cv2.dnn.blobFromImage(img, 1, (100, 100), (104, 177, 123), swapRB=True)
- # 转变后图像由三维会变为四维,所以需要进行维度压缩:变为:(1, 3, 300, 300)
- img_squeeze = np.squeeze(img_blob) # 变为(3, 300, 300)所以需要转置将3放在后面
- img_squeeze = img_squeeze.T # 输出人倒立横着的,所以需要旋转90度
- # 旋转
- img_rotate = cv2.rotate(img_squeeze, cv2.ROTATE_90_CLOCKWISE)
- # 再进行镜像翻转图像就和原图位置一样
- img_flip = cv2.flip(img_rotate, 1)
- # 去除负数:将小于0设置为0,大于0不变
- img_flip = np.maximum(img_flip, 0)
- # 归一化
- img_blob = img_flip / img_flip.max()
- return img_blob
- if __name__ =="__main__":
- # 加载模型
- model = keras.models.load_model('./face_mask_model.h5')
- model.summary()
- # 挑选一个测试图像
- img = cv2.imread('img.png')
- plt.imshow(cv2.cvtColor(img, cv2.COLOR_BGR2RGB))
- plt.show()
- """
- 由于在训练的时候将图像进行了裁剪以及blob变换,因此在测试的时候同样需要如此处理
- """
- # 加载SSD模型:将人脸剪切出来
- face_detector = cv2.dnn.readNetFromCaffe('./weights/deploy.prototxt.txt',
- 'weights/res10_300x300_ssd_iter_140000.caffemodel')
- img_crop = face_detect(img)
- plt.imshow(cv2.cvtColor(img_crop, cv2.COLOR_BGR2RGB))
- plt.show()
- img_blob = imgBlob(img_crop)
- plt.imshow(cv2.cvtColor(img_blob, cv2.COLOR_BGR2RGB))
- plt.show()
- # 进行预测:
- print(img_blob.shape) # 由于模型的输入要是四维的,而本数据是(100, 100, 3),所以需要升高维度
- img_input = img_blob.reshape(1, 100, 100, 3)
- # 得到对应属于每一类别的概率
- result = model.predict(img_input) # 输出是一个二维的,我们要变为一维的
- print(result) # 输出的结果看不出谁大谁小,所以需要将其利用softmax变为0-1
- print(result[0]) # 变为一维的
- result = softmax(result[0]) # 很明显可以看出属于哪个类别概率大
- print(result)
- # 找到最大值的索引就是属于某个类别的概率
- max_index = result.argmax()
- max_value = result[max_index]
- print(max_value) # 输出最大值的概率
- label = os.listdir('images')
- # 预测图像所属类别
- pre_label = label[max_index]
- print(pre_label)
-
相关阅读:
UML模型和类的六大关系
血氧仪方案组成结构设计分析
手动编译jdk1.8源码-centos7
list的模拟实现
春节专题|产业7问:区块链厂商的现在和未来——数字资产厂商
gitlab 16.2.4 恢复
PV操作经典例题
关键字extern用法
Javaweb学生信息管理系统(Mysql+JSP+MVC+CSS)
Hantek6022BE 虚拟示波器 (二)方波 采样率 带宽
- 原文地址:https://blog.csdn.net/bigData1994pb/article/details/126456982
