-
Flink1.15源码阅读——执行图executiongraph
执行图是在JobManager生成的,且在创建JobMaster的过程中创建的。
本篇是基于per job模式client生成JobGraph之后,就通过submitJob提交给JobManager,JobManager会根据JobGraph生成对应的ExecutionGraph。
ExecutionGraph 是Flink作业调度时使用到的核心数据结构,它包含每一个并行的task,每一个intermediate stream以及它们之间的关系。
查看JobMaster类
在JobMaster类的构造方法中有如下代码
this.schedulerNG = createScheduler( slotPoolServiceSchedulerFactory, executionDeploymentTracker, jobManagerJobMetricGroup, jobStatusListener);- 1
- 2
- 3
- 4
- 5
- 6
createScheduler
final SchedulerNG scheduler = slotPoolServiceSchedulerFactory.createScheduler( log, jobGraph, ioExecutor, jobMasterConfiguration.getConfiguration(), slotPoolService, futureExecutor, userCodeLoader, highAvailabilityServices.getCheckpointRecoveryFactory(), rpcTimeout, blobWriter, jobManagerJobMetricGroup, jobMasterConfiguration.getSlotRequestTimeout(), shuffleMaster, partitionTracker, executionDeploymentTracker, initializationTimestamp, getMainThreadExecutor(), fatalErrorHandler, jobStatusListener); return scheduler;- 1
- 2
- 3
- 4
- 5
- 6
- 7
- 8
- 9
- 10
- 11
- 12
- 13
- 14
- 15
- 16
- 17
- 18
- 19
- 20
- 21
- 22
- 23
看到工厂类调用了一个createScheduler 方法,现在只有默认实现类DefaultSlotPoolServiceSchedulerFactory.java。
又调用了一个方法,并且直接返回结果。return schedulerNGFactory.createInstance( log, jobGraph, ioExecutor, configuration, slotPoolService, futureExecutor, userCodeLoader, checkpointRecoveryFactory, rpcTimeout, blobWriter, jobManagerJobMetricGroup, slotRequestTimeout, shuffleMaster, partitionTracker, executionDeploymentTracker, initializationTimestamp, mainThreadExecutor, fatalErrorHandler, jobStatusListener);- 1
- 2
- 3
- 4
- 5
- 6
- 7
- 8
- 9
- 10
- 11
- 12
- 13
- 14
- 15
- 16
- 17
- 18
- 19
- 20
createInstance

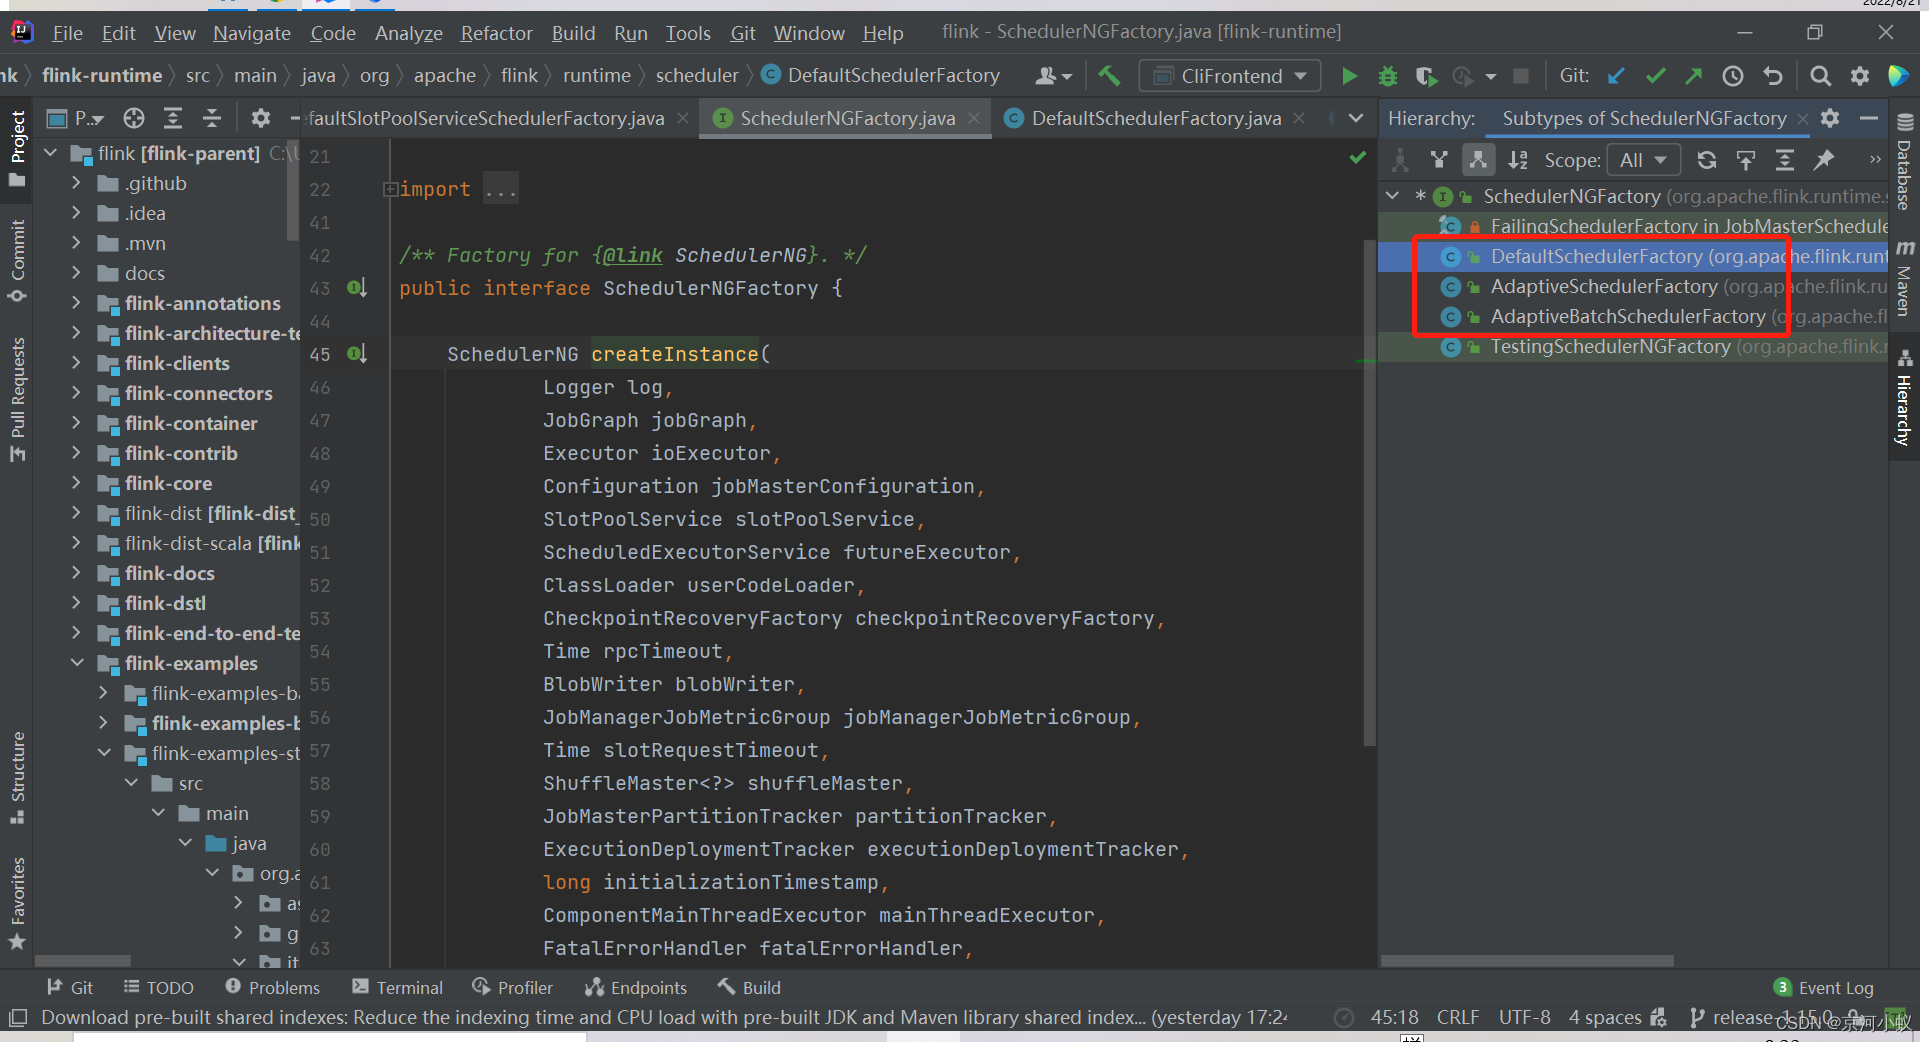
这里实现类之前1.11版本的时候只有一个默认的实现类,现在加了AdaptiveSchedulerFactory和AdaptiveBatchSchedulerFactory两种调度器;然后里面有一个方法
final ExecutionGraphFactory executionGraphFactory = new DefaultExecutionGraphFactory( jobMasterConfiguration, userCodeLoader, executionDeploymentTracker, futureExecutor, ioExecutor, rpcTimeout, jobManagerJobMetricGroup, blobWriter, shuffleMaster, partitionTracker);- 1
- 2
- 3
- 4
- 5
- 6
- 7
- 8
- 9
- 10
- 11
- 12
new DefaultExecutionGraphFactory()
这个类里有一个buildGraph方法
final ExecutionGraph newExecutionGraph = DefaultExecutionGraphBuilder.buildGraph( jobGraph, configuration, futureExecutor, ioExecutor, userCodeClassLoader, completedCheckpointStore, checkpointsCleaner, checkpointIdCounter, rpcTimeout, blobWriter, log, shuffleMaster, jobMasterPartitionTracker, partitionLocationConstraint, executionDeploymentListener, combinedExecutionStateUpdateListener, initializationTimestamp, vertexAttemptNumberStore, vertexParallelismStore, checkpointStatsTrackerFactory, isDynamicGraph, executionJobVertexFactory);- 1
- 2
- 3
- 4
- 5
- 6
- 7
- 8
- 9
- 10
- 11
- 12
- 13
- 14
- 15
- 16
- 17
- 18
- 19
- 20
- 21
- 22
- 23
- 24
看了这么多弯弯绕,才找到这个真正构建执行图的方法,看着这代码,虽然说用了很多设计模式,但是看着还是晕。
DefaultExecutionGraphBuilder.buildGraph()
核心逻辑
final DefaultExecutionGraph executionGraph; try { executionGraph = new DefaultExecutionGraph( jobInformation, futureExecutor, ioExecutor, rpcTimeout, executionHistorySizeLimit, classLoader, blobWriter, partitionGroupReleaseStrategyFactory, shuffleMaster, partitionTracker, partitionLocationConstraint, executionDeploymentListener, executionStateUpdateListener, initializationTimestamp, vertexAttemptNumberStore, vertexParallelismStore, isDynamicGraph, executionJobVertexFactory); } ... ... ... // 核心逻辑:将拓扑排序过的JobGraph添加到executionGraph数据结构中 executionGraph.attachJobGraph(sortedTopology);- 1
- 2
- 3
- 4
- 5
- 6
- 7
- 8
- 9
- 10
- 11
- 12
- 13
- 14
- 15
- 16
- 17
- 18
- 19
- 20
- 21
- 22
- 23
- 24
- 25
- 26
- 27
- 28
- 29
- 30
- 31
attachJobGraph(sortedTopology)
核心逻辑
attachJobVertices(verticesToAttach); initializeJobVertices(verticesToInitialize);- 1
- 2
attachJobVertices(verticesToAttach)
// 实例化执行图节点,根据每一个job vertex, 创建对应的ExecutionVertex ExecutionJobVertex ejv = executionJobVertexFactory.createExecutionJobVertex( this, jobVertex, parallelismInfo); ... // 将当前执行图节点加入到图中 this.verticesInCreationOrder.add(ejv);- 1
- 2
- 3
- 4
- 5
- 6
- 7
- 8
- 9
initializeJobVertices(verticesToInitialize)
初始化作业顶点
for (JobVertex jobVertex : topologicallySorted) { final ExecutionJobVertex ejv = tasks.get(jobVertex.getID()); initializeJobVertex(ejv, createTimestamp); }- 1
- 2
- 3
- 4
initializeJobVertex(ejv, createTimestamp)
ejv.initialize( executionHistorySizeLimit, rpcTimeout, createTimestamp, this.initialAttemptCounts.getAttemptCounts(ejv.getJobVertexId()), coordinatorStore); // 将创建的ExecutionJobVertex与前置的IntermediateResults连接起来 ejv.connectToPredecessors(this.intermediateResults); ... // 最后注册执行顶点和结果中间分区 registerExecutionVerticesAndResultPartitionsFor(ejv);- 1
- 2
- 3
- 4
- 5
- 6
- 7
- 8
- 9
- 10
- 11
- 12
- 13
- 14
- 15
- 16
-
相关阅读:
毕业季-个人总结
从铸剑到御剑:滴滴工程效能平台建设之路
SpringBoot整合DataWay配置前端查询
利用alt实现图片加载时显示图片加载效果
Vue3 从入门到放弃 (第一篇.环境准备)
pandas基础笔记01|joyful Pandas学习
Win11远程协助灰色无法勾选?Win11远程协助不能选择的解决方法
【目标检测】SSD损失函数详解
基于量子信息处理的量子零水印算法
Hive——Hive常用内置函数总结
- 原文地址:https://blog.csdn.net/u010772882/article/details/126061432