-
Android学习笔记 2.2.3 帧布局 && 2.2.4 绝对布局
Android学习笔记
疯狂Android讲义
第2章 Android 应用的界面编程
2.2 第1组 UI组件:布局管理器
2.2.3 帧布局
帧布局由 FrameLayout所代表,FrameLayout直接继承了ViewGroup组件。
帧布局容器为每个加入其中的组件都创建一个空白的区域(称为一帧),每个子组件占据一帧这些帧都会根据 gravity属性执行自动对齐。
FrameLayout支持的常用XML属性及相关方法

FrameLayout包含的子元素也受FrameLayout.LayoutParams 控制,因此它所包含的子元素也可指定android:layout gravity属性,该属性控制该子元素在FrameLayout中的对齐方式。
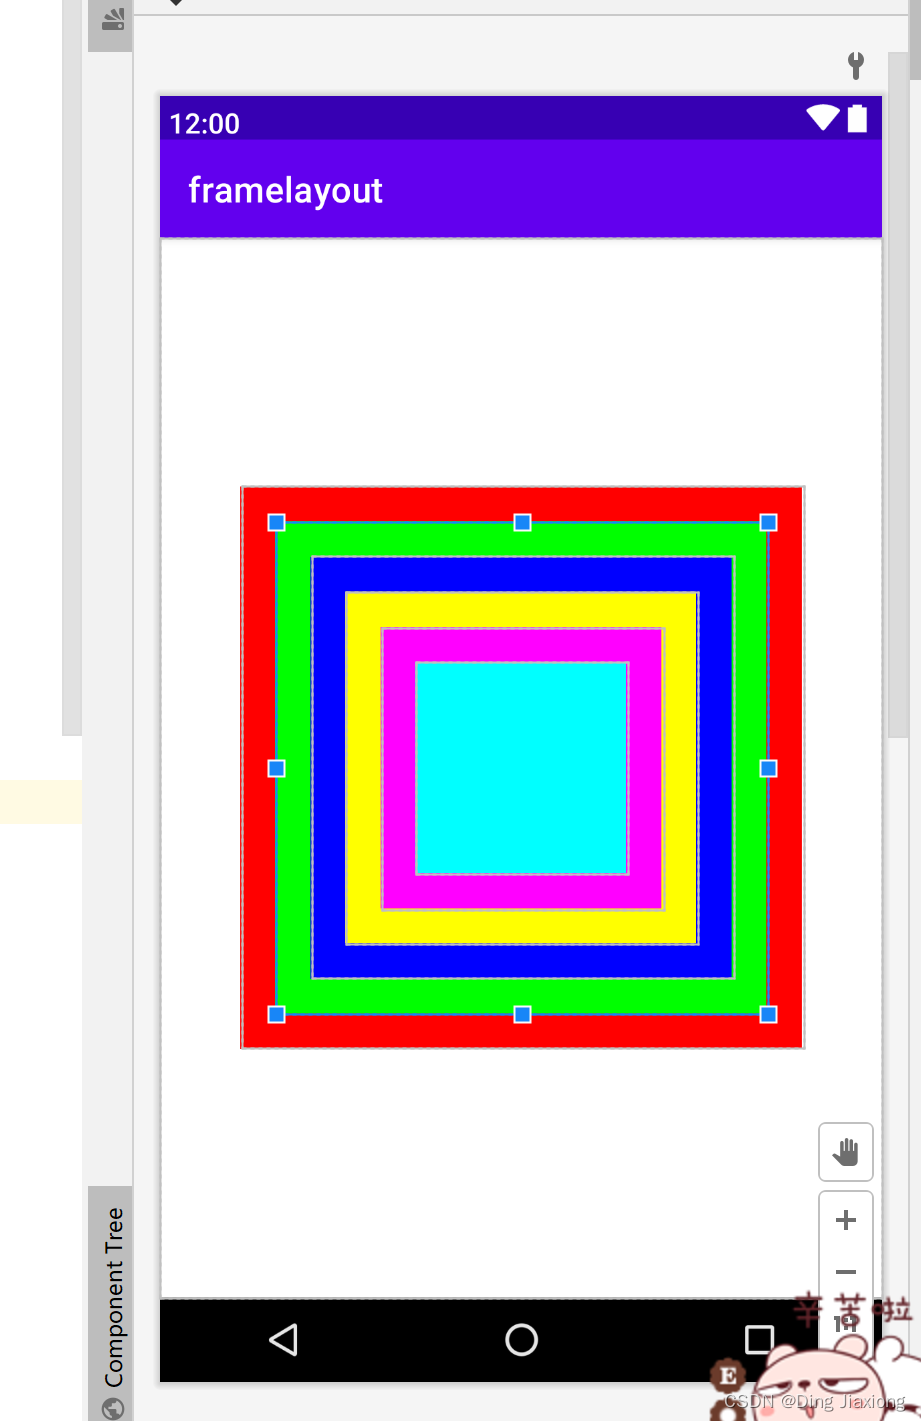
示范用法——6个TextView叠加在一起,上面的TextView遮住下面的TextView。
<FrameLayout xmlns:android="http://schemas.android.com/apk/res/android" android:layout_width="match_parent" android:layout_height="match_parent"> <TextView android:id="@+id/view01" android:layout_width="wrap_content" android:layout_height="wrap_content" android:layout_gravity="center" android:width="320dp" android:height="320dp" android:background="#f00" /> <TextView android:id="@+id/view02" android:layout_width="wrap_content" android:layout_height="wrap_content" android:layout_gravity="center" android:width="280dp" android:height="280dp" android:background="#0f0" /> <TextView android:id="@+id/view03" android:layout_width="wrap_content" android:layout_height="wrap_content" android:layout_gravity="center" android:width="240dp" android:height="240dp" android:background="#00f" /> <TextView android:id="@+id/view04" android:layout_width="wrap_content" android:layout_height="wrap_content" android:layout_gravity="center" android:width="200dp" android:height="200dp" android:background="#ff0" /> <TextView android:id="@+id/view05" android:layout_width="wrap_content" android:layout_height="wrap_content" android:layout_gravity="center" android:width="160dp" android:height="160dp" android:background="#f0f" /> <TextView android:id="@+id/view06" android:layout_width="wrap_content" android:layout_height="wrap_content" android:layout_gravity="center" android:width="120dp" android:height="120dp" android:background="#0ff" /> FrameLayout>- 1
- 2
- 3
- 4
- 5
- 6
- 7
- 8
- 9
- 10
- 11
- 12
- 13
- 14
- 15
- 16
- 17
- 18
- 19
- 20
- 21
- 22
- 23
- 24
- 25
- 26
- 27
- 28
- 29
- 30
- 31
- 32
- 33
- 34
- 35
- 36
- 37
- 38
- 39
- 40
- 41
- 42
- 43
- 44
- 45
- 46
- 47
- 48
- 49
- 50
- 51
- 52
- 53
- 54
- 55
- 56
- 57
- 58
- 59
- 60
- 61
- 62

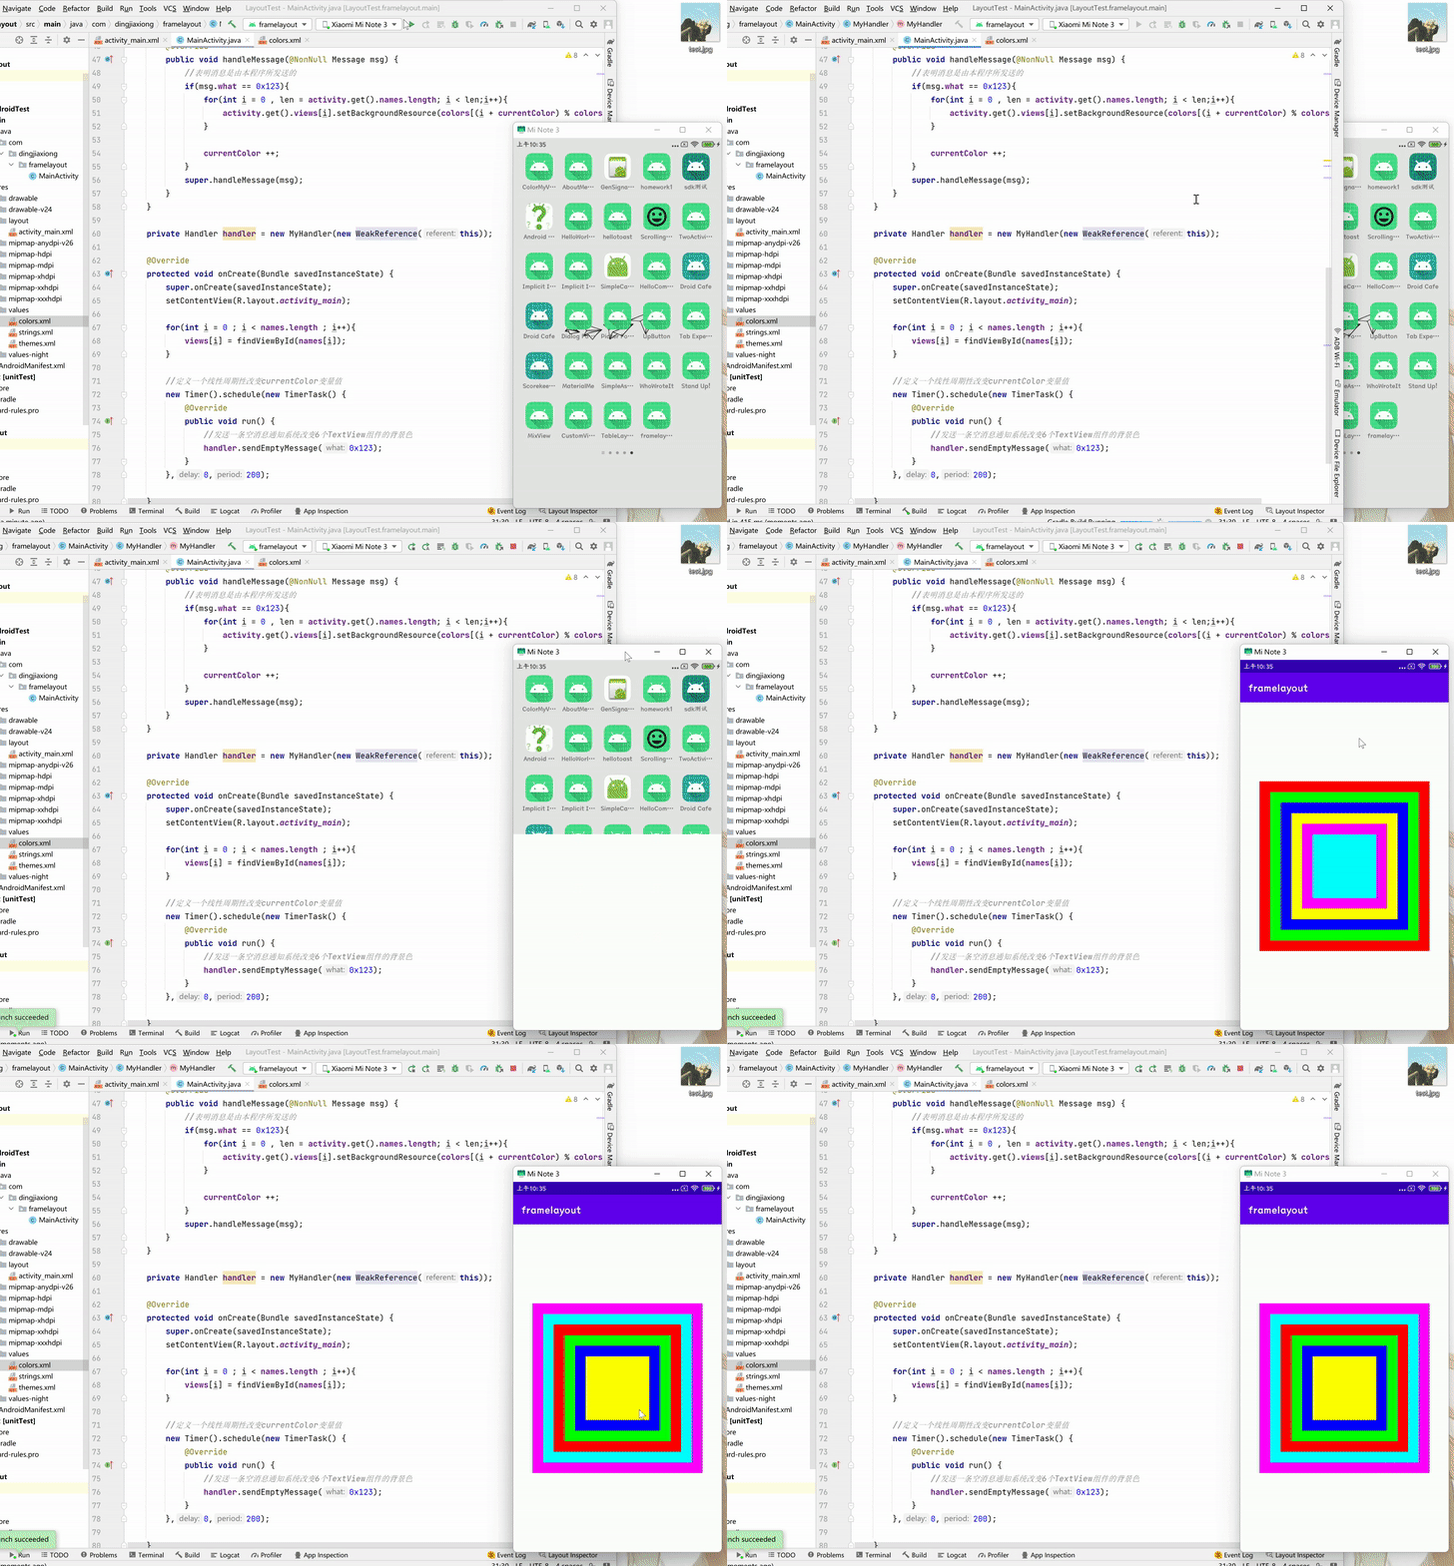
实例——霓虹灯效果
→ 轮换改变6个TextView的背景色。
package com.dingjiaxiong.framelayout; import androidx.annotation.NonNull; import androidx.appcompat.app.AppCompatActivity; import android.os.Bundle; import android.os.Handler; import android.os.Message; import android.widget.TextView; import java.lang.ref.WeakReference; import java.util.Timer; import java.util.TimerTask; public class MainActivity extends AppCompatActivity { int[] names = new int[]{ R.id.view01, R.id.view02, R.id.view03, R.id.view04, R.id.view05, R.id.view06 }; TextView[] views = new TextView[names.length]; class MyHandler extends Handler{ private WeakReference<MainActivity> activity; public MyHandler(WeakReference<MainActivity> activity) { this.activity = activity; } private int currentColor = 0; //定义一个颜色数组 int[] colors = new int[]{ R.color.color1, R.color.color2, R.color.color3, R.color.color4, R.color.color5, R.color.color6 }; @Override public void handleMessage(@NonNull Message msg) { //表明消息是由本程序所发送的 if(msg.what == 0x123){ for(int i = 0 , len = activity.get().names.length; i < len;i++){ activity.get().views[i].setBackgroundResource(colors[(i + currentColor) % colors.length]); } currentColor ++; } super.handleMessage(msg); } } private Handler handler = new MyHandler(new WeakReference(this)); @Override protected void onCreate(Bundle savedInstanceState) { super.onCreate(savedInstanceState); setContentView(R.layout.activity_main); for(int i = 0 ; i < names.length ; i++){ views[i] = findViewById(names[i]); } //定义一个线性周期性改变currentColor变量值 new Timer().schedule(new TimerTask() { @Override public void run() { //发送一条空消息通知系统改变6个TextView组件的背景色 handler.sendEmptyMessage(0x123); } },0,200); } }- 1
- 2
- 3
- 4
- 5
- 6
- 7
- 8
- 9
- 10
- 11
- 12
- 13
- 14
- 15
- 16
- 17
- 18
- 19
- 20
- 21
- 22
- 23
- 24
- 25
- 26
- 27
- 28
- 29
- 30
- 31
- 32
- 33
- 34
- 35
- 36
- 37
- 38
- 39
- 40
- 41
- 42
- 43
- 44
- 45
- 46
- 47
- 48
- 49
- 50
- 51
- 52
- 53
- 54
- 55
- 56
- 57
- 58
- 59
- 60
- 61
- 62
- 63
- 64
- 65
- 66
- 67
- 68
- 69
- 70
- 71
- 72
- 73
- 74
- 75
- 76
- 77
- 78
- 79
- 80
- 81
运行效果

因为Android的 View和UI组件不是线程安全的,所以Android不允许开发者启动线程访问用户界面的UI组件。因此,在程序中额外定义了一个Handler来处理TextView背景色的更新。
2.2.4 绝对布局
绝对布局由AbsoluteLayout所代表。是Android不提供任何布局控制,而是由开发人员自己通过X、Y坐标来控制组件的位置。当使用 AbsoluteLayout作为布局容器时,布局容器不再管理子组件的位置、大小——这些都需要开发人员自己控制。
大部分时候,使用绝对布局都不是一个好思路,因为运行Android应用的手机千差万别,因此屏幕大小、分辨率都可能存在较大差异,使用绝对布局会很难兼顾不同屏幕大小、分辨率的问题。因此,AbsoluteLayout布局管理器已经过时。
使用绝对布局时,每个子组件都可指定如下两个XML属性:
layout_x:指定该子组件的X坐标。
layout_y:指定该子组件的Y坐标。
绝对布局中的每个子组件都要指定layout x、layout y两个定位属性,这样才能控制每个子组件在容器中出现的位置。因此,使用绝对布局来控制子组件布局,编程要烦琐得多,而且当显示屏幕发生改变时,绝对布局的显示效果差异很大。
在绝对布局中指定android:layout _x、android:layout y属性可以使用形如20dp这样的属性值,这是一个距离值。在Android中一般支持如下常用的距离单位。
- px 像素:每个px对应屏幕上的一个点
- dip或dp(设备独立像素):一种基于屏幕密度的抽象单位。在每英寸160点的显示器上,1dip = 1px。但随着屏幕密度的改变,dip与px的换算会发生改变。
- sp (scaled pixels,比例像素):主要处理字体的大小,可以根据用户的字体大小首选项进行缩放。
- in(英寸):标准长度单位。
- mm(毫米):标准长度单位。
- pt(磅):标准长度单位,1/72英寸。
-
相关阅读:
【单链表基本操作的实现】
产品经理专业知识50篇(四)-从问题到能力提升:AMDGF模型工具
数据分析思维与模型:群组分析法
MyBatis中$和#
28.STM32电阻与电容触摸屏幕
点云处理开发测试题目 实现2
远程服务器的Docker环境遇到问题,无法调试
亚马逊---设计安全架构
网络TCP/IP
gride布局
- 原文地址:https://blog.csdn.net/weixin_44226181/article/details/126447261
