-
pytorch环境下跑通Focal Transformer
Focal Transformer源码:https://github.com/microsoft/Focal-Transformer
Focal Transformer论文:https://arxiv.org/pdf/2107.00641.pdf今天上午下了个Focal Transformer跑图像分类,按照官方给的步骤来总是会报错(pytorch与cuda版本是对应的),上网搜了各种解决办法,现在记录下来,方便以后换服务器了再能跑通。
一、安装pytorch环境
这个环境安装可以参考我之前写的博文:配置pytorch环境 ,注意pytorch和cuda版本对应就可以了,不知道的可以去这个官网看看:https://github.com/open-mmlab/mmcv
二、安装其他依赖包
没有在服务器配置默认源的可以在后面加上-i https://pypi.mirrors.ustc.edu.cn/simple 安装
pip install cython matplotlib opencv-python timm==0.3.2 termcolor==1.1.0 yacs==0.1.8 -i https://pypi.mirrors.ustc.edu.cn/simple- 1
三、安装apex
这个的安装很是坑啊,用官方给的命令行肯定是不行的,好像需要visual c++的依赖。如果按照我的方法来还是不行,那就是你的pytorch与cuda版本对不上,查看服务器cuda版本:
nvidia-smi- 1
确认版本对应上了就可以安装了
下载地址:https://github.com/NVIDIA/apexgit clone https://github.com/NVIDIA/apex.git cd apex # 官网给的是这个命令行安装,网上大多数也是这个,但是按照这个按照是报错的 # pip install -v --disable-pip-version-check --no-cache-dir --global-option="--cpp_ext" --global-option="--cuda_ext" ./ # 用这个命令行很轻松就安装了 python setup.py develop- 1
- 2
- 3
- 4
- 5
- 6
- 7
- 8
安装到这里,Focal Transformer需要的依赖都安装好了,下面就是运行时遇见的一些bug了。
四、运行时遇到的bug
我跑的是最小的tiny模型,
python -m torch.distributed.launch --nproc_per_node 8 --master_port 12345 main.py --cfg configs/focal_tiny_patch4_window7_224.yaml --data-path /root/wu_datasets/deep-learning-for-image-processing-master/data_set/flower_data --batch-size 128- 1
1.ImportError cannot import name ‘_pil_interp’ from ‘timm.data.transforms’
进入 data/build.py 文件,将头部的 import _pil_interp 改为导入 str_to_pil_interp,并在下面两处同样改动:

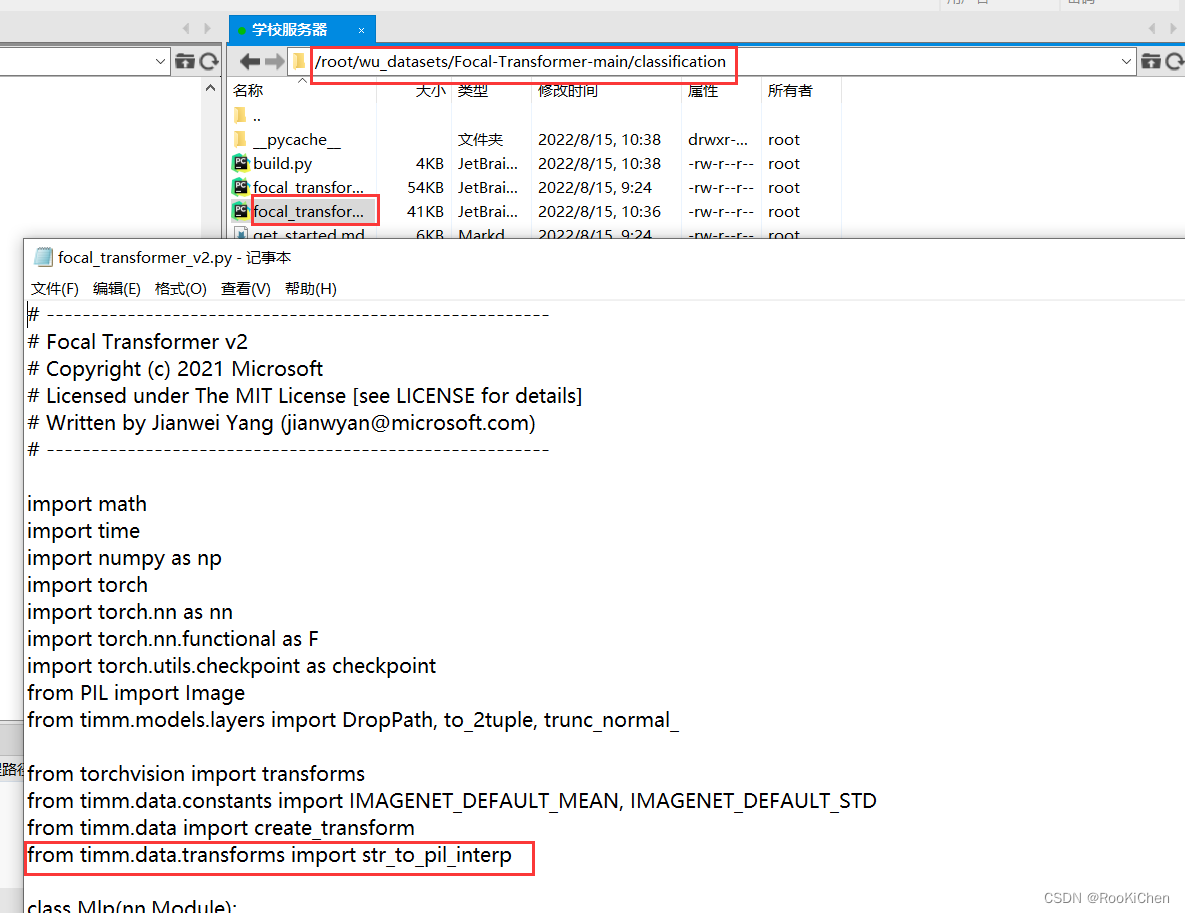
 进入 classification/focal_transformer_v2.py 文件,将头部的 import _pil_interp 改为导入 str_to_pil_interp:
2. apex库出现
IndexError: tuple index out of range进入从github上下载apex文件中,修改源代码中apex-master/apex/amp/utils.py文件
将if cached_x.grad_fn.next_functions[1][0].variable is not x:- 1
修改为
if cached_x.grad_fn.next_functions[0][0].variable is not x:- 1
之后进入apex-master,执行
python setup.py install- 1
3.RuntimeError: cuDNN error: CUDNN_STATUS_INTERNAL_ERROR
僵尸进程引起GPU上有缓存数据:
首先你需要考虑是否有其他僵尸进程占用了GPU,或者GPU上有缓存数据(
我就是因为这个原因,上网找了半天也没用,最后我直接把所以进程杀死了,想着重新运行一下,就没这个bug了)。不是因为GPU有缓存的解决办法:
在Focal Transformer文件下创建test.py文件,把cuda报错的提示信息复制到test.py文件中
import torch torch.backends.cuda.matmul.allow_tf32 = True torch.backends.cudnn.benchmark = True torch.backends.cudnn.deterministic = False torch.backends.cudnn.allow_tf32 = True data = torch.randn([1, 64, 80, 144], dtype=torch.float, device='cuda', requires_grad=True) net = torch.nn.Conv2d(64, 64, kernel_size=[3, 3], padding=[1, 1], stride=[1, 1], dilation=[1, 1], groups=1) net = net.cuda().float() out = net(data) out.backward(torch.randn_like(out)) torch.cuda.synchronize()- 1
- 2
- 3
- 4
- 5
- 6
- 7
- 8
- 9
- 10
- 11
如果你单独运行这个文件夹,发现也会报错,只需修改其中的True或者False选项直到不报错即可。
我的是修改了torch.backends.cudnn.benchmark = False就没问题了,然后加入到main.py中,单独运行这个test.py文件是不报错了,但是运行main.py文件还是报错,我的原因是有僵尸进程,如果你修改完还不行,可以去看看这个讨论:https://github.com/pytorch/pytorch/issues/457694.ImportError: cannot import name ‘container_abcs‘ from ‘torch._six‘
在1.8版本之后container_abcs就已经被移除了。所以导入方式不同会出现这样的错误:
cannot import name ‘container_abcs’ from ‘torch._six’
因此使用不同版本的torch会出现不同问题。
1.8以下版本使用 from torch._six import container_abcs;
1.8以上版本使用import collections.abc as container_abcs
进入到报错的.py文件下

将上图标记处中注释掉,在将下面的代码复制进去 :import collections.abc as container_abcs int_classes = int string_classes = str- 1
- 2
- 3
参考:ImportError: cannot import name ‘container_abcs‘ from ‘torch._six‘
-
相关阅读:
单电源、轨到轨输入输出、高精度运放MS8551/8552/8554,可替代ADI的8551/8552/8554
力扣236 补9.14
深入了解 Java 中的时间信息定义、转换、比较和操作
patch-package给依赖打补丁实例详解
ES6总结
虚机的部分磁盘空间被谁吃了?
vscode软件安装包下载安装教程
OpenCV学习——绘图函数案例
windows中Ubuntu子系统的连接
编译器优化丨Cache优化
- 原文地址:https://blog.csdn.net/RooKichenn/article/details/126343129