-
Android学习笔记 65. 数据绑定基础知识
Android学习笔记
Android基础开发——必备知识
65. 数据绑定基础知识
65.1 AboutMe项目回顾
MainActivity.kt
package com.dingjiaxiong.aboutmedatabinding import android.content.Context import androidx.appcompat.app.AppCompatActivity import android.os.Bundle import android.view.View import android.view.inputmethod.InputMethodManager import android.widget.Button import android.widget.EditText import android.widget.TextView class MainActivity : AppCompatActivity() { override fun onCreate(savedInstanceState: Bundle?) { super.onCreate(savedInstanceState) setContentView(R.layout.activity_main) findViewById<Button>(R.id.done_button).setOnClickListener { addNickname(it) } } /** * Click handler for the Done button. */ private fun addNickname(view: View) { val editText = findViewById<EditText>(R.id.nickname_edit) val nicknameTextView = findViewById<TextView>(R.id.nickname_text) nicknameTextView.text = editText.text editText.visibility = View.GONE view.visibility = View.GONE nicknameTextView.visibility = View.VISIBLE // Hide the keyboard. val imm = getSystemService(Context.INPUT_METHOD_SERVICE) as InputMethodManager imm.hideSoftInputFromWindow(view.windowToken, 0) } }- 1
- 2
- 3
- 4
- 5
- 6
- 7
- 8
- 9
- 10
- 11
- 12
- 13
- 14
- 15
- 16
- 17
- 18
- 19
- 20
- 21
- 22
- 23
- 24
- 25
- 26
- 27
- 28
- 29
- 30
- 31
- 32
- 33
- 34
- 35
- 36
- 37
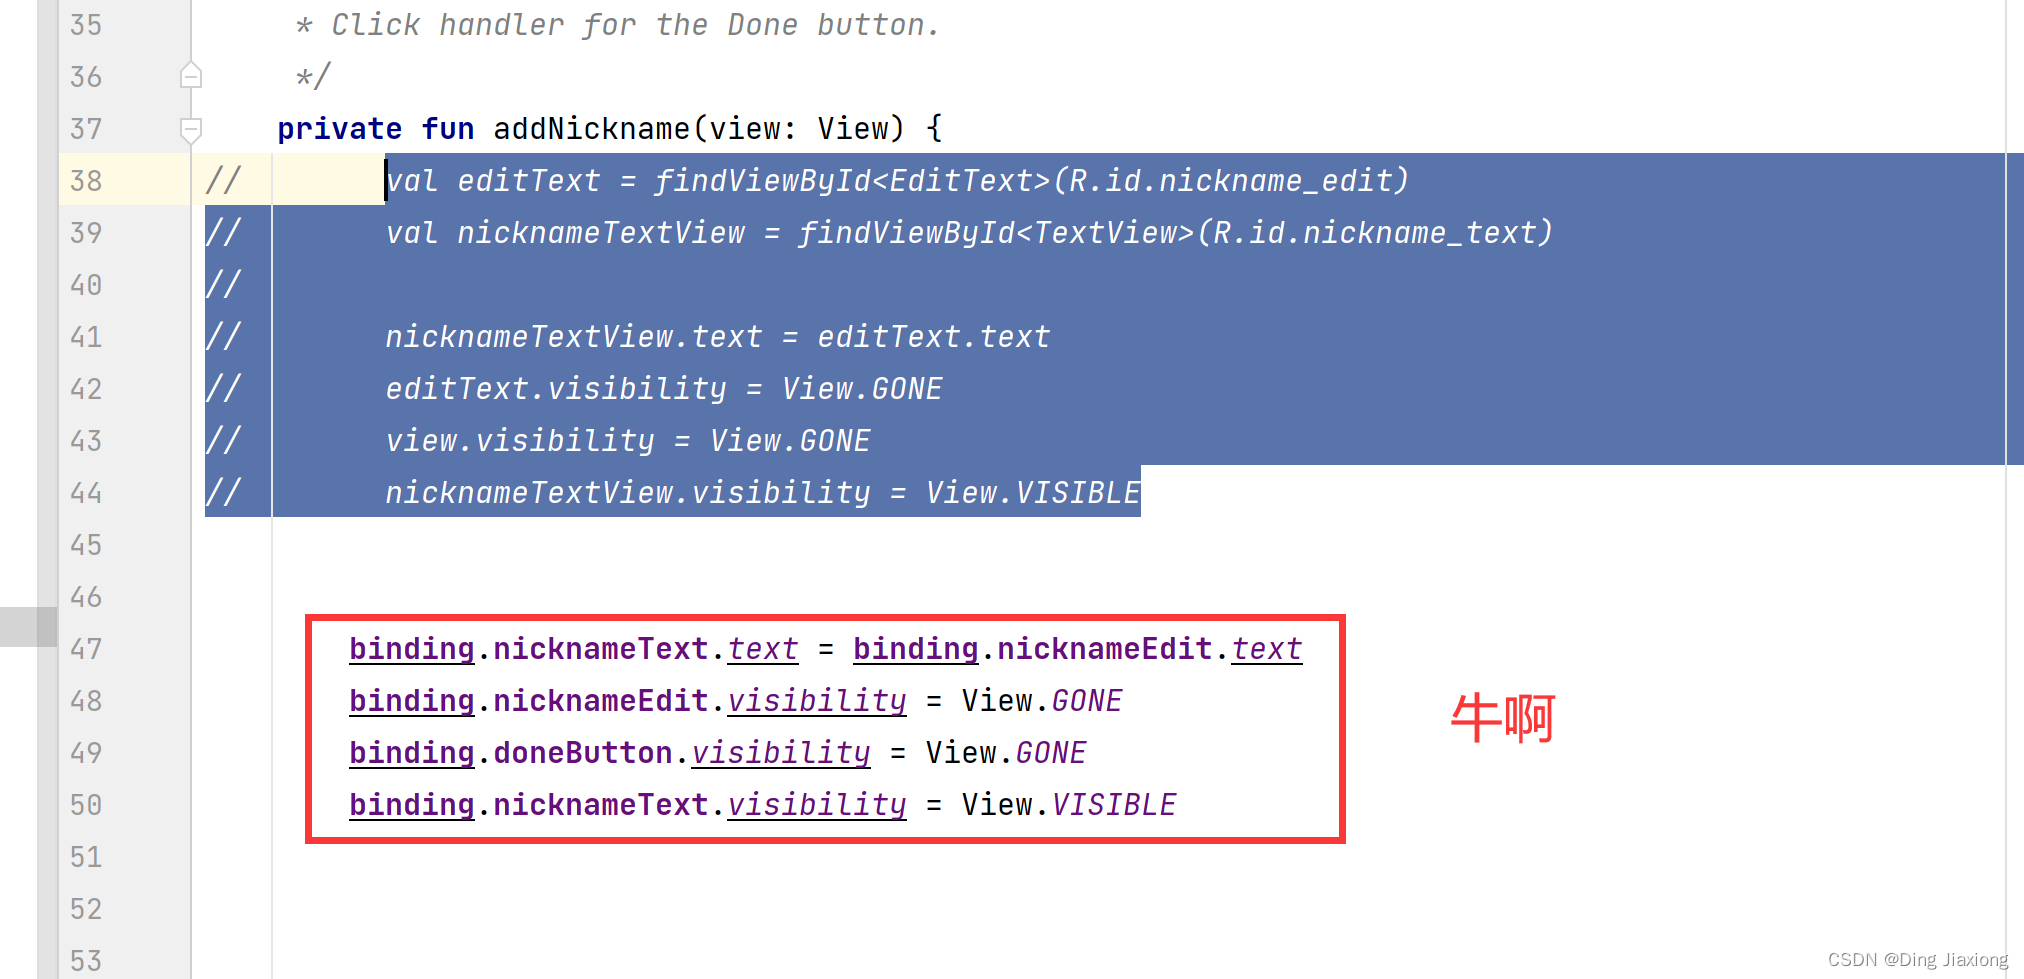
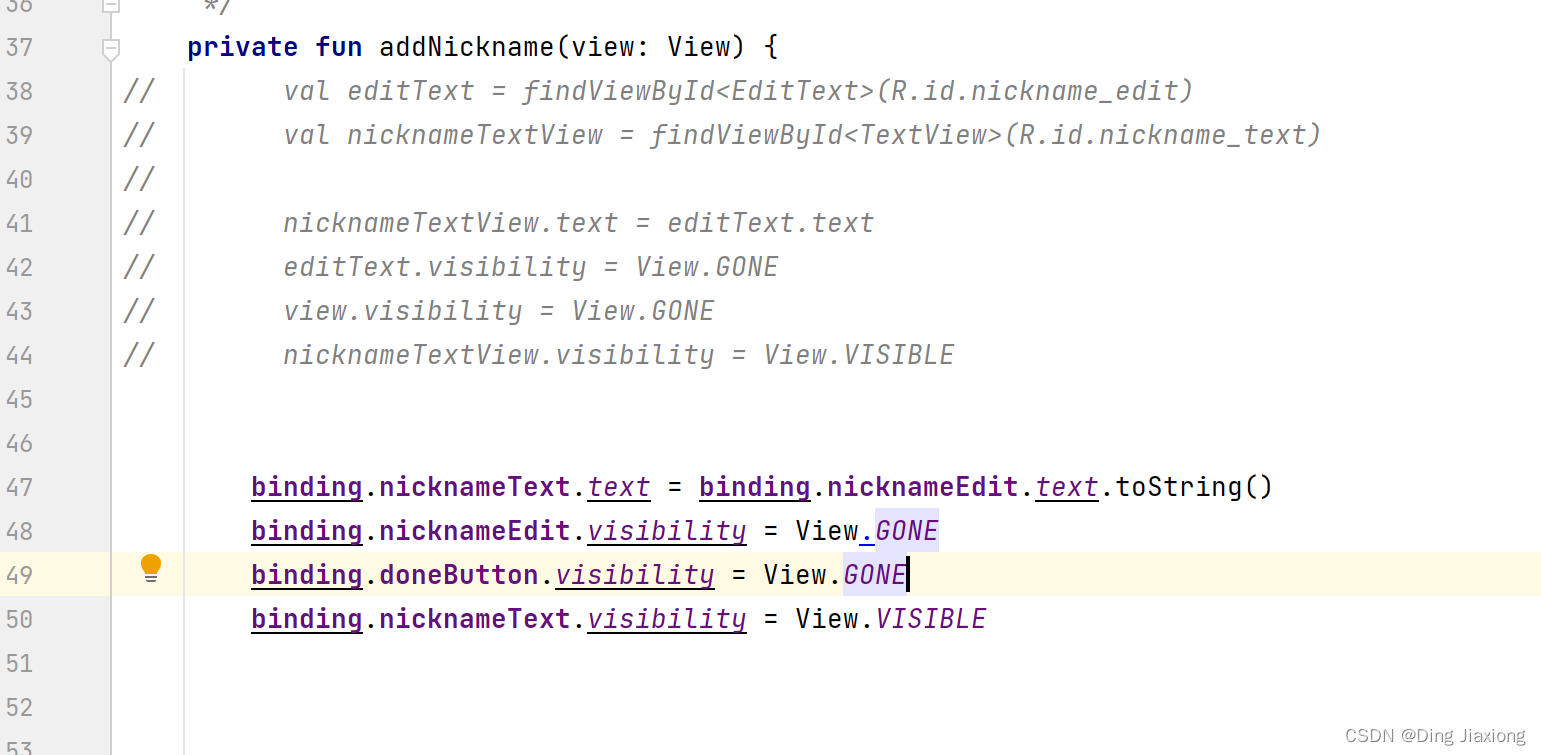
- 38
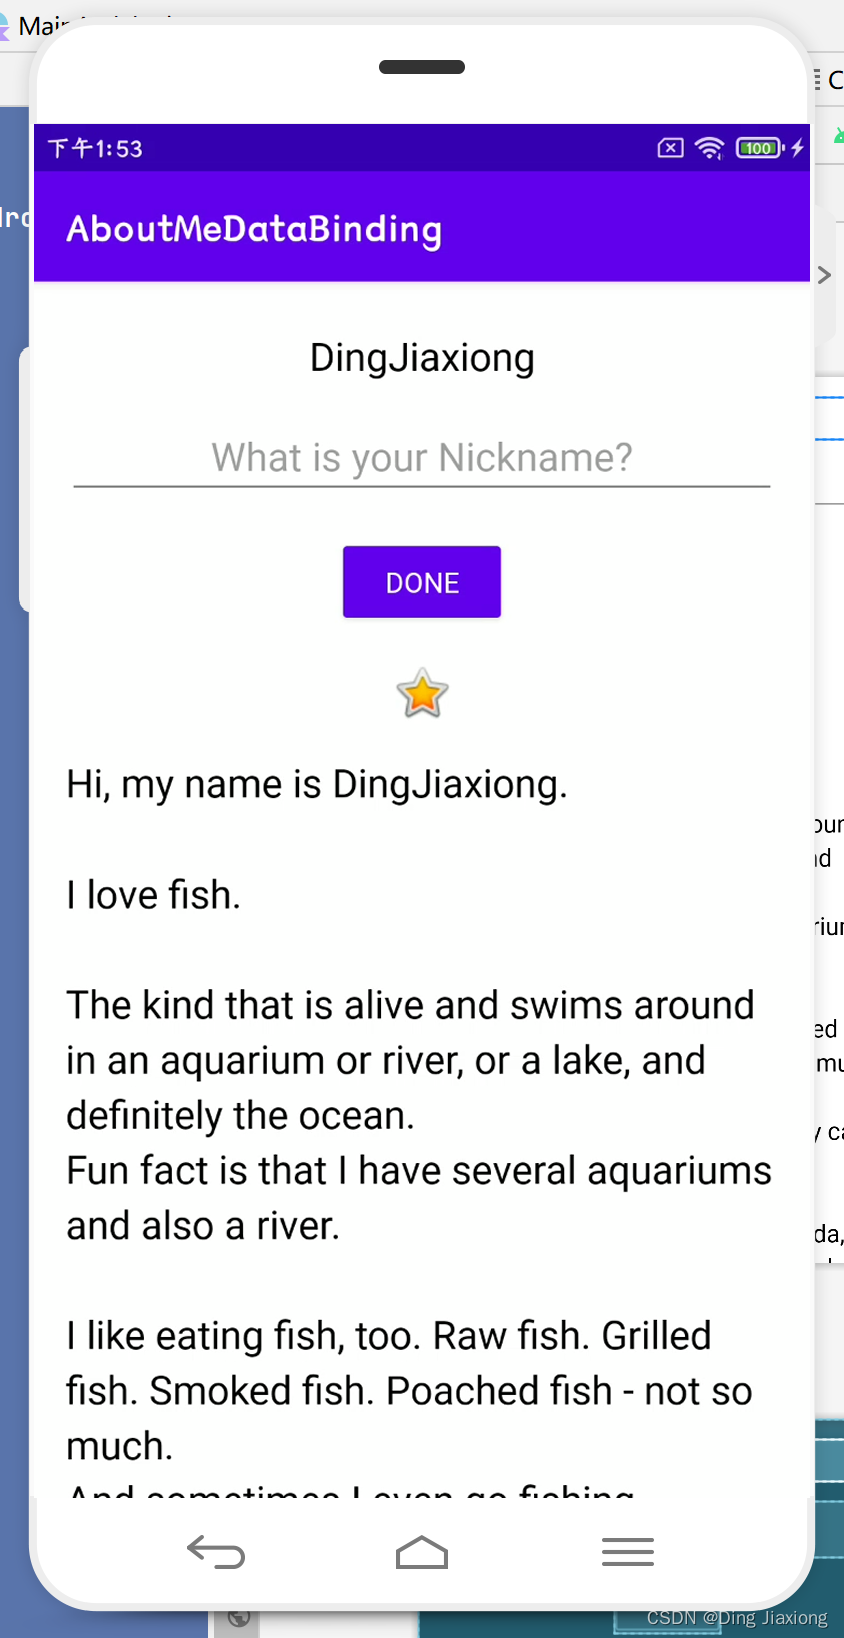
布局文件
<LinearLayout xmlns:android="http://schemas.android.com/apk/res/android" xmlns:app="http://schemas.android.com/apk/res-auto" android:layout_width="match_parent" android:layout_height="match_parent" android:orientation="vertical" android:paddingStart="@dimen/padding" android:paddingEnd="@dimen/padding"> <TextView android:id="@+id/name_text" style="@style/NameStyle" android:layout_width="match_parent" android:layout_height="wrap_content" android:text="@string/name" android:textAlignment="center" /> <TextView android:id="@+id/nickname_text" style="@style/NameStyle" android:layout_width="match_parent" android:layout_height="wrap_content" android:textAlignment="center" android:visibility="gone" /> <EditText android:id="@+id/nickname_edit" style="@style/NameStyle" android:layout_width="match_parent" android:layout_height="wrap_content" android:hint="@string/what_is_your_nickname" android:inputType="textPersonName" android:textAlignment="center" /> <Button android:id="@+id/done_button" style="@style/Widget.AppCompat.Button.Colored" android:layout_width="wrap_content" android:layout_height="wrap_content" android:layout_gravity="center_horizontal" android:layout_marginTop="@dimen/layout_margin" android:fontFamily="@font/roboto" android:text="@string/done" android:textAlignment="center" /> <ImageView android:id="@+id/star_image" android:layout_width="match_parent" android:layout_height="wrap_content" android:layout_marginTop="@dimen/layout_margin" android:contentDescription="@string/yellow_star" app:srcCompat="@android:drawable/btn_star_big_on" /> <ScrollView android:id="@+id/bio_scroll" android:layout_width="match_parent" android:layout_height="match_parent" android:layout_marginTop="@dimen/layout_margin"> <TextView android:id="@+id/bio_text" android:layout_width="match_parent" android:layout_height="wrap_content" android:lineSpacingMultiplier="@dimen/line_spacing_multiplier" android:text="@string/bio" android:textAppearance="@style/NameStyle" /> ScrollView> LinearLayout>- 1
- 2
- 3
- 4
- 5
- 6
- 7
- 8
- 9
- 10
- 11
- 12
- 13
- 14
- 15
- 16
- 17
- 18
- 19
- 20
- 21
- 22
- 23
- 24
- 25
- 26
- 27
- 28
- 29
- 30
- 31
- 32
- 33
- 34
- 35
- 36
- 37
- 38
- 39
- 40
- 41
- 42
- 43
- 44
- 45
- 46
- 47
- 48
- 49
- 50
- 51
- 52
- 53
- 54
- 55
- 56
- 57
- 58
- 59
- 60
- 61
- 62
- 63
- 64
- 65
- 66
- 67
- 68
- 69
- 70
- 71
运行效果
65.2 使用数据绑定消除findViewById()
每次
findViewById()在视图创建或重新创建后用于搜索视图时,Android 系统都会在运行时遍历视图层次结构来查找它。当您的应用只有少数视图时,这不是问题。但是,生产应用程序可能在一个布局中有几十个视图,即使设计最好,也会有嵌套视图。考虑一个包含滚动视图的线性布局,该滚动视图包含一个文本视图。对于较大或较深的视图层次结构,查找视图可能需要足够的时间,从而显着降低用户的应用程序速度。在变量中缓存视图会有所帮助,但您仍然必须在每个命名空间中为每个视图初始化一个变量。有了很多视图和多种活动,这也加起来了。
一种解决方案是创建一个包含对每个视图的引用的对象。这个对象,称为
Binding对象,可以被你的整个应用程序使用。这种技术称为数据绑定。为您的应用创建绑定对象后,您可以通过绑定对象访问视图和其他数据,而无需遍历视图层次结构或搜索数据。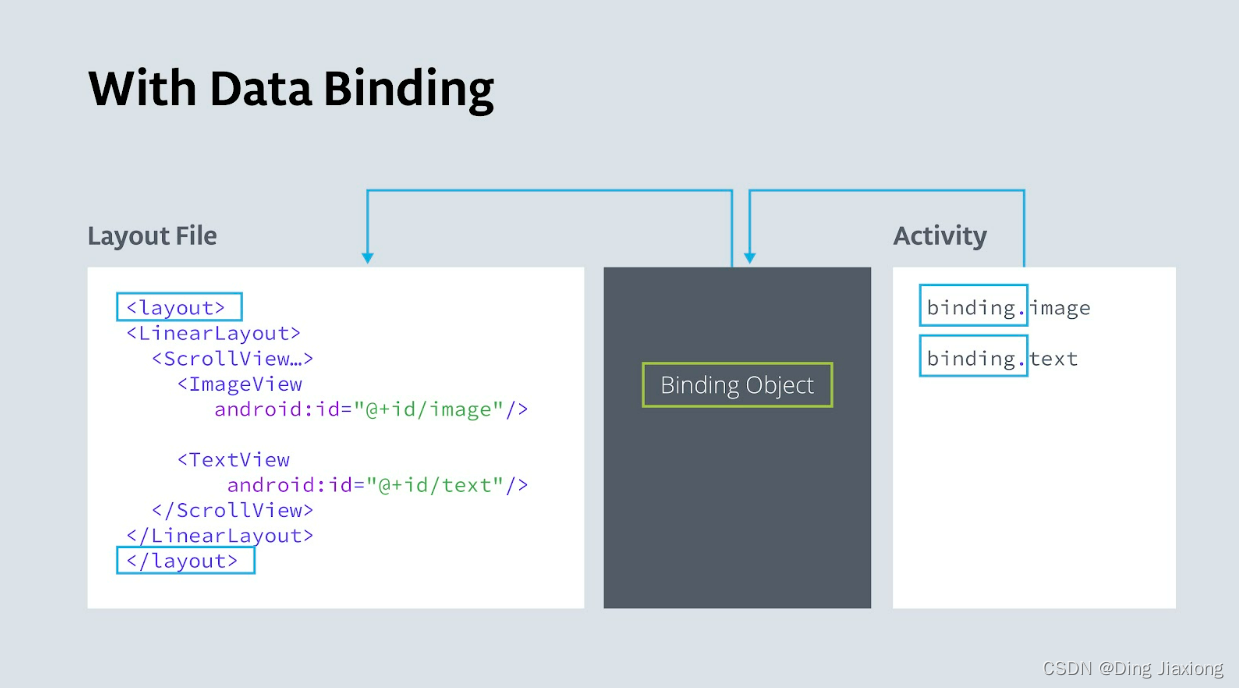
65.3 数据绑定的好处
- 比起findViewById,代码更短、更易读、更易于维护
- 数据和视图明显分开。
- Android 系统只遍历一次视图层次结构来获取每个视图,并且它发生在应用程序启动期间,而不是在用户与应用程序交互的运行时。
- 可以获得 访问视图的类型安全性。
65.4 数据绑定的使用
第1步:启用数据绑定
在 Gradle 文件中启用数据绑定,因为默认情况下未启用。这是因为数据绑定会增加编译时间并可能影响应用程序启动时间。
buildFeatures { dataBinding true }- 1
- 2
- 3
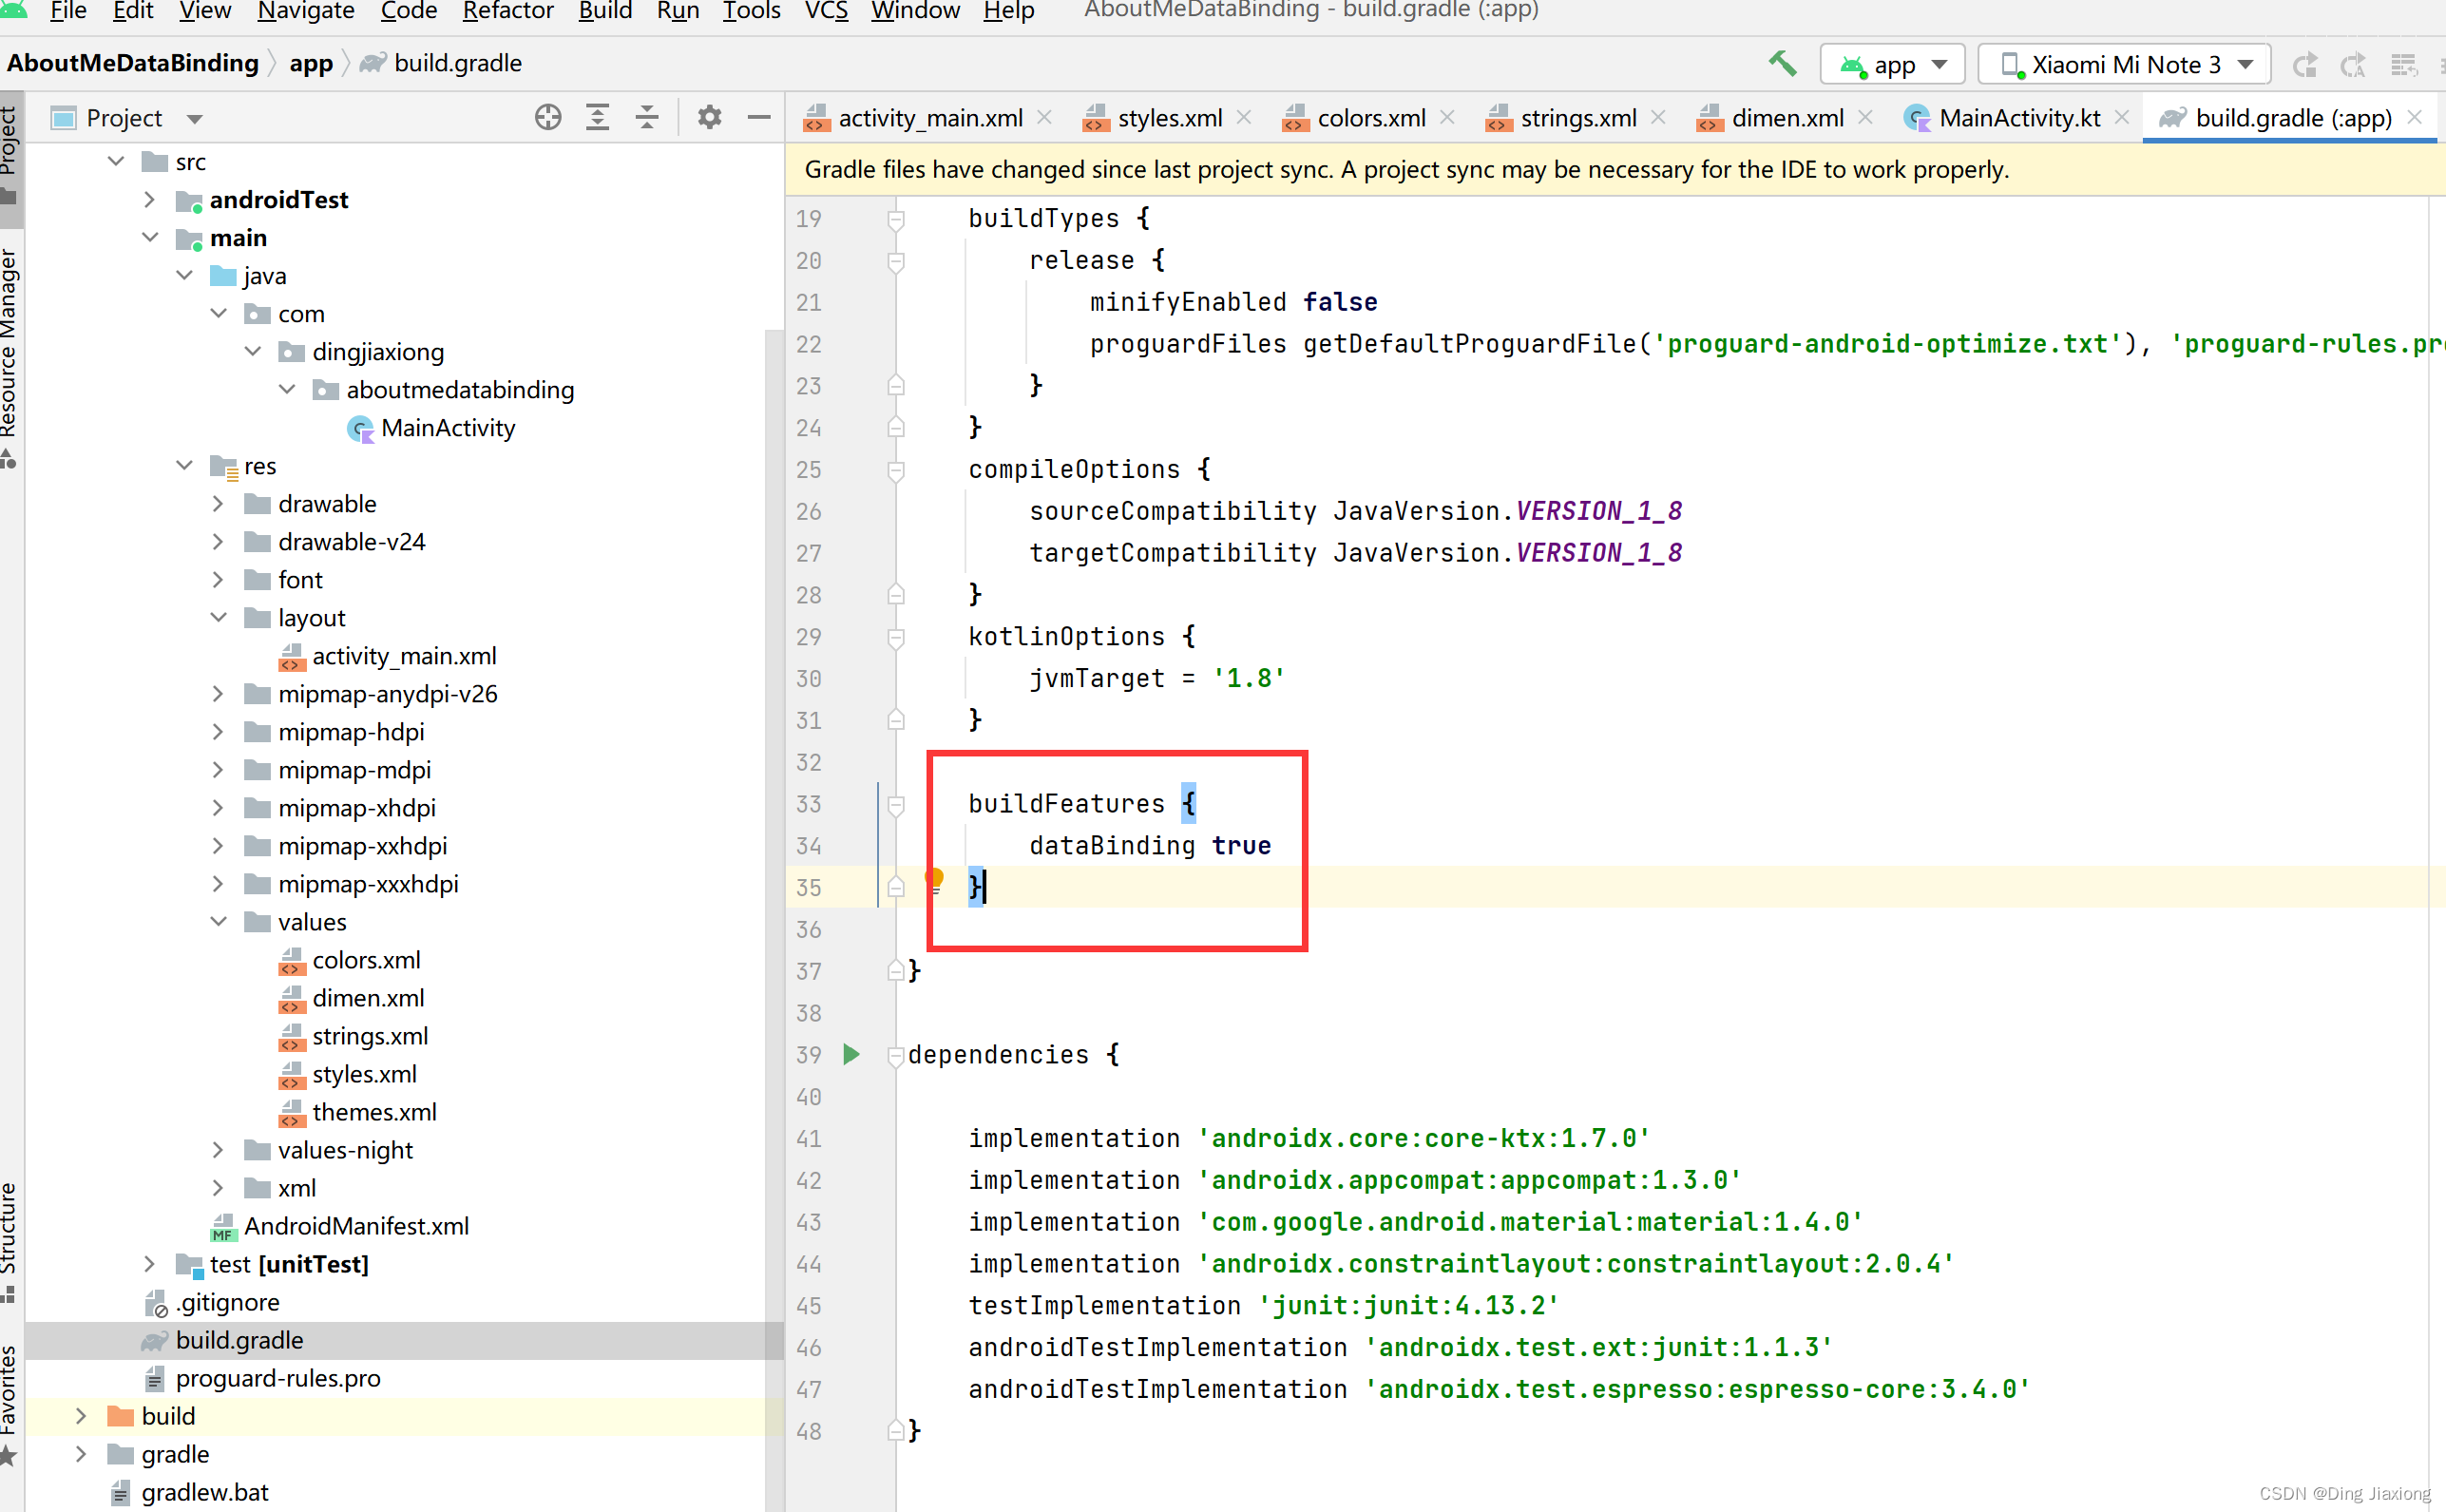
同步
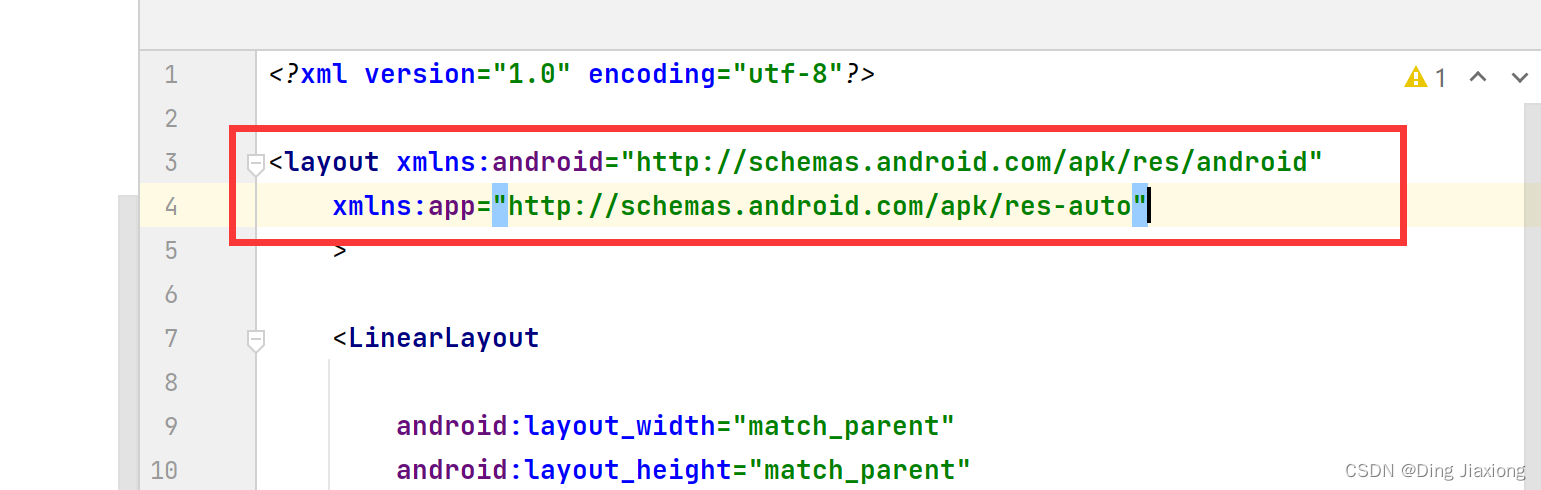
第2步:更改布局文件以用于数据绑定
使用
标签将原先的布局包起来。 如下:
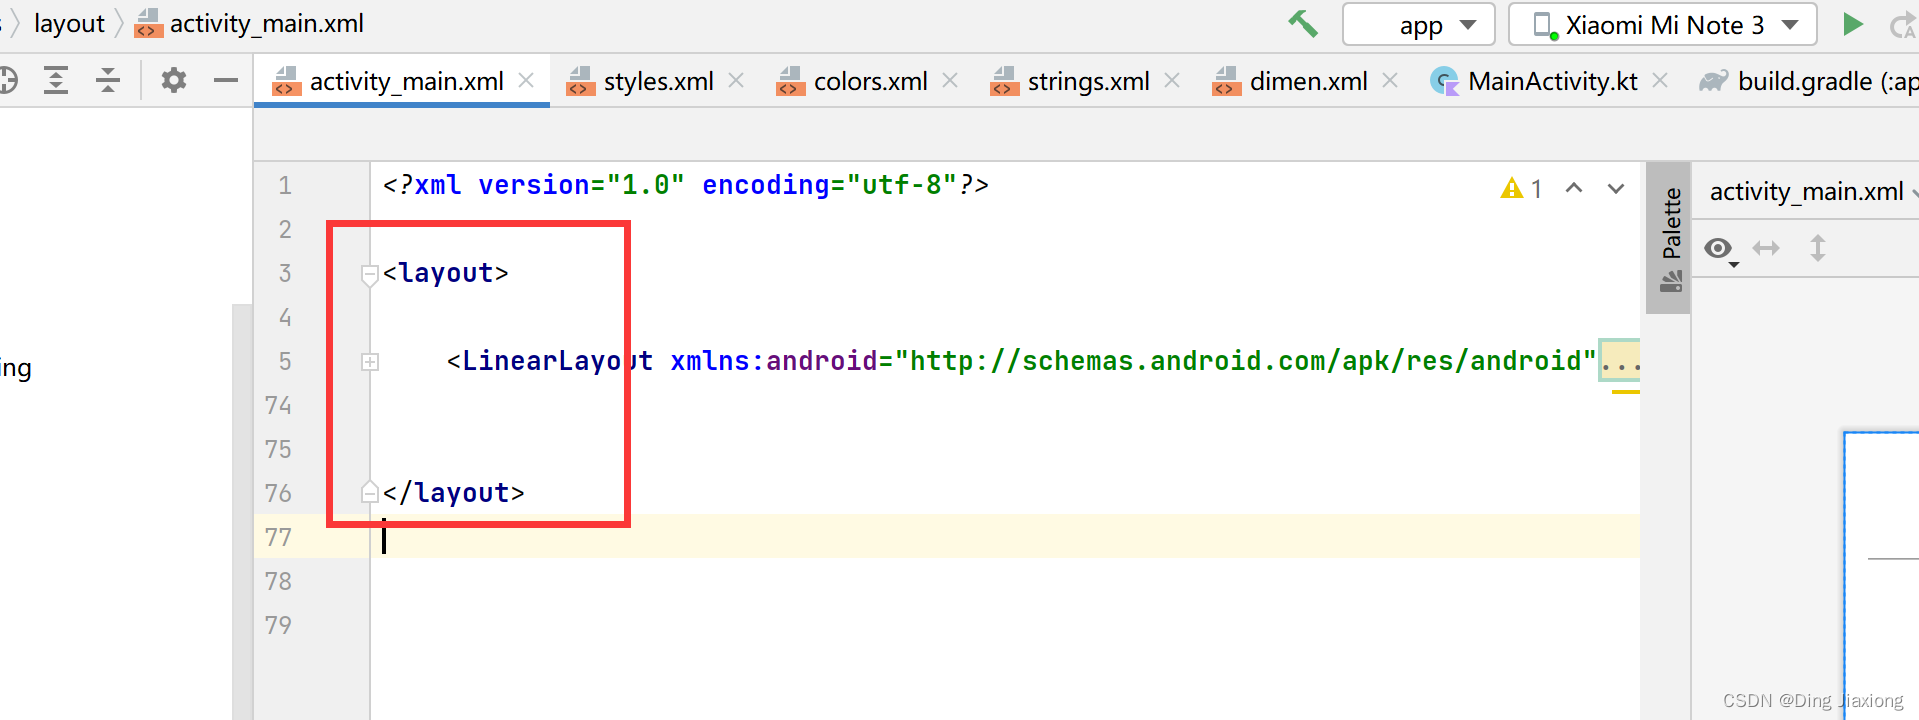
将LinearLayout的部分属性粘贴到layout标签
运行

正常运行,无任何变化。
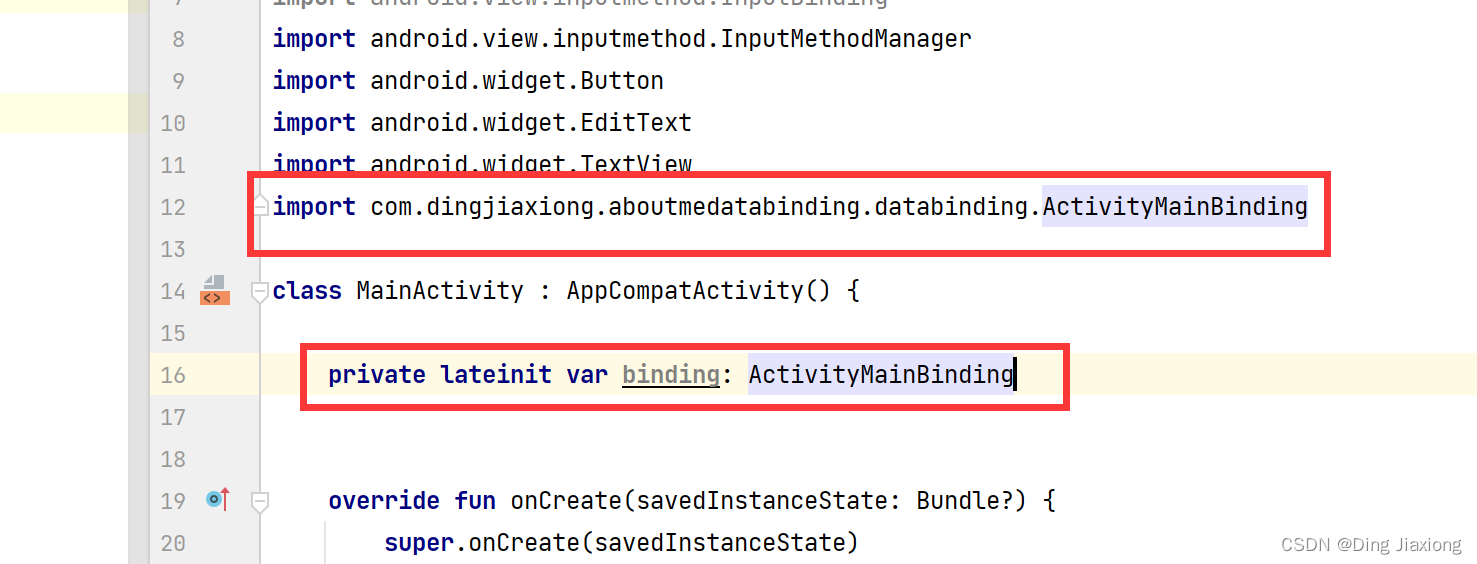
第3步:在MainActivity创建绑定对象
private lateinit var binding: ActivityMainBinding- 1
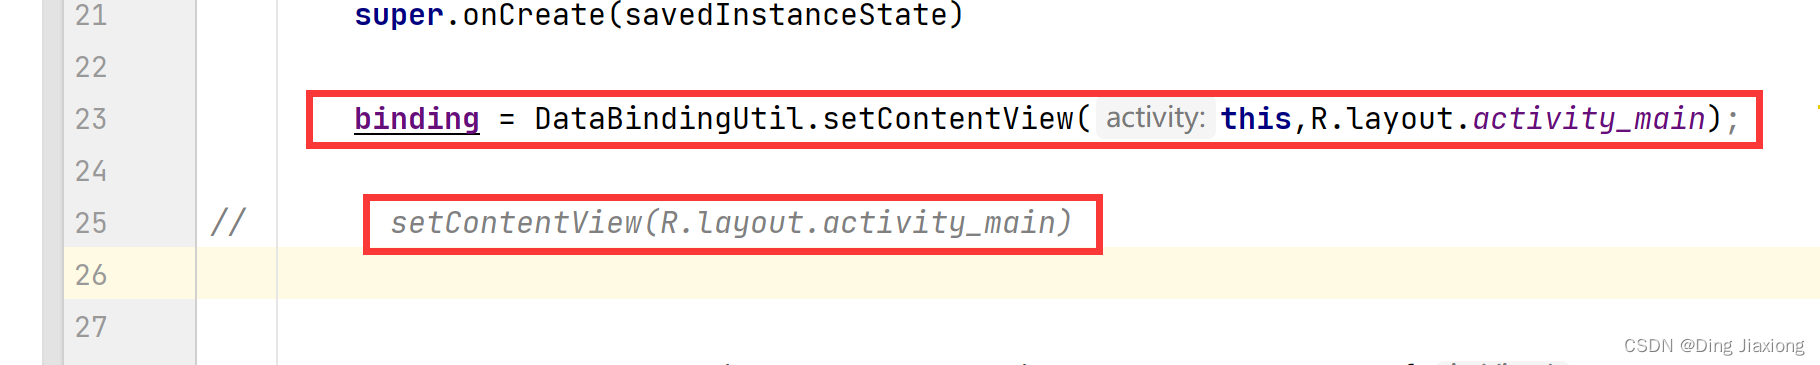
修改setContentView()函数
第4步:使用绑定对象替换所有findViewById()
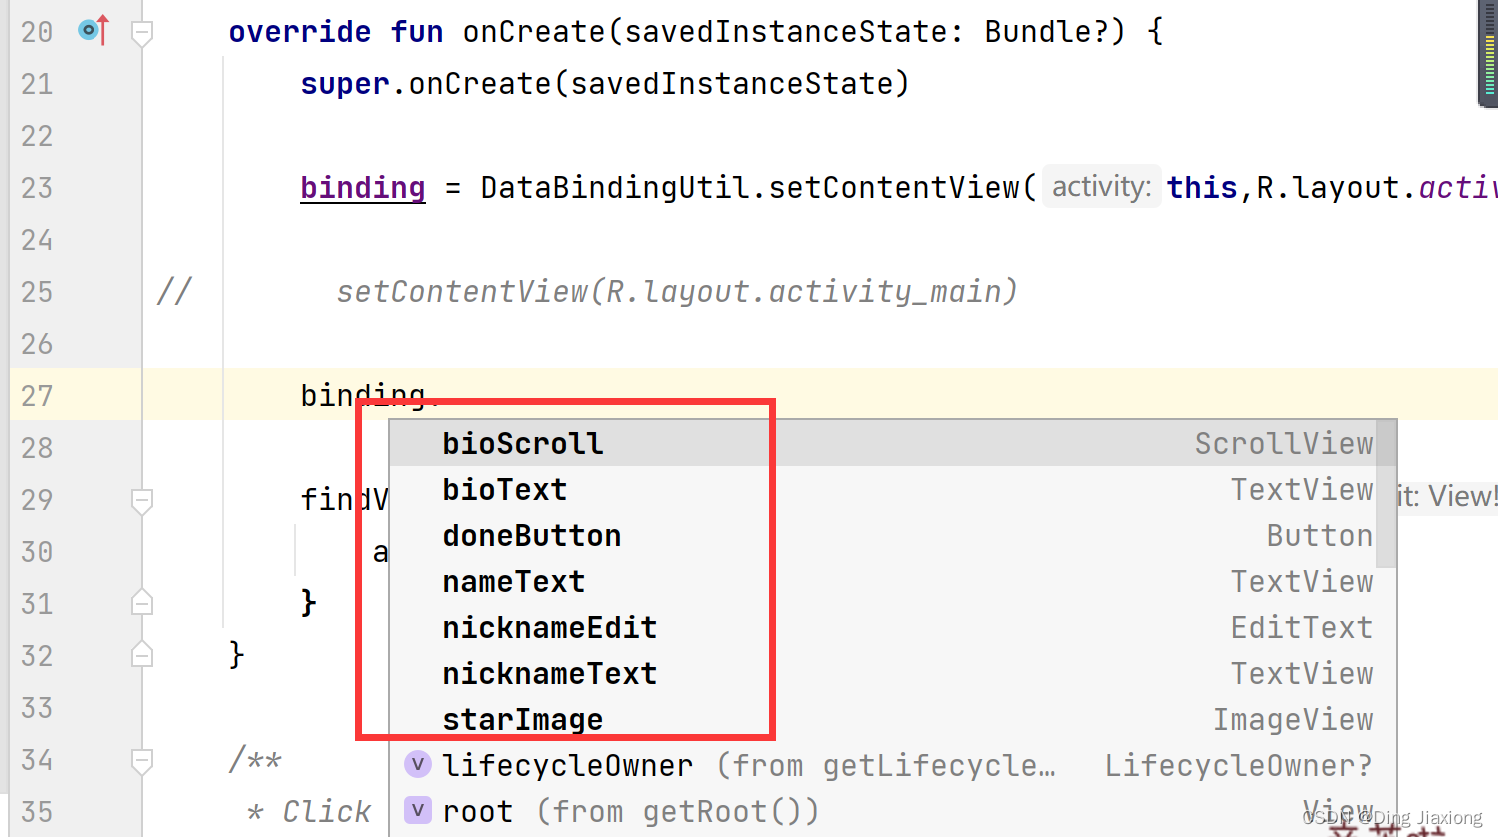
binding.doneButton.setOnClickListener { addNickname(it) }- 1

修改其他控件
运行

功能一切正常。
65.5 使用数据绑定显示数据
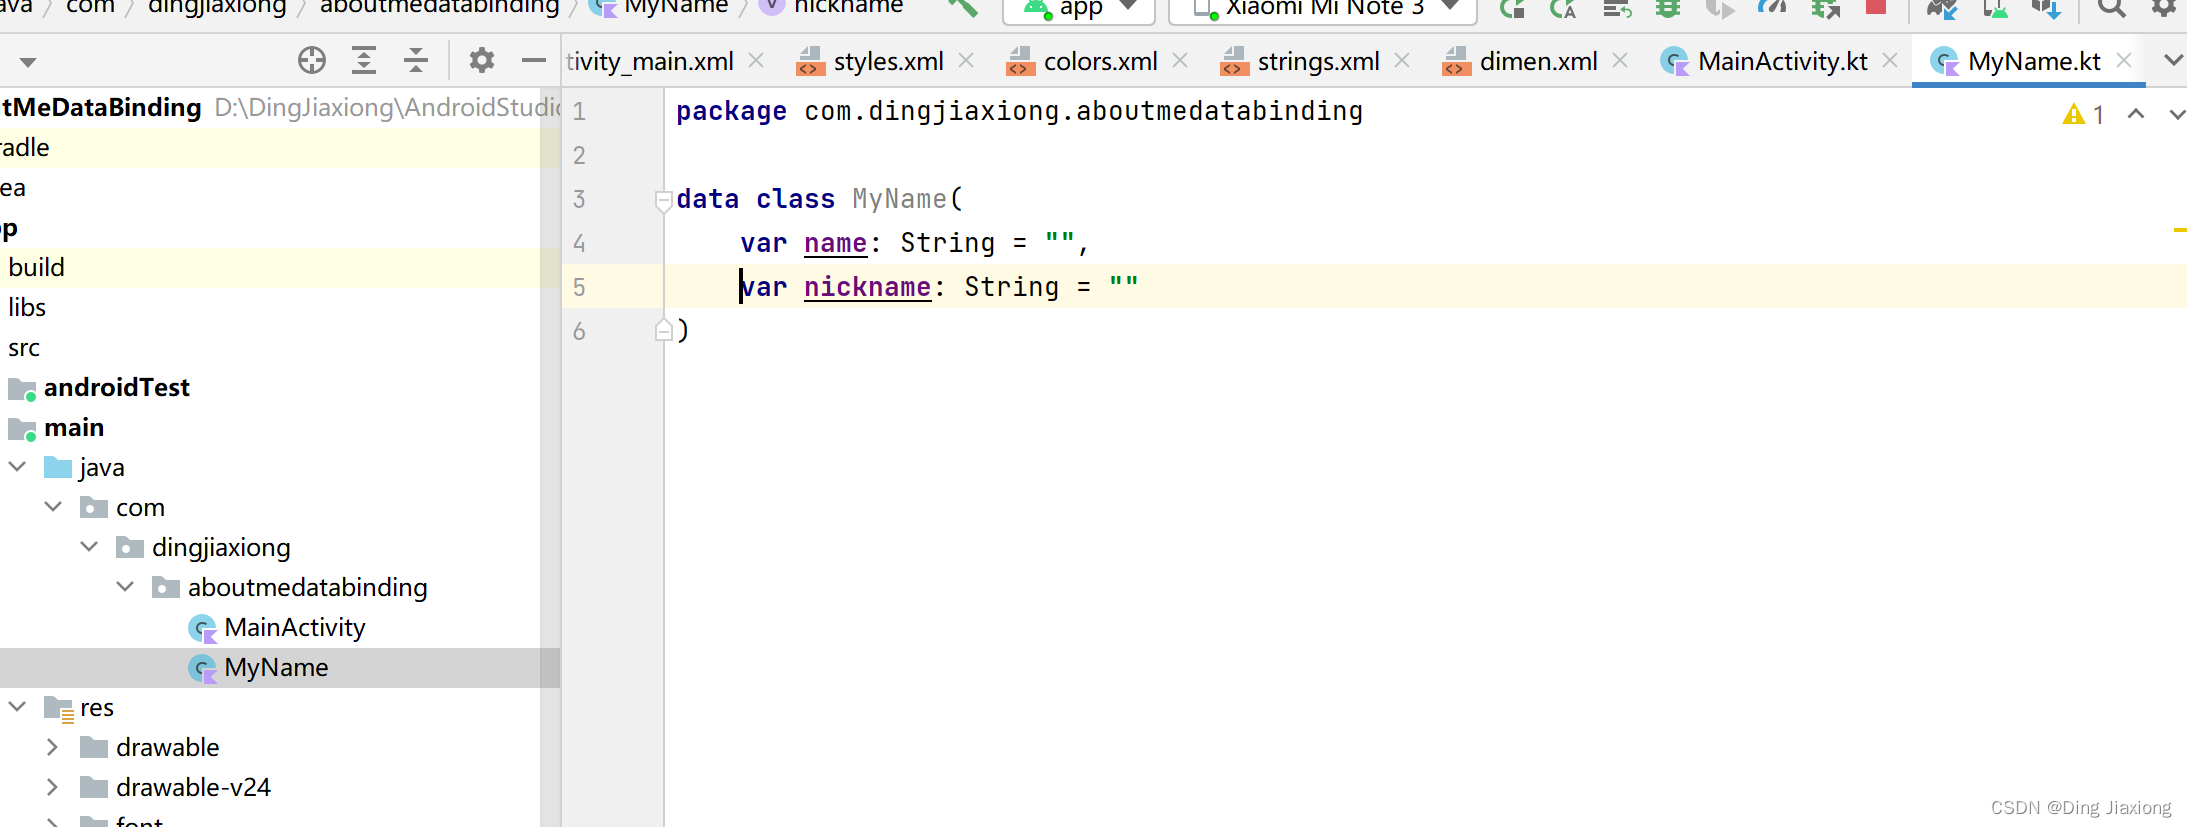
第1步:创建MyName数据类
package com.dingjiaxiong.aboutmedatabinding data class MyName( var name: String = "", var nickname: String = "" )- 1
- 2
- 3
- 4
- 5
- 6
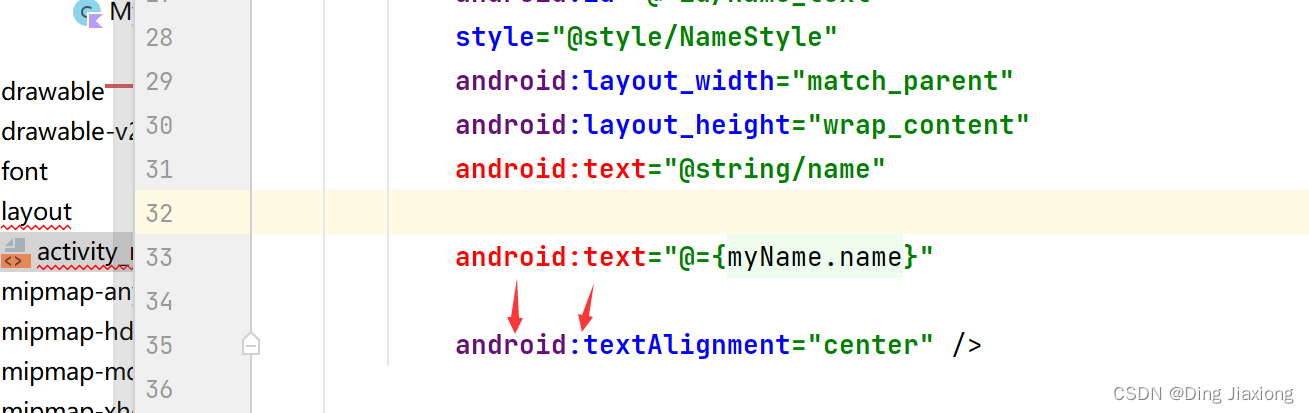
第2步:将数据添加到布局

替换文字
第3步:创建数据
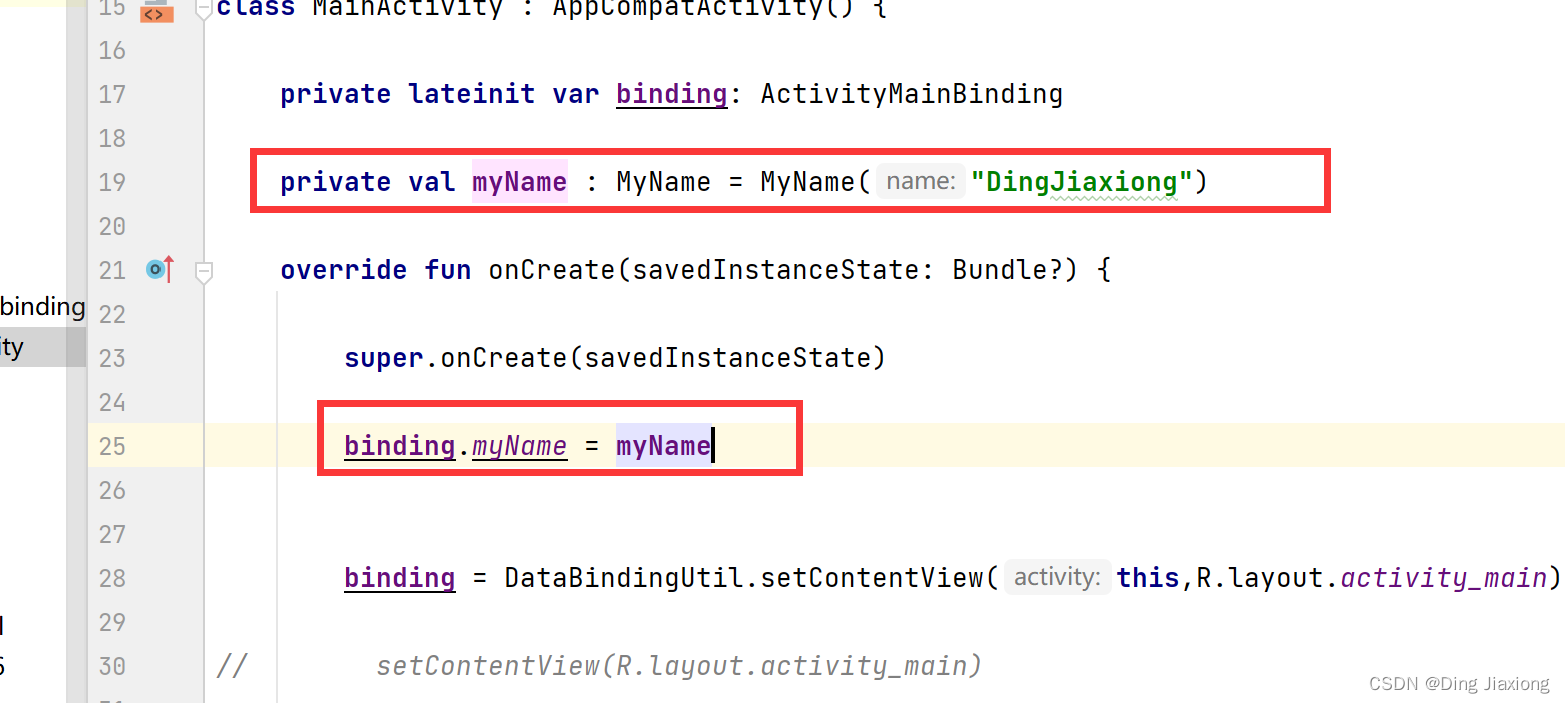
运行

奈斯
第4步:在TextView中使用nickname
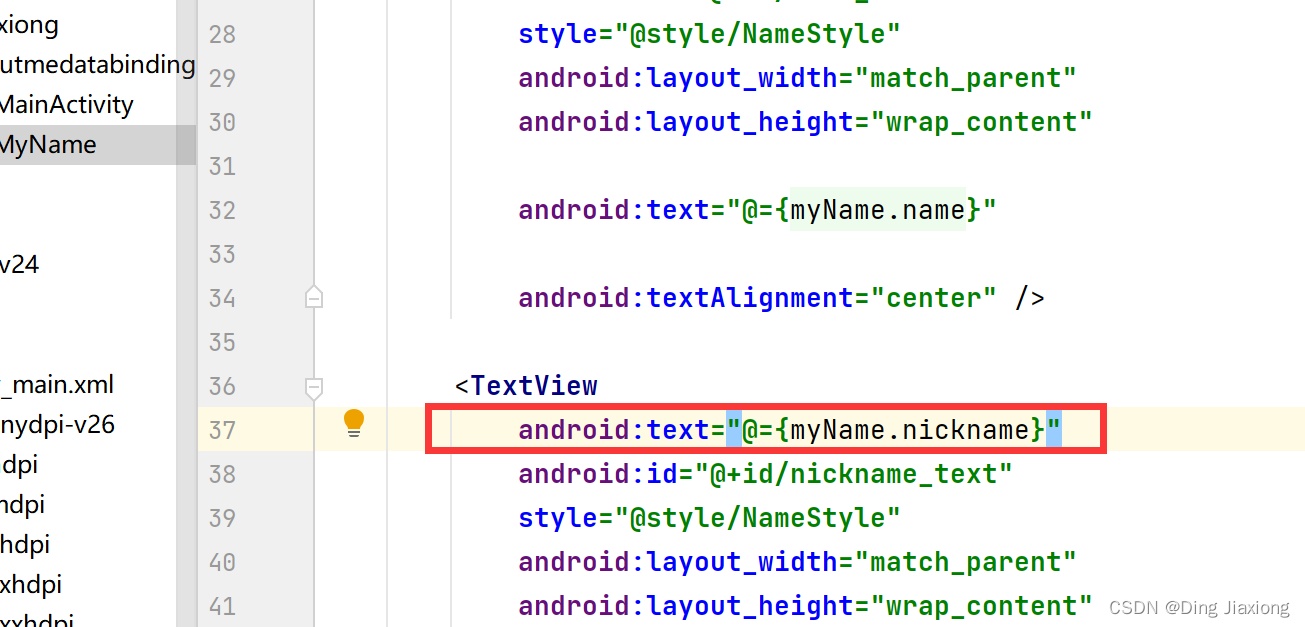
设置数据

运行,效果不变。
-
相关阅读:
Apache Dubbo 高危漏洞
学习笔记24--多传感器后融合技术
pthread_detach函数的应用
Golang起步篇(Windows、Linux、mac三种系统安装配置go环境以及IDE推荐以及入门语法详细释义)
22.11.28打卡 Codeforces Round #836 (Div. 2) A~D
C#带引导窗体的窗体设计方法:创建特殊窗体
【Rust日报】2023-10-23 让 Rust 编译器快 5% 的奇怪窍门
C++之C++11字符串字面量后缀总结(二百四十八)
【Unity编辑器扩展】| 自定义窗口和面板
Java中的Map集合
- 原文地址:https://blog.csdn.net/weixin_44226181/article/details/126339741
