-
ES6 从入门到精通 # 18:使用 Promise 封装 ajax
说明
ES6 从入门到精通系列(全23讲)学习笔记。
封装 ajax
封装一个方法 getData 去请求接口,请求方式如下
getData("https://v0.yiketianqi.com/api?unescape=1&version=v91&appid=43656176&appsecret=I42og6Lm&ext=&cityid=&city=广州") .then(res => { console.log(res) }, err => { console.log(err) })- 1
- 2
- 3
- 4
- 5
- 6
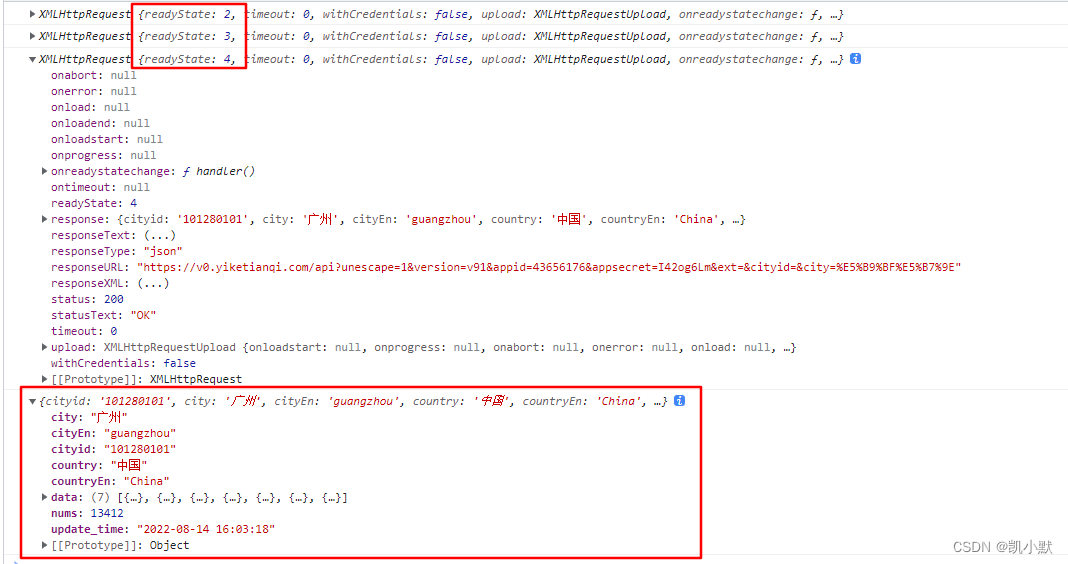
实现如下:
DOCTYPE html> <html lang="en"> <head> <meta charset="UTF-8"> <meta http-equiv="X-UA-Compatible" content="IE=edge"> <meta name="viewport" content="width=device-width, initial-scale=1.0"> <title>Documenttitle> head> <body> <script> const getData = function(url) { return new Promise((resolve, reject) => { const xhr = new XMLHttpRequest(); xhr.open("GET", url); xhr.onreadystatechange = handler; xhr.responseType = "json"; xhr.setRequestHeader("Accept", "application/json"); xhr.send(); function handler() { console.log(this); if(this.readyState === 4) { if(this.status === 200) { resolve(this.response); }else{ reject(new Error(this.statusText)); } } } }) } getData("https://v0.yiketianqi.com/api?unescape=1&version=v91&appid=43656176&appsecret=I42og6Lm&ext=&cityid=&city=广州") .then(res => { console.log(res) }, err => { console.log(err) }) script> body> html>- 1
- 2
- 3
- 4
- 5
- 6
- 7
- 8
- 9
- 10
- 11
- 12
- 13
- 14
- 15
- 16
- 17
- 18
- 19
- 20
- 21
- 22
- 23
- 24
- 25
- 26
- 27
- 28
- 29
- 30
- 31
- 32
- 33
- 34
- 35
- 36
- 37
- 38
- 39
- 40

then 方法
then 方法
- 第一个参数是 resolve 回调函数
- 第二个参数是 reject 的状态回调函数,可选
- 返回一个新的 promise 实例,可以采用链式编程
比如:
getData("https://v0.yiketianqi.com/api?unescape=1&version=v91&appid=43656176&appsecret=I42og6Lm&ext=&cityid=&city=广州") .then(res => { console.log(res) return res.data }).then(obj => { console.log(obj) });- 1
- 2
- 3
- 4
- 5
- 6
- 7

分开就能开到 kaimo 是个 Promise
const kaimo = getData("https://v0.yiketianqi.com/api?unescape=1&version=v91&appid=43656176&appsecret=I42og6Lm&ext=&cityid=&city=广州") .then(res => { console.log(res) return res.data }); console.log(kaimo) kaimo.then(obj => { console.log(obj) });- 1
- 2
- 3
- 4
- 5
- 6
- 7
- 8
- 9
- 10

另外下面两种是一样的:先改动一下接口,让其报错
getData("https://v0.yiketianqi1.com/api?unescape=1&version=v91&appid=43656176&appsecret=I42og6Lm&ext=&cityid=&city=广州") .then(res => { console.log(res) }).then(null, err => { console.log(err) }); getData("https://v0.yiketianqi1.com/api?unescape=1&version=v91&appid=43656176&appsecret=I42og6Lm&ext=&cityid=&city=广州") .then(res => { console.log(res) }).catch(err => { console.log(err) });- 1
- 2
- 3
- 4
- 5
- 6
- 7
- 8
- 9
- 10
- 11
- 12

-
相关阅读:
51单片机可调幅度频率波形信号发生器( proteus仿真+程序+原理图+报告+讲解视频)
美创科技入选IDC中国等保合规市场报告推荐厂商
Linux之iptables及firewall超详解
如何保证优秀的医疗器械设计?
SQL之游标
站在开源云的新周期,EasyStack布局数字原生企业云
js4day(获取DOM元素内容,修改元素样式,修改表单元素属性,轮播图案例)
linux中crontab讲解
JVM总结
[RK3568][Android11]驱动之插入和删除模块
- 原文地址:https://blog.csdn.net/kaimo313/article/details/125858195
