-
Spring进阶(四):Boot
文章目录
- 一、创建 Boot 项目
- 二、Boot 启动过程
- 三、Tomcat 内嵌容器
- 四、Boot 自动配置
- 4.1 AopAutoConfiguration
- 4.2 DataSourceAutoConfiguration
- 4.3 MybatisAutoConfiguration
- 4.4 TransactionAutoConfiguration
- 4.5 ServletWebServerFactoryAutoConfiguration
- 4.6 DispatcherServletAutoConfiguration
- 4.7 WebMvcAutoConfiguration
- 4.8 ErrorMvcAutoConfiguration
- 4.9 MultipartAutoConfiguration
- 4.10 HttpEncodingAutoConfiguration
- 4.11 自动配置类原理
- 4.12 收获
- 五、条件装配底层
一、创建 Boot 项目
1.1 Boot 骨架项目
如果是 linux 环境,用以下命令即可获取 spring boot 的骨架 pom.xml
curl -G https://start.spring.io/pom.xml -d dependencies=web,mysql,mybatis -o pom.xml- 1
也可以使用 Postman 等工具实现
若想获取更多用法,请参考
curl https://start.spring.io- 1
1.2 Boot War项目
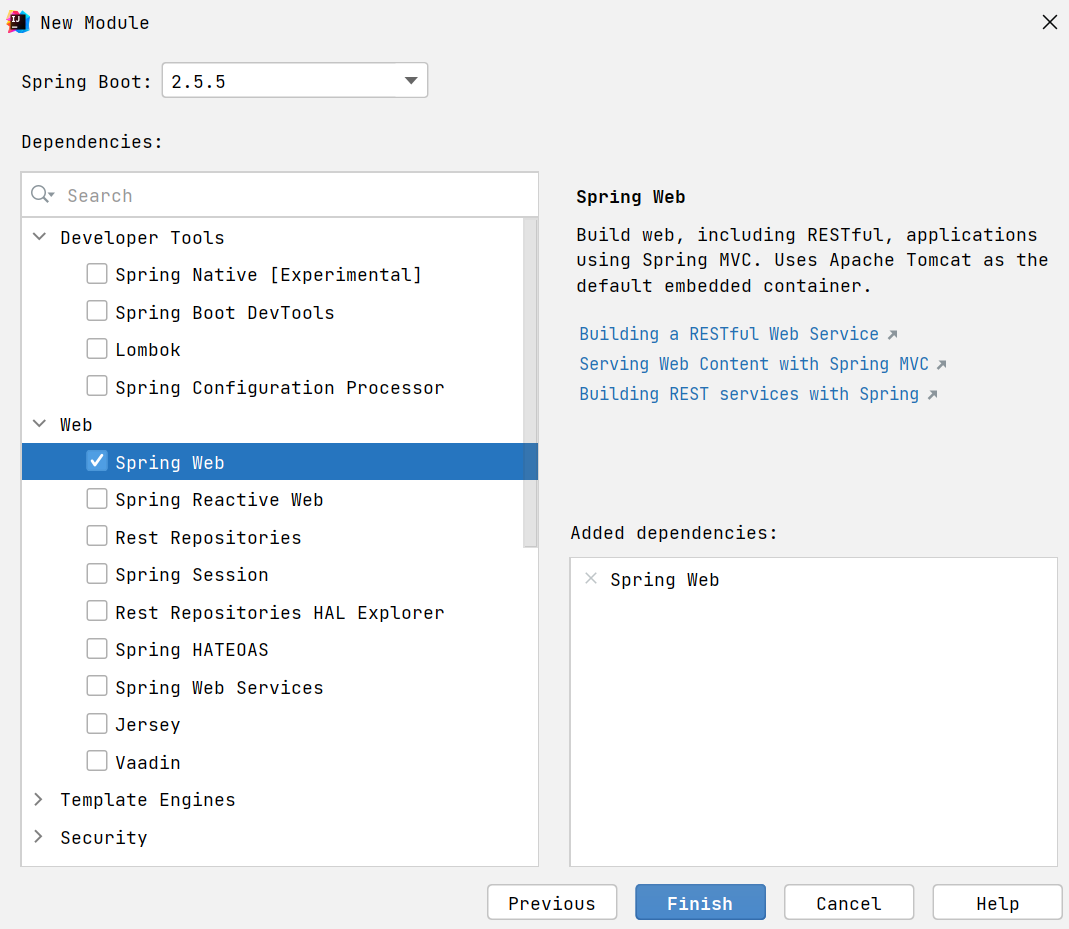
步骤1:创建模块,区别在于打包方式选择 war

接下来勾选 Spring Web 支持
步骤2:编写控制器
@Controller public class MyController { @RequestMapping("/hello") public String abc() { System.out.println("进入了控制器"); return "hello"; } }- 1
- 2
- 3
- 4
- 5
- 6
- 7
- 8
- 9
- 10
步骤3:编写 jsp 视图,新建 webapp 目录和一个 hello.jsp 文件,注意文件名与控制器方法返回的视图逻辑名一致
src |- main |- java |- resources |- webapp |- hello.jsp- 1
- 2
- 3
- 4
- 5
- 6
步骤4:配置视图路径,打开 application.properties 文件
spring.mvc.view.prefix=/ spring.mvc.view.suffix=.jsp- 1
- 2
将来 prefix + 控制器方法返回值 + suffix 即为视图完整路径
测试
如果用 mvn 插件
mvn spring-boot:run或 main 方法测试- 必须添加如下依赖,因为此时用的还是内嵌 tomcat,而内嵌 tomcat 默认不带 jasper(用来解析 jsp)
<dependency> <groupId>org.apache.tomcat.embedgroupId> <artifactId>tomcat-embed-jasperartifactId> <scope>providedscope> dependency>- 1
- 2
- 3
- 4
- 5
- 6
也可以使用 Idea 配置 tomcat 来测试,此时用的是外置 tomcat
- 骨架生成的代码中,多了一个 ServletInitializer,它的作用就是配置外置 Tomcat 使用的,在外置 Tomcat 启动后,去调用它创建和运行 SpringApplication
对于 jar 项目,若要支持 jsp,也可以在加入 jasper 依赖的前提下,把 jsp 文件置入
META-INF/resources二、Boot 启动过程
阶段一:SpringApplication 构造
- 记录 BeanDefinition 源
- 推断应用类型
- 记录 ApplicationContext 初始化器
- 记录监听器
- 推断主启动类
阶段二:执行 run 方法
- 得到 SpringApplicationRunListeners,名字取得不好,实际是事件发布器
- 发布 application starting 事件1️⃣
- 封装启动 args
- 准备 Environment 添加命令行参数(*)
- ConfigurationPropertySources 处理(*)
- 发布 application environment 已准备事件2️⃣
- 通过 EnvironmentPostProcessorApplicationListener 进行 env 后处理(*)
- application.properties,由 StandardConfigDataLocationResolver 解析
- spring.application.json
- 绑定 spring.main 到 SpringApplication 对象(*)
- 打印 banner(*)
- 创建容器
- 准备容器
- 发布 application context 已初始化事件3️⃣
- 加载 bean 定义
- 发布 application prepared 事件4️⃣
- refresh 容器
- 发布 application started 事件5️⃣
- 执行 runner
- 发布 application ready 事件6️⃣
- 这其中有异常,发布 application failed 事件7️⃣
带 * 的有独立的示例
代码参考
a39.A39_1对应 SpringApplication 构造a39.A39_2对应第1步,并演示 7 个事件com.itheima.a39.A39_3对应第2、8到12步org.springframework.boot.Step3org.springframework.boot.Step4org.springframework.boot.Step5org.springframework.boot.Step6org.springframework.boot.Step7
收获💡
- SpringApplication 构造方法中所做的操作
- 可以有多种源用来加载 bean 定义
- 应用类型推断
- 添加容器初始化器
- 添加监听器
- 演示主类推断
- 如何读取 spring.factories 中的配置
- 从配置中获取重要的事件发布器:SpringApplicationRunListeners
- 容器的创建、初始化器增强、加载 bean 定义等
- CommandLineRunner、ApplicationRunner 的作用
- 环境对象
- 命令行 PropertySource
- ConfigurationPropertySources 规范环境键名称
- EnvironmentPostProcessor 后处理增强
- 由 EventPublishingRunListener 通过监听事件2️⃣来调用
- 绑定 spring.main 前缀的 key value 至 SpringApplication
- Banner
三、Tomcat 内嵌容器
Tomcat 基本结构
Server └───Service ├───Connector (协议, 端口) └───Engine └───Host(虚拟主机 localhost) ├───Context1 (应用1, 可以设置虚拟路径, / 即 url 起始路径; 项目磁盘路径, 即 docBase ) │ │ index.html │ └───WEB-INF │ │ web.xml (servlet, filter, listener) 3.0 │ ├───classes (servlet, controller, service ...) │ ├───jsp │ └───lib (第三方 jar 包) └───Context2 (应用2) │ index.html └───WEB-INF web.xml- 1
- 2
- 3
- 4
- 5
- 6
- 7
- 8
- 9
- 10
- 11
- 12
- 13
- 14
- 15
- 16
- 17
3.1 Tomcat 内嵌容器
关键代码
public static void main(String[] args) throws LifecycleException, IOException { // 1.创建 Tomcat 对象 Tomcat tomcat = new Tomcat(); tomcat.setBaseDir("tomcat"); // 2.创建项目文件夹, 即 docBase 文件夹 File docBase = Files.createTempDirectory("boot.").toFile(); docBase.deleteOnExit(); // 3.创建 Tomcat 项目, 在 Tomcat 中称为 Context Context context = tomcat.addContext("", docBase.getAbsolutePath()); // 4.编程添加 Servlet context.addServletContainerInitializer(new ServletContainerInitializer() { @Override public void onStartup(Set<Class<?>> c, ServletContext ctx) throws ServletException { HelloServlet helloServlet = new HelloServlet(); ctx.addServlet("aaa", helloServlet).addMapping("/hello"); } }, Collections.emptySet()); // 5.启动 Tomcat tomcat.start(); // 6.创建连接器, 设置监听端口 Connector connector = new Connector(new Http11Nio2Protocol()); connector.setPort(8080); tomcat.setConnector(connector); }- 1
- 2
- 3
- 4
- 5
- 6
- 7
- 8
- 9
- 10
- 11
- 12
- 13
- 14
- 15
- 16
- 17
- 18
- 19
- 20
- 21
- 22
- 23
- 24
- 25
- 26
- 27
- 28
- 29
3.2 集成 Spring 容器
关键代码
WebApplicationContext springContext = getApplicationContext(); // 4.编程添加 Servlet context.addServletContainerInitializer(new ServletContainerInitializer() { @Override public void onStartup(Set<Class<?>> c, ServletContext ctx) throws ServletException { // ⬇️通过 ServletRegistrationBean 添加 DispatcherServlet 等 for (ServletRegistrationBean registrationBean : springContext.getBeansOfType(ServletRegistrationBean.class).values()) { registrationBean.onStartup(ctx); } } }, Collections.emptySet());- 1
- 2
- 3
- 4
- 5
- 6
- 7
- 8
- 9
- 10
- 11
- 12
- 13
四、Boot 自动配置
4.1 AopAutoConfiguration
Spring Boot 是利用了自动配置类来简化了 aop 相关配置
- AOP 自动配置类为
org.springframework.boot.autoconfigure.aop.AopAutoConfiguration - 可以通过
spring.aop.auto=false禁用 aop 自动配置 - AOP 自动配置的本质是通过
@EnableAspectJAutoProxy来开启了自动代理,如果在引导类上自己添加了@EnableAspectJAutoProxy那么以自己添加的为准 @EnableAspectJAutoProxy的本质是向容器中添加了AnnotationAwareAspectJAutoProxyCreator这个 bean 后处理器,它能够找到容器中所有切面,并为匹配切点的目标类创建代理,创建代理的工作一般是在 bean 的初始化阶段完成的
4.2 DataSourceAutoConfiguration
- 对应的自动配置类为:org.springframework.boot.autoconfigure.jdbc.DataSourceAutoConfiguration
- 它内部采用了条件装配,通过检查容器的 bean,以及类路径下的 class,来决定该 @Bean 是否生效
简单说明一下,Spring Boot 支持两大类数据源:
- EmbeddedDatabase - 内嵌数据库连接池
- PooledDataSource - 非内嵌数据库连接池
PooledDataSource 又支持如下数据源
- hikari 提供的 HikariDataSource
- tomcat-jdbc 提供的 DataSource
- dbcp2 提供的 BasicDataSource
- oracle 提供的 PoolDataSourceImpl
如果知道数据源的实现类类型,即指定了
spring.datasource.type,理论上可以支持所有数据源,但这样做的一个最大问题是无法订制每种数据源的详细配置(如最大、最小连接数等)4.3 MybatisAutoConfiguration
- MyBatis 自动配置类为
org.mybatis.spring.boot.autoconfigure.MybatisAutoConfiguration - 它主要配置了两个 bean
- SqlSessionFactory - MyBatis 核心对象,用来创建 SqlSession
- SqlSessionTemplate - SqlSession 的实现,此实现会与当前线程绑定
- 用 ImportBeanDefinitionRegistrar 的方式扫描所有标注了 @Mapper 注解的接口
- 用 AutoConfigurationPackages 来确定扫描的包
- 还有一个相关的 bean:MybatisProperties,它会读取配置文件中带
mybatis.前缀的配置项进行定制配置
@MapperScan 注解的作用与 MybatisAutoConfiguration 类似,会注册 MapperScannerConfigurer 有如下区别
- @MapperScan 扫描具体包(当然也可以配置关注哪个注解)
- @MapperScan 如果不指定扫描具体包,则会把引导类范围内,所有接口当做 Mapper 接口
- MybatisAutoConfiguration 关注的是所有标注 @Mapper 注解的接口,会忽略掉非 @Mapper 标注的接口
这里有同学有疑问,之前介绍的都是将具体类交给 Spring 管理,怎么到了 MyBatis 这儿,接口就可以被管理呢?
- 其实并非将接口交给 Spring 管理,而是每个接口会对应一个 MapperFactoryBean,是后者被 Spring 所管理,接口只是作为 MapperFactoryBean 的一个属性来配置
4.4 TransactionAutoConfiguration
- 事务自动配置类有两个:
org.springframework.boot.autoconfigure.jdbc.DataSourceTransactionManagerAutoConfigurationorg.springframework.boot.autoconfigure.transaction.TransactionAutoConfiguration
- 前者配置了 DataSourceTransactionManager 用来执行事务的提交、回滚操作
- 后者功能上对标 @EnableTransactionManagement,包含以下三个 bean
- BeanFactoryTransactionAttributeSourceAdvisor 事务切面类,包含通知和切点
- TransactionInterceptor 事务通知类,由它在目标方法调用前后加入事务操作
- AnnotationTransactionAttributeSource 会解析 @Transactional 及事务属性,也包含了切点功能
- 如果自己配置了 DataSourceTransactionManager 或是在引导类加了 @EnableTransactionManagement,则以自己配置的为准
4.5 ServletWebServerFactoryAutoConfiguration
- 提供 ServletWebServerFactory
4.6 DispatcherServletAutoConfiguration
- 提供 DispatcherServlet
- 提供 DispatcherServletRegistrationBean
4.7 WebMvcAutoConfiguration
- 配置 DispatcherServlet 的各项组件,提供的 bean 见过的有
- 多项 HandlerMapping
- 多项 HandlerAdapter
- HandlerExceptionResolver
4.8 ErrorMvcAutoConfiguration
- 提供的 bean 有 BasicErrorController
4.9 MultipartAutoConfiguration
- 它提供了 org.springframework.web.multipart.support.StandardServletMultipartResolver
- 该 bean 用来解析 multipart/form-data 格式的数据
4.10 HttpEncodingAutoConfiguration
- POST 请求参数如果有中文,无需特殊设置,这是因为 Spring Boot 已经配置了 org.springframework.boot.web.servlet.filter.OrderedCharacterEncodingFilter
- 对应配置 server.servlet.encoding.charset=UTF-8,默认就是 UTF-8
- 当然,它只影响非 json 格式的数据
4.11 自动配置类原理
关键代码
假设已有第三方的两个自动配置类
@Configuration // ⬅️第三方的配置类 static class AutoConfiguration1 { @Bean public Bean1 bean1() { return new Bean1(); } } @Configuration // ⬅️第三方的配置类 static class AutoConfiguration2 { @Bean public Bean2 bean2() { return new Bean2(); } }- 1
- 2
- 3
- 4
- 5
- 6
- 7
- 8
- 9
- 10
- 11
- 12
- 13
- 14
- 15
- 16
提供一个配置文件 META-INF/spring.factories,key 为导入器类名,值为多个自动配置类名,用逗号分隔
MyImportSelector=\ AutoConfiguration1,\ AutoConfiguration2- 1
- 2
- 3
- 4
注意
- 上述配置文件中 MyImportSelector 与 AutoConfiguration1,AutoConfiguration2 为简洁均省略了包名,自己测试时请将包名根据情况补全
引入自动配置
@Configuration // ⬅️本项目的配置类 @Import(MyImportSelector.class) static class Config { } static class MyImportSelector implements DeferredImportSelector { // ⬇️该方法从 META-INF/spring.factories 读取自动配置类名,返回的 String[] 即为要导入的配置类 public String[] selectImports(AnnotationMetadata importingClassMetadata) { return SpringFactoriesLoader .loadFactoryNames(MyImportSelector.class, null).toArray(new String[0]); } }- 1
- 2
- 3
- 4
- 5
- 6
- 7
- 8
- 9
- 10
- 11
- 12
4.12 收获
- 自动配置类本质上就是一个配置类而已,只是用 META-INF/spring.factories 管理,与应用配置类解耦
- @Enable 打头的注解本质是利用了 @Import
- @Import 配合 DeferredImportSelector 即可实现导入,selectImports 方法的返回值即为要导入的配置类名
- DeferredImportSelector 的导入会在最后执行,为的是让其它配置优先解析
五、条件装配底层
条件装配的底层是本质上是 @Conditional 与 Condition,这两个注解。引入自动配置类时,期望满足一定条件才能被 Spring 管理,不满足则不管理,怎么做呢?
比如条件是【类路径下必须有 dataSource】这个 bean ,怎么做呢?
首先编写条件判断类,它实现 Condition 接口,编写条件判断逻辑
static class MyCondition1 implements Condition { // ⬇️如果存在 Druid 依赖,条件成立 public boolean matches(ConditionContext context, AnnotatedTypeMetadata metadata) { return ClassUtils.isPresent("com.alibaba.druid.pool.DruidDataSource", null); } }- 1
- 2
- 3
- 4
- 5
- 6
- 7
其次,在要导入的自动配置类上添加
@Conditional(MyCondition1.class),将来此类被导入时就会做条件检查@Configuration // 第三方的配置类 @Conditional(MyCondition1.class) // ⬅️加入条件 static class AutoConfiguration1 { @Bean public Bean1 bean1() { return new Bean1(); } }- 1
- 2
- 3
- 4
- 5
- 6
- 7
- 8
- 9
分别测试加入和去除 druid 依赖,观察 bean1 是否存在于容器
<dependency> <groupId>com.alibabagroupId> <artifactId>druidartifactId> <version>1.1.17version> dependency>- 1
- 2
- 3
- 4
- 5
学习一种特殊的 if - else
-
相关阅读:
Spring AOP与事务
逆天改命,专科学历,五面京东成功斩获Offer
layui--记录
防御DDOS的方法是什么?
java97-中断线程的另一种处理
英语语法参考
shell脚本之函数
JVM中的GC如何判断对象可以被回收
docker系列:dockerfile及其用法解析
flask_笔记
- 原文地址:https://blog.csdn.net/qq_38697437/article/details/126300167