-
Small Tools(5) 前端项目搭建:Vue3+Vite2+TypeScript+Vue Router+Element Plus+Pinia
文章目录
环境
node: v16.15.1
npm: 8.12.1本文项目地址:https://gitee.com/zhengqingya/small-tools
文档更新地址:https://gitee.com/zhengqingya/java-developer-document技术栈
- Vue3
- Vite2
- TypeScript
- Vue Router
- Element Plus
- Pinia
一、项目初始化
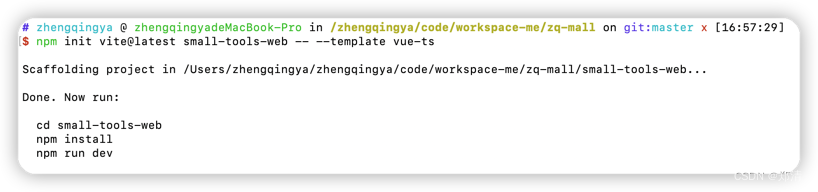
创建项目
npm init vite@latest small-tools-web -- --template vue-ts- 1
二、编码规范配置
ESLint:编码规范检查
Prettier:代码格式化工具1、安装
# eslint => ESLint的核心代码 # @typescript-eslint/parser => ESLint的解析器,用于解析ts,从而检查和规范ts代码 # @typescript-eslint/eslint-plugin => 一个ESLint插件,包含了各类定义好的检测ts代码的规范 # eslint-plugin-vue => vue3的代码校验 # prettier => prettier插件的核心代码 # eslint-config-prettier => 解决ESLint中的样式规范和prettier中样式规范的冲突,以prettier的样式规范为准,使ESLint中的样式规范自动失效 # eslint-plugin-prettier => 将prettier作为ESLint规范来使用 cnpm install --save-dev eslint @typescript-eslint/parser @typescript-eslint/eslint-plugin eslint-plugin-vue prettier eslint-config-prettier eslint-plugin-prettier- 1
- 2
- 3
- 4
- 5
- 6
- 7
- 8
2、配置
.eslintrc.js配置文件https://eslint.org/docs/latest/user-guide/configuring/configuration-files#configuration-file-formats
https://eslint.vuejs.org/rulesmodule.exports = { parser: '@typescript-eslint/parser', //定义ESLint的解析器 extends: [ 'prettier/@typescript-eslint', // 使@typescript-eslint中的样式规范失效,遵循prettier中的样式规范 'plugin:prettier/recommended' // 使用prettier中的样式规范,且如果使ESLint会检测prettier的格式问题,同样将格式问题以error的形式抛出 ], settings: { "react": { "pragma": "React", "version": "detect" } }, parserOptions: { "ecmaVersion": 2019, "sourceType": 'module', "ecmaFeatures": { jsx: true } }, env: { //指定代码的运行环境 browser: true, node: true, } };- 1
- 2
- 3
- 4
- 5
- 6
- 7
- 8
- 9
- 10
- 11
- 12
- 13
- 14
- 15
- 16
- 17
- 18
- 19
- 20
- 21
- 22
- 23
- 24
- 25
.prettierrc.js配置文件module.exports = { printWidth: 120, semi: false, singleQuote: true, trailingComma: "all", bracketSpacing: false, jsxBracketSameLine: true, arrowParens: "avoid", insertPragma: true, tabWidth: 4, useTabs: false, };- 1
- 2
- 3
- 4
- 5
- 6
- 7
- 8
- 9
- 10
- 11
- 12
.eslintignoreESLint忽略检查文件node_modules *.md .vscode .idea dist /public .eslintrc.js src/assets- 1
- 2
- 3
- 4
- 5
- 6
- 7
- 8
.prettierignorePrettier忽略格式化文件/dist/* /node_modules/** **/*.svg /public/*- 1
- 2
- 3
- 4
3、代码检查 & 自动修复 & 自动格式化
package.json的scripts中添加--ext: 配置要检查文件的后缀
eslint --ext .js --ext .ts --ext .vue src: 只检查src文件夹下的js/ts/vue文件"scripts": { "lint": "eslint --ext .js --ext .ts --ext .vue src", "lint-fix": "eslint --ext .js --ext .ts --ext .vue src --fix", "prettier": "prettier --write ." }- 1
- 2
- 3
- 4
- 5
# 代码检查 cnpm run lint # 自动修复 tips: 部分代码修复可能会影响功能,所以不会自动修复,会给出提示 cnpm run lint-fix # prettier 自动格式化 cnpm run prettier- 1
- 2
- 3
- 4
- 5
- 6
- 7
- 8
4、统一代码风格
需安装插件
EditorConfig for VS Code.editorconfig# https://editorconfig.org root = true [*] charset = utf-8 indent_style = space indent_size = 2 end_of_line = lf insert_final_newline = true trim_trailing_whitespace = true [*.md] insert_final_newline = false trim_trailing_whitespace = false- 1
- 2
- 3
- 4
- 5
- 6
- 7
- 8
- 9
- 10
- 11
- 12
- 13
- 14
三、Vite配置
1、配置路径别名
vite.config.tsimport * as path from 'path'; export default defineConfig({ resolve: { // 配置路径别名 alias: [ // @代替src { find: '@', replacement: path.resolve('./src') } ] }, })- 1
- 2
- 3
- 4
- 5
- 6
- 7
- 8
- 9
- 10
- 11
- 12
- 13
- 14
解决:找不到模块“path”或其相应的类型声明
# 安装node声明文件 cnpm i @types/node --save-dev- 1
- 2
2、环境变量
.env.dev# 开发环境 NODE_ENV='dev' # 为了防止意外地将一些环境变量泄漏到客户端,只有以 VITE_ 为前缀的变量才会暴露给经过 vite 处理的代码。 # ts中通过`import.meta.env.VITE_APP_BASE_API`取值 VITE_APP_PORT = 5173 VITE_APP_BASE_API = '/dev-api'- 1
- 2
- 3
- 4
- 5
- 6
- 7
3、反向代理解决跨域问题 & 配置项目运行端口
vite.config.tsimport { defineConfig, loadEnv } from 'vite' export default defineConfig(({ mode }) => { // 获取`.env`环境配置文件 const env = loadEnv(mode, process.cwd()); return { server: { host: 'localhost', port: Number(env.VITE_APP_PORT), // 运行时自动打开浏览器 // open: true, proxy: { [env.VITE_APP_BASE_API]: { target: 'http://localhost:1218', changeOrigin: true, rewrite: path => path.replace(new RegExp('^' + env.VITE_APP_BASE_API), '') } } } } })- 1
- 2
- 3
- 4
- 5
- 6
- 7
- 8
- 9
- 10
- 11
- 12
- 13
- 14
- 15
- 16
- 17
- 18
- 19
- 20
- 21
- 22
- 23
4、引入scss全局变量
vite.config.tsexport default defineConfig(({ mode }) => { return { // 引入scss全局变量 css: { preprocessorOptions: { scss: { additionalData: `@import "@/styles/app-theme.scss";` } } } } })- 1
- 2
- 3
- 4
- 5
- 6
- 7
- 8
- 9
- 10
- 11
- 12
src/styles/app-theme.scss$dark_main_color: #021b32;- 1
四、TypeScript配置
tsconfig.json通过vite创建项目后的默认配置
{ "compilerOptions": { "target": "ESNext", "useDefineForClassFields": true, "module": "ESNext", "moduleResolution": "Node", "strict": true, "jsx": "preserve", "sourceMap": true, "resolveJsonModule": true, "isolatedModules": true, "esModuleInterop": true, "lib": ["ESNext", "DOM"], "skipLibCheck": true }, "include": ["src/**/*.ts", "src/**/*.d.ts", "src/**/*.tsx", "src/**/*.vue"], "references": [{ "path": "./tsconfig.node.json" }] }- 1
- 2
- 3
- 4
- 5
- 6
- 7
- 8
- 9
- 10
- 11
- 12
- 13
- 14
- 15
- 16
- 17
- 18
- 19
解决:找不到模块“@/router”或其相应的类型声明。
tsconfig.json新增如下配置"baseUrl": ".", "paths": { "@/*": [ "src/*" ] }- 1
- 2
- 3
- 4
解决:template中使用$store报错
vite-env.d.tsimport { Store } from '@/store' declare module '@vue/runtime-core' { interface ComponentCustomProperties { $store: Store; } }- 1
- 2
- 3
- 4
- 5
- 6
五、package.json
package.json{ "name": "small-tools-web", "private": true, "version": "1.0.1", "type": "module", "scripts": { // 运行 "dev": "vite --mode dev", // 构建生成 dist 文件夹 "build:prod": "vue-tsc --noEmit && vite build --mode prod", // 在本地启动一个静态 Web 服务器,将 dist 文件夹运行在 http://localhost:8080 "preview": "vite preview --port 8080 --mode prod", // eslint检查 "lint": "eslint --ext .js --ext .ts --ext .vue src", // eslint自动修复 "lint-fix": "eslint --ext .js --ext .ts --ext .vue src --fix", // prettier自动格式化代码 "prettier": "prettier --write ." }, "dependencies": { "vue": "^3.2.37", "vue-router": "^4.1.2" }, "devDependencies": { "@types/node": "^18.0.5", "@typescript-eslint/eslint-plugin": "^5.30.6", "@typescript-eslint/parser": "^5.30.6", "@vitejs/plugin-vue": "^3.0.0", "eslint": "^8.20.0", "eslint-config-prettier": "^8.5.0", "eslint-plugin-prettier": "^4.2.1", "eslint-plugin-vue": "^9.2.0", "prettier": "^2.7.1", "typescript": "^4.6.4", "vite": "^3.0.0", "vue-tsc": "^0.38.4" } }- 1
- 2
- 3
- 4
- 5
- 6
- 7
- 8
- 9
- 10
- 11
- 12
- 13
- 14
- 15
- 16
- 17
- 18
- 19
- 20
- 21
- 22
- 23
- 24
- 25
- 26
- 27
- 28
- 29
- 30
- 31
- 32
- 33
- 34
- 35
- 36
- 37
- 38
# devDependencies: 里面的插件只用于开发环境,不用于生产环境 # dependencies: 需要发布到生产环境的 # 写入到 dependencies 对象 npm i module_name -S => npm install module_name --save # 写入到 devDependencies 对象 npm i module_name -D => npm install module_name --save-dev- 1
- 2
- 3
- 4
- 5
- 6
- 7
- 8
六、Sass
安装
cnpm install sass --save-dev- 1
七、Vue Router
1、安装
cnpm install vue-router@4- 1
2、入门配置
src/router/index.tsimport {createRouter, createWebHashHistory} from 'vue-router'; // 静态路由 export const routes = [ { path: '/login', component: () => import('@/views/login/index.vue') }, { path: '/404', component: () => import('@/views/error-page/404.vue') }, ]; // 创建路由 const router = createRouter({ history: createWebHashHistory(), routes }); export default router;- 1
- 2
- 3
- 4
- 5
- 6
- 7
- 8
- 9
- 10
- 11
- 12
- 13
- 14
- 15
- 16
- 17
- 18
- 19
- 20
- 21
src/main.ts// ****** ↓↓↓ 路由 ↓↓↓ ****** import router from '@/router'; const app = createApp(App); app.use(router); app.mount('#app')- 1
- 2
- 3
- 4
- 5
- 6
src/views/error-page/404.vue404
- 1
- 2
- 3
- 4
src/App.vue- 1
- 2
- 3
- 4
- 5
- 6
访问
http://ip:端口/#/404八、Element Plus
1、安装
cnpm install element-plus --save cnpm install @element-plus/icons-vue- 1
- 2
2、配置
main.ts// ****** ↓↓↓ element-plus ↓↓↓ ****** import ElementPlus from 'element-plus' import 'element-plus/dist/index.css' import * as ElementPlusIconsVue from '@element-plus/icons-vue' // 注册所有图标 for (const [key, component] of Object.entries(ElementPlusIconsVue)) { app.component(key, component) } const app = createApp(App) app.use(ElementPlus) app.mount('#app')- 1
- 2
- 3
- 4
- 5
- 6
- 7
- 8
- 9
- 10
- 11
- 12
- 13
3、Volar 支持
tsconfig.json中通过compilerOptions.types指定全局组件类型{ "compilerOptions": { "types": [ "element-plus/global" ] } }- 1
- 2
- 3
- 4
- 5
- 6
- 7
4、demo
<template> <el-button link>按钮el-button> <el-icon class="is-loading"> <Loading /> el-icon> <div> <el-button :icon="Search" circle /> <el-button type="primary" :icon="Edit" circle /> <el-button type="success" :icon="Check" circle /> <el-button type="info" :icon="Message" circle /> <el-button type="warning" :icon="Star" circle /> <el-button type="danger" :icon="Delete" circle /> div> template> <script lang="ts" setup> import { Check, Delete, Edit, Message, Search, Star, } from '@element-plus/icons-vue' script>- 1
- 2
- 3
- 4
- 5
- 6
- 7
- 8
- 9
- 10
- 11
- 12
- 13
- 14
- 15
- 16
- 17
- 18
九、自定义样式
main.tsimport '@/styles/index.scss';- 1
src/styles/index.scss@import './element-plus-theme'; body { background-color: #021b32; }- 1
- 2
- 3
- 4
- 5
src/styles/element-plus-theme.scss// ****** ↓↓↓ 覆盖 element-plus 的样式 ↓↓↓ ****** // 按钮 .el-button--text { // background-color: #8f6732 !important; margin-left: 3px; border: none !important; }- 1
- 2
- 3
- 4
- 5
- 6
- 7
- 8
十、Pinia
1、安装
cnpm install pinia --save- 1
2、配置
main.tsconst app = createApp(App) // pinia import { createPinia } from 'pinia'; const pinia = createPinia() app.use(pinia) // store import useStore from "@/store"; app.config.globalProperties.$store = useStore(); app.mount('#app')- 1
- 2
- 3
- 4
- 5
- 6
- 7
- 8
- 9
- 10
- 11
- 12
3、使用
src/store/index.tsimport useAppStore from './modules/app'; const useStore = () => ({ app: useAppStore() }); export default useStore;- 1
- 2
- 3
- 4
- 5
- 6
- 7
src/store/modules/app.tsimport { AppState } from '@/types/store/app'; import { localStorage } from '@/utils/storage'; import { defineStore } from 'pinia'; const useAppStore = defineStore({ id: 'app', state: (): AppState => ({ name: localStorage.get('name') || 'Small Tools', }), actions: { setName(name: string) { this.name = name; localStorage.set('name', name); } } }); export default useAppStore;- 1
- 2
- 3
- 4
- 5
- 6
- 7
- 8
- 9
- 10
- 11
- 12
- 13
- 14
- 15
- 16
- 17
- 18
src/utils/storage.ts/** * window.localStorage => 浏览器永久存储,用于长久保存整个网站的数据,保存的数据没有过期时间,直到手动去删除。 */ export const localStorage = { set(key: string, val: any) { window.localStorage.setItem(key, JSON.stringify(val)); }, get(key: string) { const json: any = window.localStorage.getItem(key); return JSON.parse(json); }, remove(key: string) { window.localStorage.removeItem(key); }, clear() { window.localStorage.clear(); }, }; /** * window.sessionStorage => 浏览器本地存储,数据保存在当前会话中,在关闭窗口或标签页之后将会删除这些数据。 */ export const sessionStorage = { set(key: string, val: any) { window.sessionStorage.setItem(key, JSON.stringify(val)); }, get(key: string) { const json: any = window.sessionStorage.getItem(key); return JSON.parse(json); }, remove(key: string) { window.sessionStorage.removeItem(key); }, clear() { window.sessionStorage.clear(); }, };- 1
- 2
- 3
- 4
- 5
- 6
- 7
- 8
- 9
- 10
- 11
- 12
- 13
- 14
- 15
- 16
- 17
- 18
- 19
- 20
- 21
- 22
- 23
- 24
- 25
- 26
- 27
- 28
- 29
- 30
- 31
- 32
- 33
- 34
- 35
- 36
- 37
页面引用
<template> <p>store: {{ name }}p> <p>store: {{ app.name }}p> <p>store: {{ $store.app.name }}p> <el-button @click="changeStore('666')">change storeel-button> template> <script lang="ts" setup> import { storeToRefs } from 'pinia' import useStore from "@/store"; const { app } = useStore() // const name = ref(app.name) // 响应式 const { name: name } = storeToRefs(app) function changeStore(value: string) { app.setName(value) } script>- 1
- 2
- 3
- 4
- 5
- 6
- 7
- 8
- 9
- 10
- 11
- 12
- 13
- 14
- 15
- 16
- 17
- 18
- 19
- 20
十一、Axios和API封装
1、安装
cnpm install axios --save- 1
2、axios工具封装
src/utils/request.tsimport axios, { AxiosRequestConfig, AxiosResponse } from 'axios'; import { ElMessage, ElMessageBox } from 'element-plus'; import { localStorage } from '@/utils/storage'; import useStore from '@/store'; // 创建axios实例 const service = axios.create({ baseURL: import.meta.env.VITE_APP_BASE_API, // 请求超时时间:50s timeout: 50000, headers: { 'Content-Type': 'application/json;charset=utf-8' }, }); // 请求拦截器 service.interceptors.request.use( (config: AxiosRequestConfig) => { if (!config.headers) { throw new Error( `Expected 'config' and 'config.headers' not to be undefined` ); } const { user } = useStore(); if (user.token) { // 授权认证 config.headers.Authorization = user.token; } // 租户ID config.headers['TENANT_ID'] = '1' return config; }, (error) => { return Promise.reject(error); } ); // 响应拦截器 service.interceptors.response.use( (response: AxiosResponse) => { const res = response.data; const { code, msg } = res; if (code === 200) { return res; } else { // token过期 if (code === -1) { ElMessageBox.confirm("您的登录账号已失效,请重新登录", { confirmButtonText: "再次登录", cancelButtonText: "取消", type: "warning" }).then(() => { // 清除浏览器全部缓存 localStorage.clear(); // 跳转登录页 window.location.href = '/'; location.reload(); }); } else { ElMessage({ message: msg || '系统出错', type: 'error', duration: 5 * 1000 }); } return Promise.reject(new Error(msg || 'Error')); } }, (error) => { const { msg } = error.response.data; // 未认证 if (error.response.status === 401) { ElMessageBox.confirm("您的登录账号已失效,请重新登录", { confirmButtonText: "再次登录", cancelButtonText: "取消", type: "warning" }).then(() => { // 清除浏览器全部缓存 localStorage.clear(); // 跳转登录页 window.location.href = '/'; location.reload(); }); } else { ElMessage({ message: "网络异常,请稍后再试!", type: "error", duration: 5 * 1000 }); return Promise.reject(new Error(msg || 'Error')); } } ); // 导出实例 export default service;- 1
- 2
- 3
- 4
- 5
- 6
- 7
- 8
- 9
- 10
- 11
- 12
- 13
- 14
- 15
- 16
- 17
- 18
- 19
- 20
- 21
- 22
- 23
- 24
- 25
- 26
- 27
- 28
- 29
- 30
- 31
- 32
- 33
- 34
- 35
- 36
- 37
- 38
- 39
- 40
- 41
- 42
- 43
- 44
- 45
- 46
- 47
- 48
- 49
- 50
- 51
- 52
- 53
- 54
- 55
- 56
- 57
- 58
- 59
- 60
- 61
- 62
- 63
- 64
- 65
- 66
- 67
- 68
- 69
- 70
- 71
- 72
- 73
- 74
- 75
- 76
- 77
- 78
- 79
- 80
- 81
- 82
- 83
- 84
- 85
- 86
- 87
- 88
- 89
- 90
- 91
- 92
- 93
- 94
- 95
- 96
- 97
3、api封装
src/api/index.ts// 拿到所有api const modulesFiles = import.meta.globEager('./*/*.*'); const modules: any = {}; for (const key in modulesFiles) { const moduleName = key.replace(/(.*\/)*([^.]+).*/gi, '$2'); const value: any = modulesFiles[key]; if (value.default) { // 兼容js modules[moduleName] = value.default; } else { // 兼容ts modules[moduleName] = value; } } // console.log(666, modules); export default modules;- 1
- 2
- 3
- 4
- 5
- 6
- 7
- 8
- 9
- 10
- 11
- 12
- 13
- 14
- 15
- 16
main.tsconst app = createApp(App); // 配置全局api import api from '@/api' app.config.globalProperties.$api = api; app.mount('#app')- 1
- 2
- 3
- 4
- 5
- 6
- 7
4、api调用demo
src/api/system/sys_login.tsimport { Captcha } from '@/types/api/system/login'; import request from '@/utils/request'; import { AxiosPromise } from 'axios'; // 获取验证码 export function getCaptcha(): AxiosPromise<Captcha> { return request({ url: '/captcha?t=' + new Date().getTime().toString(), method: 'get', }); }- 1
- 2
- 3
- 4
- 5
- 6
- 7
- 8
- 9
- 10
- 11
src/types/api/system/login.d.ts// 验证码类型声明 export interface Captcha { img: string; uuid: string; }- 1
- 2
- 3
- 4
- 5
src/views/login/index.vue<template> <p>Hello...</p> </template> <script lang="ts" setup> import { getCurrentInstance } from 'vue'; // 组件实例 const { proxy }: any = getCurrentInstance(); // 获取验证码 async function handleCaptcha() { const res = await proxy.$api.sys_login.getCaptcha() console.log('res:', res); } handleCaptcha() </script>- 1
- 2
- 3
- 4
- 5
- 6
- 7
- 8
- 9
- 10
- 11
- 12
- 13
- 14
- 15
十二、全局组件
1、全局组件注册
src/components/index.tsconst modulesFiles = import.meta.globEager('./*/*.vue'); const modules: any = {}; for (const key in modulesFiles) { const moduleName = key.replace(/(.*\/)*([^.]+).*/gi, '$2'); const value: any = modulesFiles[key]; modules[moduleName] = value.default; } // console.log(666, modules); export default modules;- 1
- 2
- 3
- 4
- 5
- 6
- 7
- 8
- 9
- 10
- 11
main.tsconst app = createApp(App); // 全局组件注册 import myComponent from '@/components/index' Object.keys(myComponent).forEach((key) => { app.component(key, myComponent[key]) }) app.mount('#app')- 1
- 2
- 3
- 4
- 5
- 6
- 7
- 8
- 9
2、组件示例
src/components/base/BaseNoData.vue暂无数据 - 1
- 2
- 3
- 4
- 5
- 6
- 7
- 8
- 9
- 10
- 11
- 12
- 13
- 14
- 15
- 16
- 17
- 18
- 19
引用
<base-no-data>请先选择数据base-no-data>- 1
今日分享语句: 愿我可以一直沉迷于学习无法自拔。
-
相关阅读:
Google搜索操作符:让你秒变搜索专家
表白弹药库 - 这是我为你写的散文诗(结尾附源码)
Vue2.0开发之——Vue基础用法-侦听器(27)
二十种实战调优MySQL性能优化的经验
Python优化算法04——模拟退火算法
如何创建并运行java线程呢?
业务网关之AK中心建设
2022陕西清北录取人数排名,西工大附中遥遥领先,高新一中40人
c语言常见字符函数、内存函数(详讲)
基于springboot的ShardingSphere5.2.1的分库分表的解决方案之mysql主从的配置(五)
- 原文地址:https://blog.csdn.net/qq_38225558/article/details/126268598