-
HDRP shader 获取阴影(Custom Pass)
环境
Unity:2021.3.0f1
HDRP:12.1.6
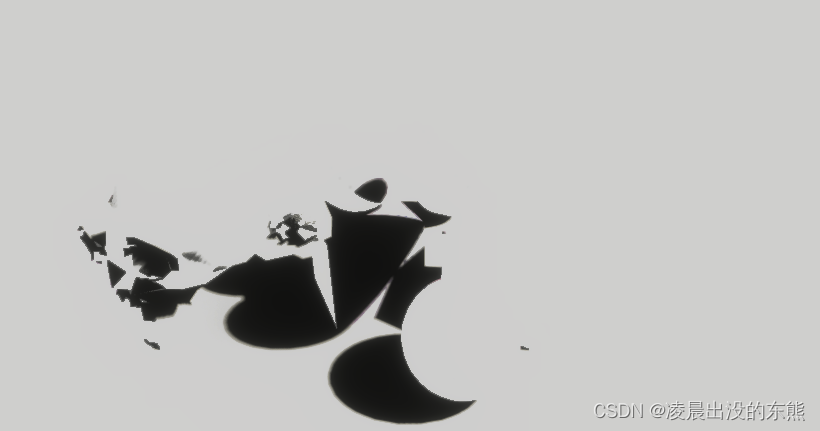
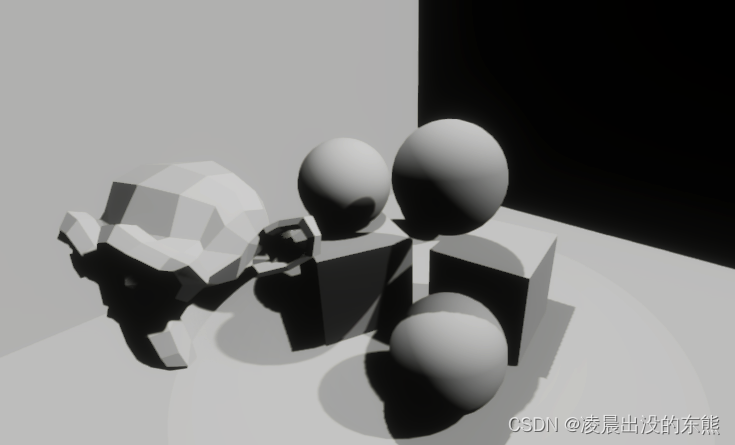
以下程序均在 自定义全屏通道 中运行,详情示例场景如图

直接光阴影
应该可能是这么写吧(代码出处是Lighting\LightLoop\LightLoop.hlsl)
#pragma multi_compile SHADOW_LOW SHADOW_MEDIUM SHADOW_HIGH SHADOW_VERY_HIGH- 1
#include "Packages/com.unity.render-pipelines.high-definition/Runtime/Material/NormalBuffer.hlsl" #include "Packages/com.unity.render-pipelines.high-definition/Runtime/Lighting/PunctualLightCommon.hlsl" #include "Packages/com.unity.render-pipelines.high-definition/Runtime/Lighting/LightLoop/HDShadow.hlsl"- 1
- 2
- 3
- 4
NormalData normalData; DecodeFromNormalBuffer(posInput.positionSS, normalData); HDShadowContext shadowContext = InitShadowContext(); DirectionalLightData light = _DirectionalLightDatas[_DirectionalShadowIndex]; float3 L = -light.forward; float3 shadow = GetDirectionalShadowAttenuation(shadowContext, posInput.positionSS, posInput.positionWS, normalData.normalWS, light.shadowIndex, L);- 1
- 2
- 3
- 4
- 5
- 6
- 7
- 8
- 9
- 10

去掉背面的影子
这个效果不太对劲,不过显然物体背面是接受不到影子的(毕竟照不到光),所以索性去掉背面的阴影。
shadow = dot(normalData.normalWS, L) < 0 ? 1 : shadow;- 1
着色
确实是剩下影子了,不过这样看有点怪怪,所以这里来给这幅图加一个黑白版lambert着色。
// shadow = dot(normalData.normalWS, L) < 0 ? 1 : shadow; shadow *= saturate(dot(normalData.normalWS, L));- 1
- 2

所有光源
为做示例,这里加了一盏聚光灯。

另一个API
额外添加 #define 和 #include
#include "Packages/com.unity.render-pipelines.high-definition/Runtime/Material/NormalBuffer.hlsl" #include "Packages/com.unity.render-pipelines.high-definition/Runtime/Lighting/PunctualLightCommon.hlsl" #include "Packages/com.unity.render-pipelines.high-definition/Runtime/Lighting/LightLoop/HDShadow.hlsl" // 添加以下内容 #define LIGHTLOOP_DISABLE_TILE_AND_CLUSTER #include "Packages/com.unity.render-pipelines.high-definition/Runtime/Lighting/LightLoop/LightLoopDef.hlsl" #include "Packages/com.unity.render-pipelines.high-definition/Runtime/Lighting/LightLoop/HDShadowLoop.hlsl"- 1
- 2
- 3
- 4
- 5
- 6
- 7
- 8
- 9
如下修改代码(代码出处是Sky\HDRISky\HDRISky.shader)
NormalData normalData; DecodeFromNormalBuffer(posInput.positionSS, normalData); HDShadowContext shadowContext = InitShadowContext(); // 注释以下几行 // DirectionalLightData light = _DirectionalLightDatas[_DirectionalShadowIndex]; // float3 L = -light.forward; // float3 shadow = GetDirectionalShadowAttenuation(shadowContext, // posInput.positionSS, posInput.positionWS, normalData.normalWS, // light.shadowIndex, L); // shadow = saturate(dot(normalData.normalWS, L)); float3 shadow3; ShadowLoopMin(shadowContext, posInput, normalData.normalWS, LIGHTFEATUREFLAGS_PUNCTUAL | LIGHTFEATUREFLAGS_DIRECTIONAL | LIGHTFEATUREFLAGS_AREA, DEFAULT_LIGHT_LAYERS, shadow3); float3 shadow = dot(shadow3, float3(1.0 / 3.0, 1.0 / 3.0, 1.0 / 3.0));- 1
- 2
- 3
- 4
- 5
- 6
- 7
- 8
- 9
- 10
- 11
- 12
- 13
- 14
- 15
- 16
- 17
- 18

可以看到,聚光灯的影子已经出来了,不过物体背面的影子也出来了,下面继续修改,在这里也来加一个黑白版lambert着色。
创建 CustomHDShadowLoop.hlsl
在你上面写的着色器的同目录下新建一个文件,命名为CustomHDShadowLoop.hlsl

把 HDShadowLoop.hlsl 的所有内容拷贝到 CustomHDShadowLoop.hlslHDShadowLoop.hlsl 的完整路径大概是在:
“你的项目\Library\PackageCache\com.unity.render-pipelines.high-definition@12.1.6\Runtime\Lighting\LightLoop\HDShadowLoop.hlsl”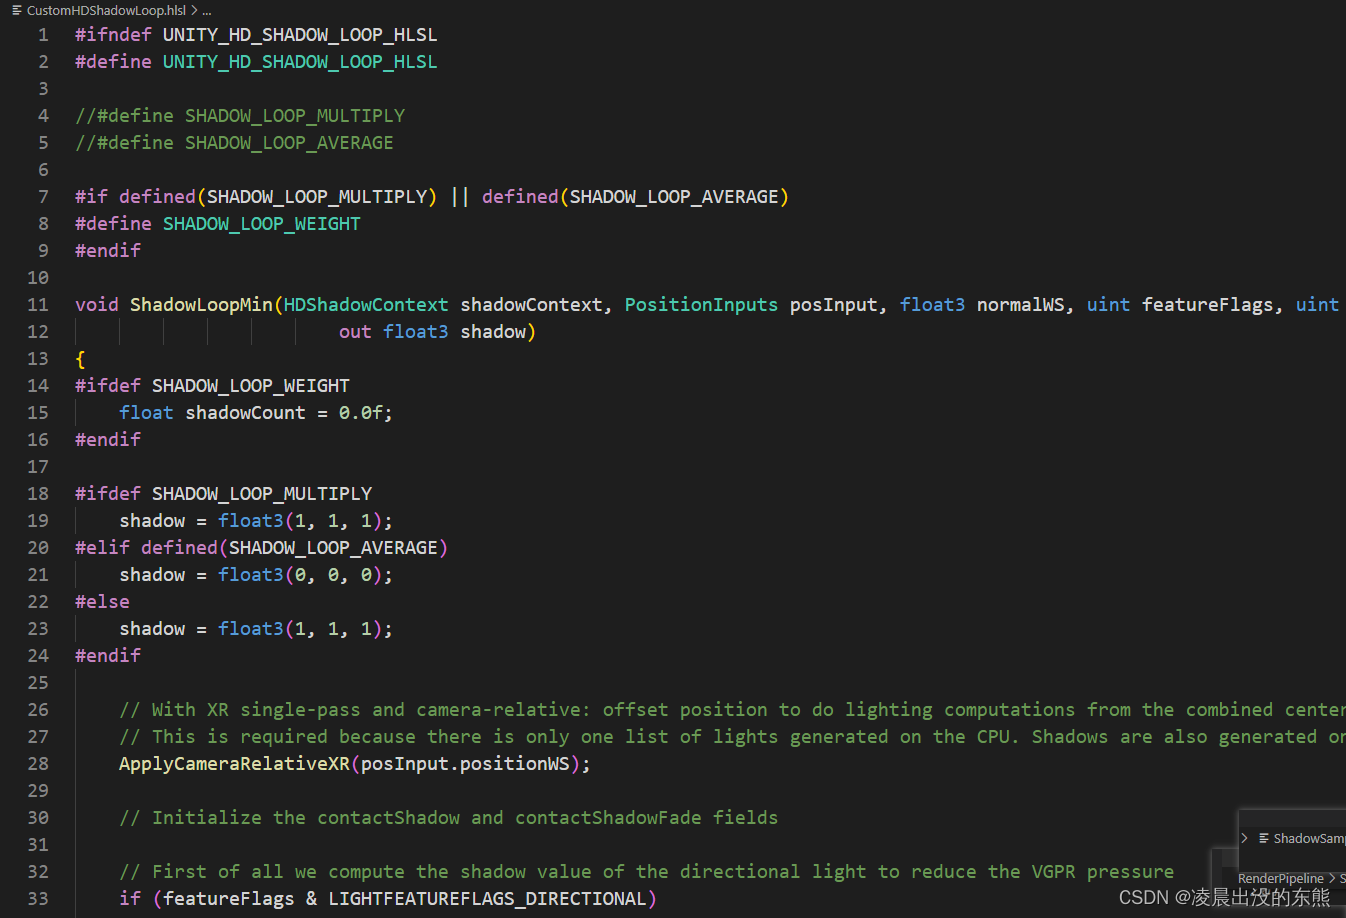
修改 CustomHDShadowLoop.hlsl
- 在文件最顶上,把 #define SHADOW_LOOP_AVERAGE , 去除注释

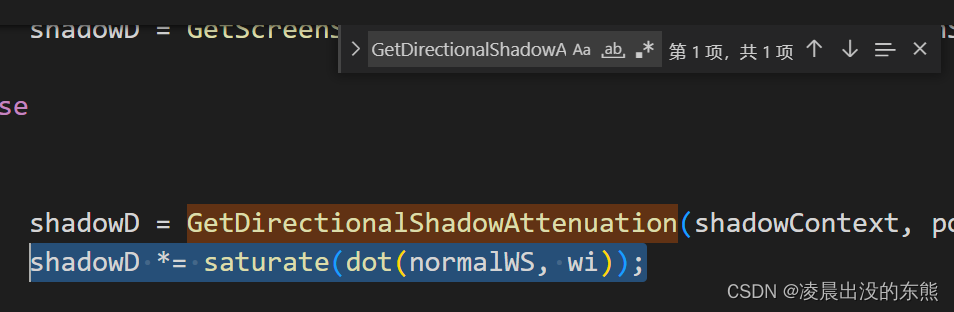
- 搜索 GetDirectionalShadowAttenuation,并添加代码
shadowD *= saturate(dot(normalWS, wi));- 1
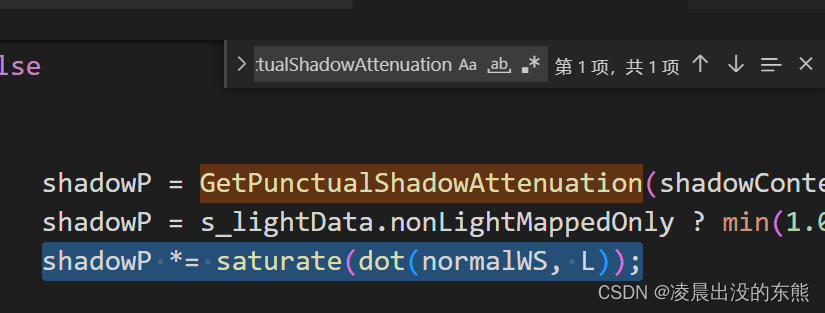
- 搜索 GetPunctualShadowAttenuation,并添加代码
shadowP *= saturate(dot(normalWS, L));- 1
- 最后回去你自己的着色器,修改一下头文件
#include "Packages/com.unity.render-pipelines.high-definition/Runtime/Material/NormalBuffer.hlsl" #define LIGHTLOOP_DISABLE_TILE_AND_CLUSTER #include "Packages/com.unity.render-pipelines.high-definition/Runtime/Lighting/PunctualLightCommon.hlsl" #include "Packages/com.unity.render-pipelines.high-definition/Runtime/Lighting/LightLoop/HDShadow.hlsl" #include "Packages/com.unity.render-pipelines.high-definition/Runtime/Lighting/LightLoop/LightLoopDef.hlsl" // 注释掉这行 // #include "Packages/com.unity.render-pipelines.high-definition/Runtime/Lighting/LightLoop/HDShadowLoop.hlsl" // 改成引用刚刚新建的文件 #include "CustomHDShadowLoop.hlsl"- 1
- 2
- 3
- 4
- 5
- 6
- 7
- 8
- 9
- 10
- 11
效果就出来了捏
参考
- SebLagarde-HDRP getting shadow attenuation-https://forum.unity.com/threads/hdrp-getting-shadow-attenuation.863620/
- Material\Lit\Lit.shader 中的 “Forward” Pass(毕竟自定义通道似乎都是向前渲染来着…)
抛砖引玉,恳请批评指正!
-
相关阅读:
redis 集群 底层原理以及实操
vs(visual stuiod)中vc++工程的Filter和Folder及vcxproj知识
Kerberos环境下 命令行连接kafka 和zk
Linux环境下不安装DM数据库,编译dmPython
一文搞懂Linux内核之内核线程
fiddler 监听不到接口怎么办
非技术人员也能快速实现Wordpress网页开发
Nacos的长轮询实践
SCAN BASIC --- PARTI basic and fault model
Blender中的4种视图着色模式
- 原文地址:https://blog.csdn.net/qq_15505341/article/details/126217597
