-
OSS文件上传
阿里云操作图解
1、注册登录阿里云
https://www.aliyun.com/
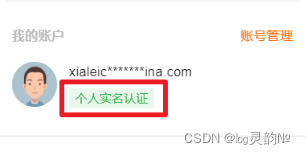
2、实名认证
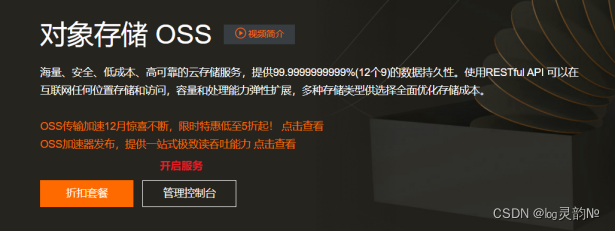
3、开启OSS服务

4、使用OSS
(1)进入控制台
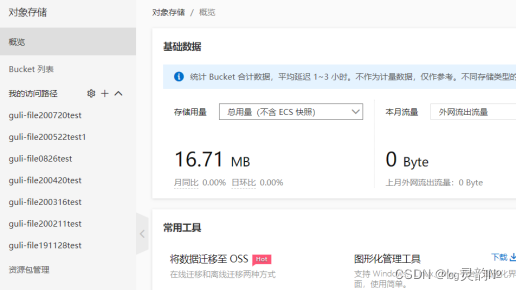
(2)创建根目录
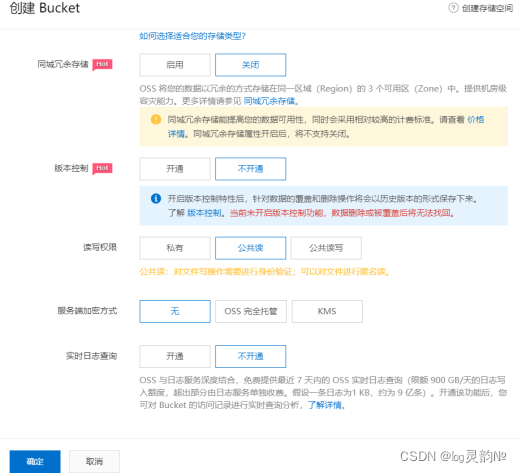
 创建bucket

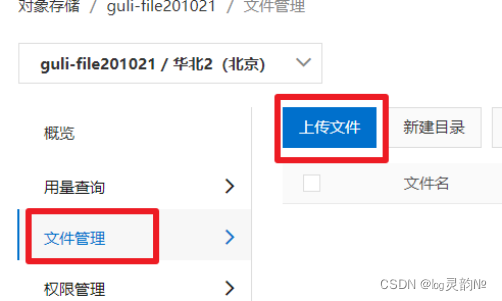
 (3)上传文件
阿里云OSS服务调用
1、如何对接


创建SpringBoot工程
自行创建好springBoot工程并引入相关启动类
引入相关依赖
<!-- 阿里云oss依赖 --> <dependency> <groupId>com.aliyun.oss</groupId> <artifactId>aliyun-sdk-oss</artifactId> </dependency> <!-- 日期工具栏依赖 --> <dependency> <groupId>joda-time</groupId> <artifactId>joda-time</artifactId> </dependency>- 1
- 2
- 3
- 4
- 5
- 6
- 7
- 8
- 9
- 10
- 11
写好application.properties配置文件

#服务端口 server.port=8002 #服务名 spring.application.name=service-oss #环境设置:dev、test、prod spring.profiles.active=dev #写自己的服务器地址参考如下 aliyun.oss.file.endpoint=oss-cn-shenzhen.aliyuncs.com aliyun.oss.file.keyid=写自己的 aliyun.oss.file.keysecret=写自己的 #bucket可以在控制台创建,也可以使用java代码创建 #写自己的创建的文件路径 参考如下 aliyun.oss.file.bucketname=guli-da-file2022- 1
- 2
- 3
- 4
- 5
- 6
- 7
- 8
- 9
- 10
- 11
- 12
- 13
- 14
- 15
创建配置类

import org.springframework.beans.factory.InitializingBean; import org.springframework.beans.factory.annotation.Value; import org.springframework.stereotype.Component; /** * @description: TODO * @author MIS * @date 2022/8/3 17:15 * @version 1.0 */ @Component public class ConstantPropertiesUtil implements InitializingBean { @Value("${aliyun.oss.file.endpoint}") private String endpoint; @Value("${aliyun.oss.file.keyid}") private String keyId; @Value("${aliyun.oss.file.keysecret}") private String keySecret; @Value("${aliyun.oss.file.bucketname}") private String bucketName; public static String END_POINT; public static String ACCESS_KEY_ID; public static String ACCESS_KEY_SECRET; public static String BUCKET_NAME; @Override public void afterPropertiesSet() throws Exception { END_POINT = endpoint; ACCESS_KEY_ID = keyId; ACCESS_KEY_SECRET = keySecret; BUCKET_NAME = bucketName; } }- 1
- 2
- 3
- 4
- 5
- 6
- 7
- 8
- 9
- 10
- 11
- 12
- 13
- 14
- 15
- 16
- 17
- 18
- 19
- 20
- 21
- 22
- 23
- 24
- 25
- 26
- 27
- 28
- 29
- 30
- 31
- 32
- 33
- 34
- 35
- 36
- 37
- 38
- 39
- 40
写好service层
import com.aliyun.oss.OSS; import com.aliyun.oss.OSSClientBuilder; import com.atguigu.baseservice.handler.GuliException; import com.atguigu.ossservice.service.FileService; import com.atguigu.ossservice.utils.ConstantPropertiesUtil; import org.joda.time.DateTime; import org.springframework.stereotype.Service; import org.springframework.web.multipart.MultipartFile; import java.io.IOException; import java.io.InputStream; import java.util.UUID; /** * @description: TODO * @author MIS * @date 2022/8/3 14:28 * @version 1.0 */ @Service public class FileServiceImp implements FileService { @Override public String uploadFileOss(MultipartFile file) { // yourEndpoint填写Bucket所在地域对应的Endpoint。以华东1(杭州)为例,Endpoint填写为https://oss-cn-hangzhou.aliyuncs.com。 String endpoint = ConstantPropertiesUtil.END_POINT; // 阿里云账号AccessKey拥有所有API的访问权限,风险很高。强烈建议您创建并使用RAM用户进行API访问或日常运维,请登录RAM控制台创建RAM用户。 String accessKeyId = ConstantPropertiesUtil.ACCESS_KEY_ID; String accessKeySecret = ConstantPropertiesUtil.ACCESS_KEY_SECRET; String bucketName = ConstantPropertiesUtil.BUCKET_NAME; String fileName = file.getOriginalFilename(); // 创建OSSClient实例。 OSS ossClient = new OSSClientBuilder().build(endpoint, accessKeyId, accessKeySecret); try { //上传文件流 InputStream inputStream = file.getInputStream(); //优化文件名不重复 fileName= UUID.randomUUID().toString()+fileName; //优化文件存储路径//优化文件存储路径(/2022/08/03/uuid+01.jpg) String path=new DateTime().toString("yyyy/MM/dd"); fileName=path+"/"+fileName; ossClient.putObject(bucketName, fileName, inputStream); // 关闭OSSClient。 ossClient.shutdown(); //https://guli-file201021.oss-cn-beijing.aliyuncs.com/01.jpg String url ="https://"+bucketName+"."+endpoint+"/"+fileName; return url; } catch (IOException e) { e.printStackTrace(); throw new GuliException(20001,"上传失败"); } } }- 1
- 2
- 3
- 4
- 5
- 6
- 7
- 8
- 9
- 10
- 11
- 12
- 13
- 14
- 15
- 16
- 17
- 18
- 19
- 20
- 21
- 22
- 23
- 24
- 25
- 26
- 27
- 28
- 29
- 30
- 31
- 32
- 33
- 34
- 35
- 36
- 37
- 38
- 39
- 40
- 41
- 42
- 43
- 44
- 45
- 46
- 47
- 48
- 49
- 50
- 51
- 52
- 53
- 54
- 55
- 56
- 57
- 58
写好Controllerceng
/** * @author MIS * @version 1.0 * @description: TODO * @date 2022/8/3 14:29 */ @Api(description = "文件管理") @RestController @RequestMapping("/eduoss/fileoss") @CrossOrigin public class FileController { @Autowired FileService fileService; @ApiOperation(value = "文件上传") @PostMapping("/uploadFile") public R uploadFile(MultipartFile file) { String url = fileService.uploadFileOss(file); return R.ok().data("url", url); } }- 1
- 2
- 3
- 4
- 5
- 6
- 7
- 8
- 9
- 10
- 11
- 12
- 13
- 14
- 15
- 16
- 17
- 18
- 19
- 20
- 21
- 22
- 23
- 24
调用

-
相关阅读:
CAD Exchanger SDK 3.23.0 for Linux Crack
ASP.NET电子购物商城系统(源代码+论文+开题报告+答辩PPT)
深入理解C#中委托的使用及不同类型委托的应用示例
机器视觉分析在加油站安全中的应用:使用手机检测、打电话行为识别
GO[一起来学习Go吧]
堆栈队列应用
2.可视化基础(上)
sentinel实现流控规则nacos持久化
【IDEA 使用easyAPI、easyYapi、Apifox helper等插件时,导出接口文档缺少代码字段注释的相关内容、校验规则的解决方法】
目标检测(8)—— YOLOV5代码调试及参数解析
- 原文地址:https://blog.csdn.net/daai5201314/article/details/126204079
