-
为你的项目搭建sentry并且通过企微推送
介绍
sentry是一个开源的监控系统,能支持服务端与客户端的监控,还有个强大的后台错误分析、报警平台。
本篇文章主要介绍 搭建sentry、使用sentry、接入企业微信推送 …更多学习案例尽在我的github
搭建sentry
这里推荐使用docker-compose来搭建。
github:https://github.com/getsentry/sentry1.安装docker
sudo yum -y install docker-io2.启动docker
service docker start3.安装Docker-compose:
curl -L https://github.com/docker/compose/releases/download/1.9.0/docker-compose-`uname -s`-`uname -m` > /usr/local/bin/docker-compose chmod +x /usr/local/bin/docker-compose- 1
- 2
4.克隆 git clone https://github.com/getsentry/onpremise.git 按照remind.md 一步步操作
如果执行过程中一切正常的话,在浏览器中输入http://ip:9000 就进入 Sentry 的登录页面了,使用上面创建的管理员用户名和密码登录系统。

使用sentry
搭建好之后,我们开始创建sentry项目并且把Sentry代码植入业务项目。
创建Sentry项目
搭建好sentry之后,直接登录。
选择创建项目(vue 或者 react):

vue项目代码植入
创建项目之后,以vue项目为例,可以在sentry网站看到以下代码。

我们将代码植入main.js。// main.js import Vue from "vue"; import Router from "vue-router"; import * as Sentry from "@sentry/vue"; import { BrowserTracing } from "@sentry/tracing"; Vue.use(Router); const router = new Router({ // ... }); Sentry.init({ Vue, dsn: "http://3d603aa24cf64cafbe930a4ba21369f0@172.18.254.211:9000/3", integrations: [ new BrowserTracing({ routingInstrumentation: Sentry.vueRouterInstrumentation(router), tracingOrigins: ["localhost", "my-site-url.com", /^\//], }), ], // Set tracesSampleRate to 1.0 to capture 100% // of transactions for performance monitoring. // We recommend adjusting this value in production tracesSampleRate: 1.0, }); // ... new Vue({ router, render: h => h(App), }).$mount("#app");- 1
- 2
- 3
- 4
- 5
- 6
- 7
- 8
- 9
- 10
- 11
- 12
- 13
- 14
- 15
- 16
- 17
- 18
- 19
- 20
- 21
- 22
- 23
- 24
- 25
- 26
- 27
- 28
- 29
- 30
- 31
- 32
- 33
- 34
利用webpack上传sourcemap
在webpack.config.js增加SentryWebpackPlugin的插件配置
const SentryWebpackPlugin = require("@sentry/webpack-plugin"); module.exports = { // other configuration configureWebpack: { plugins: [ new SentryWebpackPlugin({ include: ".", ignore: ["node_modules", "webpack.config.js"], configFile: ".sentryclirc", }), ], }, };- 1
- 2
- 3
- 4
- 5
- 6
- 7
- 8
- 9
- 10
- 11
- 12
- 13
- 14
include, ignoreFile, ignore, configFile 是官方文档demo上的属性,
其中只有include是必填项,其他都是可选。
include:指定路径让sentry-cli来检测有没有.map与.js文件,如果有就会上传到sentry。
需要关注的可选的属性:
ignore: 忽略文件夹或文件不要被检测。 一般都会将node_moudules与webpack.config.js忽略掉。
configFile: “.sentryclirc”, 配置文件
.sentryclirc 是放在根目录的
.sentryclirc 配置:[auth] token = 8a8991288dd541b59659d5a218cba9ed95c7787a7dae42a0ada73c219bca5a3d // Settings - Account - API - Auth Tokens [defaults] url = https://sentry.**t.cn/ // 搭建的sentry地址 org = sentry // Organization Settings project = 91xft-zhengliuji-admin // 创建的项目名称- 1
- 2
- 3
- 4
- 5
- 6
- 7
上传成功后 可以在sentry后台看到:

没有上传sourcemap的报错信息展示如下 (看不到具体内容,因为是压缩混淆文件):
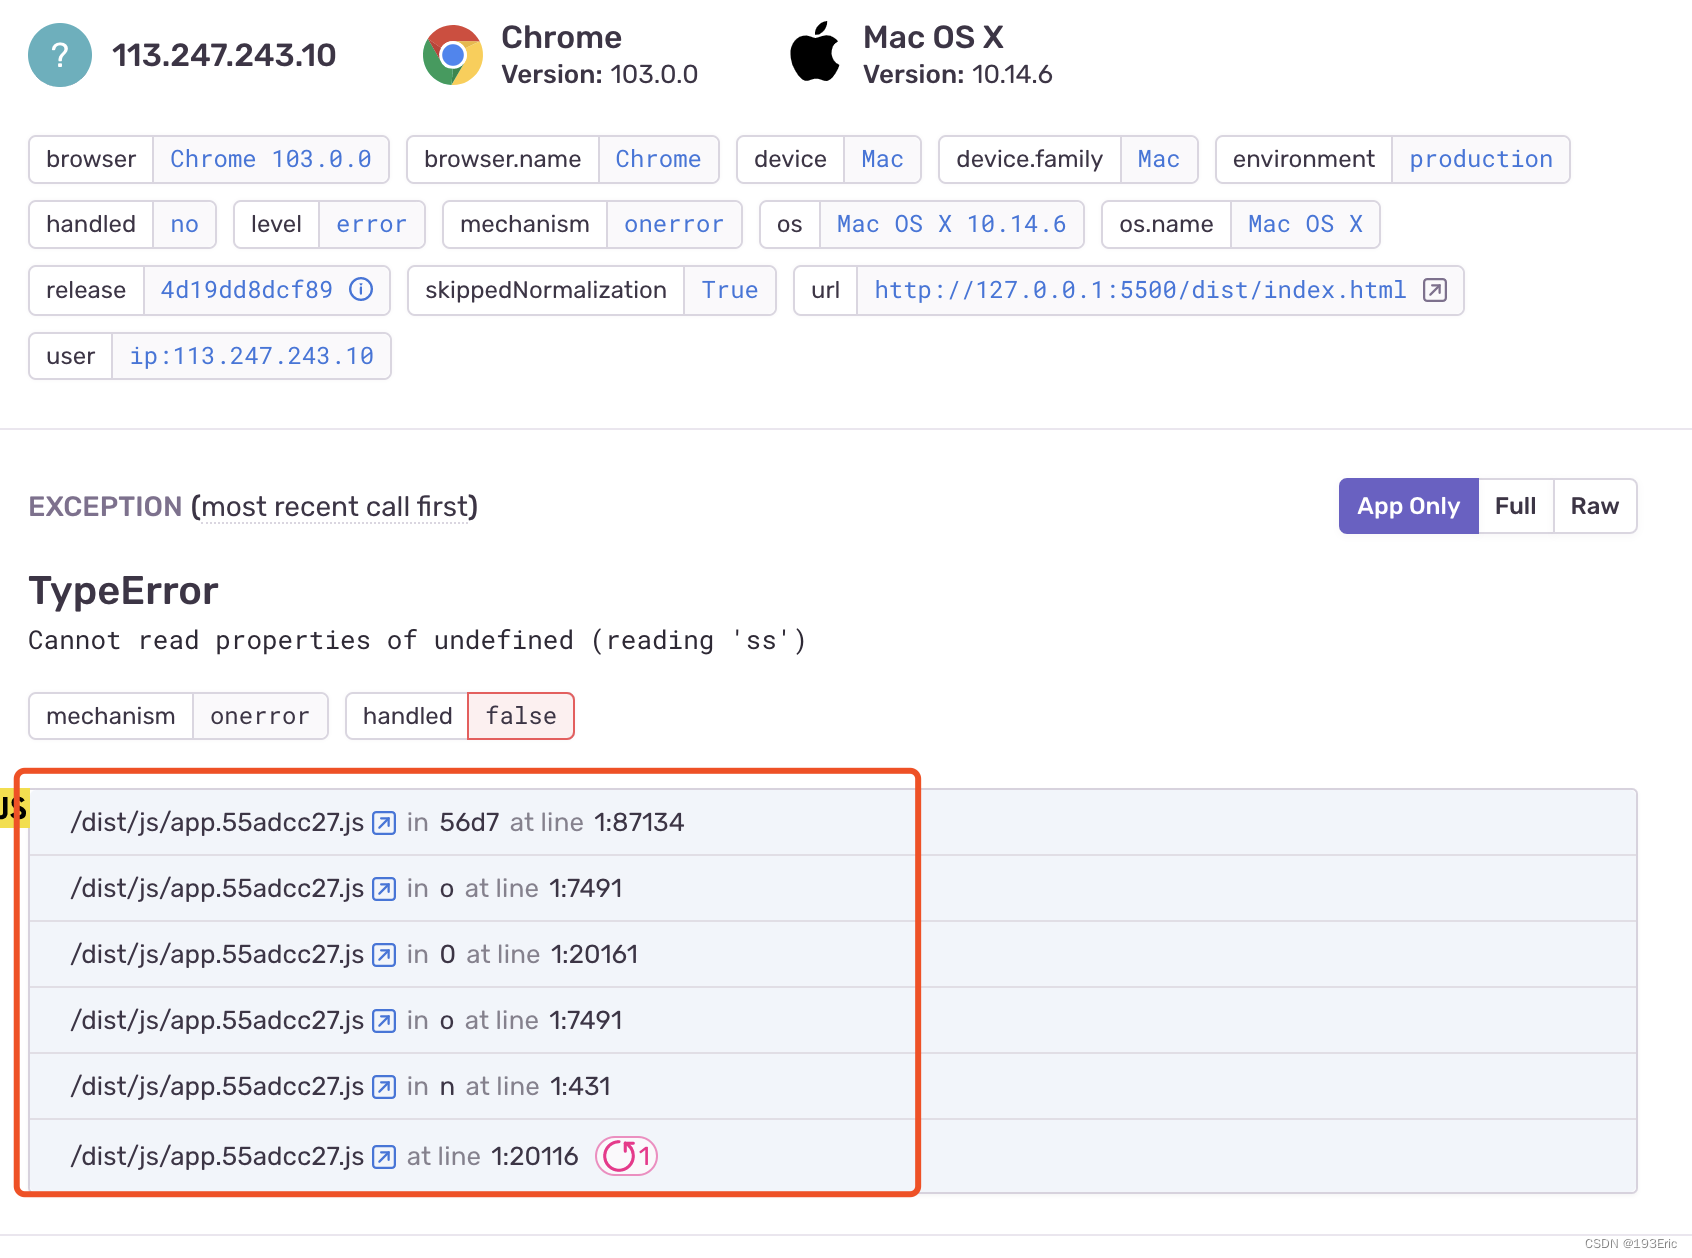
上传sourcemap的报错信息展示如下(能看到具体报错信息):

sentry && 企业微信应用做推送
一、开通机器人权限
先找公司行政部门开通企业微信机器人权限。开通相关权限后,会发现此时就可以往公司企业微信群里添加相关机器人,如下图所示:
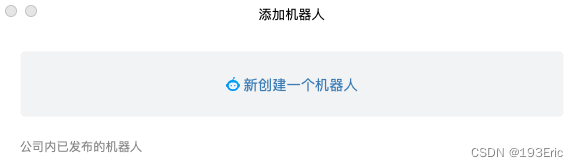
创建一个机器人,叫日志监控机器人,专门用来进行 Sentry 的错误告警上报,如下图所示。

进入Sentry服务器,找到相应项目,并点击设置按钮。

将刚才生成的企业微信机器人的 Webhook 复制到 Sentry 服务器的相应项目中,点击保存,至此大功告成,是不是很激动!!!

点击测试插件按钮,发现企业微信机器人并没有收到相关日志提醒,咦,这是怎么回事,难道是复制的姿势不对?
造成这一问题的主要原因是 Sentry 调用 webhook 发送的数据报文格式和企业微信机器人要求的数据报文格式不一致造成的,如下所示:
企业微信机器人要求的数据报文格式:
{ "msgtype": "text", "text": { "content": "广州今日天气:29度,大部分多云,降雨概率:60%", "mentioned_list":["wangqing","@all"], "mentioned_mobile_list":["13800001111","@all"] } }- 1
- 2
- 3
- 4
- 5
- 6
- 7
- 8
Sentry发送的数据报文格式:
{ id: '7', project: 'ii-admin-pro', project_name: 'ii-admin-pro', project_slug: 'ii-admin-pro', logger: null, level: 'error', culprit: 'raven.scripts.runner in main', message: 'This is an example Python exception', url: 'http://sentry.xxxxxxx.com/organizations/sentry/issues/7/?referrer=webhooks_plugin', triggering_rules: [], event: { event_id: 'f602ac321ee04bc28a20c9f4d446ef48', level: 'error', version: '5', type: 'default', logentry: { formatted: 'This is an example Python exception', message: null, params: null }, logger: '', modules: { 'my.package': '1.0.0' }, platform: 'python', timestamp: 1622734089.769465, received: 1622734089.7702, environment: 'prod', user: { id: '1', email: 'sentry@example.com', ip_address: '127.0.0.1', username: 'sentry', name: 'Sentry', geo: [Object] }, request: { url: 'http://example.com/foo', method: 'GET', data: [Object], query_string: [Array], cookies: [Array], headers: [Array], env: [Object], inferred_content_type: 'application/json', fragment: null }, ... } }- 1
- 2
- 3
- 4
- 5
- 6
- 7
- 8
- 9
- 10
- 11
- 12
- 13
- 14
- 15
- 16
- 17
- 18
- 19
- 20
- 21
- 22
- 23
- 24
- 25
- 26
- 27
- 28
- 29
- 30
- 31
- 32
- 33
- 34
- 35
- 36
- 37
- 38
- 39
- 40
- 41
- 42
- 43
- 44
- 45
- 46
- 47
- 48
- 49
针对数据报文格式不一致的问题,此时就需要搭建一个 Node 服务,将 Sentry 的数据报文做下转换,并按照企业微信机器人的数据报文格式进行发送。
二、搭建 Node 服务
笔者基于 egg.js 快速搭建了一个 Node 服务,路由配置如下:

在 app/controller/robot/sentry.js 文件中创建 SentryController,用来负责数据报文的转换,代码所示:
'use strict'; const Controller = require('egg').Controller; const request = require('../../utils/request'); const { SENTRY_HOOKS } = require('../../utils/const'); const { fmtDateTime, genProjectOwners } = require('../../utils/utils'); class SentryController extends Controller { /** * 接收Sentry发送过来的Webhook */ async recvSentryWebhook() { const { params, request: { body }, } = this.ctx; const ROBOT_DATA = { msgtype: 'markdown', markdown: { content: `!!!前端项目${body.project_name}发生错误: > 错误原因: ${body.culprit} > 错误时间: ${fmtDateTime()} > 错误级别: ${body.level} > 错误链接: [查看日志](${body.url}) \n 请以下同事注意:${genProjectOwners(SENTRY_HOOKS[params.name].owners)}`, }, }; const result = await request({ url: SENTRY_HOOKS[params.name].sentry_hook, method: 'POST', headers: { 'content-type': 'application/json', }, data: JSON.stringify(ROBOT_DATA), }); this.ctx.body = { code: '0', data: result, msg: '提醒成功', }; } } module.exports = SentryController;- 1
- 2
- 3
- 4
- 5
- 6
- 7
- 8
- 9
- 10
- 11
- 12
- 13
- 14
- 15
- 16
- 17
- 18
- 19
- 20
- 21
- 22
- 23
- 24
- 25
- 26
- 27
- 28
- 29
- 30
- 31
- 32
- 33
- 34
- 35
- 36
- 37
- 38
- 39
- 40
- 41
- 42
- 43
- 44
- 45
- 46
- 47
- 48
utils/utils.js文件
/** * 对当前时间进行格式化 */ const fmtDateTime = () => { let date = new Date(); let year = date.getFullYear(); let month = date.getMonth() + 1; let hour = date.getHours(); let min = date.getMinutes(); month = month < 10 ? `0${month}` : month; hour = hour < 10 ? `0${hour}` : hour; min = min < 10 ? `0${min}` : min; return `${year}-${month}-${date.getDate()} ${hour}:${min}`; }; /** * 生成项目负责人 */ const genProjectOwners = (owners) => { return owners.map((item) => `<@${item}> `).join(''); }; module.exports = { fmtDateTime, genProjectOwners, };- 1
- 2
- 3
- 4
- 5
- 6
- 7
- 8
- 9
- 10
- 11
- 12
- 13
- 14
- 15
- 16
- 17
- 18
- 19
- 20
- 21
- 22
- 23
- 24
- 25
- 26
- 27
- 28
- 29
utils/const.js
主要用来存储配置常量,后续有新的项目,只需往常量文件中添加新的项目配置即可
其中:- owners 存放的是企业微信用户的 userid,userid 即企业邮箱的前缀,举例:xiaoli@xxxx.com,userid 则是 xiaoli;
代码编写完后,接下来就是将项目部署上线了,笔者采用的是 pm2 来管理线上 Node 服务,运行pm2 deploy ecosystem.yaml production,将本地代码同步到线上,并重启 Node 服务(关于项目部署,不是本文重点,此处略过)。
将线上接口地址复制到 Sentry 服务器相应的 Webhooks 地址中,保存后点击测试插件按钮,测试日志监控机器人是否生效,如下所示:

这时,企业微信群成功收到 Sentry 发送过来的日志提醒,如下所示:
至此,大功告成!注意事项:
开发过程中如果你的 Sentry 服务是部署在线上,不在本地局域网内,那么你本地在进行 Node 服务调试时是收不到 Sentry 发送的日志告警的,此时需要做内网穿透或者将你的node服务搭到线上,关于这一点要注意下!!!本人在这一问题曾卡壳一两天。
-
相关阅读:
LeetCode刷题--思路总结记录
链表【数据结构与算法Java】
C语言学习笔记(十六)
别人做跨境电商都月入过万了,真这么好做吗?
【校招VIP】 java开源框架之mq
Ansible运行临时命令及常用模块介绍
算法与数据结构(第三周)——数据结构基础:动态数组
P 算法与 K 算法
YOLOv8改进 | SPPF | 双通道特征处理的池化结构——SPPFCSPC【全网独家】
特种劳动防护用品安全标志证书
- 原文地址:https://blog.csdn.net/qq_24073885/article/details/126161122
