-
「Python入门」python操作MySQL和SqlServer
活动地址:CSDN21天学习挑战赛
前言
pymysql模块模块说明:是一个Python编写的MySQL驱动程序,让我们可以用Python语言操作MySQL数据库。

一、安装第三方模块
pip install pymysql // 安装pymysql pip install pymssql // 安装pymssql- 1
- 2

二、pymysql模块使用说明
2.1 mysql数据库及环境准备
注:很多同学卡在这个环节不知道怎么下一步,在进行mysql数据库连接,如果已掌握的同学请直接跳过进入下一步2.3流程,如果未掌握的同学可以通过phpstudy本地一键部署,相对比较容易入手。phpstudy小皮面板安装包→传送门。2.1.1 官网下载集成环境
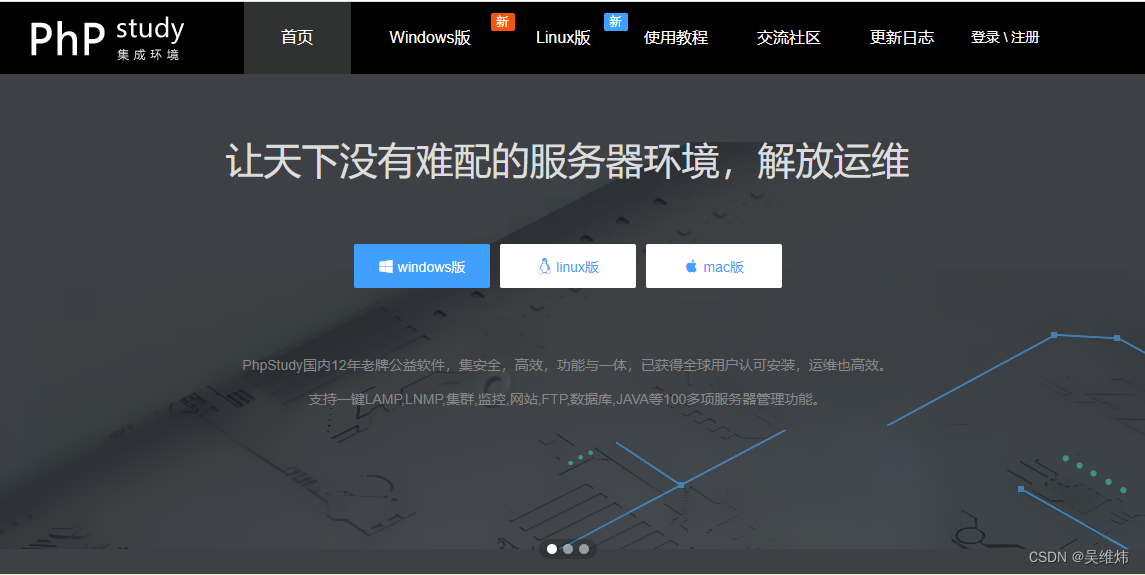
2.1.2 面版配置
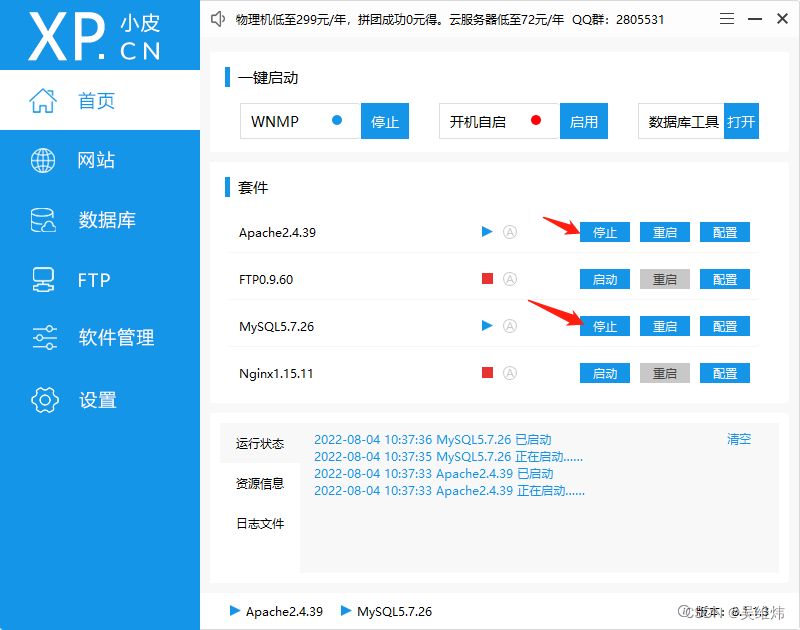
2.1.3 进入mysql管理工具
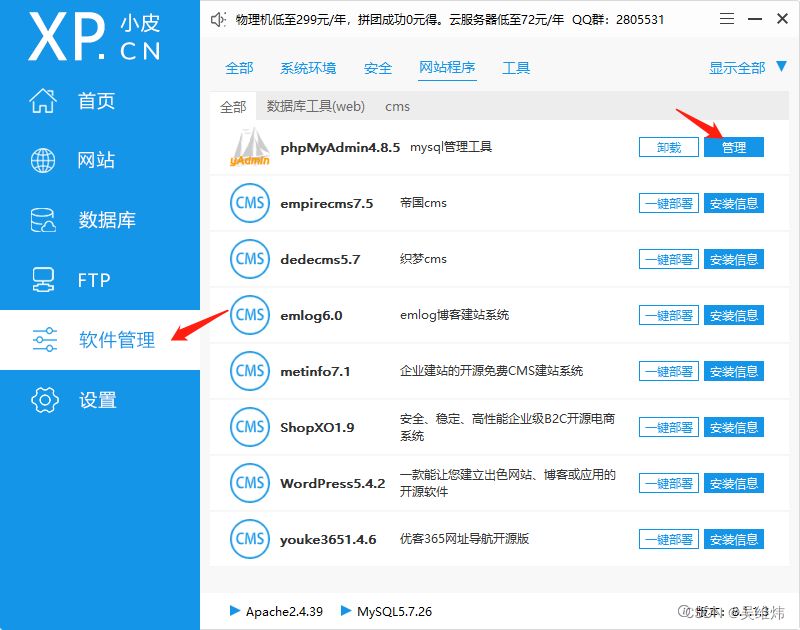
2.1.4 输入数据库账号密码
初始化账号 root
初始化密码 root
建议修改root密码并新增用户角色管理对应的数据库演示环境账号root,密码root,数据库命名beautydb,表命名userinfo,数据字段1(userName:小王子,password:123)数据字段2(userName:Anna,password:123)。

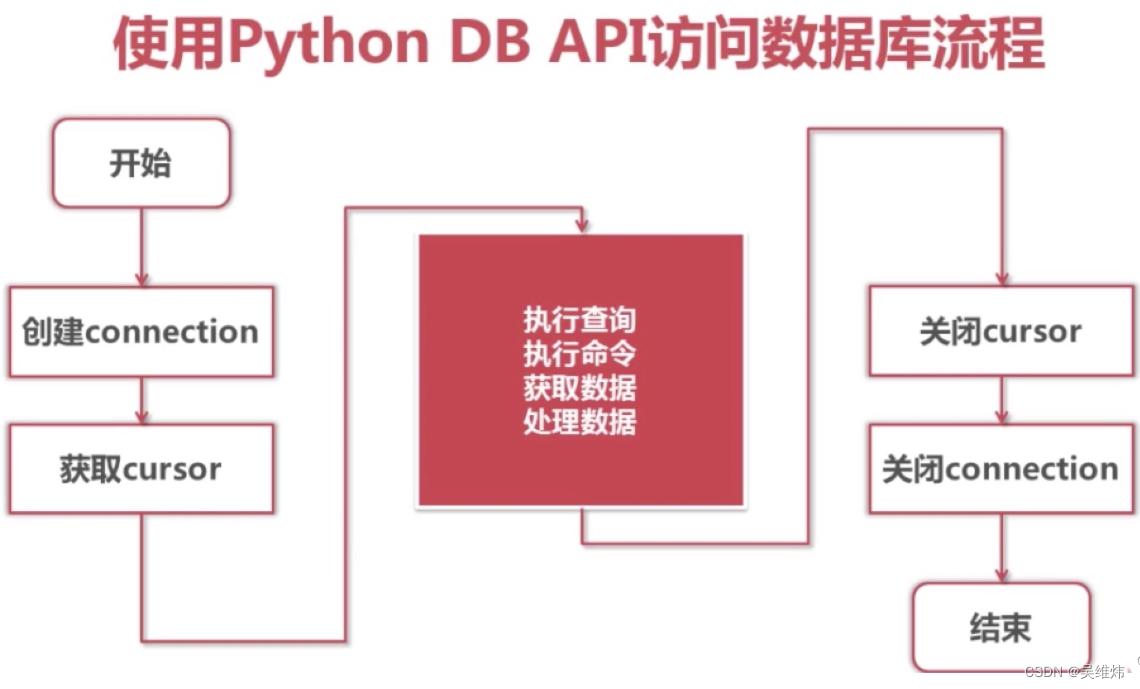
2.2 pymysql操作流程逻辑视图
2.3 pymysql的使用
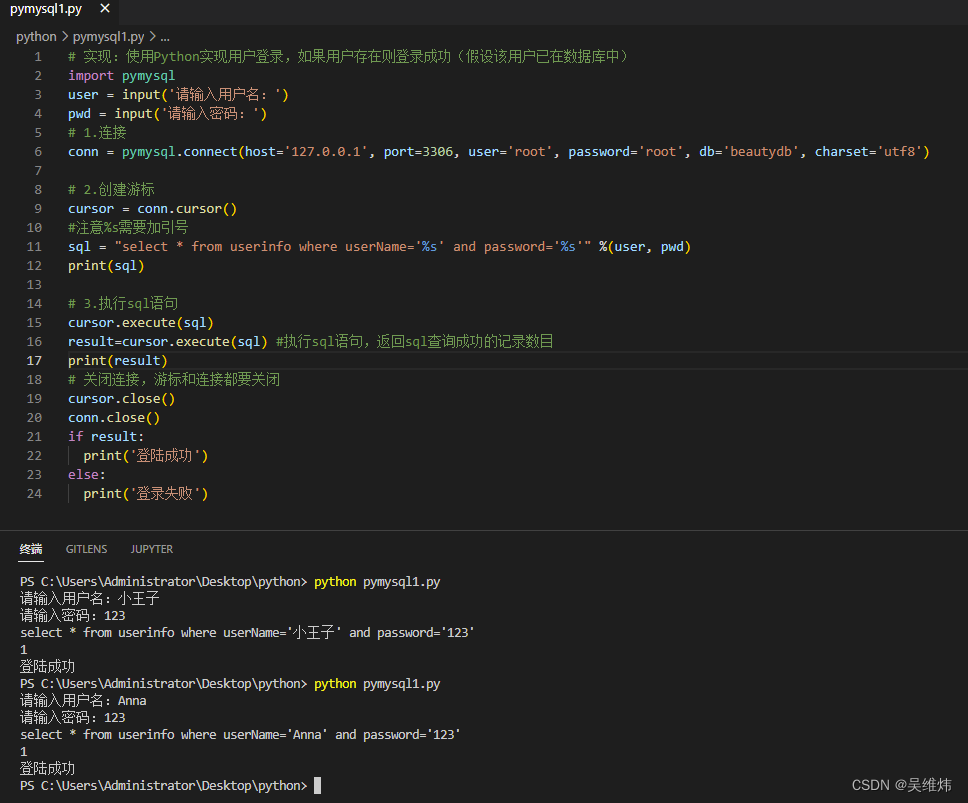
2.3.1 使用Python实现用户登录
# 实现:使用Python实现用户登录,如果用户存在则登录成功(该用户已在数据库中) import pymysql # 导入pymysql模块 user = input('请输入用户名:') pwd = input('请输入密码:') # 1.连接 # host:连接的mysql主机,如果本机是’localhost’ # port:连接的mysql主机的端口,默认是3306 # database:数据库的名称 # user:连接的用户名 # password:连接的密码 # charset:通信采用的编码方式,推荐使用utf8 conn = pymysql.connect(host='127.0.0.1', port=3306, user='root', password='root', db='beautydb', charset='utf8') # 2.创建游标 # 创建获取游标对象的目的就是要执行sql语句,完成对数据库的增、删、改、查操作的代码 cursor = conn.cursor() #注意%s需要加引号 sql = "select * from userinfo where userName='%s' and password='%s'" %(user, pwd) print(sql) # 3.执行sql语句 cursor.execute(sql) result=cursor.execute(sql) #执行sql语句,返回sql查询成功的记录数目 print(result) cursor.close() # 关闭连接,游标和连接都要关闭 # conn.close():关闭连接 # conn.commit():提交数据 # conn.rollback():撤销数据 conn.close() if result: print('登陆成功') else: print('登录失败')- 1
- 2
- 3
- 4
- 5
- 6
- 7
- 8
- 9
- 10
- 11
- 12
- 13
- 14
- 15
- 16
- 17
- 18
- 19
- 20
- 21
- 22
- 23
- 24
- 25
- 26
- 27
- 28
- 29
- 30
- 31
- 32
- 33
- 34
- 35
2.3.2 pymysql的使用抛异常
异常情况: 连接超时
conect_timeout、由于计算机积极拒绝,无法连接
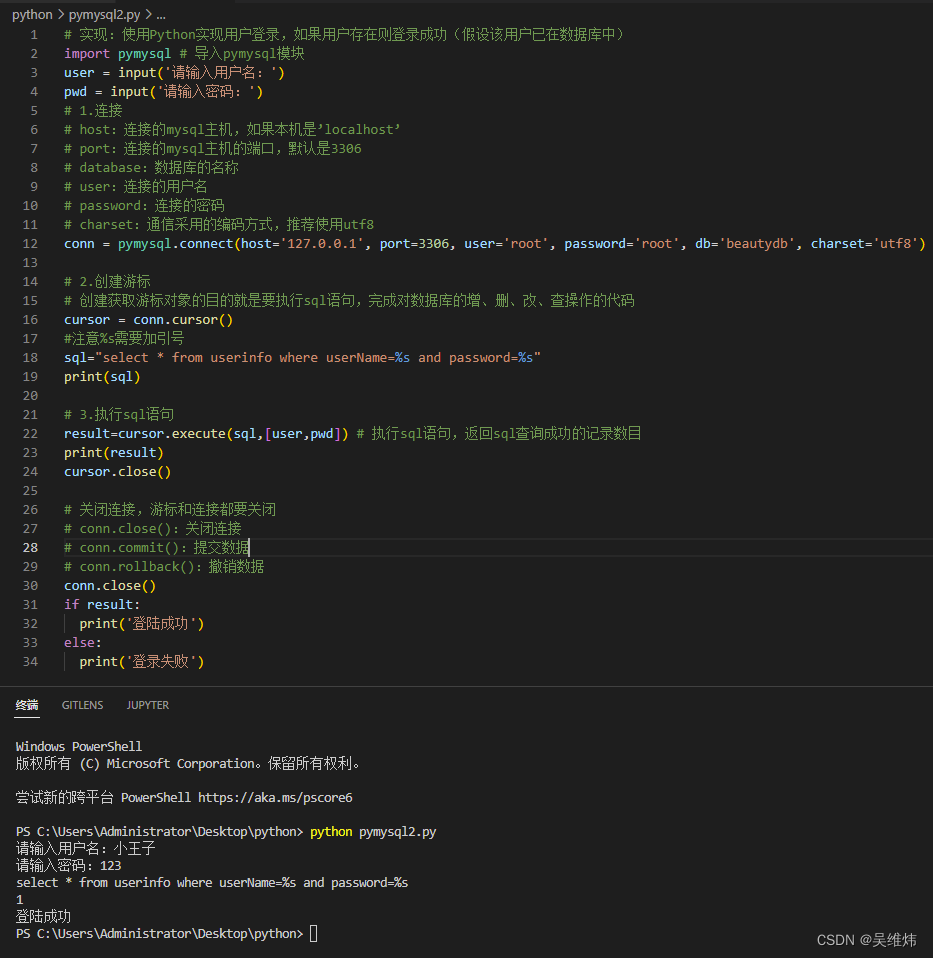
处理方案: 如果你遇到这个情况,标识你mysql数据库未安装或未启动服务。可以参照步骤2.1学习一下2.4 execute()之sql注入
- sql注入之:用户存在,绕过密码
xxx’ – 任意字符 - sql注入之:用户不存在,绕过用户与密码
xxx’ or 1=1 – 任意字符
# 原来是我们对sql进行字符串拼接 sql = "select * from userinfo where userName='%s' and password='%s'" %(user, pwd) print(sql) result=cursor.execute(sql) # 改写为(execute帮我们做字符串拼接,我们无需且一定不能再为%s加引号了) # !!!注意%s需要去掉引号,因为pymysql会自动为我们加上 sql="select * from userinfo where userName=%s and password=%s" # pymysql模块自动帮我们解决sql注入的问题,只要我们按照pymysql的规矩来。 result=cursor.execute(sql,[user,pwd])- 1
- 2
- 3
- 4
- 5
- 6
- 7
- 8
- 9
- 10
完整案例:
# 实现:使用Python实现用户登录,如果用户存在则登录成功(假设该用户已在数据库中) import pymysql # 导入pymysql模块 user = input('请输入用户名:') pwd = input('请输入密码:') # 1.连接 # host:连接的mysql主机,如果本机是’localhost’ # port:连接的mysql主机的端口,默认是3306 # database:数据库的名称 # user:连接的用户名 # password:连接的密码 # charset:通信采用的编码方式,推荐使用utf8 conn = pymysql.connect(host='127.0.0.1', port=3306, user='root', password='root', db='beautydb', charset='utf8') # 2.创建游标 # 创建获取游标对象的目的就是要执行sql语句,完成对数据库的增、删、改、查操作的代码 cursor = conn.cursor() #注意%s需要加引号 sql="select * from userinfo where userName=%s and password=%s" print(sql) # 3.执行sql语句 result=cursor.execute(sql,[user,pwd]) # 执行sql语句,返回sql查询成功的记录数目 print(result) cursor.close() # 关闭连接,游标和连接都要关闭 # conn.close():关闭连接 # conn.commit():提交数据 # conn.rollback():撤销数据 conn.close() if result: print('登陆成功') else: print('登录失败')- 1
- 2
- 3
- 4
- 5
- 6
- 7
- 8
- 9
- 10
- 11
- 12
- 13
- 14
- 15
- 16
- 17
- 18
- 19
- 20
- 21
- 22
- 23
- 24
- 25
- 26
- 27
- 28
- 29
- 30
- 31
- 32
- 33
- 34
2.5 增、删、改:conn.commit()
# 增、删、改:conn.commit() # commit()方法:在数据库里增、删、改的时候,必须要进行提交,否则插入的数据不生效。 import pymysql # 导入pymysql模块 user = input('请输入用户名:') pwd = input('请输入密码:') # user2 = input('请输入用户名2:') # pwd2 = input('请输入密码2:') # 1.连接 # host:连接的mysql主机,如果本机是’localhost’ # port:连接的mysql主机的端口,默认是3306 # database:数据库的名称 # user:连接的用户名 # password:连接的密码 # charset:通信采用的编码方式,推荐使用utf8 conn = pymysql.connect(host='127.0.0.1', port=3306, user='root', password='root', db='beautydb', charset='utf8') # 2.创建游标 cursor = conn.cursor() # 操作 # 增 # sql = "insert into user(username,password) values (%s,%s)" # result=cursor.execute(sql,[user,pwd]) # 执行sql语句 #同时插入多条数据 # sql = "insert into user(username,password) values (%s,%s)" # result=cursor.executemany(sql,[(user,pwd),(user2,pwd2)]) # print(result) # 改 # sql = "update user set username = %s where uid = %s" # print(sql) # result = cursor.execute(sql,[user,pwd]) # print(result) # 删 # sql = "delete from user where uid = %s" # print(sql) # result = cursor.execute(sql,[user]) # print(result) #一定记得commit conn.commit() # try: # cursor.execute(sql) # 执行sql语句 # conn.commit() # 增删改都必须提交数据 # except: # conn.rollback() # 如果报错就对修改的数据进行撤销,表示数据回滚 # 4.关闭游标 cursor.close() # 5.关闭连接 conn.close()- 1
- 2
- 3
- 4
- 5
- 6
- 7
- 8
- 9
- 10
- 11
- 12
- 13
- 14
- 15
- 16
- 17
- 18
- 19
- 20
- 21
- 22
- 23
- 24
- 25
- 26
- 27
- 28
- 29
- 30
- 31
- 32
- 33
- 34
- 35
- 36
- 37
- 38
- 39
- 40
- 41
- 42
- 43
- 44
- 45
- 46
- 47
- 48
- 49
- 50
- 51
- 52
2.6 查:fetchone、fetchmany、fetchall
# fetchone() 获取下一行数据,第一次为首行; # 查询第一行的数据 result= cursor.fetchone() print(result) # 查询第二行数据 result = cursor.fetchone() print(result) # fetchall()获取所有行数据源 result = cursor.fetchall() print(result) # fetchmany(n) 获取第n行数据 result = cursor.fetchmany(2) # 获取第2行数据 print(result)- 1
- 2
- 3
- 4
- 5
- 6
- 7
- 8
- 9
- 10
- 11
- 12
- 13
- 14
- 15
三、pymssql模块使用说明
pymssql模块 与pymyql模块的区别在于:- 导包:
import pymssql - 创建连接对象:
conn = pymssql.connect()
其他语法与pymyql一模一样就不过多冗余讲解了。
-
相关阅读:
数据结构题目收录(二十)
4-3端口服务版本和操作系统版本
散列表(哈希表)知识详解
37、Docker 安装 RabbitMQ
直播出海 | 国内直播间再出爆品,「外卷」全球如何致胜
cmd/bat 输出符,控制台日志输出到文件
云LDAP的成本
GraphPad Prism 10 for Mac(统计分析绘图软件)
UE4游戏客户端开发进阶学习指南
Dubbo链路追踪——生成全局ID(traceId)
- 原文地址:https://blog.csdn.net/qq_38209578/article/details/126171178
