-
【Spring】Spring中更简单的存储和读取Bean手术刀剖析
文章目录

前言
上一篇文章介绍了Spring的创建和使用,相对与servlet这个技术来说,Spring可谓是一个很大的进步,它摈弃了servlet繁琐的步骤,而是更加直接地进行存储和读取对象。虽说如此,但是对于上一篇博客介绍的Spring的创建和使用,对于我们使用者来说,还是比较繁琐,因此,Spring再一次进化,直接用注解来搞定这一切,那么具体是如何操作呢?这正是本文接下来的重点——在Spring中,如何更简单的存储和读取Bean。
1.为什么需要进化?
回顾我们之前存储Bean对象时候的操作,我们需要在我们创建的 .xml 文件上添加一行 bean的注册内容,如下图:

使用这种方式来进行Bean对象的存储会存储以下问题:- 我们需要手动添加 bean 对象到配置文件中。
- 如果是配置文件中出现了问题,不好调试。因为配置文件出了问题之后,它不会抛出异常,因此我们很难发现错误。
基于上面原因,我们才需要更加方便、简单的方式进行处理。也就是采用注解的方式。
2.存储Bean对象
注意:想要将对象成功的存储到 Spring 中,我们需要配置下存储对象的扫描包路径,只有被配置的包下的所有类,并且添加了注解才能被正确的识别并保存到 Spring 中。这里的“注解”实际上是一个说明,只有使用了它,你才能顺利的存储Bean对象,就像动漫中的人物使用技能前都要大喊技能的名字一样。
下面,我将通过图文的形式进行演示和讲述。
2.1.创建Maven项目
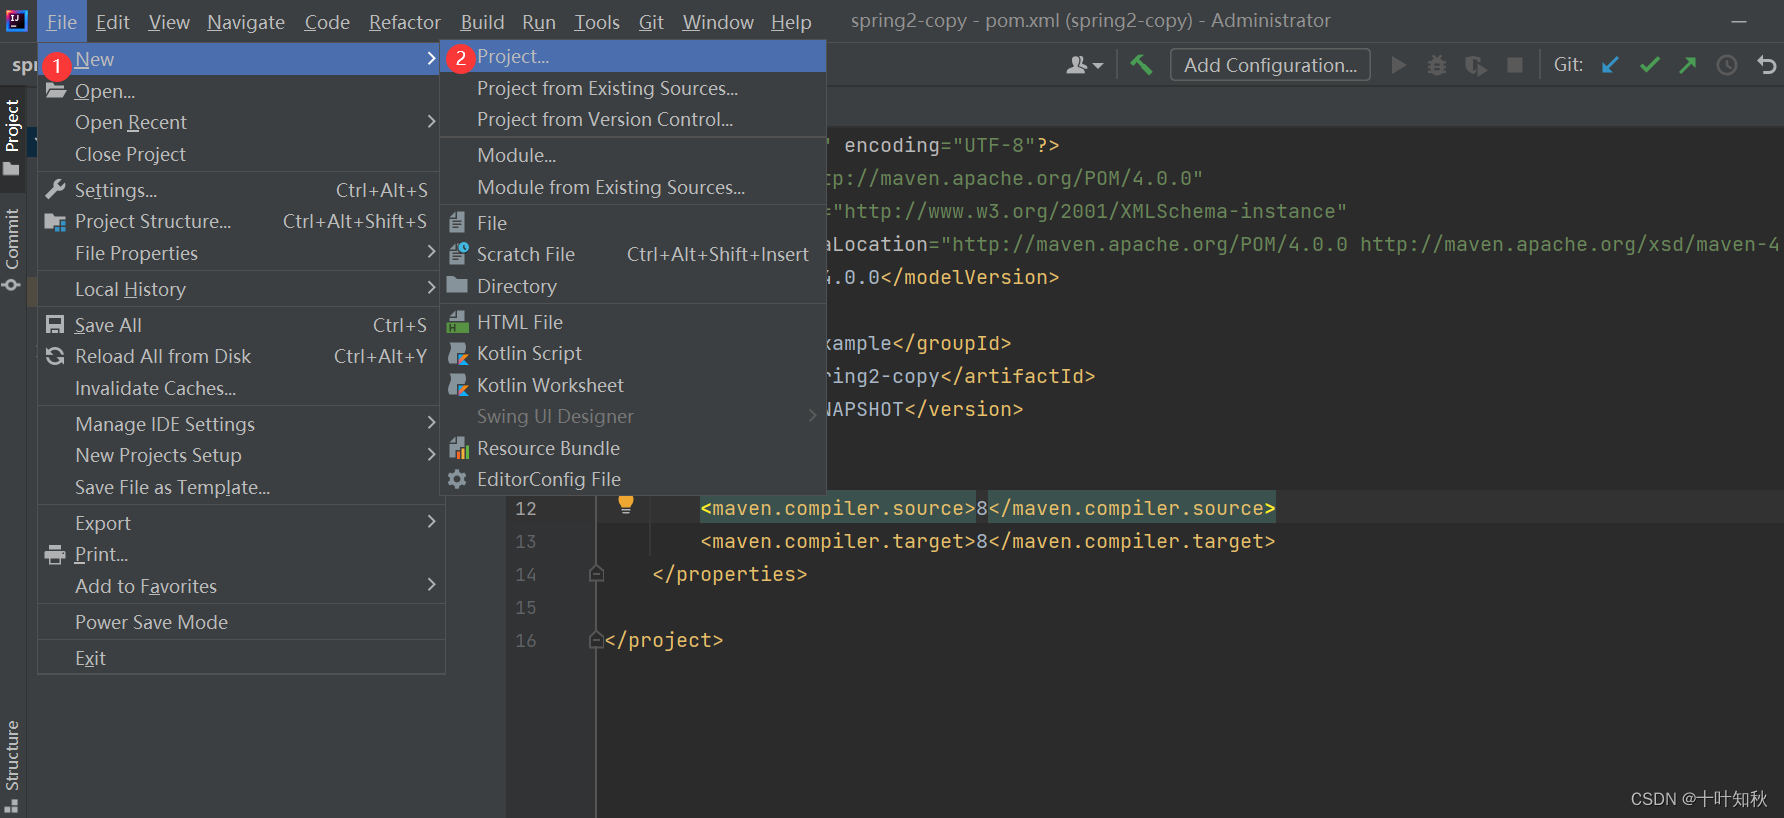
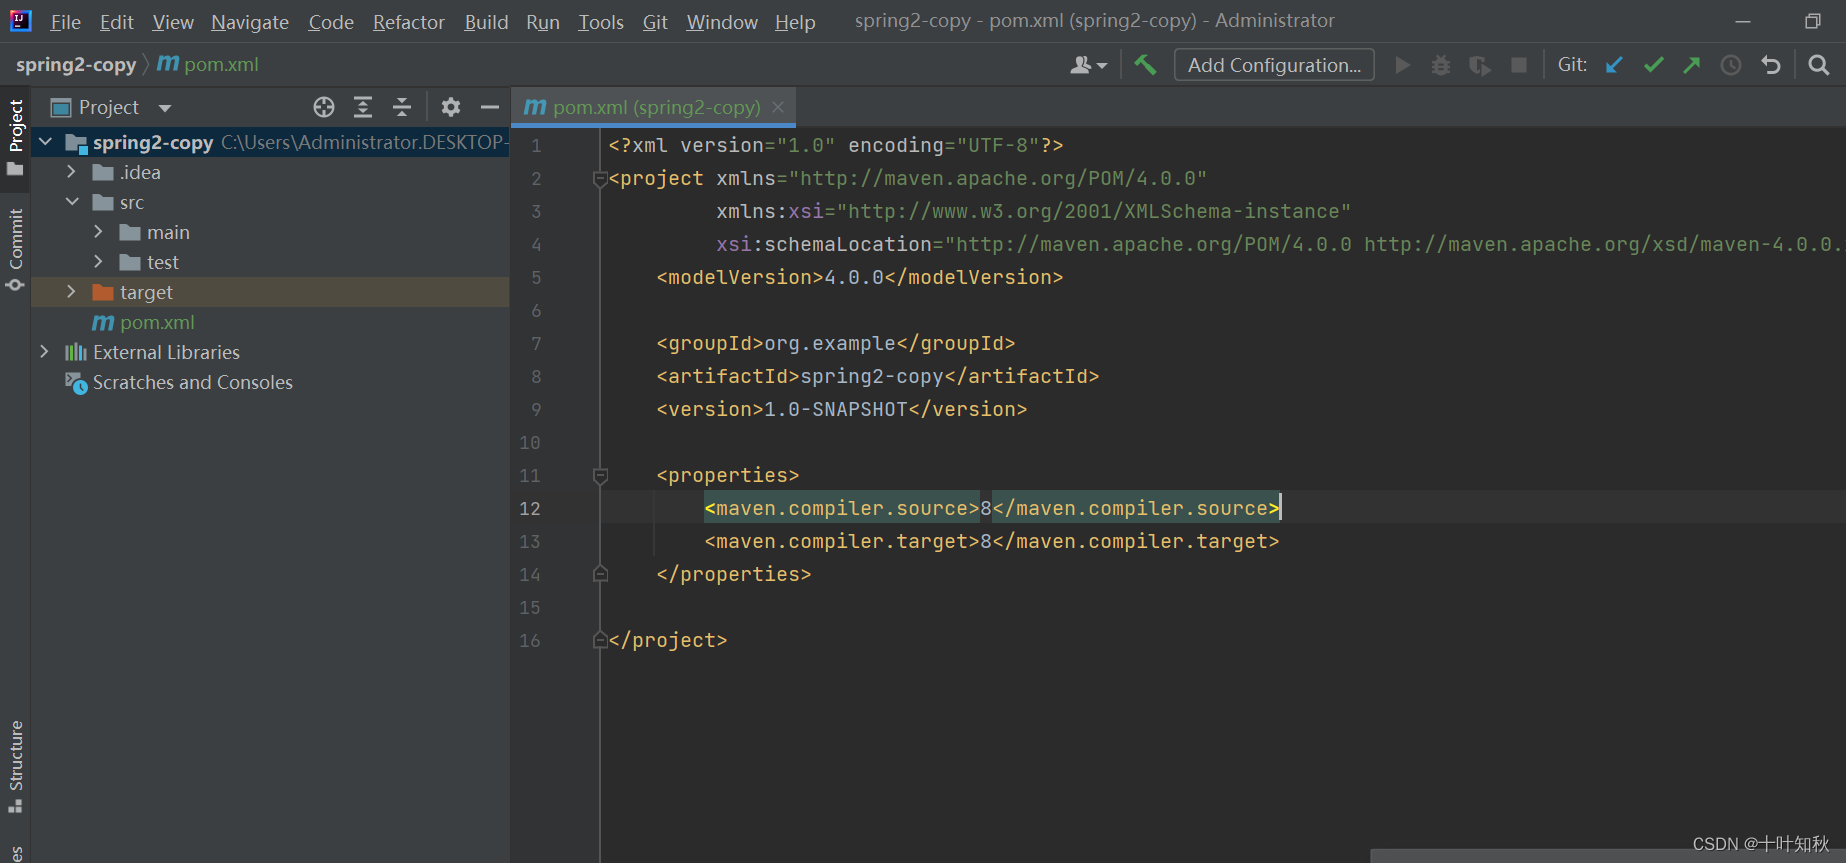
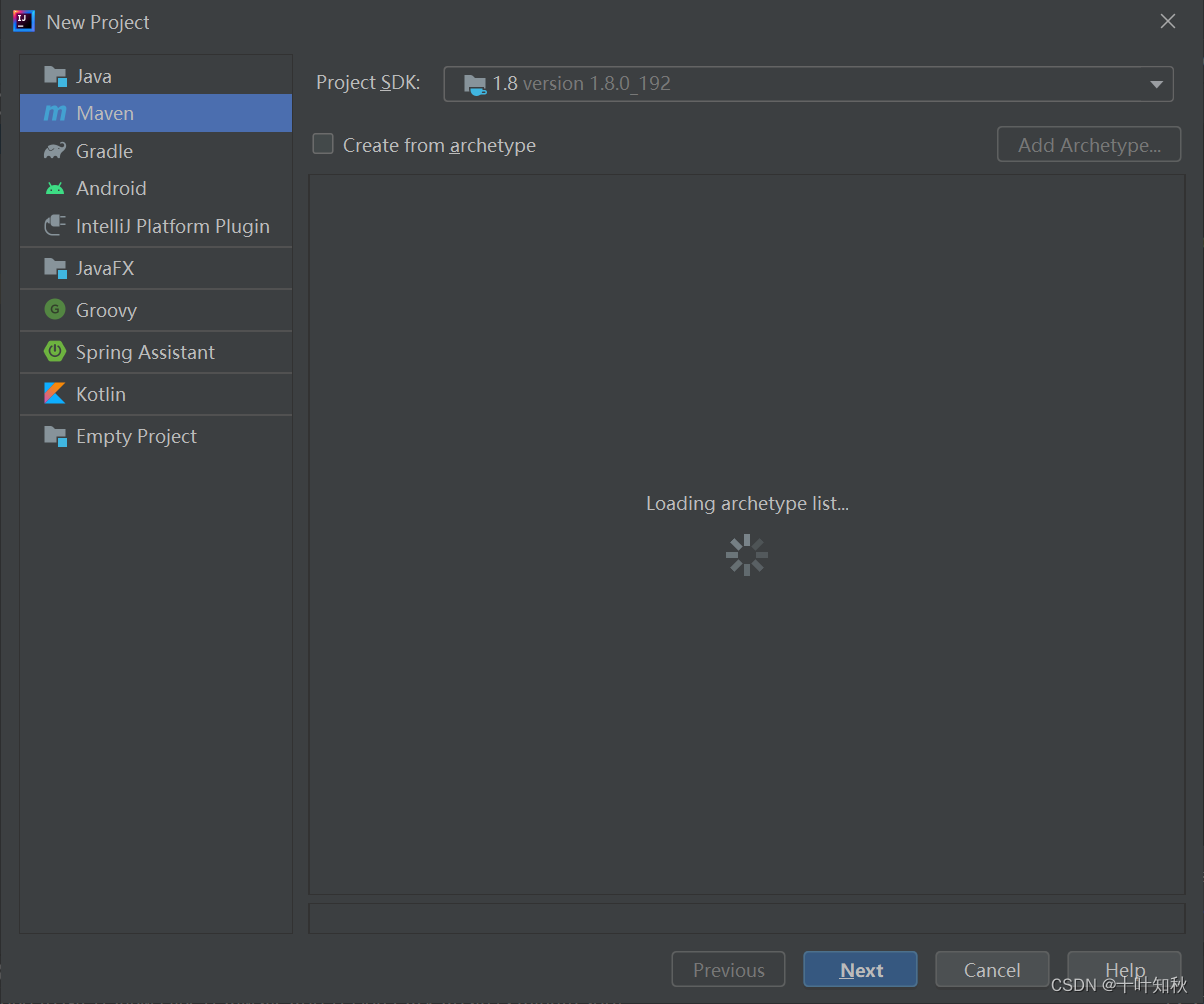 选择Next,然后命名就行。创建好如下图:
2.2.引入 Spring 框架的支持
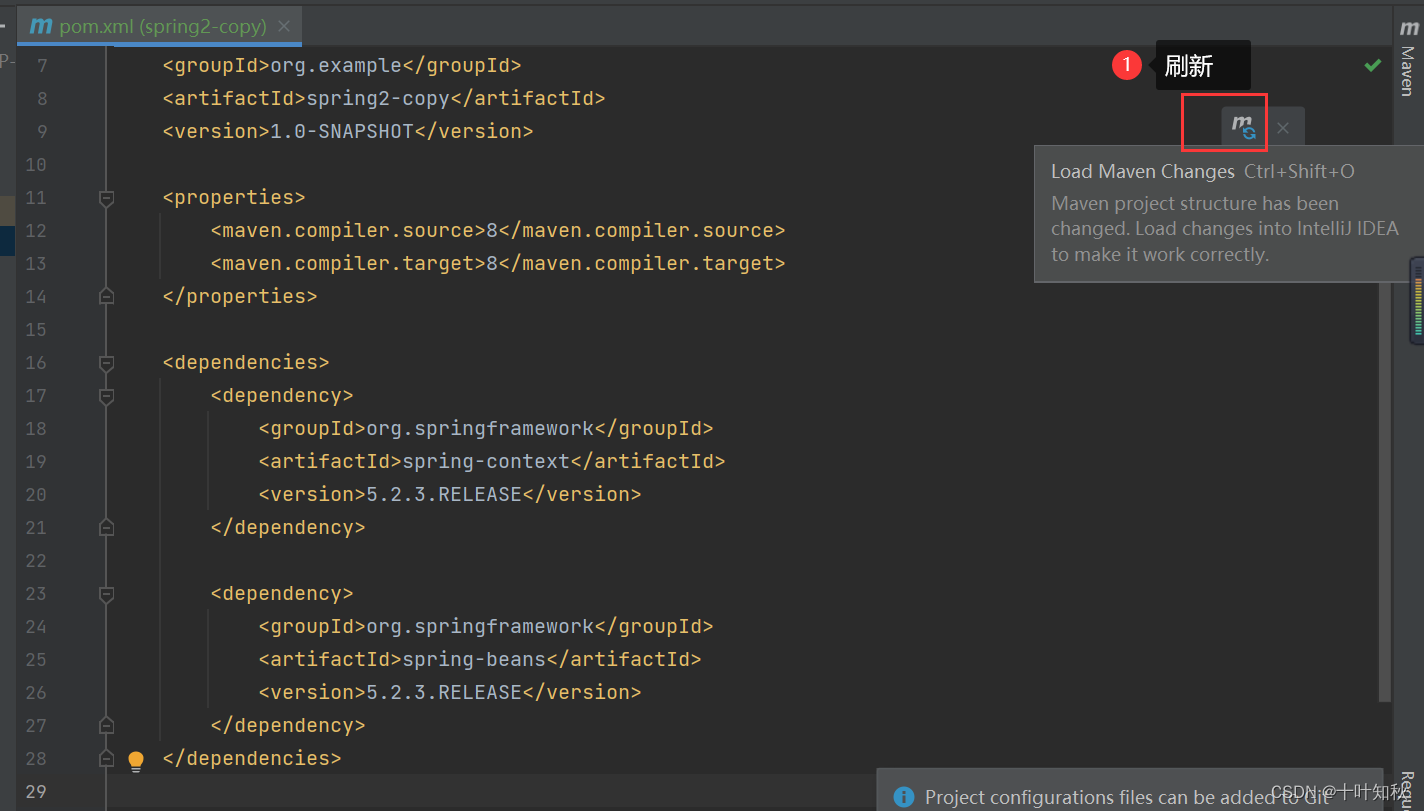
将下面的依赖复制到 pom.xml文件上,然后点击刷新
org.springframework spring-context 5.2.3.RELEASE org.springframework spring-beans 5.2.3.RELEASE - 1
- 2
- 3
- 4
- 5
- 6
- 7
- 8
- 9
- 10
- 11
- 12
- 13
2.3.创建配置文件
在resources文件夹下,创建一个配置文件,命名自定,但建议使用一看就懂的那种命名,例如:spring-config.xml,将下面内容复制到里面:
- 1
- 2
- 3
- 4
- 5
- 6
- 7
【注意】

在这里,我选择的路径是 con.beans,这个需要自己创建。如下图:

这里强调一下这个路径的重要性:
- 框住的那个为注册扫描的包,如果没有或者错了的话,即使添加了注解,如果不是在配置的扫描包下的类对象,也是不能被存储到 Spring 中的。
- 提高扫描的效率,如果没有指定路径的话,Spring 就会去扫描所有的类,但我们在项目中,不是所有类都是Spring类型的,它还有其他类,Spring 为了 提升效率,就指定扫描的目录。
2.4.添加注解存储 Bean 对象
我们更简单的存储就是通过添加注解来实现的。
想要将对象存储在 Spring 中,有两种注解类型可以实现:
- 类注解:@Controller、@Service、@Repository、@Component、@Configuration。
- 法注解:@Bean
在进行实操之前,我们先来想两个问题,带着这几个问题,我们进行实操。
- 为什么需要这么多注解?
- 这些注解之间有什么关系
2.4.1.@Controller(控制器存储)
(1)创建一个UserController类,写一个简单的测试方法,并通过@Controller 这个注解将Bean存入到Spring中:
【注意】这个类要创建在我们上面的扫描路径 ——“com.beans”中
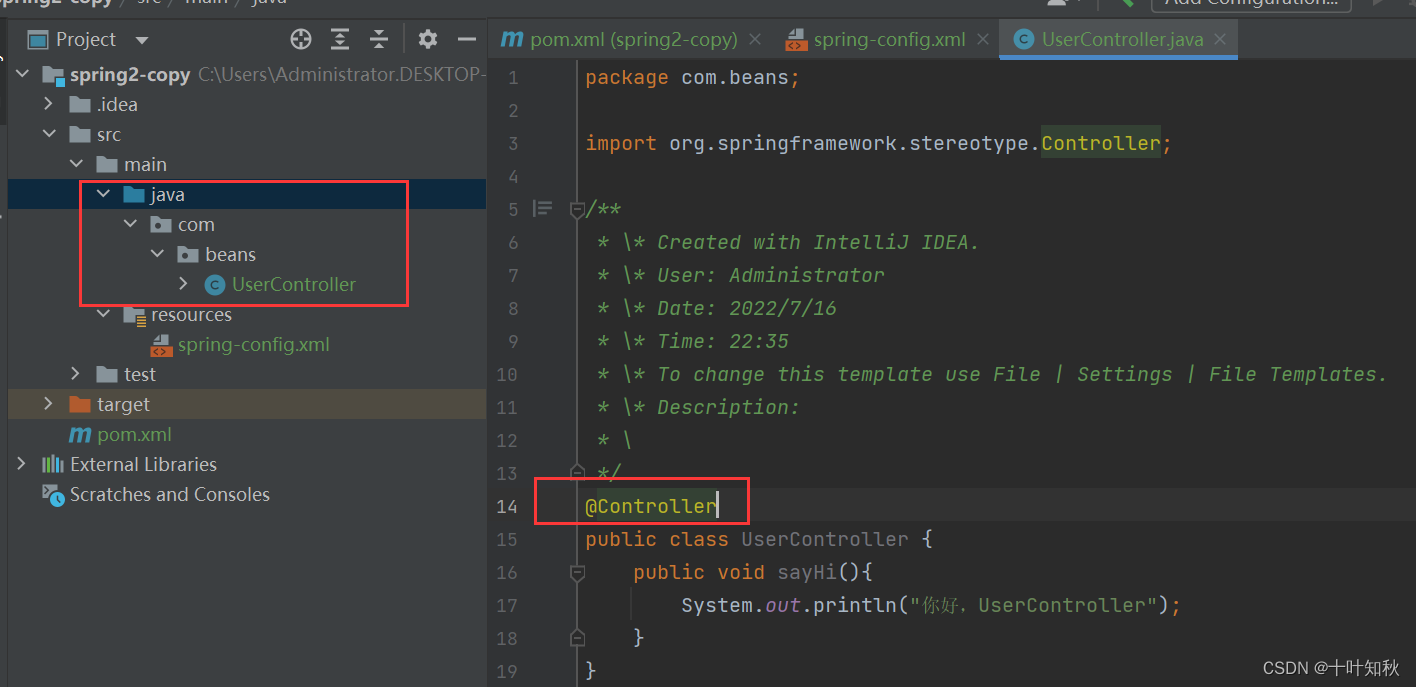
由于我们还没讲到更简单的注解,先使用之前的方式读取。
(2)读取UserController对象
我们先创建一个启动类App,在这这里面读取Bean对象。public class App { public static void main(String[] args) { //1.获取Spring的上下文对象 ApplicationContext context = new ClassPathXmlApplicationContext("spring-config.xml"); //2.获取Bean UserController userController = context.getBean(UserController.class); //3.调用Bean方法 userController.sayHi(); } }- 1
- 2
- 3
- 4
- 5
- 6
- 7
- 8
- 9
- 10
结果:
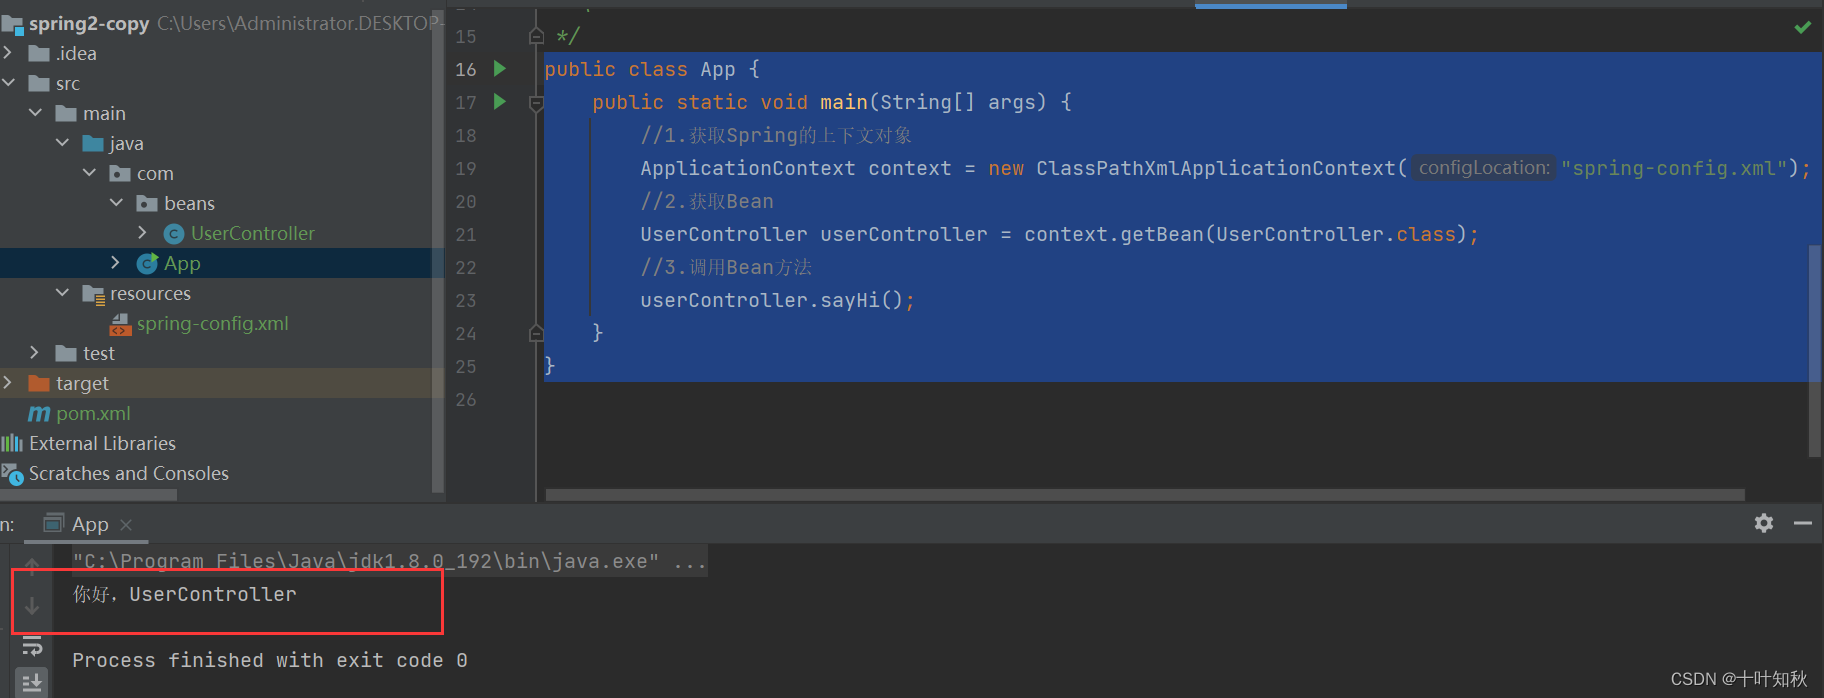
在之前读取Bean对象的时候,我们需要先注册:
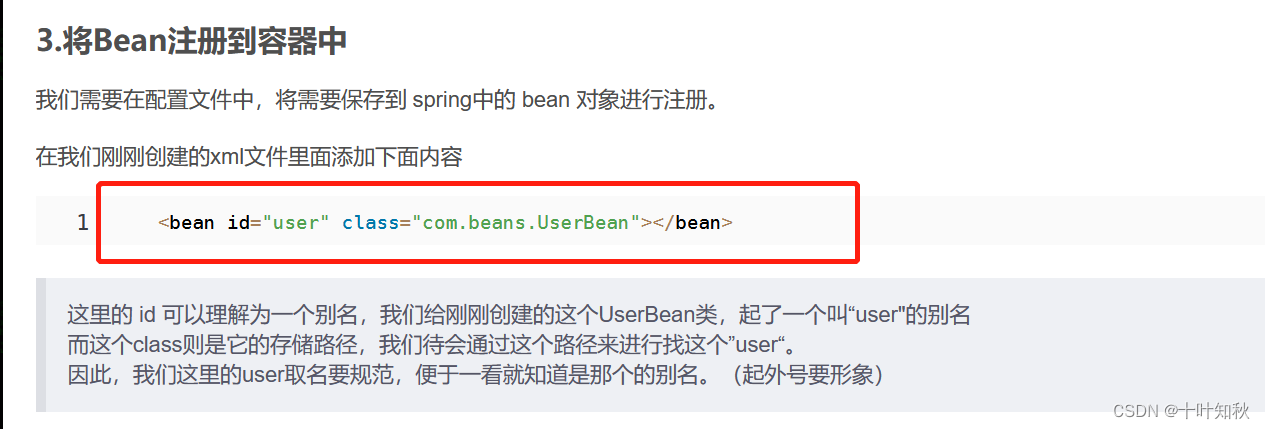
但通过注解的方式,则省略了这个步骤,更加方便了。
2.4.2.@Service(服务存储)
(1)创建一个UserService类,写一个简单的测试方法
@Controller public class UserController { public void sayHi(){ System.out.println("你好,UserService"); } }- 1
- 2
- 3
- 4
- 5
- 6
(2)读取Bean对象
public class App { public static void main(String[] args) { //1.获取Spring的上下文对象 ApplicationContext context = new ClassPathXmlApplicationContext("spring-config.xml"); //2.获取Bean //(1)使用Controller注解 // UserController userController = context.getBean(UserController.class); //(2)使用Service注解 UserService userService = context.getBean("userService",UserService.class); //3.调用Bean方法 //userController.sayHi(); userService.sayHi(); } }- 1
- 2
- 3
- 4
- 5
- 6
- 7
- 8
- 9
- 10
- 11
- 12
- 13
- 14
- 15
(3)结果
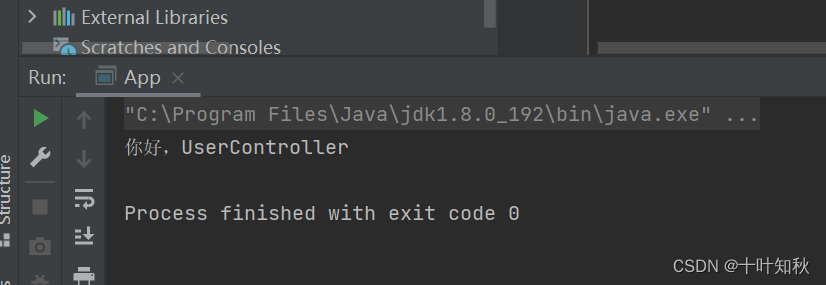
下面的几种注解的操作也是一样的
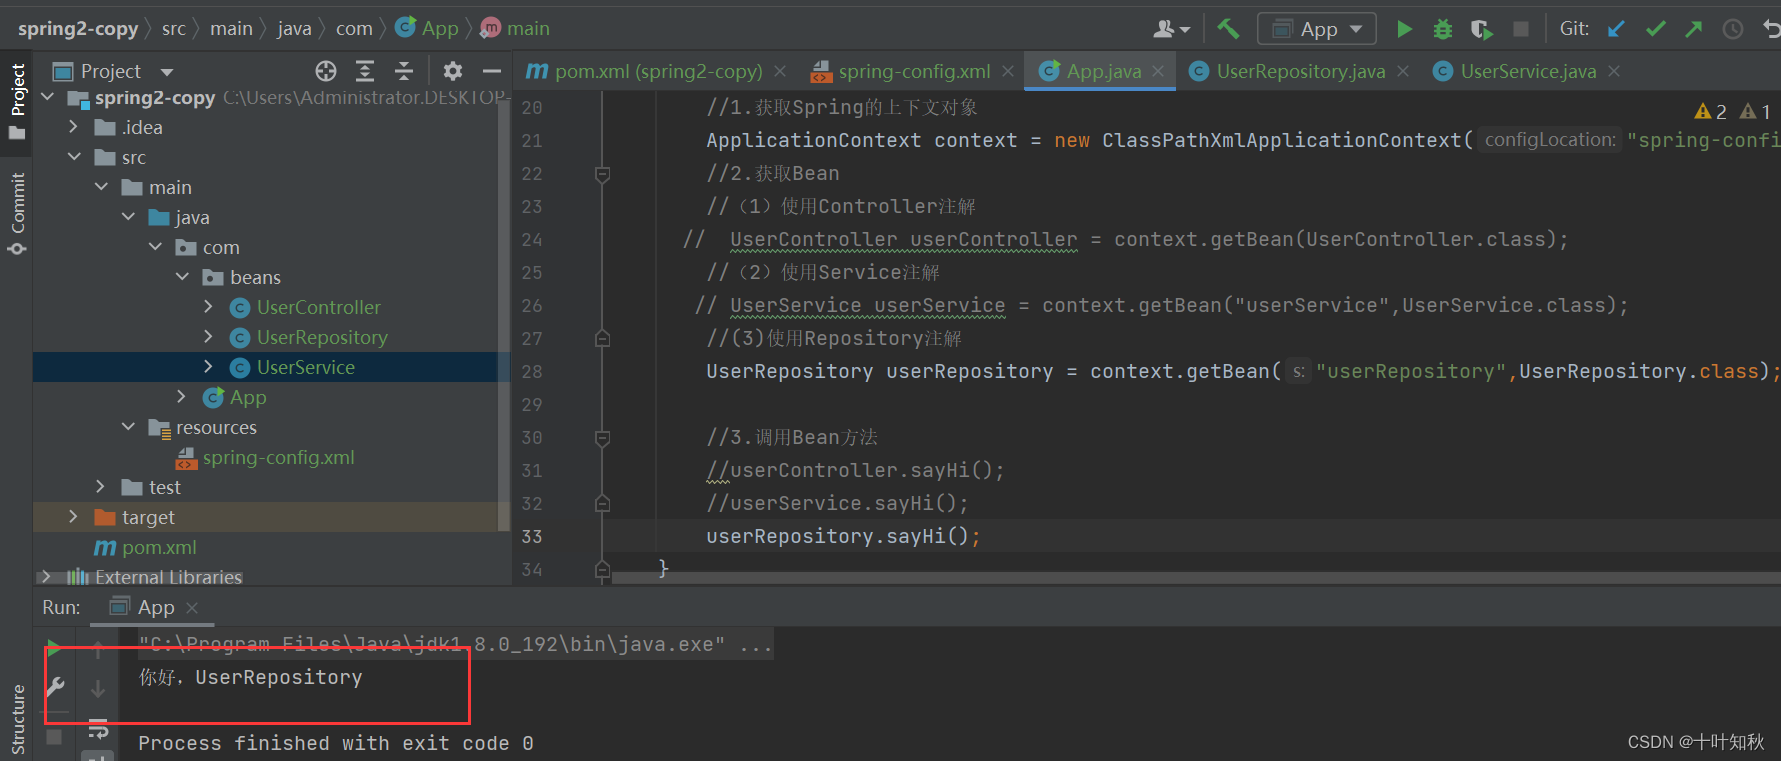
2.4.3.@Repository(仓库存储)
(1)创建一个UserRepository类,写一个简单的测试方法
@Service public class UserService { public void sayHi(){ System.out.println("你好,UserController"); } }- 1
- 2
- 3
- 4
- 5
- 6
(2)读取Bean对象
package com; import com.beans.UserController; import com.beans.UserRepository; import com.beans.UserService; import org.springframework.context.ApplicationContext; import org.springframework.context.support.ClassPathXmlApplicationContext; /** * * Created with IntelliJ IDEA. * * User: Administrator * * Date: 2022/7/16 * * Time: 22:43 * * To change this template use File | Settings | File Templates. * * Description: *- 1
- 2
- 3
- 4
- 5
- 6
- 7
- 8
- 9
- 10
- 11
- 12
- 13
- 14
- 15
- 16
*/
public class App {
public static void main(String[] args) {
//1.获取Spring的上下文对象
ApplicationContext context = new ClassPathXmlApplicationContext(“spring-config.xml”);
//2.获取Bean
//(3)使用Repository注解
UserRepository userRepository = context.getBean(“userRepository”,UserRepository.class);
//3.调用Bean方法
userRepository.sayHi();
}
}(3)结果
2.4.4.@Component(组件存储)
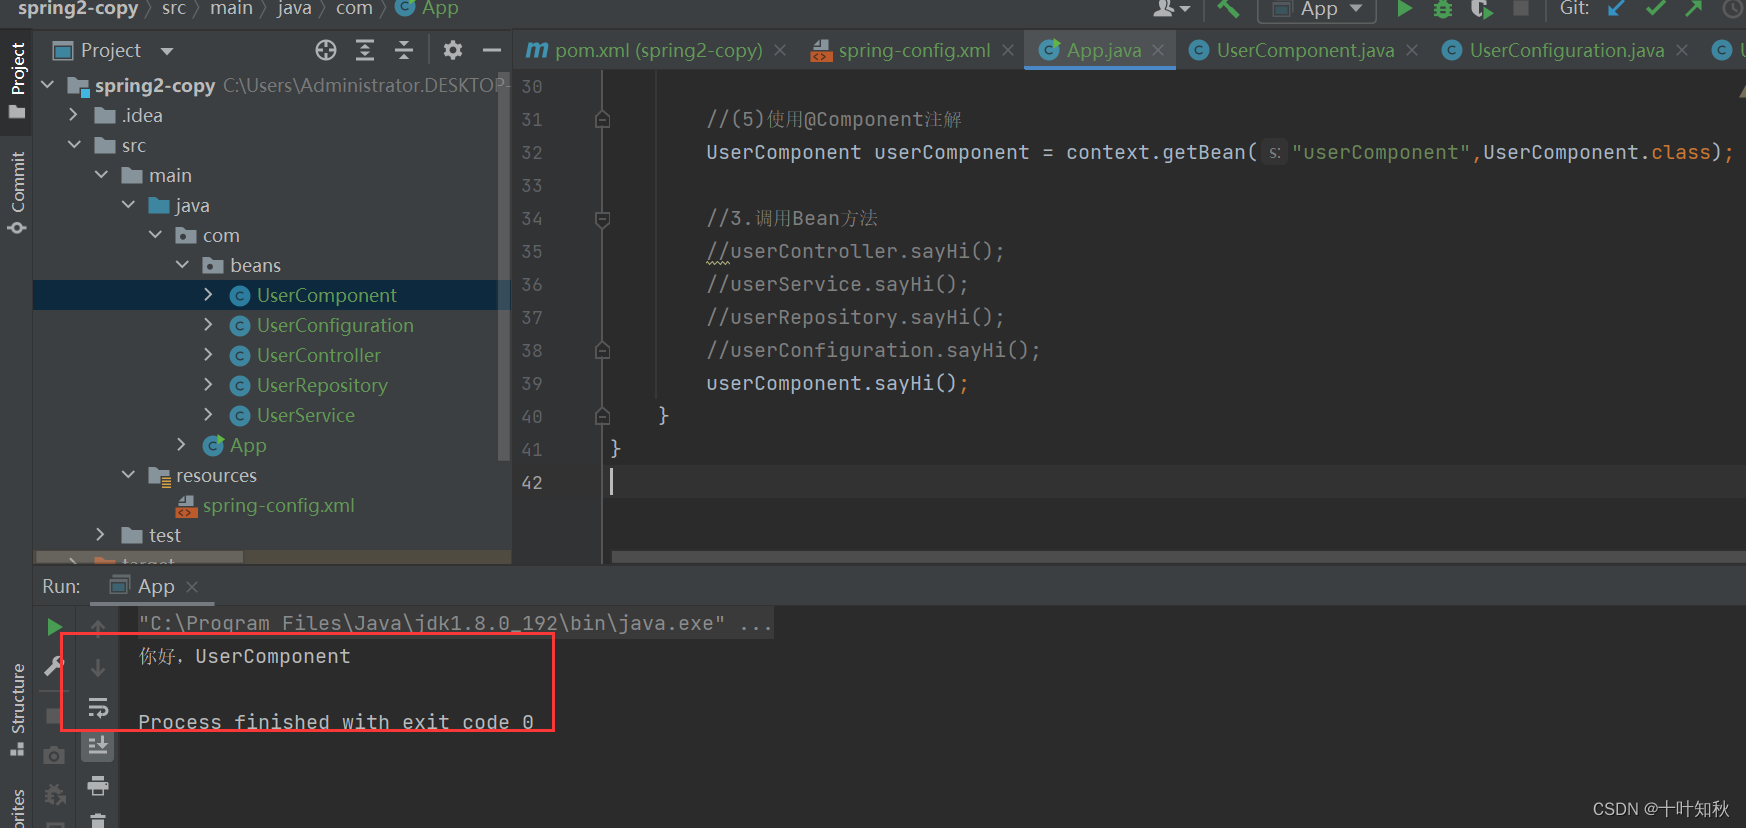
(1)创建一个UserComponent类,写一个简单的测试方法
package com.beans; import org.springframework.stereotype.Component; /** * * Created with IntelliJ IDEA. * * User: Administrator * * Date: 2022/7/16 * * Time: 23:37 * * To change this template use File | Settings | File Templates. * * Description: *- 1
- 2
- 3
- 4
- 5
- 6
- 7
- 8
- 9
- 10
- 11
- 12
*/
@Component
public class UserComponent {
public void sayHi(){
System.out.println(“你好,UserComponent”);
}
}(2)读取Bean对象
package com; import com.beans.*; import org.springframework.context.ApplicationContext; import org.springframework.context.support.ClassPathXmlApplicationContext; /** * * Created with IntelliJ IDEA. * * User: Administrator * * Date: 2022/7/16 * * Time: 22:43 * * To change this template use File | Settings | File Templates. * * Description: *- 1
- 2
- 3
- 4
- 5
- 6
- 7
- 8
- 9
- 10
- 11
- 12
- 13
- 14
*/
public class App {
public static void main(String[] args) {
//1.获取Spring的上下文对象
ApplicationContext context = new ClassPathXmlApplicationContext(“spring-config.xml”);
//2.获取Bean
//(5)使用@Component注解
UserComponent userComponent = context.getBean(“userComponent”,UserComponent.class);
//3.调用Bean方法
userComponent.sayHi();
}
}(3)结果
2.4.5.@Configuration(配置存储)
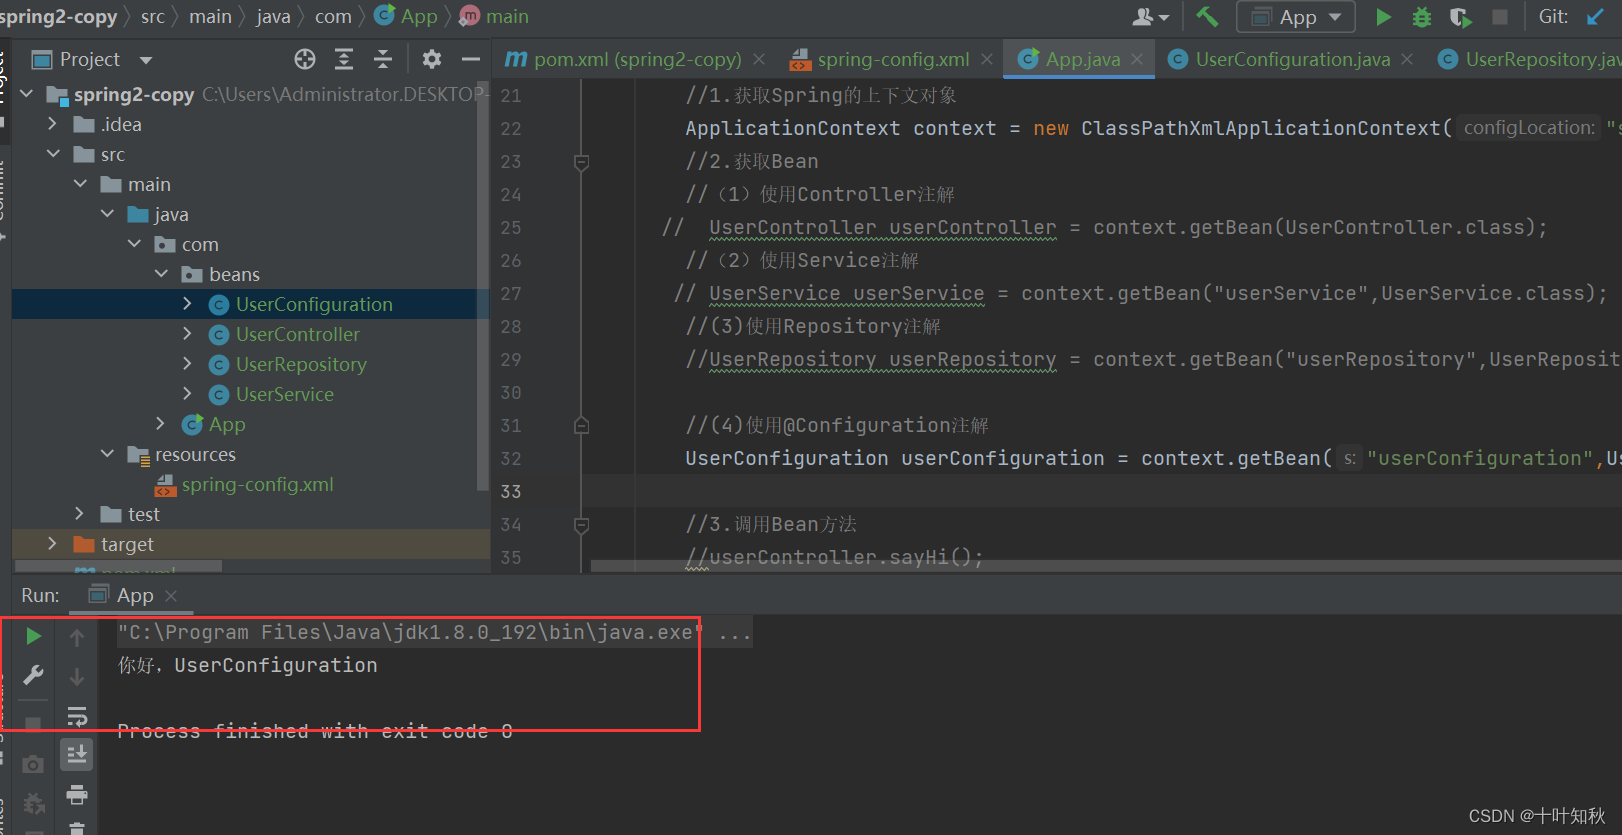
(1)创建一个UserConfiguration类,写一个简单的测试方法
package com.beans; import org.springframework.context.annotation.Configuration; /** * * Created with IntelliJ IDEA. * * User: Administrator * * Date: 2022/7/16 * * Time: 23:33 * * To change this template use File | Settings | File Templates. * * Description: *- 1
- 2
- 3
- 4
- 5
- 6
- 7
- 8
- 9
- 10
- 11
- 12
*/
@Configuration
public class UserConfiguration {
public void sayHi(){
System.out.println(“你好,UserConfiguration”);
}
}(2)读取Bean对象
package com; import com.beans.UserConfiguration; import com.beans.UserController; import com.beans.UserRepository; import com.beans.UserService; import org.springframework.context.ApplicationContext; import org.springframework.context.support.ClassPathXmlApplicationContext; /** * * Created with IntelliJ IDEA. * * User: Administrator * * Date: 2022/7/16 * * Time: 22:43 * * To change this template use File | Settings | File Templates. * * Description: *- 1
- 2
- 3
- 4
- 5
- 6
- 7
- 8
- 9
- 10
- 11
- 12
- 13
- 14
- 15
- 16
- 17
*/
public class App {
public static void main(String[] args) {
//1.获取Spring的上下文对象
ApplicationContext context = new ClassPathXmlApplicationContext(“spring-config.xml”);
//2.获取Bean
//(4)使用@Configuration注解
UserConfiguration userConfiguration = context.getBean(“userConfiguration”,UserConfiguration.class);//3.调用Bean方法 userConfiguration.sayHi(); } }- 1
- 2
- 3
- 4
(3)结果
实际上,通过上面的操作,我们可以发现,它们之间的功能好像没有什么区别,都是一样的用法,那么为什么我们需要这么多注解呢?接下来我们回答一下一开始的两个问题。
- 为什么需要这么多注解?
- 这些注解之间有什么关系
2.5.为什么需要这么多注解
答案很简单:是为了让代码的可读性提高,让程序员能够更直观的判断当前类的业务用途。
实际上我们的每个注解代表的意思都不一样,它本身的注解的英文意思就可以让我们知道它大概存放的类是什么类型的,比如:
- @Controller:表示的是业务逻辑层
- @Servie:服务层
- @Repository:持久层
- @Configuration:配置层
- …
在工作中,我们的代码是需要分层的,不同类型的代码放在不同的层级上面,既方便管理,也方便辨认。
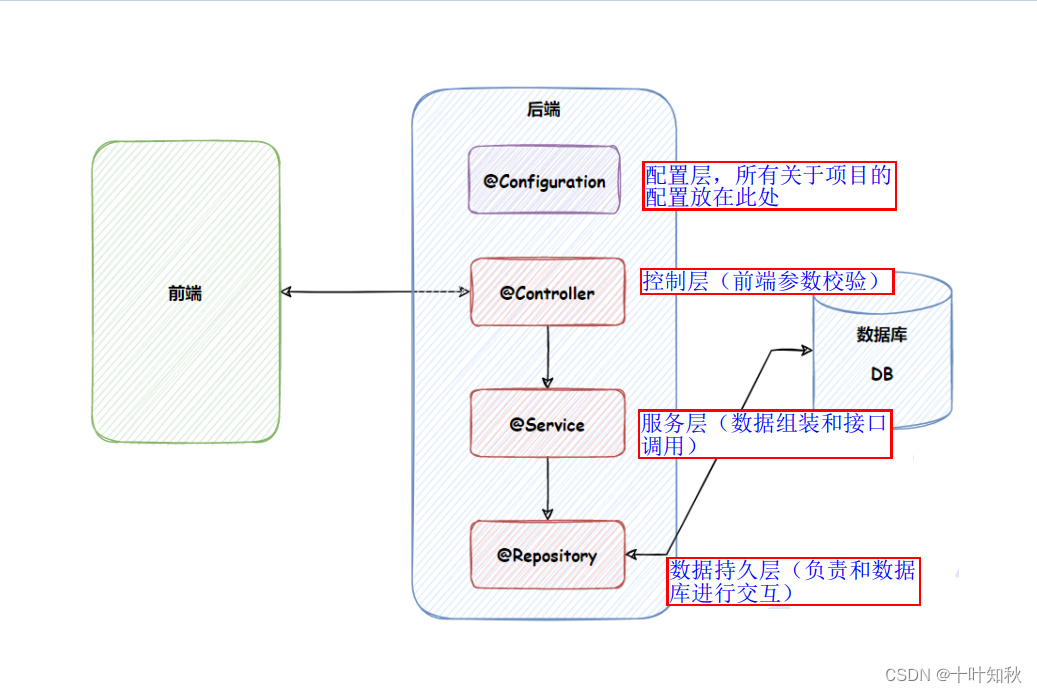
实际上,不同的注解,会对应不同的程序,前端来的所有数据,都会先到controller(控制层),对参数进行校验。检验通过之后,继续执行下一层“服务层”。然后,服务层(service)去分配接口,分配到接口之后,才会真正去操作数据库,也就是到数据持久层(repository)。对数据库进行操作,肯定为了获取某些数据,也就代表数据库将会数据返回。数据持久层就会将数据先反馈给服务层,服务层拿到数据之后,在返回给Controller。Controller再结果反馈给前端。这就是前端与后端的一个正常交互的流程。
这里的程序程分层,调流程如下
2.6.五个类注解之间的关系
查看 @Controller / @Service / @Repository / @Configuration 等注解的源码发现:这些注解都有个注解 @Component,说明它们本身就是属于 @Component 的“类”
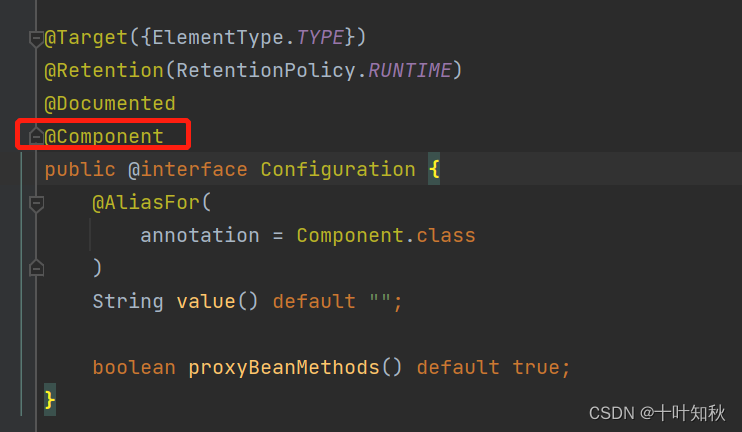
因此,Component 注解,与其它四大注解,是父子类关系。 Controller,Service, Repository,configuration注解, 都是基于 Component 注解实现的。
2.7.方法注解 @Bean
2.7.1.需配合类注解使用
通过名字,我们就可以知道:类注解是添加到某个类上的,而方法注解是放到某个方法上的。
【注意】 方法注解需要搭配类注解,如果仅仅只有方法注解的话,会报错。如下图:
(1)创建一个User类,来定义id 和需要的 name:
package com.beans; /** * * Created with IntelliJ IDEA. * * User: Administrator * * Date: 2022/7/17 * * Time: 14:05 * * To change this template use File | Settings | File Templates. * * Description: *- 1
- 2
- 3
- 4
- 5
- 6
- 7
- 8
- 9
- 10
*/
public class User {
private int id;
private String name;public int getId() { return id; } public void setId(int id) { this.id = id; } public String getName() { return name; } public void setName(String name) { this.name = name; } @Override public String toString() { return "User{" + "id=" + id + ", name='" + name + ''' + '}'; } }- 1
- 2
- 3
- 4
- 5
- 6
- 7
- 8
- 9
- 10
- 11
- 12
- 13
- 14
- 15
- 16
- 17
- 18
- 19
- 20
- 21
- 22
- 23
- 24
(2)创建一个UserBean类,仅仅使用了方法注解@Bean,没有使用类注解
package com.beans; import org.springframework.context.annotation.Bean; /** * * Created with IntelliJ IDEA. * * User: Administrator * * Date: 2022/7/17 * * Time: 14:02 * * To change this template use File | Settings | File Templates. * * Description: *- 1
- 2
- 3
- 4
- 5
- 6
- 7
- 8
- 9
- 10
- 11
- 12
*/
public class UserBean {
@Bean
public User user(){
User user = new User();
user.setId(1);
user.setName(“瑞文”);
return user;
}
}(3)创建一个启动类App2:
package com; import com.beans.User; import org.springframework.context.ApplicationContext; import org.springframework.context.support.ClassPathXmlApplicationContext; /** * * Created with IntelliJ IDEA. * * User: Administrator * * Date: 2022/7/17 * * Time: 14:07 * * To change this template use File | Settings | File Templates. * * Description: *- 1
- 2
- 3
- 4
- 5
- 6
- 7
- 8
- 9
- 10
- 11
- 12
- 13
- 14
*/
public class App2 {
public static void main(String[] args) {
ApplicationContext context = new ClassPathXmlApplicationContext(“spring-config.xml”);
User user = context.getBean(“user”,User.class);
System.out.println(user);
}
}(4)运行后结果:

上图显示报错的原因,是因为只使用方法注解,没有使用类注解。
正确的写法需要配合类注解来使用。因为在 Spring 框架的设计中,方法注解 @Bean 要配合类注解才能将对象正常的存储到 Spring 容器中。因此,我们需要在UserBean类上添加多一个类注解。
package com.beans; import org.springframework.context.annotation.Bean; import org.springframework.stereotype.Component; @Component public class UserBean { @Bean public User user(){ User user = new User(); user.setId(1); user.setName("瑞文"); return user; } }- 1
- 2
- 3
- 4
- 5
- 6
- 7
- 8
- 9
- 10
- 11
- 12
- 13
- 14
这时候才能正确执行:

2.7.2.重命名Bean
我们这里的@Bean注解是可以通过设置 name 属性给 Bean 对象进重命名操作。

重命名之后,我们可以通过新的名字来获取Bean,二者是等价的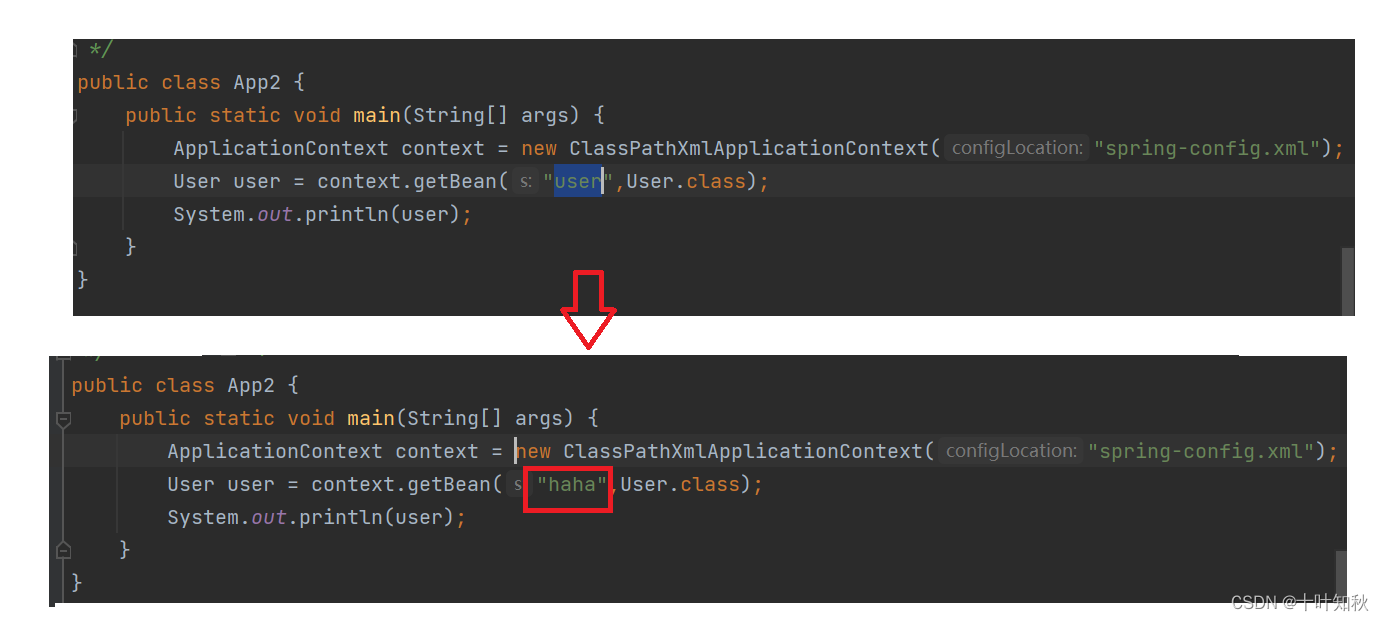
这个重命名的 name 其实是个数组,个 bean 可以有多个名字,也就是说通过这几个名字都能获取到Bean:
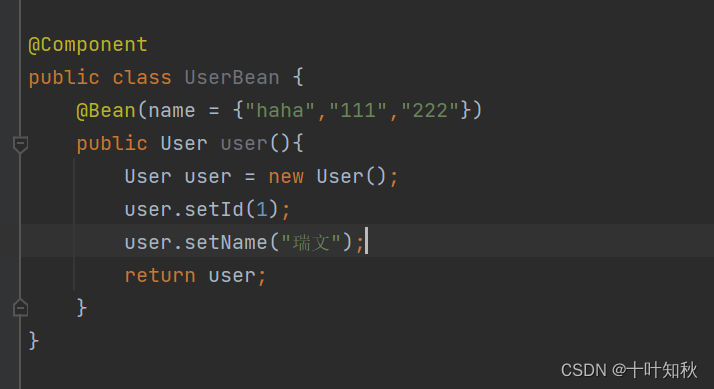
但是这里有一点需要注意:
被重命名之后,原来的方法名就不能获取到Bean了。
3. 获取Bean对象
获取 bean 对象也叫做对象装配,是把对象取出来放到某个类中,有时候也叫对象注。对象装配(对象注)的实现法以下 3 种:
- 属性注
- 构造法注
- Setter 注
3.1.属性注入
3.1.1.@Autowired 注解
属性注是使 @Autowired 实现的,下面我们将 Service 类注到 UserController 类中。
(1)修改原来的UserController类,注入一个User类:

(2)获取 UserController 中的 sayHi()法
public class App2 { public static void main(String[] args) { ApplicationContext context = new ClassPathXmlApplicationContext("spring-config.xml"); UserController userController = context.getBean("userController", UserController.class); userController.sayHi(); } }- 1
- 2
- 3
- 4
- 5
- 6
- 7
(3)结果如下,成功获取到User类里面的内容:

(4)注意事项
使用 @Autowired 进行属性注入的时候,如果注入的对象,被多次存入Spring 中了,那么,光凭属性的类型是找不到匹配的 bean。我们需要将属性的变量名改成 BeanName,根据 BeanName 来找寻匹配的对象(bean)并进行属性注入。例如下面:
如果我们的UserBean类有两个@Bean注解的方法的话,通过我们上面的方式获取就会出错:
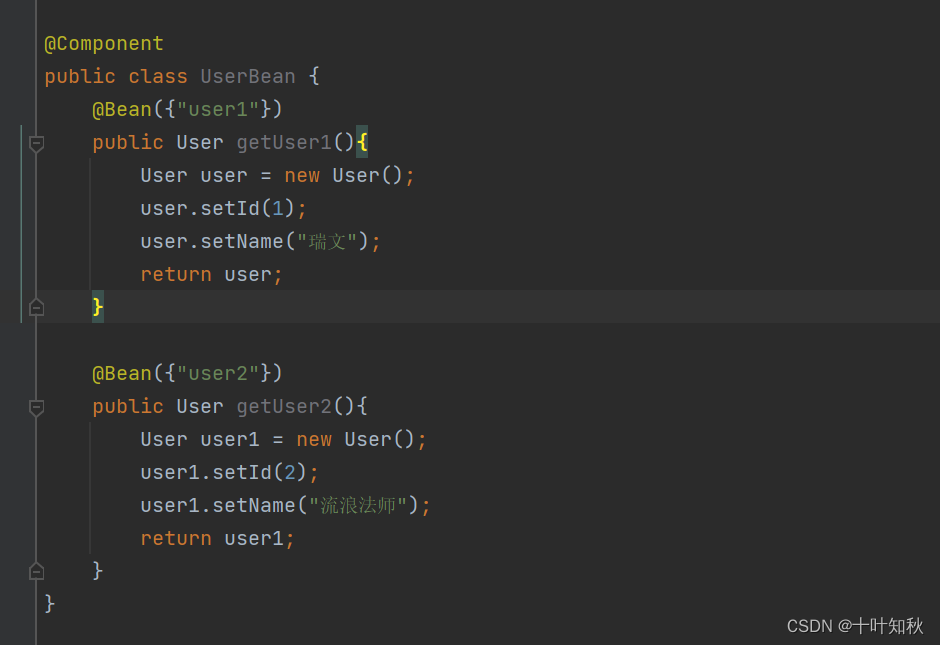
通过原来的方式进行获取:

结果报错:


这里报错的原因是因为我们找到了user1和user2两个对象,但不知道匹配那个。
更深层的原因是:** 我们的@Autowired进行属性注入的时候,一次只能注入一个bean——一个引用类型的变量,只能指向一个对象,不可能指向两个对象**。解决办法:注入属性的变量名,如下图:
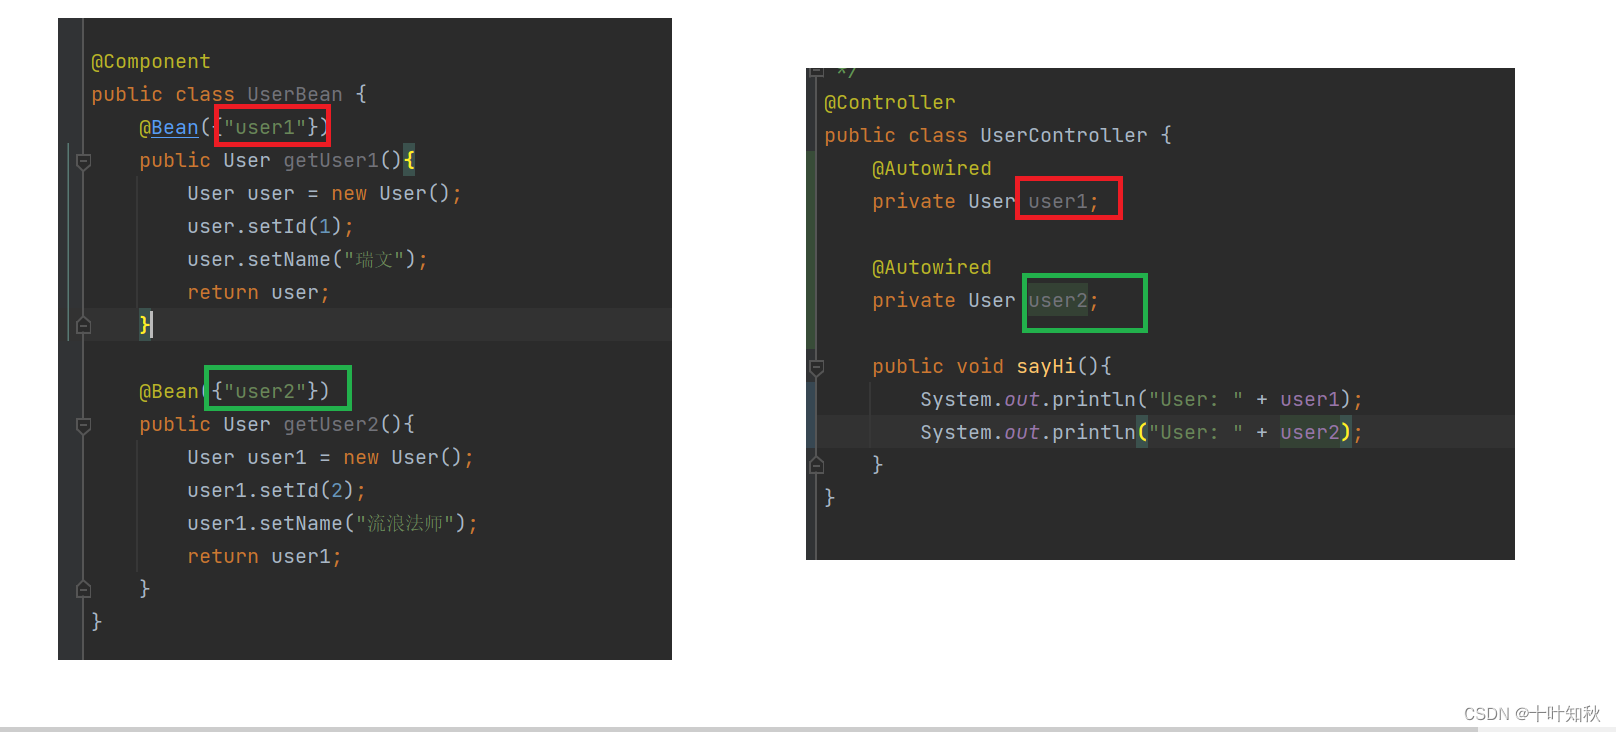
只要保持对应,就可以成功获取Bean,结果如下:
总结一下:这里比以前的方法更简单的地方在于我们不需要去获取Spring的上下文对象和getBean方法,而是通过一个注解直接搞定。
3.1.2.@Resource 注解
与@Autowired注解来自spring不同,@Resource注解是JDK自带的注解。通过@Resource注解,我们也能完成@Autowired注解的工作。如下图:

运行结果:

此外,相比于@Autowired注解,@Resource 注解有一个 name 属性,可以用指定 注入的 bean 的名称。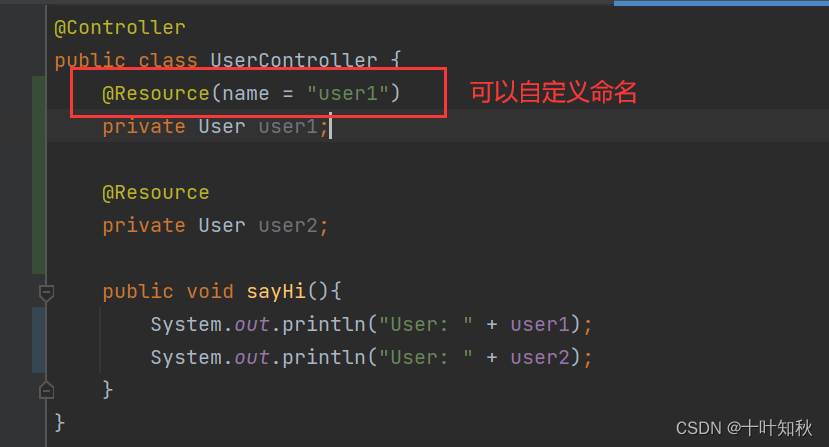
总结:@Autowired 和 @Resource 的区别:- 出身不同:@Autowired 来于 Spring, @Resource 来于 JDK 的注解
- 使时设置的参数不同:相于 @Autowired 来说,@Resource 持更多的参数设置,例如 name
设置,根据名称获取 Bean
3.1.3.@Autowired注解搭配使用 @Qualifier 注解
前面我们说过:使用 @Autowired 进行属性注入的时候,如果注入的对象,被多次存入Spring 中了,那么,光凭属性的类型是找不到匹配的 bean。我们需要将属性的变量名改成 BeanName,根据 BeanName 来找寻匹配的对象(bean)并进行属性注入。
如果此时加上了@Qualifier注解,那么问题就可以迎刃而解了。
@Qualifier - 限定符 :解决注入的迷失问题。
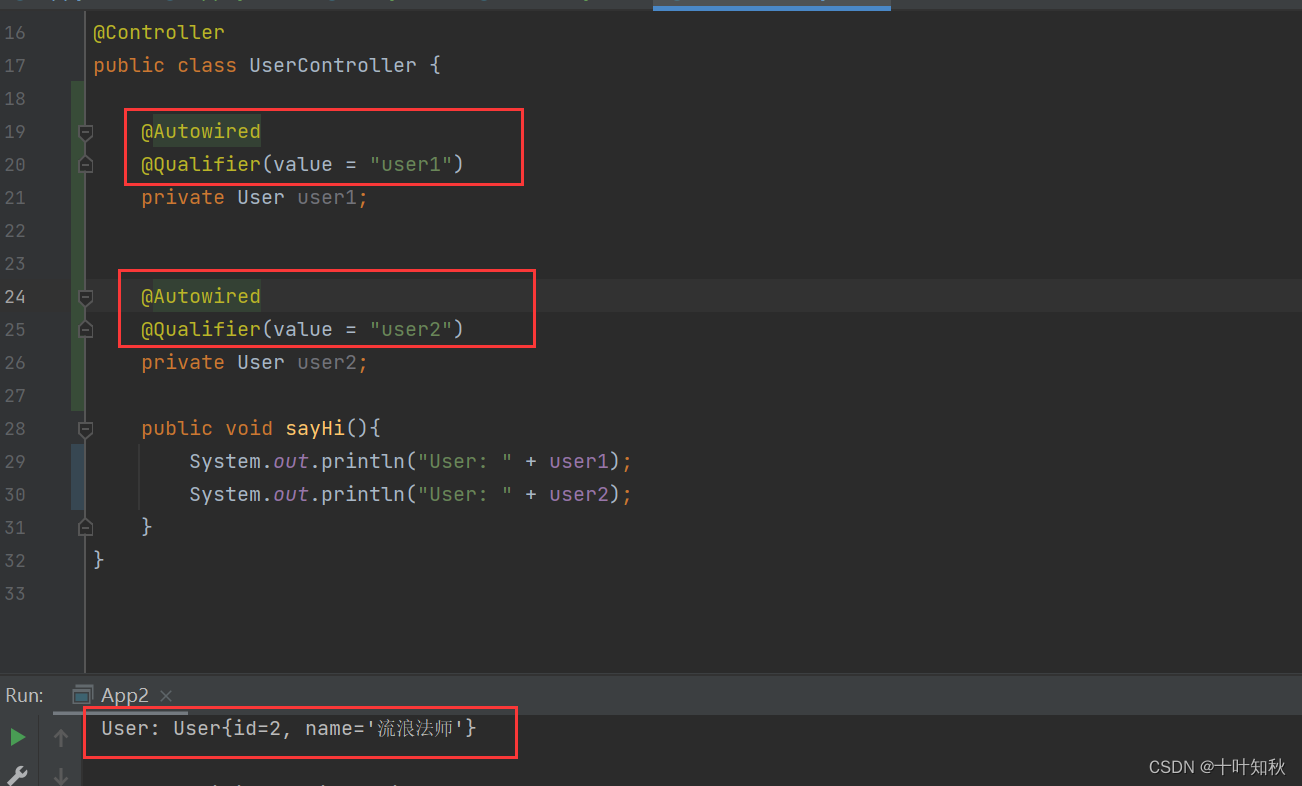
3.2.构造方法注入(@Autowired)
构造法注是在类的构造法中实现注,我们使用 @Autowired 来注解来实现:
(1)创建一个UserController2类:
package com.beans; import org.springframework.beans.factory.annotation.Autowired; import org.springframework.stereotype.Controller; /** * * Created with IntelliJ IDEA. * * User: Administrator * * Date: 2022/7/17 * * Time: 23:12 * * To change this template use File | Settings | File Templates. * * Description: *- 1
- 2
- 3
- 4
- 5
- 6
- 7
- 8
- 9
- 10
- 11
- 12
- 13
*/
@Controller
public class UserController2 {
private UserService userService;
@Autowired
public UserController2(UserService userService){//进行构造方法的注入
this.userService = userService;
}//通过这个方法调用userService里面的方法 public void sayHi(){ userService.sayHi(); } }- 1
- 2
- 3
- 4
- 5
(2)在App2类中启动:

(3)结果:

【注意】
- @Resource 注解,是不支持 构造方法注入的
- 当类里面只有一个构造方法的时候,@Autowired 是可以省略的
3.3.Setter注入(@Autowired)
Setter 注和属性的 Setter 法实现类似,只不过在设置 set 法的时候需要加上 @Autowired 注解。
(1)创建一个UserController3类:
package com.beans; import org.springframework.beans.factory.annotation.Autowired; import org.springframework.stereotype.Controller; /** * * Created with IntelliJ IDEA. * * User: Administrator * * Date: 2022/7/17 * * Time: 23:19 * * To change this template use File | Settings | File Templates. * * Description: *- 1
- 2
- 3
- 4
- 5
- 6
- 7
- 8
- 9
- 10
- 11
- 12
- 13
*/
@Controller
public class UserController3 {
private UserService userService;@Autowired public void setUserService(UserService userService){ this.userService = userService; } public void sayHi(){ userService.sayHi(); } }- 1
- 2
- 3
- 4
- 5
- 6
- 7
- 8
- 9
(2)在App2中启动:

(3)结果:

此外,@Resource也支持 Setter 注入。这里不做演示。
3.4.三种注入优缺点分析
- 属性注的优点是简洁,使便;缺点是只能于 IoC 容器,如果是 IoC 容器不可,并且只有在使的时候才会出现 NPE(空指针异常)。
- 构造法注是 Spring 推荐的注式,它的缺点是如果有多个注会显得较臃肿,但出现这种情况你应该考虑下当前类是否符合程序的单职责的设计模式了,它的优点是通性,在使之前定能把保证注的类不为空。
- Setter 式是 Spring 前期版本推荐的注式,但通性不如构造法,所有 Spring 现版本已经推荐使构造法注的式来进类注了.
完!
先自我介绍一下,小编13年上师交大毕业,曾经在小公司待过,去过华为OPPO等大厂,18年进入阿里,直到现在。深知大多数初中级java工程师,想要升技能,往往是需要自己摸索成长或是报班学习,但对于培训机构动则近万元的学费,着实压力不小。自己不成体系的自学效率很低又漫长,而且容易碰到天花板技术停止不前。因此我收集了一份《java开发全套学习资料》送给大家,初衷也很简单,就是希望帮助到想自学又不知道该从何学起的朋友,同时减轻大家的负担。添加下方名片,即可获取全套学习资料哦
-
相关阅读:
循环神经网络RNN完全解析:从基础理论到PyTorch实战
一篇全网最详细的可视化图表Python库,学到就赚到了
Android gradle编译错误OOM:java heap space的解决办法
[注塑]各种进胶方式优缺点分析
Kotlin 开发Android app(三):Kotlin 的字符串indexOf,substring,replace,split
VMware 虚拟机安装CentOS镜像详细步骤
计算机毕业设计源代码java项目开发实例ssh+mysql实现的Javaweb在线订电影票系统|影视[包运行成功]
windows使用小技巧-----设置远程连接无密码登录
一文了解GCC(GNU C)语法
Oracle/PLSQL: To_Clob Function
- 原文地址:https://blog.csdn.net/m0_67390969/article/details/126080676
