-
Centos7安装ELK
Centos7安装ELK
1. Centos7安装elasticsearch-7.5.1
1.1 elasticsearch官网: https://www.elastic.co/cn/downloads/elasticsearch
1.2 下载 elasticsearch:
wget https://artifacts.elastic.co/downloads/elasticsearch/elasticsearch-7.5.1-linux-x86_64.tar.gz- 1


1.3 解压elasticsearch:tar -zxvf elasticsearch-7.5.1-linux-x86_64.tar.gz- 1

1.4 通过 hostname 命令查询到主机名hostname- 1
1.5 修改config配置(elasticsearch-7.5.1/config文件夹下)
cluster.initial_master_nodes: ["主机名"] network.host: 0.0.0.0 http.port: 9200 http.cors.enabled: true http.cors.allow-origin: "*"- 1
- 2
- 3
- 4
- 5

1.6 修改centos7 本机相关文件描述:vi /etc/sysctl.conf vm.max_map_count=262144- 1
- 2
- 3

1.7 查询配置是否生效
sysctl -p- 1

1.8 修改limits.conf 相关配置
vi /etc/security/limits.conf * soft nofile 65536 * hard nofile 65536- 1
- 2
- 3
- 4

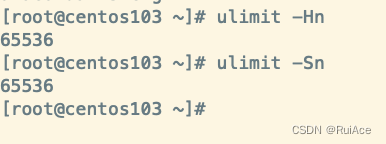
1.9 查询修改limits.conf文件后是否生效
ulimit -Hn ulimit -Sn- 1
- 2
- 3
1.10 es不允许root⽤户启动,需要添加新⽤户身份
#创建elk⽤户组及elk⽤户 groupadd elk useradd elk -g elk -p 12345678 #更改elasticsearch⽂件夹及内部⽂件的所属⽤户及组为elk:elk chown -R elk:elk elasticsearch #切换到elk⽤户再启动 su elk #守护进程运⾏ ./bin/elasticsearch -d- 1
- 2
- 3
- 4
- 5
- 6
- 7
- 8
- 9
1.11 验证elasticsearch是否正常启动
#验证启动进程 ps aux | grep elasticsearch # 检查是否启动 netstat -ntlp | grep 9200 curl http://localhost:9200- 1
- 2
- 3
- 4
- 5
- 6
- 7
- 8

**注意:**如果无法访问centos7 中的elasticsearch,请检查防火墙。
systemctl status firewalld.service
systemctl stop firewalld.service
systemctl status firewalld.service
再在命令行中输入命令“systemctl disable firewalld.service”命令,即可永久关闭防火墙。1.12 ik分词器安装:
es默认分词器对中⽂分词⾮常不友好,需要安装ik分词器
Analyzer: ik_smart , ik_max_word , Tokenizer: ik_smart , ik_max_word1.13 中⽂分词器安装:
wget -c https://github.com/medcl/elasticsearch-analysis-ik/releases/download/v7.5.1/elasticsearch-analysis-ik-7.5.1.zip- 1
- 2
1.14 配置ik分词器
mkdir $ES_HOME/plugins/ik unzip elasticsearch-analysis-ik-7.5.1.zip -d $ES_HOME/plugins/ik unzip elasticsearch-analysis-ik-7.5.1.zip -d /usr/local/elk/elasticsearch/elasticsearch-7.5.1/plugins/ik #安装完成重启es ./bin/elasticsearch -d- 1
- 2
- 3
- 4
- 5
1.15 检查ik分词器是否可以正常使用
http://192.168.109.103:9200/_analyze {"text":"CSDN是全球知名中文IT技术交流平台","analyzer": "ik_max_word"}- 1
- 2
- 3
{ "tokens": [ { "token": "csdn", "start_offset": 0, "end_offset": 4, "type": "ENGLISH", "position": 0 }, { "token": "是", "start_offset": 4, "end_offset": 5, "type": "CN_CHAR", "position": 1 }, { "token": "全球", "start_offset": 5, "end_offset": 7, "type": "CN_WORD", "position": 2 }, { "token": "知名", "start_offset": 7, "end_offset": 9, "type": "CN_WORD", "position": 3 }, { "token": "中文", "start_offset": 9, "end_offset": 11, "type": "CN_WORD", "position": 4 }, { "token": "技术交流", "start_offset": 13, "end_offset": 17, "type": "CN_WORD", "position": 5 }, { "token": "技术", "start_offset": 13, "end_offset": 15, "type": "CN_WORD", "position": 6 }, { "token": "交流平台", "start_offset": 15, "end_offset": 19, "type": "CN_WORD", "position": 7 }, { "token": "交流", "start_offset": 15, "end_offset": 17, "type": "CN_WORD", "position": 8 }, { "token": "平台", "start_offset": 17, "end_offset": 19, "type": "CN_WORD", "position": 9 } ] }- 1
- 2
- 3
- 4
- 5
- 6
- 7
- 8
- 9
- 10
- 11
- 12
- 13
- 14
- 15
- 16
- 17
- 18
- 19
- 20
- 21
- 22
- 23
- 24
- 25
- 26
- 27
- 28
- 29
- 30
- 31
- 32
- 33
- 34
- 35
- 36
- 37
- 38
- 39
- 40
- 41
- 42
- 43
- 44
- 45
- 46
- 47
- 48
- 49
- 50
- 51
- 52
- 53
- 54
- 55
- 56
- 57
- 58
- 59
- 60
- 61
- 62
- 63
- 64
- 65
- 66
- 67
- 68
- 69
- 70
- 71
- 72
- 73
- 74

2. logstash的安装
2.1 简介
Logstash诞⽣于2009年8有2⽇,其作者是世界著名的虚拟主机托管商DreamHost的运维⼯程师Jordan
Sissel。在2013年,被ElasticSearch公司收购,作为⽇志收集⼯具,成为elk的⼀员。2.2 logstash官网地址 : [ logstash官网 ]
2.3 下载:
wget https://artifacts.elastic.co/downloads/logstash/logstash-7.5.1.tar.gz- 1
2.4 解压部署
tar -zxvf logstash-7.5.1.tar.gz- 1

2.5创建logstash启动的配置文件在conf.d⽬录下新建⼀个config.conf⽂件
input { file { path => "/usr/local/logs/*.log" start_position => beginning add_field => {"from" => "localfile"} } } filter { } output { elasticsearch { hosts => "localhost:9200" index => "testlog" } stdout { } }- 1
- 2
- 3
- 4
- 5
- 6
- 7
- 8
- 9
- 10
- 11
- 12
- 13
- 14
- 15
- 16
- 17
2.6 启动logstash
/usr/local/elk/logstash-7.5.1/bin/logstash -f /usr/local/elk/logstash7.5.1/conf.d/config.cong --config.reload.automatic &- 1
3. kibana的安装
3.1 kibana简介
Kibana是⼀个开源的分析与可视化平台,主要⽤于和Elasticsearch⼀起使⽤。使⽤kibana进⾏简单的配置,就可以搜索、查看存放在Elasticsearch中的数据。Kibana具有各种不同的图表、表格、地图等,借助这些直观的视图,可以达到⾼级的数据分析与可视化的⽬的。3.2 kibana官网地址 : [kibana官网]
3.3 下载kibana
wget https://artifacts.elastic.co/downloads/kibana/kibana-7.5.1-linux-x86_64.tar.gz- 1
3.4 解压安装部署
tar xvf kibana-7.5.1-linux-x86_64.tar.gz- 1
3.5 kibana相关配置
修改config/kibana.ymlvi config/kibana.yml server.port: 9102 server.host: "0.0.0.0" elasticsearch.hosts: "http://localhost:9200" kibana.index: ".kibana"- 1
- 2
- 3
- 4
- 5
- 6
3.6 启动kibana
/usr/local/elk/kibana-7.5.1-linux-x86_64/bin/kibana --allow-root &- 1
3.7 验证kibana启动是否成功
访问地址: 192.168.109.103:9102

-
相关阅读:
The valid characters are defined in RFC 7230 and RFC 3986
【高级语言程序设计】python函数式编程(一)
重识Nginx - 11 使用ngx_http_proxy_module的proxy_cache搭建一个具备缓存功能的反向代理服务
研发运营一体化(DevOps)能力成熟度模型
python游戏开始界面
Linux OpenGrok搭建
新书推荐:11.6 调用约定
站长号平台新版友情链接交换上线
Sora - 探索AI视频模型的无限可能
Ansible自动化:简化你的运维任务
- 原文地址:https://blog.csdn.net/ruipeng250/article/details/125947506
