-
Spring更简单的使用方法
前面介绍了一些最基本的存储和读取Bean对象的方法,但是在Spring中已经基本不这样使用了,因此这一篇博客就来介绍一下更简单的存储和读取Bean对象的方法而想要更简单的存储和读取最核心的就是使用注解,下面一起来看看吧!

🍌 一.存储Bean对象
🍓 1.配置扫描路径
想要将bean对象成功的存储到 Spring 中,此处需要配置⼀下存储对象的扫描包路径,在在Spring的配置文件 spring-config.xml中添加如下内容:
<beans xmlns="http://www.springframework.org/schema/beans" xmlns:xsi="http://www.w3.org/2001/XMLSchema-instance" xmlns:content="http://www.springframework.org/schema/context" xsi:schemaLocation="http://www.springframework.org/schema/beans http://www.springframework.org/schema/beans/spring-beans.xsd http://www.springframework.org/schema/context https://www.springframework.org/schema/context/spring-context.xsd"> <content:component-scan base-package="beans">content:component-scan> beans>- 1
- 2
- 3
- 4
- 5
- 6
- 7
- 8
这里需要修改的就是base-package的路径,这里需要将自己设置的存放bean对象的包改进去,然后Spring就会从这个包里面去扫描,如果没有设置的话,就是不会扫描的!
🍓 2.使用五大类注解实现
🍉 2.1.@Controller【控制器】
@Controller public class UserController { public void func(){ System.out.println("你好,controller"); } }- 1
- 2
- 3
- 4
- 5
- 6
- 7
此时就已经将此对象存储到Spring中了,然后再通过之前的取对象就看有进行读取使用了
public class Main { public static void main(String[] args) { //先得到上下文对象 ApplicationContext context = new ClassPathXmlApplicationContext("spring-config.xml"); //得到bean, UserController controller = context.getBean("userController",UserController.class); //使用bean controller.func(); } }- 1
- 2
- 3
- 4
- 5
- 6
- 7
- 8
- 9
- 10
此时这里就有个问题id到底是什么呢?很显然这里就需要使用到类名的小驼峰模式了!这样就能够访问到对象里面的方法了

🍉 2.2.@Service【服务】
@Service public class UserService { public void func(){ System.out.println("你好,service"); } }- 1
- 2
- 3
- 4
- 5
- 6
- 7
此时就已经将此对象存储到Spring中了,然后再通过之前的取对象就看有进行读取使用了
public class Main { public static void main(String[] args) { //先得到上下文对象 ApplicationContext context = new ClassPathXmlApplicationContext("spring-config.xml"); //得到bean UserService service= context.getBean("userService",UserService.class); //使用bean Service.func(); } }- 1
- 2
- 3
- 4
- 5
- 6
- 7
- 8
- 9
- 10

🍉 2.3.@Repository【仓库】
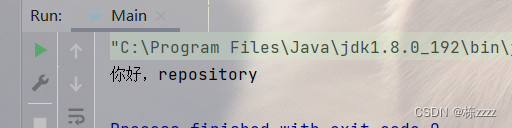
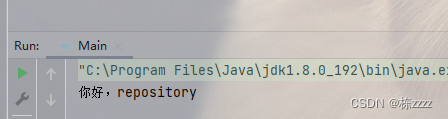
@Repository public class UserRepository { public void func(){ System.out.println("你好,repository"); } }- 1
- 2
- 3
- 4
- 5
- 6
- 7
此时就已经将此对象存储到Spring中了,然后再通过之前的取对象就看有进行读取使用了
public class Main { public static void main(String[] args) { //先得到上下文对象 ApplicationContext context = new ClassPathXmlApplicationContext("spring-config.xml"); //得到bean UserRepository repository = context.getBean("userRepository",UserRepository.class); //使用bean repository.func(); } }- 1
- 2
- 3
- 4
- 5
- 6
- 7
- 8
- 9
- 10
🍉 2.4.@Configuration【配置】
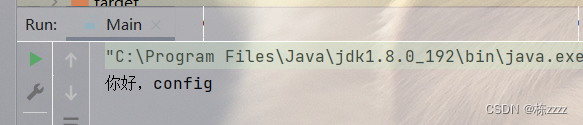
@Configuration public class UserConfig { public void func(){ System.out.println("你好,config"); } }- 1
- 2
- 3
- 4
- 5
- 6
- 7
这里一定不能使用Configurable,而是Configuration注解,这是配置层

public class Main { public static void main(String[] args) { //先得到上下文对象 ApplicationContext context = new ClassPathXmlApplicationContext("spring-config.xml"); //得到bean UserRepository repository = context.getBean("userRepository",UserRepository.class); //使用bean repository.func(); } }- 1
- 2
- 3
- 4
- 5
- 6
- 7
- 8
- 9
- 10
🍉 2.5.@Component【组件】
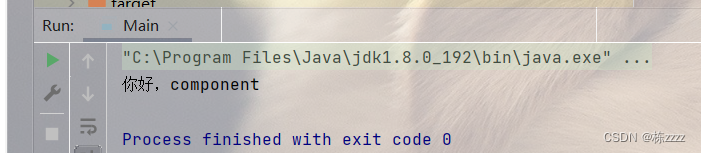
@Component public class UserComponent { public void func(){ System.out.println("你好,component"); } }- 1
- 2
- 3
- 4
- 5
- 6
public class Main { public static void main(String[] args) { //先得到上下文对象 ApplicationContext context = new ClassPathXmlApplicationContext("spring-config.xml"); //得到bean UserComponent component = context.getBean("userComponent",UserComponent.class); component.func(); } }- 1
- 2
- 3
- 4
- 5
- 6
- 7
- 8
- 9
🍓 3.为什么需要五大类注解
上面五大类注解用法基本用法都是类似的,但是为什么要用到五类注解呢?他们之间又有什么关系呢?下面一起来看看吧!

这个是程序的分工层次,这其实就对应到了上面的注解,其实每个注解都对应了不同的应用场景,而之所以非诚这么多类注解,就是让程序员看到注解之后,就能直接了当的了解类的用途,这也就提升了代码的可读性,让程序员可以直观的判断当前类的用途;五大注解之间的关系:
简单的看一下五大注解的源码,就可以发现
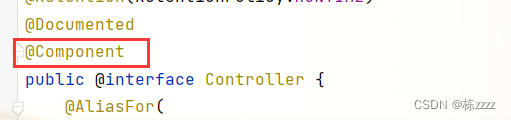
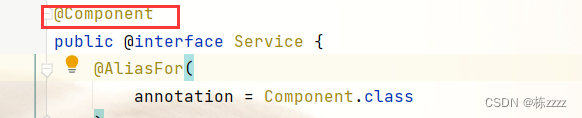
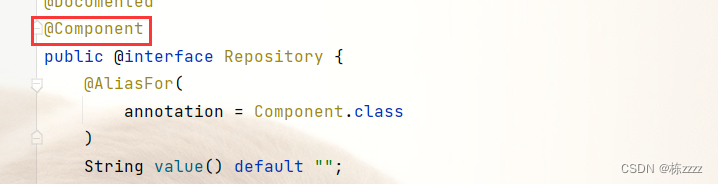
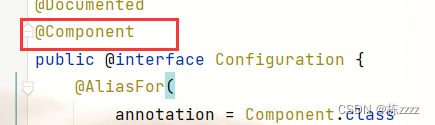
@Controller,@Service,@Repository,@Configuration都是基于@Component实现的,@Component是四个注解的父类!这里再来考虑一下为什么bean name是小驼峰的模式?
查看源码可以发现


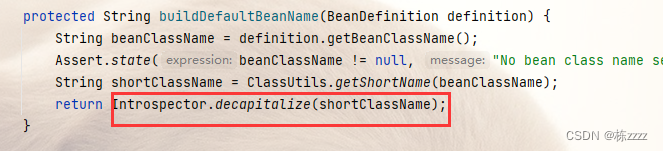
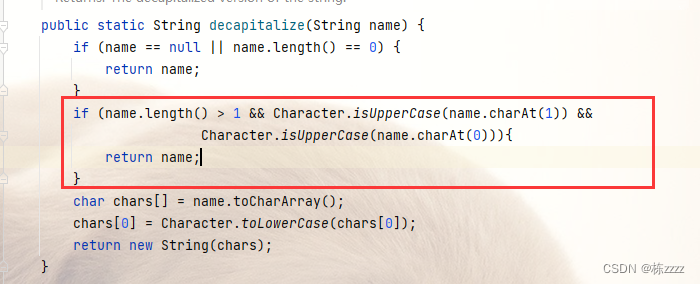
可以发现当类名的第一个和第二个字符都是大写的时候是直接返回的,而当第二个字符不是大写的时候,就会使用小驼峰的形式进行返回,因此这里一般使用的就是小驼峰的形式!
🍓 4.使用方法注解@Bean来实现
使用方法注解就不能再把注解加到类上了,因此只能加到方法上才可以,而@Bean是不能单独使用的,需要搭配一个类注解才可以使用(五个注解任何一个都可以)!
@Component public class UserBeans { //这里使用bean注解,bean注解只能放在方法上面 @Bean public User user1(){ User user = new User(); user.setId(1); user.setName("张三"); return user; } }- 1
- 2
- 3
- 4
- 5
- 6
- 7
- 8
- 9
- 10
- 11
- 12
public class Main { public static void main(String[] args) { //先得到上下文对象 ApplicationContext context = new ClassPathXmlApplicationContext("spring-config.xml"); //得到bean //这里的id就是方法名 User user = context.getBean("user1",User.class); System.out.println(user); } }- 1
- 2
- 3
- 4
- 5
- 6
- 7
- 8
- 9
- 10

这样就获得到这个bean对象了,而这里的bean name就不是类名的小驼峰形式了,而是加@Bean注解的方法名称!
而这里直接使用方法名就会比较奇怪,也不符合规范,因此能不能给bean name进行修改呢?当然是可以的,这里就可以通过设置 name 属性给 Bean 对象进⾏重命名操作!@Component public class UserBeans { @Bean(name = {"user"}) public User user1(){ User user = new User(); user.setId(1); user.setName("张三"); return user; } }- 1
- 2
- 3
- 4
- 5
- 6
- 7
- 8
- 9
- 10
这里是设置了一个名称,通过这个name再获取对象:
public class Main { public static void main(String[] args) { //先得到上下文对象 ApplicationContext context = new ClassPathXmlApplicationContext("spring-config.xml"); //得到bean //这里的id就是方法名 User user = context.getBean("user",User.class); System.out.println(user); } }- 1
- 2
- 3
- 4
- 5
- 6
- 7
- 8
- 9
- 10

发现也是可以的,因此名字就算修改成功了,而且这里还可以给一个bean对象设置多个名字,只需要将其他名字也放到大括号内就行了,而@Bean命名规则,当没有设置name属性的时候,bean name默认的名称就是方法名,当设置了name属性后,就只能通过设置好的bean name来获取bean了,再使用方法名就会报错了!
🍌 二.获取Bean对象
获取bean对象也称为对象装配,就是把对象取出来放到某个类中,而这有时候也称为对象注入,而吧对象从容器中读取出来有三种方法,下面一起来看看吧!

🍓 1.属性注入(字段注入)
直接使用@Autowired在属性上就可以进行注入了
@Repository public class UserRepository { public void func(){ System.out.println("你好,repository"); } } @Controller public class UserController { //属性注入,使用Autowired @Autowired // 前提条件是UserRepository对象已经存储到Spring中了 private UserRepository userRepository; public void func(){ userRepository.func(); }- 1
- 2
- 3
- 4
- 5
- 6
- 7
- 8
- 9
- 10
- 11
- 12
- 13
- 14
此时就已经将对象注入进来了,下面可以看一下是否成功了
public class Main { public static void main(String[] args) { //先得到上下文对象 ApplicationContext context = new ClassPathXmlApplicationContext("spring-config.xml"); UserController controller = context.getBean("userController",UserController.class); controller.func(); } }- 1
- 2
- 3
- 4
- 5
- 6
- 7
- 8
这就发现是符合预期结果的🍓 2.构造方法注入
在构造方法上面添加@Autowired注解也就看有进行注入了
@Repository public class UserRepository { public void func(){ System.out.println("你好,repository"); } } @Controller public class UserController { private UserService userService; @Autowired //构造方法注入,要遵守单一原则,多个参数是会注入失败的 public UserController(UserService userService){ this.userService = userService; } public void func(){ userService.func(); }- 1
- 2
- 3
- 4
- 5
- 6
- 7
- 8
- 9
- 10
- 11
- 12
- 13
- 14
- 15
- 16
此时就已经将对象注入进来了,下面可以看一下是否成功了
public class Main { public static void main(String[] args) { //先得到上下文对象 ApplicationContext context = new ClassPathXmlApplicationContext("spring-config.xml"); UserController controller = context.getBean("userController",UserController.class); controller.func(); } }- 1
- 2
- 3
- 4
- 5
- 6
- 7
- 8

而当构造方法传入的参数较多时,就无法正确进行注入了,就会出现错误,因此在使用构造方法注入的时候,就需要遵循单一原则!而当一个类中只有一个构造方法的时候是可以省略@Autowired🍓 3.Setter注入
@Repository public class UserRepository { public void func(){ System.out.println("你好,repository"); } } @Controller public class UserController { private UserService userService; @Autowired public void setUserService(UserService userService) { this.userService = userService; } public void func(){ userService.func(); }- 1
- 2
- 3
- 4
- 5
- 6
- 7
- 8
- 9
- 10
- 11
- 12
- 13
- 14
- 15
- 16
此时就已经将对象注入进来了,下面可以看一下是否成功了
public class Main { public static void main(String[] args) { //先得到上下文对象 ApplicationContext context = new ClassPathXmlApplicationContext("spring-config.xml"); UserController controller = context.getBean("userController",UserController.class); controller.func(); } }- 1
- 2
- 3
- 4
- 5
- 6
- 7
- 8

那么这三种注入方法的区别是什么?
- 属性注入特点是写法非常简单的,但是通用性不好,只能运行在IoC容器下,如果在非IoC容器下,是很有可能空指针异常的;
- 早期Spring版本推荐的写法是Setter写法,但是Setter注入通用性没有构造方法注入通过,因为在其他语言中setter方法有可能是无法使用的;
- 是在3.4版本之后构造方法成为了官方推荐的版本,构造方法的通用性更好,能确保在使用注入对象之前,此注入对象一定是初始化了,而之前不推荐的原因是因为多个参数的话,是无法进行注入的!

🍓 4.另⼀种注入关键字 @Resource
而进行注入的关键字也不只有@Autowired一个关键字,这个是有Spring提供的,而JDK也提供了一种注入关键字@Resource,和@Autowired用法是差不多的,但是也是有一定区别的:
- 出身不同:@Autowired 来⾃于 Spring框架的注解,⽽ @Resource 是来⾃于 JDK 的注解;
- 用法不同:@Autowired 支持属性注入,构造方法注入,Setter注入,而@Resource是不支持构造方法注入的;
- 支持的参数不同:@Resource支持更多的参数设置,比如name、type设置,而@Autowired只支持required参数设置;
🍓 5.@Bean将一个类型的参数注入多次
在使用@Bean将一个类型的参数注入多次的时候是会出现问题的
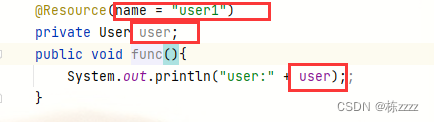
@Component public class UserBeans { @Bean(name = {"user1"}) public User getUser1(){ User user = new User(); user.setId(1); user.setName("张三"); return user; } @Bean(name = {"user2"}) public User getUser2(){ User user = new User(); user.setId(2); user.setName("李四"); return user; } } @Controller public class UserController { @Autowired private User user; public void func(){ System.out.println("user:" + user);; } } public class Main { public static void main(String[] args) { //先得到上下文对象 ApplicationContext context = new ClassPathXmlApplicationContext("spring-config.xml"); UserController controller = context.getBean("userController",UserController.class); controller.func(); } }- 1
- 2
- 3
- 4
- 5
- 6
- 7
- 8
- 9
- 10
- 11
- 12
- 13
- 14
- 15
- 16
- 17
- 18
- 19
- 20
- 21
- 22
- 23
- 24
- 25
- 26
- 27
- 28
- 29
- 30
- 31
- 32
- 33
- 34
- 35

这里是会先根据名称去找,然后会使用类去找,发现有两个就出现错误了,因此解决方法有以下三种:
🍉 5.1.精确的描述bean的名称(将注入的名字写对)
可以将注入的bean的名字修改成自己设定的name值就可以了


但是这个也有缺陷,如果这个名称已经被使用过了, 其他地方就不能再使用了,因此就需要其他解决方法!🍉 5.2.使用@Resource注解
上面我说了使用@Resource可以有多个参数的支持,而这里就可以将bean的name放到name属性里面,然后就可以重命名注入的bean对象名字了

但是如果不使用@Resource注解的话,当然使用@Autowired也是可以解决的!🍉 5.3.使用@Autowired注解
而使用@Autowired是没有name属性的,是无法像@Resource一样直接设置参数的,而这里就需要假如另一个注解@Qualifier,通过这个注解来进行限定,限定为存储的bean对象的名字,也是可以解决的
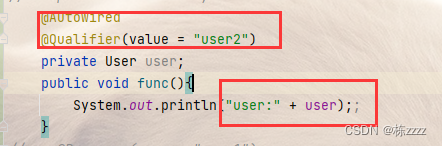

而@Qualifier里面的参数value是可以省略的,因为@Qualifier里面只有一个参数,但是建议写上这个,不要省略!

-
相关阅读:
【C语言精髓 之 指针】指针*、取地址&、解引用*、引用&
ElasticSearch第三讲:ES详解 - Elastic Stack生态和场景方案
git常用命令
基于C#的学生综合教务管理系统
【Unity】3D贪吃蛇游戏制作/WebGL本地测试及项目部署
二叉查找树(二)- C++实现
64、3D Neural Scene Representations for Visuomotor Control
漏洞复现--华测监测预警系统2.2任意文件读取
[附源码]SSM计算机毕业设计民宿客栈管理系统JAVA
JavaSE&Java8 时间日期API + 使用心得
- 原文地址:https://blog.csdn.net/qq_58266033/article/details/125746199
