-
Express接收请求参数
一、Express接收请求参数
1、接收get请求参数:使用req.query接收
req.query.参数名- 1
演示;
1.1、在WebStrom中创建express项目: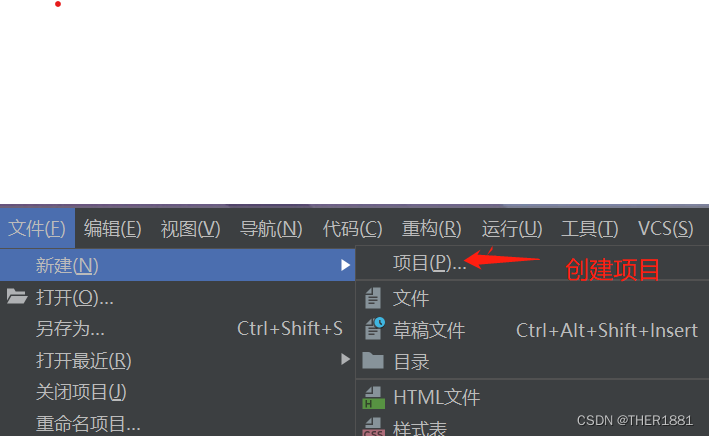

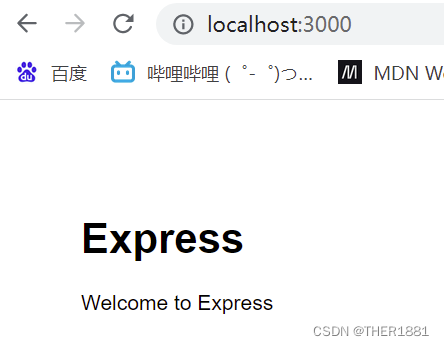
1.2、创建完成后,运行服务器,检查是否在3000端口上成功运行:
1.3、创建路由,命名为gets.js:const express = require('express') const router = express.Router() //创建get请求的处理代码 http://localhost:3000/params/gets router.get('/gets',(req, res) => { //通过req.query接收get请求的参数 res.send(req.query) console.log(req.query) }) module.exports = router- 1
- 2
- 3
- 4
- 5
- 6
- 7
- 8
- 9
- 10
- 11
- 12
1.4、配置app.js文件:
var getparamsRouter=require('./routes/getparams'); app.use('/params',getparamsRouter);- 1
- 2
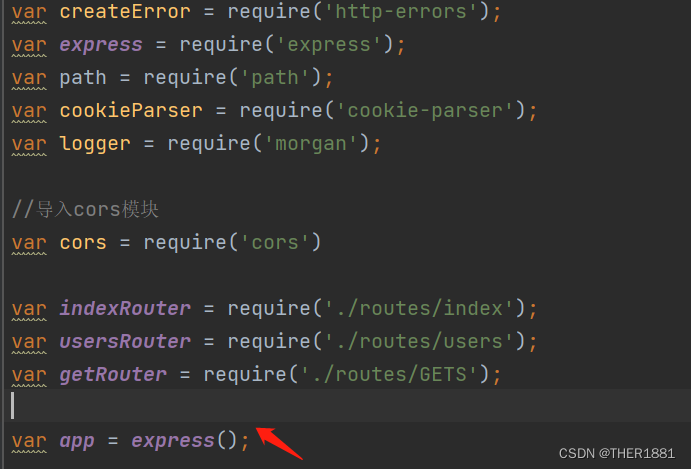
需要注意的是在配置app.js时,导入自定义路由文件时必须放在
var app = express()前,否则可能会出现错误。图示:
1.5、在Apipost中进行调试


2、接收post请求参数:使用req.body接收
req.body.参数名- 1
post请求前期的创建express项目等步骤和get请求一致,这里就不在做演示。
2.1、创建post.js
演示:const express = require('express') const router = express.Router() //创建post请求的处理代码 router.post('/posts',(req, res) => { res.send(req.body) console.log("姓名"+req.body.username) console.log("密码"+req.body.pwd) }) module.exports = router- 1
- 2
- 3
- 4
- 5
- 6
- 7
- 8
- 9
- 10
- 11
- 12
- 13
- 14
依旧先在Apipost中调试

2.2在客户端中进行验证:首先创建HTML页面:
<!DOCTYPE html> <html lang="en"> <head> <meta charset="UTF-8"> <meta http-equiv="X-UA-Compatible" content="IE=edge"> <meta name="viewport" content="width=device-width, initial-scale=1.0"> <title>Document</title> </head> <style> div{ width: 300px; margin: 100px 600px 500px 400px; } </style> <body> <div> <form action="http://localhost:3000/params/gets" method="get"> <label for=""> 用户名: <input type="text" name="username"> </label> <br><br> <label for=""> 密 码: <input type="password" name="pwd" id=""> </label> <br><br> <button type="submit">提交</button> </form> </div> </body> </html>- 1
- 2
- 3
- 4
- 5
- 6
- 7
- 8
- 9
- 10
- 11
- 12
- 13
- 14
- 15
- 16
- 17
- 18
- 19
- 20
- 21
- 22
- 23
- 24
- 25
- 26
- 27
- 28
- 29
- 30
- 31
- 32

点击提交后:
3、接收路由参数
定义路由时,在请求路径中传递的参数例如请求路径“/find/:id”中的“:id”是一个参数占位符,当浏览器向“/find/:id”地址发送请求时,“:id”对应的值就是参数值。在接收参数时,使用req.params
演示:
3.1、gets.js:
const express = require('express') const router = express.Router() router.get('/find/:id/:addr',(req, res) => { res.send(req.params) console.log('路由参数:'+req.params.id) console.log('路由参数:'+req.params.addr) }) module.exports = router- 1
- 2
- 3
- 4
- 5
- 6
- 7
- 8
3.2、进行验证:

-
相关阅读:
记录一个cpu彪高的BUG处理--jvm调优
Python之字典与集合的基本操作
Java项目论文+PPT+源码等]S2SH+mysql水费管理系统
测试C#分词工具jieba.NET(续1:提取关键词及并行分词)
SpringBoot集成WebSocket--------Spring方式集成(一)
完成Zookeeper集群部署
模糊测试面面观 | 车联网场景模糊测试解决方案
UNIAPP day_01(8.30) uin-app概述
13-ROS参数的学习与使用
NodeJS使用npm安装vue脚手架
- 原文地址:https://blog.csdn.net/thwr1881/article/details/125996341
