-
JavaScript实现简单的数据库查询(不完整)
JavaScript实现简单的数据库查询
1.创建Project (Module)
创建完之后:


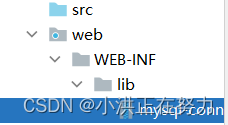
2.创建lib文件

如图:放入mysql驱动
写代码:
1.建立pojo包,放入Student类:
package com.situ.web.pojo; public class Student { private Integer id; private String name; private Integer age; private String gender; public Student(Integer id, String name, Integer age, String gender) { this.id = id; this.name = name; this.age = age; this.gender = gender; } public Integer getId() { return id; } public void setId(Integer id) { this.id = id; } public String getName() { return name; } public void setName(String name) { this.name = name; } public Integer getAge() { return age; } public void setAge(Integer age) { this.age = age; } public String getGender() { return gender; } public void setGender(String gender) { this.gender = gender; } @Override public String toString() { return "Student{" + "id=" + id + ", name='" + name + '\'' + ", age=" + age + ", gender='" + gender + '\'' + '}'; } }- 1
- 2
- 3
- 4
- 5
- 6
- 7
- 8
- 9
- 10
- 11
- 12
- 13
- 14
- 15
- 16
- 17
- 18
- 19
- 20
- 21
- 22
- 23
- 24
- 25
- 26
- 27
- 28
- 29
- 30
- 31
- 32
- 33
- 34
- 35
- 36
- 37
- 38
- 39
- 40
- 41
- 42
- 43
- 44
- 45
- 46
- 47
- 48
- 49
- 50
- 51
- 52
- 53
- 54
- 55
- 56
- 57
- 58
2.为了方便连接,将部分JDBC操作封装为JDBCUtil类:
package com.situ.web.util; import java.sql.*; public class JDBCUtil { private final static String URL = "jdbc:mysql://localhost:3306/java2207?useUnicode=true&characterEncoding=UTF-8&serverTimezone=UTC"; private final static String USER = "root"; private final static String PASSWORD = "root"; //私有构造器防止被实例化 private JDBCUtil() { } //加载驱动(static在类加载时执行一次) static { try { Class.forName("com.mysql.jdbc.Driver"); } catch (ClassNotFoundException e) { e.printStackTrace(); } } //建立连接 public static Connection getConnection() throws SQLException { Connection connection = DriverManager.getConnection(URL,USER,PASSWORD); return connection; } //封装close方法,按照先建立的后关闭原则(与栈类似,创建顺序为connection,preparedStatement,resultSet,所以关闭时顺序如下) public static void close(Connection connection, PreparedStatement preparedStatement, ResultSet resultSet){ if (resultSet != null) { try { resultSet.close(); } catch (SQLException throwables) { throwables.printStackTrace(); } } if (preparedStatement != null) { try { preparedStatement.close(); } catch (SQLException throwables) { throwables.printStackTrace(); } } if (connection != null) { try { connection.close(); } catch (SQLException throwables) { throwables.printStackTrace(); } } } }- 1
- 2
- 3
- 4
- 5
- 6
- 7
- 8
- 9
- 10
- 11
- 12
- 13
- 14
- 15
- 16
- 17
- 18
- 19
- 20
- 21
- 22
- 23
- 24
- 25
- 26
- 27
- 28
- 29
- 30
- 31
- 32
- 33
- 34
- 35
- 36
- 37
- 38
- 39
- 40
- 41
- 42
- 43
- 44
- 45
- 46
- 47
- 48
- 49
- 50
- 51
- 52
3.重写service方法,建立服务器(tomcat)将我们的代码以tomcat执行共享给浏览器。
什么是Servlet?
***package com.situ.web.servlet; import com.situ.web.pojo.Student; import com.situ.web.util.JDBCUtil; import javax.servlet.ServletException; import javax.servlet.annotation.WebServlet; import javax.servlet.http.HttpServlet; import javax.servlet.http.HttpServletRequest; import javax.servlet.http.HttpServletResponse; import java.io.IOException; import java.sql.*; import java.util.ArrayList; import java.util.List; @WebServlet("/student") public class StudentServlet extends HttpServlet { // 访问servlet默认访问service方法 @Override protected void service(HttpServletRequest req, HttpServletResponse resp) throws ServletException, IOException { Connection connection = null; PreparedStatement preparedStatement = null; ResultSet resultSet = null; List<Student> list = new ArrayList<>(); try { //建立连接 connection = JDBCUtil.getConnection(); //sql语句 String sql = "select id,name,age,gender from student"; //构建桥梁,预编译sql语句 preparedStatement = connection.prepareStatement(sql); //查询结果放入resultSet resultSet = preparedStatement.executeQuery(); //迭代取出元素 while(resultSet.next()){ int id = resultSet.getInt("id"); String name = resultSet.getString("name"); int age = resultSet.getInt("age"); String gender = resultSet.getString("gender"); //封装student Student student = new Student(id,name,age,gender); list.add(student); } //打印台测试 for (Student student : list) { System.out.println(student); } } catch (SQLException throwables) { throwables.printStackTrace(); }finally { JDBCUtil.close(connection,preparedStatement,resultSet); } 把List集合中数据放到request内存里面 req.setAttribute("list",list); // 转发到student_list.jsp页面进行展示 req.getRequestDispatcher("student_list.jsp").forward(req,resp); } }- 1
- 2
- 3
- 4
- 5
- 6
- 7
- 8
- 9
- 10
- 11
- 12
- 13
- 14
- 15
- 16
- 17
- 18
- 19
- 20
- 21
- 22
- 23
- 24
- 25
- 26
- 27
- 28
- 29
- 30
- 31
- 32
- 33
- 34
- 35
- 36
- 37
- 38
- 39
- 40
- 41
- 42
- 43
- 44
- 45
- 46
- 47
- 48
- 49
- 50
- 51
- 52
- 53
- 54
- 55
- 56
- 57
- 58
- 59
- 60
- 61
- 62
- 63
4.编写student_list.jsp
JSP:
Servlet的作用:用于java语言开发动态资源的技术!!
JSP的作用:用java语言 + html语言,开发动态资源的技术!!
JSP就是servlet!!!JSP的脚本:(脚本就是一段代码)
语法:<%java代码 %>
作用: 执行java代码JSP表达式:
语法:<%=变量或表达式%>
作用: 向浏览器输出变量的值或表达式计算的结果%@ page import="java.util.List" %> <%@ page import="com.situ.web.pojo.Student" %> <%@ page import="java.util.List" %> <%@ page import="java.util.ArrayList" %> <%@ page contentType="text/html;charset=UTF-8" language="java" %> <html> <head> <title>Title</title> <link rel="stylesheet" type="text/css" href="static/bootstrap-3.4.1-dist/css/bootstrap.css"/> </head> <body> ${list} <% List<Student> list = (List<Student>) request.getAttribute("list"); %> <table class="table table-striped table-bordered table-hover table-condensed"> <tr> <th>ID</th> <th>姓名</th> <th>年龄</th> <th>性别</th> </tr> <% for (Student student:list) { %> <tr> <td><%=student.getId()%></td> <td><%=student.getName()%></td> <td><%=student.getAge()%></td> <td><%=student.getGender()%></td> <td><a href="">删除</a></td> </tr> <% } %> </table> </body> </html>- 1
- 2
- 3
- 4
- 5
- 6
- 7
- 8
- 9
- 10
- 11
- 12
- 13
- 14
- 15
- 16
- 17
- 18
- 19
- 20
- 21
- 22
- 23
- 24
- 25
- 26
- 27
- 28
- 29
- 30
- 31
- 32
- 33
- 34
- 35
- 36
- 37
- 38
- 39
-
相关阅读:
StretchBlt()、Bitblt用法详解
使用 Telegraf 进行综合监控
牛客网刷题 | BC117 逆序输出
thinkPHP框架详解+部署
循序渐进学习AOP切面编程(包含详细demo)
.NET餐厅管理系统sql数据帮助类C#利用反射获取对象属性值、将sr_readStr数组存入数据库image类型的字段中
计算机组成原理-华科版本
使用nvm-windows在Windows下轻松管理多个Node.js版本
reduce方法的使用以及一些使用场景
在Pytorch中调用RNN模型的小细节
- 原文地址:https://blog.csdn.net/kallenAB/article/details/125899706
