-
【Python】【技能树评测】【05】数据库操作详细含源码:
前言:
CSDN技能树数据库的操作上来就执行database的sql语句,但是,还没有安装咋办呢,所以,本章借鉴了一个CSDN有关数据库的安装先从头安装一下。
而且,CSND给出的例子也是编译不通啊。于是我又在Pycharm上编译了一下,源码贴在本章里面了。1 数据库的安装:
1.1 下载安装包
Mysql下载地址:
Mysql8.0.29下载地址1.2 解压
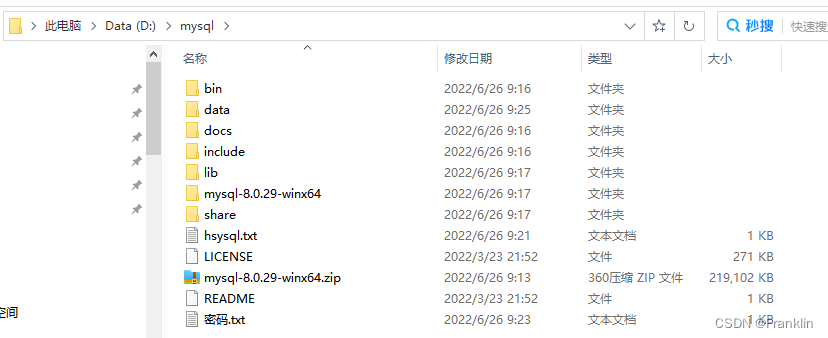
下载后,解压就可以用了:

我解压到下面地址:D:\mysql- 1
1.3 配置初始化ini文件:
放在安装目录下:
> [mysqld] # 设置3306端口 port=3306 # 设置mysql的安装目录 ----------是你的文件路径------------- basedir=D:\mysql # 设置mysql数据库的数据的存放目录 ---------是你的文件路径data文件夹自行创建 datadir=D:\mysql\data # 允许最大连接数 max_connections=200 # 允许连接失败的次数。 max_connect_errors=10 # 服务端使用的字符集默认为utf8mb4 character-set-server=utf8mb4 # 创建新表时将使用的默认存储引擎 default-storage-engine=INNODB # 默认使用“mysql_native_password”插件认证 #mysql_native_password default_authentication_plugin=mysql_native_password [mysql] # 设置mysql客户端默认字符集 default-character-set=utf8mb4 [client] # 设置mysql客户端连接服务端时默认使用的端口 port=3306 default-character-set=utf8mb4- 1
- 2
- 3
- 4
- 5
- 6
- 7
- 8
- 9
- 10
- 11
- 12
- 13
- 14
- 15
- 16
- 17
- 18
- 19
- 20
- 21
- 22
- 23
- 24
- 25
1.4 执行基本数据指令
1.4.1 以管理员身份打开CMD
1.4.2 构建自己的数据库
1.4.2.1 进入刚才解压配置的目录
D:\>cd mysql D:\mysql>cd bin- 1
- 2
1.4.2.2 初始化并安装数据库服务
在bin目录初始化数据库服务:
D:\mysql\bin>mysqld --initialize --console 2022-06-26T01:22:23.092877Z 0 [System] [MY-013169] [Server] D:\mysql\bin\mysqld.exe (mysqld 8.0.29) initializing of server in progress as process 15296 2022-06-26T01:22:23.260962Z 1 [System] [MY-013576] [InnoDB] InnoDB initialization has started. 2022-06-26T01:22:34.420053Z 1 [System] [MY-013577] [InnoDB] InnoDB initialization has ended. 2022-06-26T01:22:58.116447Z 6 [Note] [MY-010454] [Server] A temporary password is generated for root@localhost: jpy_uI2l79tv- 1
- 2
- 3
- 4
- 5
安装mysql
D:\mysql\bin>mysqld --install mysql Service successfully installed.- 1
- 2
启动mysql
D:\mysql\bin>net start mysql mysql 服务正在启动 .... mysql 服务已经启动成功。- 1
- 2
- 3
【现在,我们已经启动了一个默认的数据库服务,现在要改成我们自己的服务,第一步就是改密码】
1.4.2.3 更改根密码
D:\mysql\bin>mysql -uroot -p Enter password: ************ Welcome to the MySQL monitor. Commands end with ; or \g. Your MySQL connection id is 8 Server version: 8.0.29 Copyright (c) 2000, 2022, Oracle and/or its affiliates. Oracle is a registered trademark of Oracle Corporation and/or its affiliates. Other names may be trademarks of their respective owners. Type 'help;' or '\h' for help. Type '\c' to clear the current input statement.- 1
- 2
- 3
- 4
- 5
- 6
- 7
- 8
- 9
- 10
- 11
- 12
mysql> ALTER USER 'root'@'localhost' IDENTIFIED BY 'yourpassword'; Query OK, 0 rows affected (0.19 sec)- 1
- 2
【在yourpassword,填入你自己的密码】
1.4.2.4 构建自己的数据库:
mysql> create database hsyPythontest01; Query OK, 1 row affected (0.21 sec)- 1
- 2
1.4.2.5 显示自己的数据库:
mysql> show databases; +--------------------+ | Database | +--------------------+ | hsypythontest01 | | information_schema | | mysql | | performance_schema | | sys | +--------------------+ 5 rows in set (0.00 sec)- 1
- 2
- 3
- 4
- 5
- 6
- 7
- 8
- 9
- 10
- 11
【这里,我们已经在windows系统里面安装了一个简单mysql数据库服务,并且建了一个空的数据库hsypythontest01】
2 在Pycharm中运行运行数据库:
我们现在只是在操作系统里面构建了数据库,还没有吧python的编译环境连接起来,这一节做这个事情。
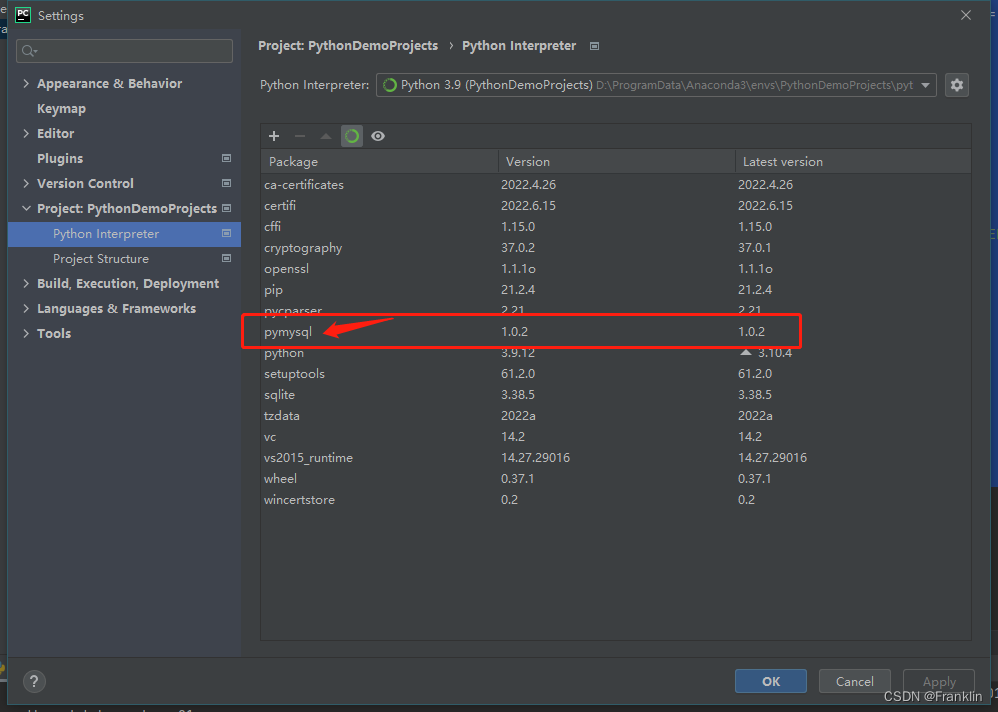
2.1 在Pycharm上确认一下,我们的数据库模块已经安装了:

2.2 在Pycharm上运行1 - 连接并插入一个表【源码】
话不多说,上源码:
import pymysql print("python database demo 01") db = pymysql.connect(host='localhost', user='root', password='8661', database='hsypythontest01') #print (db) cursor = db.cursor() print(cursor) # curcur.execute("creat talbe book (\ # id varchar(20) PRIMARY KEY,\ # name varchar(20)) ") # 使用 execute() 方法执行 SQL,如果表存在则删除 cursor.execute("DROP TABLE IF EXISTS EMPLOYEE") # 使用预处理语句创建表 sql = """CREATE TABLE EMPLOYEE ( FIRST_NAME CHAR(20) NOT NULL, LAST_NAME CHAR(20), AGE INT, SEX CHAR(1), INCOME FLOAT )""" cursor.execute(sql) # 关闭数据库连接 db.close()- 1
- 2
- 3
- 4
- 5
- 6
- 7
- 8
- 9
- 10
- 11
- 12
- 13
- 14
- 15
- 16
- 17
- 18
- 19
- 20
- 21
- 22
- 23
- 24
- 25
【验证一下】
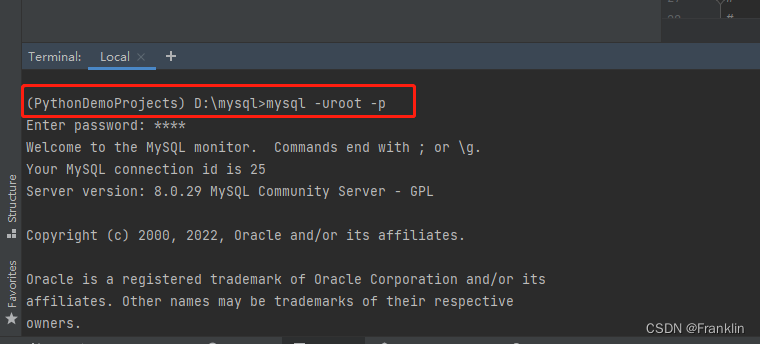
我们登录一下刚才创建的空数据库,登录的地方可以是刚才的CMD窗口,也可以在Pycharm里面的Terminal里面,我们这次用Pycharm的Terminal里面;

登录需要敲入密码:8661D:\mysql>mysql -uroot -p- 1
选择数据库
use hsypythontest01- 1
进入mysql后,然后,可以验证刚才我们创建的表:
mysql> show tables; Empty set (0.13 sec) mysql> show tables; +---------------------------+ | Tables_in_hsypythontest01 | +---------------------------+ | employee | +---------------------------+ 1 row in set (0.01 sec)- 1
- 2
- 3
- 4
- 5
- 6
- 7
- 8
- 9
- 10
- 11
2.1 遇到的问题1
没有安装和连接数据库
在python的环境中安装数据库:
(PythonDemoProjects) D:\BaiduNetdiskWorkspace\PythonDemoProjects>pip install pymysql Collecting pymysql Downloading PyMySQL-1.0.2-py3-none-any.whl (43 kB) |████████████████████████████████| 43 kB 700 kB/s Installing collected packages: pymysql Successfully installed pymysql-1.0.2- 1
- 2
- 3
- 4
- 5
- 6
- 7
2.1.1 连接报错
D:\ProgramData\Anaconda3\envs\PythonDemoProjects\python.exe D:/BaiduNetdiskWorkspace/PythonDemoProjects/PythonDemoDataBase01.py
python database demo 01
Traceback (most recent call last):
File “D:\BaiduNetdiskWorkspace\PythonDemoProjects\PythonDemoDataBase01.py”, line 3, in
db = pymysql.connect(host=‘127.0.0.1’, user=‘root’, password=‘8661’, database=‘hsypythontest01’)
File “D:\ProgramData\Anaconda3\envs\PythonDemoProjects\lib\site-packages\pymysql\connections.py”, line 353, in init
self.connect()
File “D:\ProgramData\Anaconda3\envs\PythonDemoProjects\lib\site-packages\pymysql\connections.py”, line 633, in connect
self._request_authentication()
File “D:\ProgramData\Anaconda3\envs\PythonDemoProjects\lib\site-packages\pymysql\connections.py”, line 932, in _request_authentication
auth_packet = _auth.caching_sha2_password_auth(self, auth_packet)
File “D:\ProgramData\Anaconda3\envs\PythonDemoProjects\lib\site-packages\pymysql_auth.py”, line 265, in caching_sha2_password_auth
data = sha2_rsa_encrypt(conn.password, conn.salt, conn.server_public_key)
File “D:\ProgramData\Anaconda3\envs\PythonDemoProjects\lib\site-packages\pymysql_auth.py”, line 143, in sha2_rsa_encrypt
raise RuntimeError(
RuntimeError: ‘cryptography’ package is required for sha256_password or caching_sha2_password auth methods
Process finished with exit code 1【缺少cryptography模块】
(PythonDemoProjects) D:\BaiduNetdiskWorkspace\PythonDemoProjects>pip install cryptography Collecting cryptography Downloading cryptography-37.0.2-cp36-abi3-win_amd64.whl (2.4 MB) |████████████████████████████████| 2.4 MB 172 kB/s Collecting cffi>=1.12 Downloading cffi-1.15.0-cp39-cp39-win_amd64.whl (180 kB) |████████████████████████████████| 180 kB 48 kB/s Collecting pycparser Downloading pycparser-2.21-py2.py3-none-any.whl (118 kB) |████████████████████████████████| 118 kB 226 kB/s Installing collected packages: pycparser, cffi, cryptography Successfully installed cffi-1.15.0 cryptography-37.0.2 pycparser-2.21- 1
- 2
- 3
- 4
- 5
- 6
- 7
- 8
- 9
- 10
- 11
- 12
- 13
参考:
1.1 参考博客:
mysql8.0.25安装配置教程(windows 64位)最详细
Python案例参考:
1.2 数据库管理工具下载资源:
-
相关阅读:
PHP-Redis接口参照文件
3.13 小红书笔记怎样带话题,才能增加曝光?【玩赚小红书】
项目管理实战总结(二)-沟通路径
宏观上理解blazor中的表单验证
DzzOffice集成功能最丰富的开源PHP+MySQL办公系统套件
朴素贝叶斯算法
DevOps 环境预测测试中的机器学习
2022/08/08 day05:Jedis
跨域和验证码的实现
【期末大作业】基于HTML+CSS+JavaScript南京大学网页校园教育网站html模板(3页)
- 原文地址:https://blog.csdn.net/yellow_hill/article/details/125469544