-
【SpringBoot】线程池自定义配置
方法
1、创建配置类
@Configuration @EnableAsync @Component public class ThreadPoolConfigTest { @Bean(name = "asyncExecutor") public Executor getThreadPool() { //cpu的核心数,包括超线程出来的cpu核心数 int num = Runtime.getRuntime().availableProcessors(); ThreadPoolTaskExecutor taskExecutor = new ThreadPoolTaskExecutor(); taskExecutor.setCorePoolSize(num); taskExecutor.setMaxPoolSize(num * 5); //阻塞队列任务 taskExecutor.setQueueCapacity(num * 2); //线程名的前缀 taskExecutor.setThreadNamePrefix("taskExecutor->"); //初始化线程池 taskExecutor.initialize(); return taskExecutor; } }- 1
- 2
- 3
- 4
- 5
- 6
- 7
- 8
- 9
- 10
- 11
- 12
- 13
- 14
- 15
- 16
- 17
- 18
- 19
- 20
- 21
- 22
- 23
- 24
- 25
- 26
- 27
2、使用方式
方式一、通过注解方式使用线程池
创建线程任务
@Component public class ThreadTasks { @Async public void startMyThreadTask(int i) throws InterruptedException { Thread.sleep(1000); System.out.println(Thread.currentThread().getName() + ": " + i); System.out.println("startMyThreadTask: " + i); } }- 1
- 2
- 3
- 4
- 5
- 6
- 7
- 8
- 9
调用
@RestController @RequestMapping("/thread") public class ThreadController { @Resource private ThreadTasks threadTasks; @Resource private TestService testService; @GetMapping("test1") public void test1() throws InterruptedException { System.out.println("test1获取主线程名称: " + Thread.currentThread().getName()); for (int i = 0; i < 10; i++) { threadTasks.startMyThreadTask(i); } System.out.println("test1执行任务完成了"); }- 1
- 2
- 3
- 4
- 5
- 6
- 7
- 8
- 9
- 10
- 11
- 12
- 13
- 14
- 15
- 16
- 17
- 18
方式二、通过submit使用
定义Service
@Service public class TestService { @Resource private ThreadPoolTaskExecutor asyncExecutor; public void test() { System.out.println(Thread.currentThread().getName()); asyncExecutor.submit(() -> { System.out.println(Thread.currentThread().getName()); System.out.println("娃哈哈哈哈哈"); }); } }- 1
- 2
- 3
- 4
- 5
- 6
- 7
- 8
- 9
- 10
- 11
- 12
- 13
- 14
使用Service
@RestController @RequestMapping("/thread") public class ThreadController { @Resource private ThreadTasks threadTasks; @Resource private TestService testService; @GetMapping("test2") public void test2() { testService.test(); } }- 1
- 2
- 3
- 4
- 5
- 6
- 7
- 8
- 9
- 10
- 11
- 12
- 13
额外提示
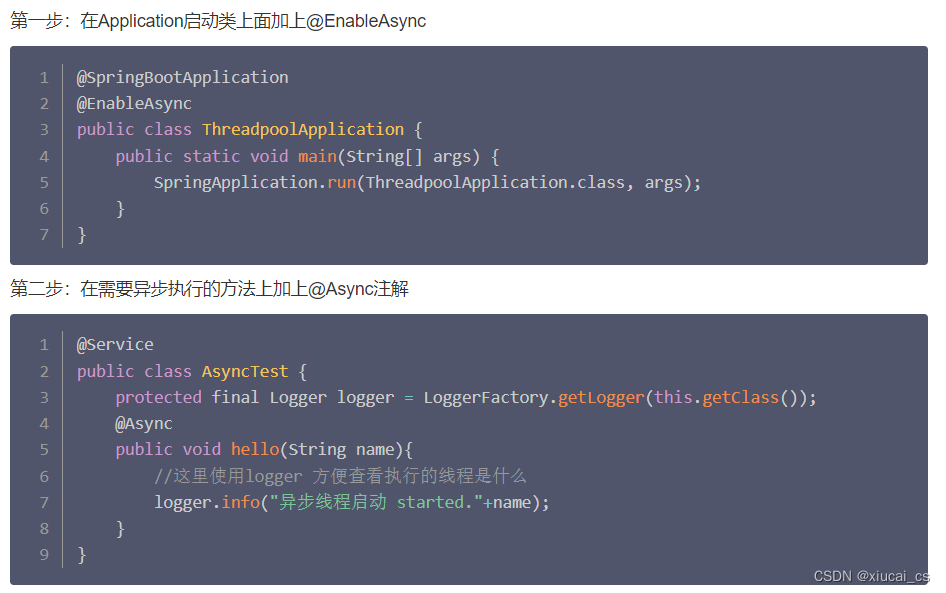
- SpringBoot默认是有线程池的,如果不想自己定义。可以直接在SpringBoot的启动类上加上@EnableAsync,即可通过注解的方式使用默认的线程池。

- 由于SpringBoot默认有线程池,所以也可以用直接调用ThreadPoolTaskExecutor的方式使用线程池。
实例代码
@SpringBootTest class ThreadPoolApplicationTests { protected final Logger logger = LoggerFactory.getLogger(this.getClass()); @Autowired AsyncTest asyncTest; @Autowired ThreadPoolTaskExecutor threadPoolTaskExecutor; @Test void contextLoads() throws InterruptedException { asyncTest.hello("async注解创建"); threadPoolTaskExecutor.submit(new Thread(()->{ logger.info("threadPoolTaskExecutor 创建线程"); })); //一定要休眠 不然主线程关闭了,子线程还没有启动 Thread.sleep(1000); } }- 1
- 2
- 3
- 4
- 5
- 6
- 7
- 8
- 9
- 10
- 11
- 12
- 13
- 14
- 15
- 16
- 17
- 18
参考链接: 线程池配置及@Async异步注解
-
相关阅读:
typeof 与 instanceof 区别
Nautlius Chain主网正式上线,模块Layer3时代正式开启
汇编语言之栈
【MySQL】快速了解MySQL基础
vue3 Element Plus 基于webstorm练习
Apollo + LGSVL联合仿真
查看项目go代码cpu利用率
vue项目搭建
kubernetes的多租户管理实践
【SoC FPGA】HPS启动过程
- 原文地址:https://blog.csdn.net/qq_40258748/article/details/125612386
