-
ES、kibana、JavaClient详细安装及操作
版本声明:ElasticSearch8.2.0、kibana8.2.0、javaClinet8.2.0
文章同步地址:博客地址-阅读效果更加
一、使用docker安装ElasticSearch
1.创建挂载卷
在本机任意位置创建相关文件夹,复制其路径:
- /Users/ppsn/Documents/docker/elasticsearch9201/config
- /Users/ppsn/Documents/docker/elasticsearch9201/data
- /Users/ppsn/Documents/docker/elasticsearch9201/plugins
由于是macos端,不事先创建文件夹可能会挂载失败,Linux上则会自动创建文件夹
2.运行容器
直接运行容器即可,docker会自动拉取相关镜像
docker run -d -p 9201:9200 -e "discovery.type=single-node" -e ES_JAVA_OPTS="-Xms512m -Xmx512m" -v /Users/ppsn/Documents/docker/elasticsearch9201/config:/usr/share/elasticsearch/config -v /Users/ppsn/Documents/docker/elasticsearch9201/data:/usr/share/elasticsearch/data -v /Users/ppsn/Documents/docker/elasticsearch9201/plugins:/usr/share/elasticsearch/plugins --name es9201 elasticsearch:8.2.0- 1
说明:
-
-d后台运行 -
-p 9201:9200指定端口映射- 小p代表自己指定端口,大P代表随机映射端口
- 9201 : 指定端口
- 9200 : es默认端口
-
-e "discovery.type=single-node"指定单节点运行 -
-e ES_JAVA_OPTS="-Xms512m -Xmx512m"指定参数运行- Xms512m : 初始使用内存,-Xmx512m : 最大使用内存
- es8.2版本默认不指定时为4GB,本机测试太大,建议修改
-
-v 本地目录:容器内目录指定文件挂载目录 -
-name es9201指定运行时容器名称 -
elasticsearch:8.2.0镜像名称及标签
3.可能出现的异常
运行上述命令会提示缺少jvm什么的
这可能是因为容器内的文件无法复制出来
解决思路:
- 首先以不挂载数据卷的方式运行容器
- 执行拷贝命令将相关文件拷贝到本机
- 删除容器,再以数据挂载卷的方式运行
具体执行:
# 运行容器 docker run -d --name es9201 -p 9201:9200 -p 9300:9300 -e "discovery.type=single-node" -e ES_JAVA_OPTS="-Xms512m -Xmx512m" elasticsearch:8.2.0- 1
- 2
# 拷贝文件 # docker cp 容器id/名称:容器内路径 本机路径 docker cp es9201:/usr/share/elasticsearch/config /Users/ppsn/Documents/docker/elasticsearch9201/- 1
- 2
- 3
# 最终执行 docker run -d -p 9201:9200 -e "discovery.type=single-node" -e ES_JAVA_OPTS="-Xms512m -Xmx512m" -v /Users/ppsn/Documents/docker/elasticsearch9201/config:/usr/share/elasticsearch/config -v /Users/ppsn/Documents/docker/elasticsearch9201/data:/usr/share/elasticsearch/data -v /Users/ppsn/Documents/docker/elasticsearch9201/plugins:/usr/share/elasticsearch/plugins --name es9201 elasticsearch:8.2.0- 1
- 2
4.elasticsearch.yml配置
这是docker容器给默认生成的elasticsearch.yml的文件量
cluster.name: "docker-cluster" network.host: 0.0.0.0 #----------------------- BEGIN SECURITY AUTO CONFIGURATION ----------------------- # # The following settings, TLS certificates, and keys have been automatically # generated to configure Elasticsearch security features on 29-06-2022 08:16:42 # # -------------------------------------------------------------------------------- # Enable security features xpack.security.enabled: true xpack.security.enrollment.enabled: true # Enable encryption for HTTP API client connections, such as Kibana, Logstash, and Agents xpack.security.http.ssl: enabled: true keystore.path: certs/http.p12 # Enable encryption and mutual authentication between cluster nodes xpack.security.transport.ssl: enabled: true verification_mode: certificate keystore.path: certs/transport.p12 truststore.path: certs/transport.p12 http.host: 0.0.0.0 # 这句是额外加的,用于连接kibana #----------------------- END SECURITY AUTO CONFIGURATION -------------------------- 1
- 2
- 3
- 4
- 5
- 6
- 7
- 8
- 9
- 10
- 11
- 12
- 13
- 14
- 15
- 16
- 17
- 18
- 19
- 20
- 21
- 22
- 23
- 24
- 25
- 26
- 27
- 28
- 29
- 30
- 31
xpack.security.enabled: true是否开启es密码访问,8.2版本默认为true,后面继续讨论改成false即关闭安全访问,执行
docker restart 容器id重启容器此时直接访问http://localhost:9201如果出现以下信息代表成功!
{ "name" : "feed0c777ff4", "cluster_name" : "docker-cluster", "cluster_uuid" : "bLSZzezvTEuox6IFpxYd6A", "version" : { "number" : "8.2.0", "build_flavor" : "default", "build_type" : "docker", "build_hash" : "b174af62e8dd9f4ac4d25875e9381ffe2b9282c5", "build_date" : "2022-04-20T10:35:10.180408517Z", "build_snapshot" : false, "lucene_version" : "9.1.0", "minimum_wire_compatibility_version" : "7.17.0", "minimum_index_compatibility_version" : "7.0.0" }, "tagline" : "You Know, for Search" }- 1
- 2
- 3
- 4
- 5
- 6
- 7
- 8
- 9
- 10
- 11
- 12
- 13
- 14
- 15
- 16
- 17
我们再改成true,
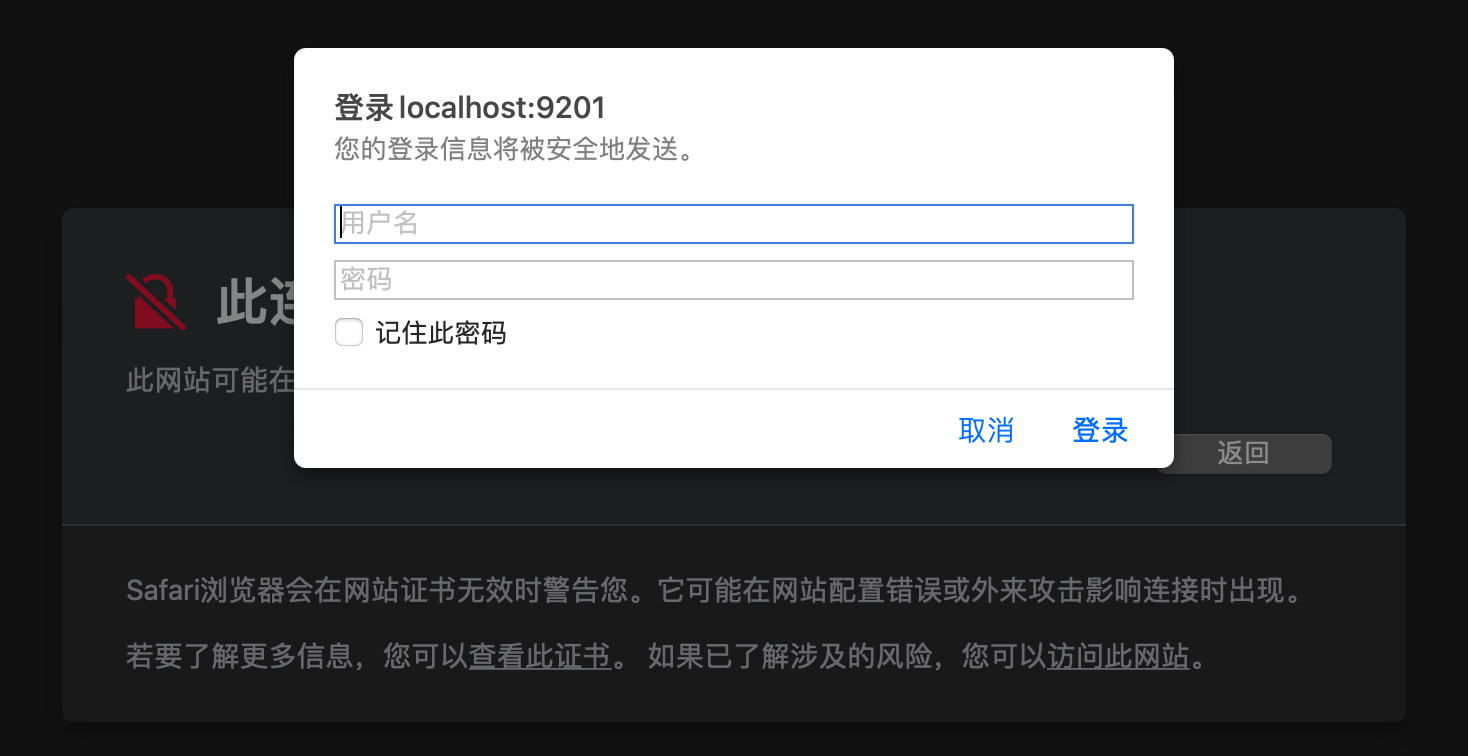
重启容器再次访问https://localhost:9201可以看到
点击显示详细信息继续访问,弹出如下页面
也可以:不要用鼠标去点任何地方,直接在键盘上输入thisisunsafe,然后回车进入如下页面

用户名默认是
elastic,密码则需要额外获取!获取密码:
- 进入容器
docker exec -it 容器id /bin/bash- 1
- 执行如下命令,重新生成密码
bin/elasticsearch-reset-password -u elastic- 1
- 如果执行上述命令没有重新生成密码而是报错如下,就要检查上面是不是以单节点运行了
ERROR: Failed to determine the health of the cluster.- 1
- 成功后控制台会打印密码,复制保留即可
- 使用此密码登录上述页面即可,后面
javaClient也会用到此密码
二、使用docker安装kibana
1.运行容器
运行如下命令启动容器
docker run --name kibana5602 -e ELASTICSEARCH_URL=http://127.0.0.1:9201 -p 5602:5601 -d kibana:8.2.0- 1
说明:
-e ELASTICSEARCH_URL=http://127.0.0.1:9201要连接的es的地址-p 5602:5601指定映射端口
浏览器访问http://localhost:5602如果出现提示说
服务正在启动之类的稍等片刻,如果长时间如此,可能是出现了问题,进入容器查看其配置文件cat /usr/share/kibana/config/kibana.yml- 1
注意(如果上述失败的话):
-
server.host: 0.0.0.0应该和elasticsearch.yml中的http.host: 0.0.0.0指向同一个ip -
elasticsearch.hosts: ['https://172.17.0.2:9200']这里配置正确的ip应是es的内网ip+端口-
如何查看es的内网ip
进入es容器执行:
cat /etc/hosts- 1
会出现如下信息:
127.0.0.1 localhost ::1 localhost ip6-localhost ip6-loopback fe00::0 ip6-localnet ff00::0 ip6-mcastprefix ff02::1 ip6-allnodes ff02::2 ip6-allrouters 172.17.0.2 feed0c777ff4- 1
- 2
- 3
- 4
- 5
- 6
- 7
最后一行的ip即是es内网ip,后面那一串是容器的id
-
最好不要更改,直接删除再次运行容器
docker run --name kibana5602 -e ELASTICSEARCH_URL=http://172.17.0.2:9201 -p 5602:5601 -d kibana:8.2.0- 1
-
2.令牌-密码访问
如果正常访问到http://localhost:5602会出现让我们填写token令牌
令牌获取:默认在es启动时打印到日志中,当然找不到的话可以再次生成
如何生成?
- 进入es容器,执行如下命令
bin/elasticsearch-create-enrollment-token- 1
- 控制台会生成一长串文本,保存下来,这就是给kibana用来连接es的token,默认有效期为30分钟
- 如果报错,则可能是有关安全配置设置为了
false
- 如果报错,则可能是有关安全配置设置为了
- 填入如下文本框内,点击配置
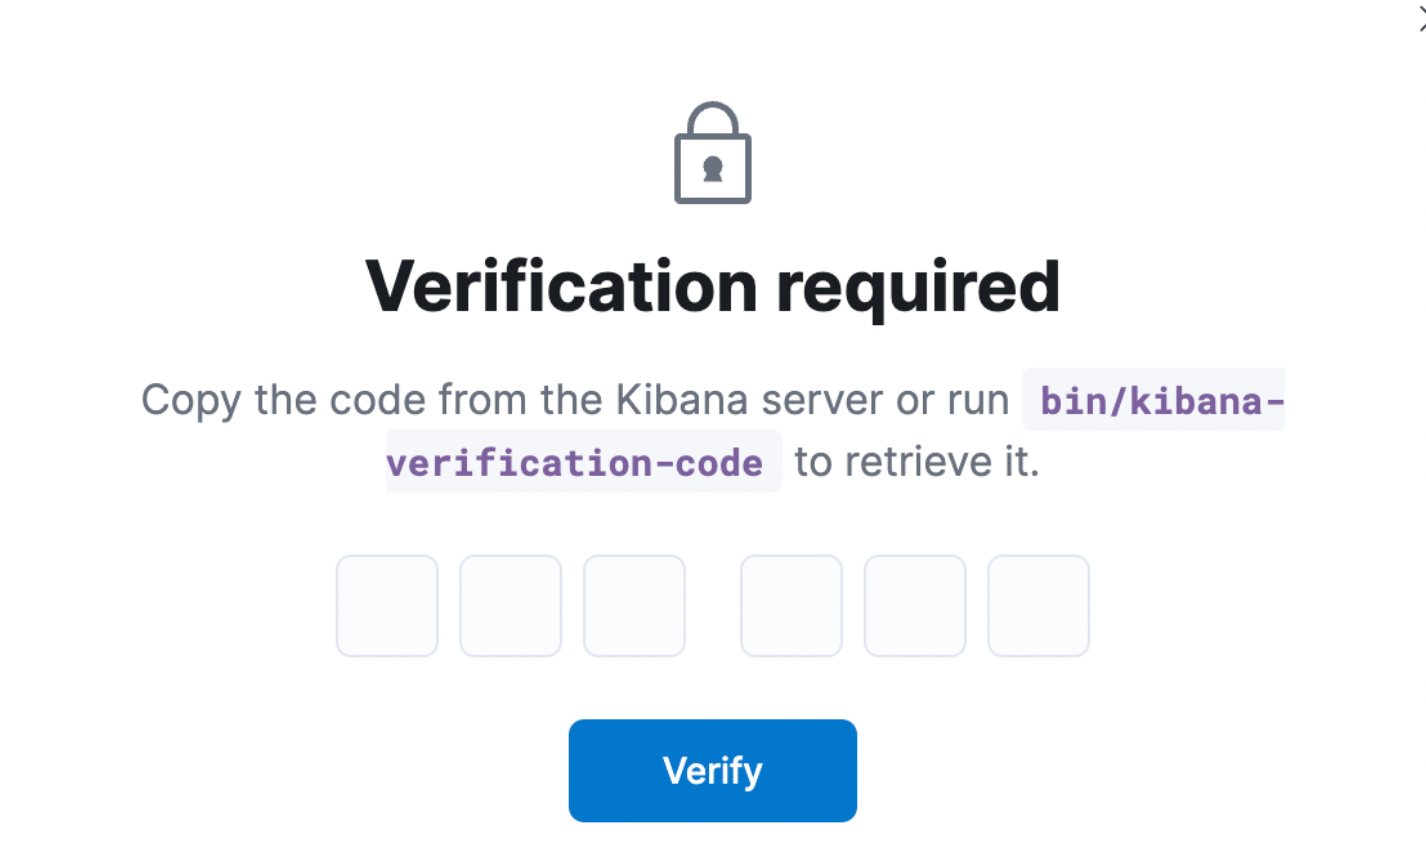
- 此时会让我们输出6位数的验证码,进入kibana容器内,查看日志最下方即可看到
# 如何查看日志? # 容器内执行 docker logs -f -t --tail 50 容器id # 即可查看最近50条的日志- 1
- 2
- 3
- 4
- 输入后确定即可


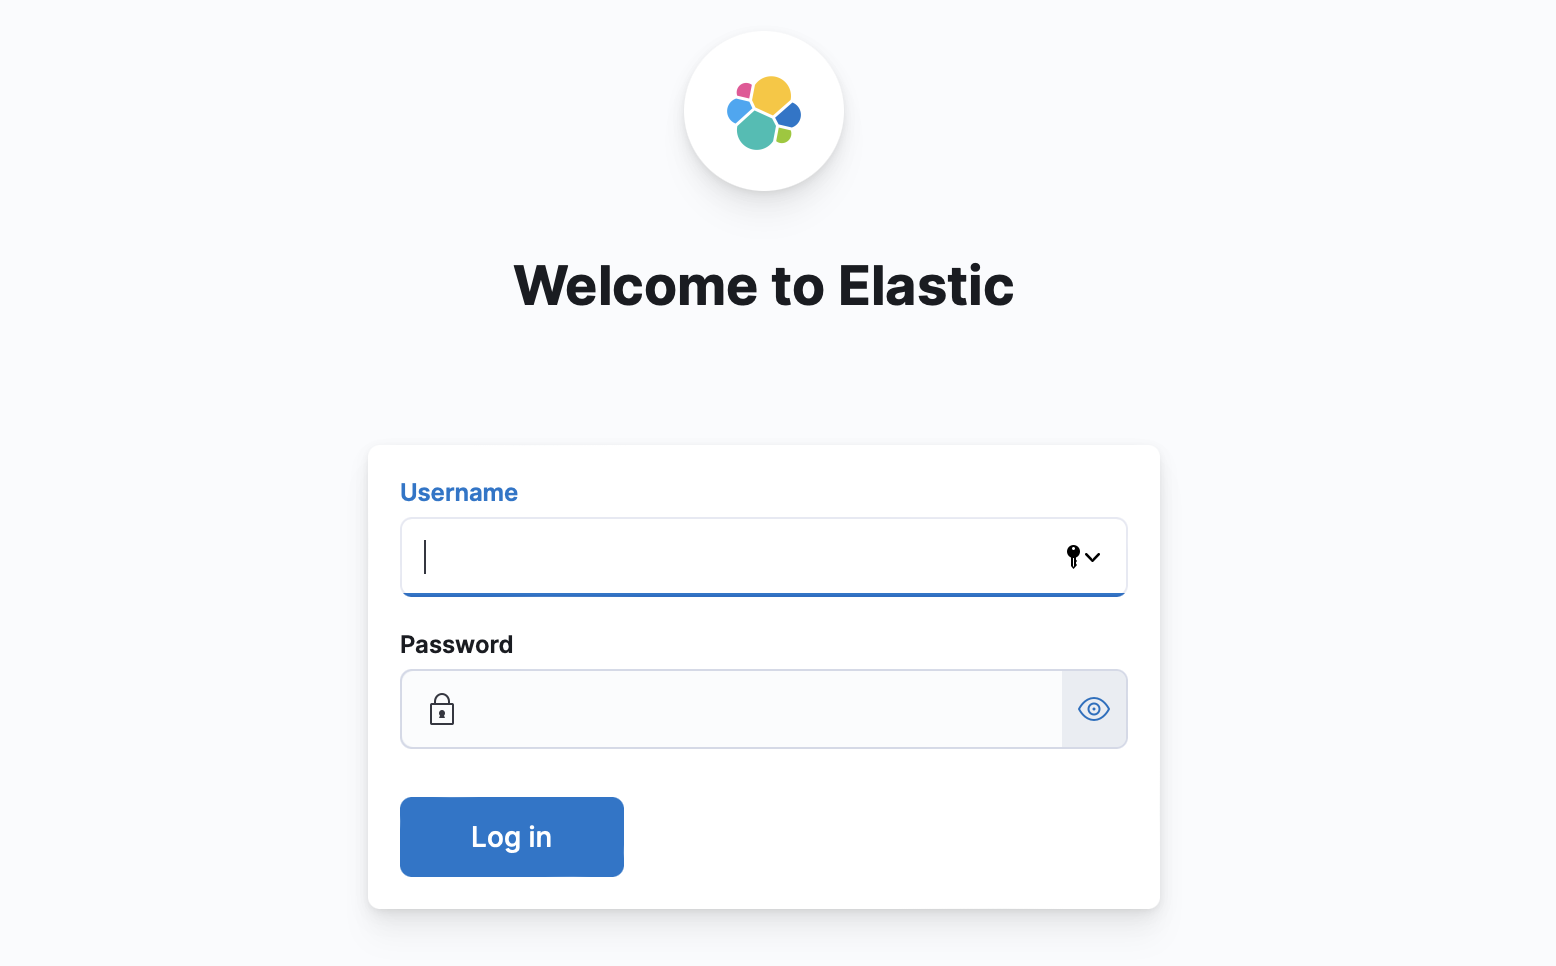
之后出现如下页面

填入es的账号密码即可!
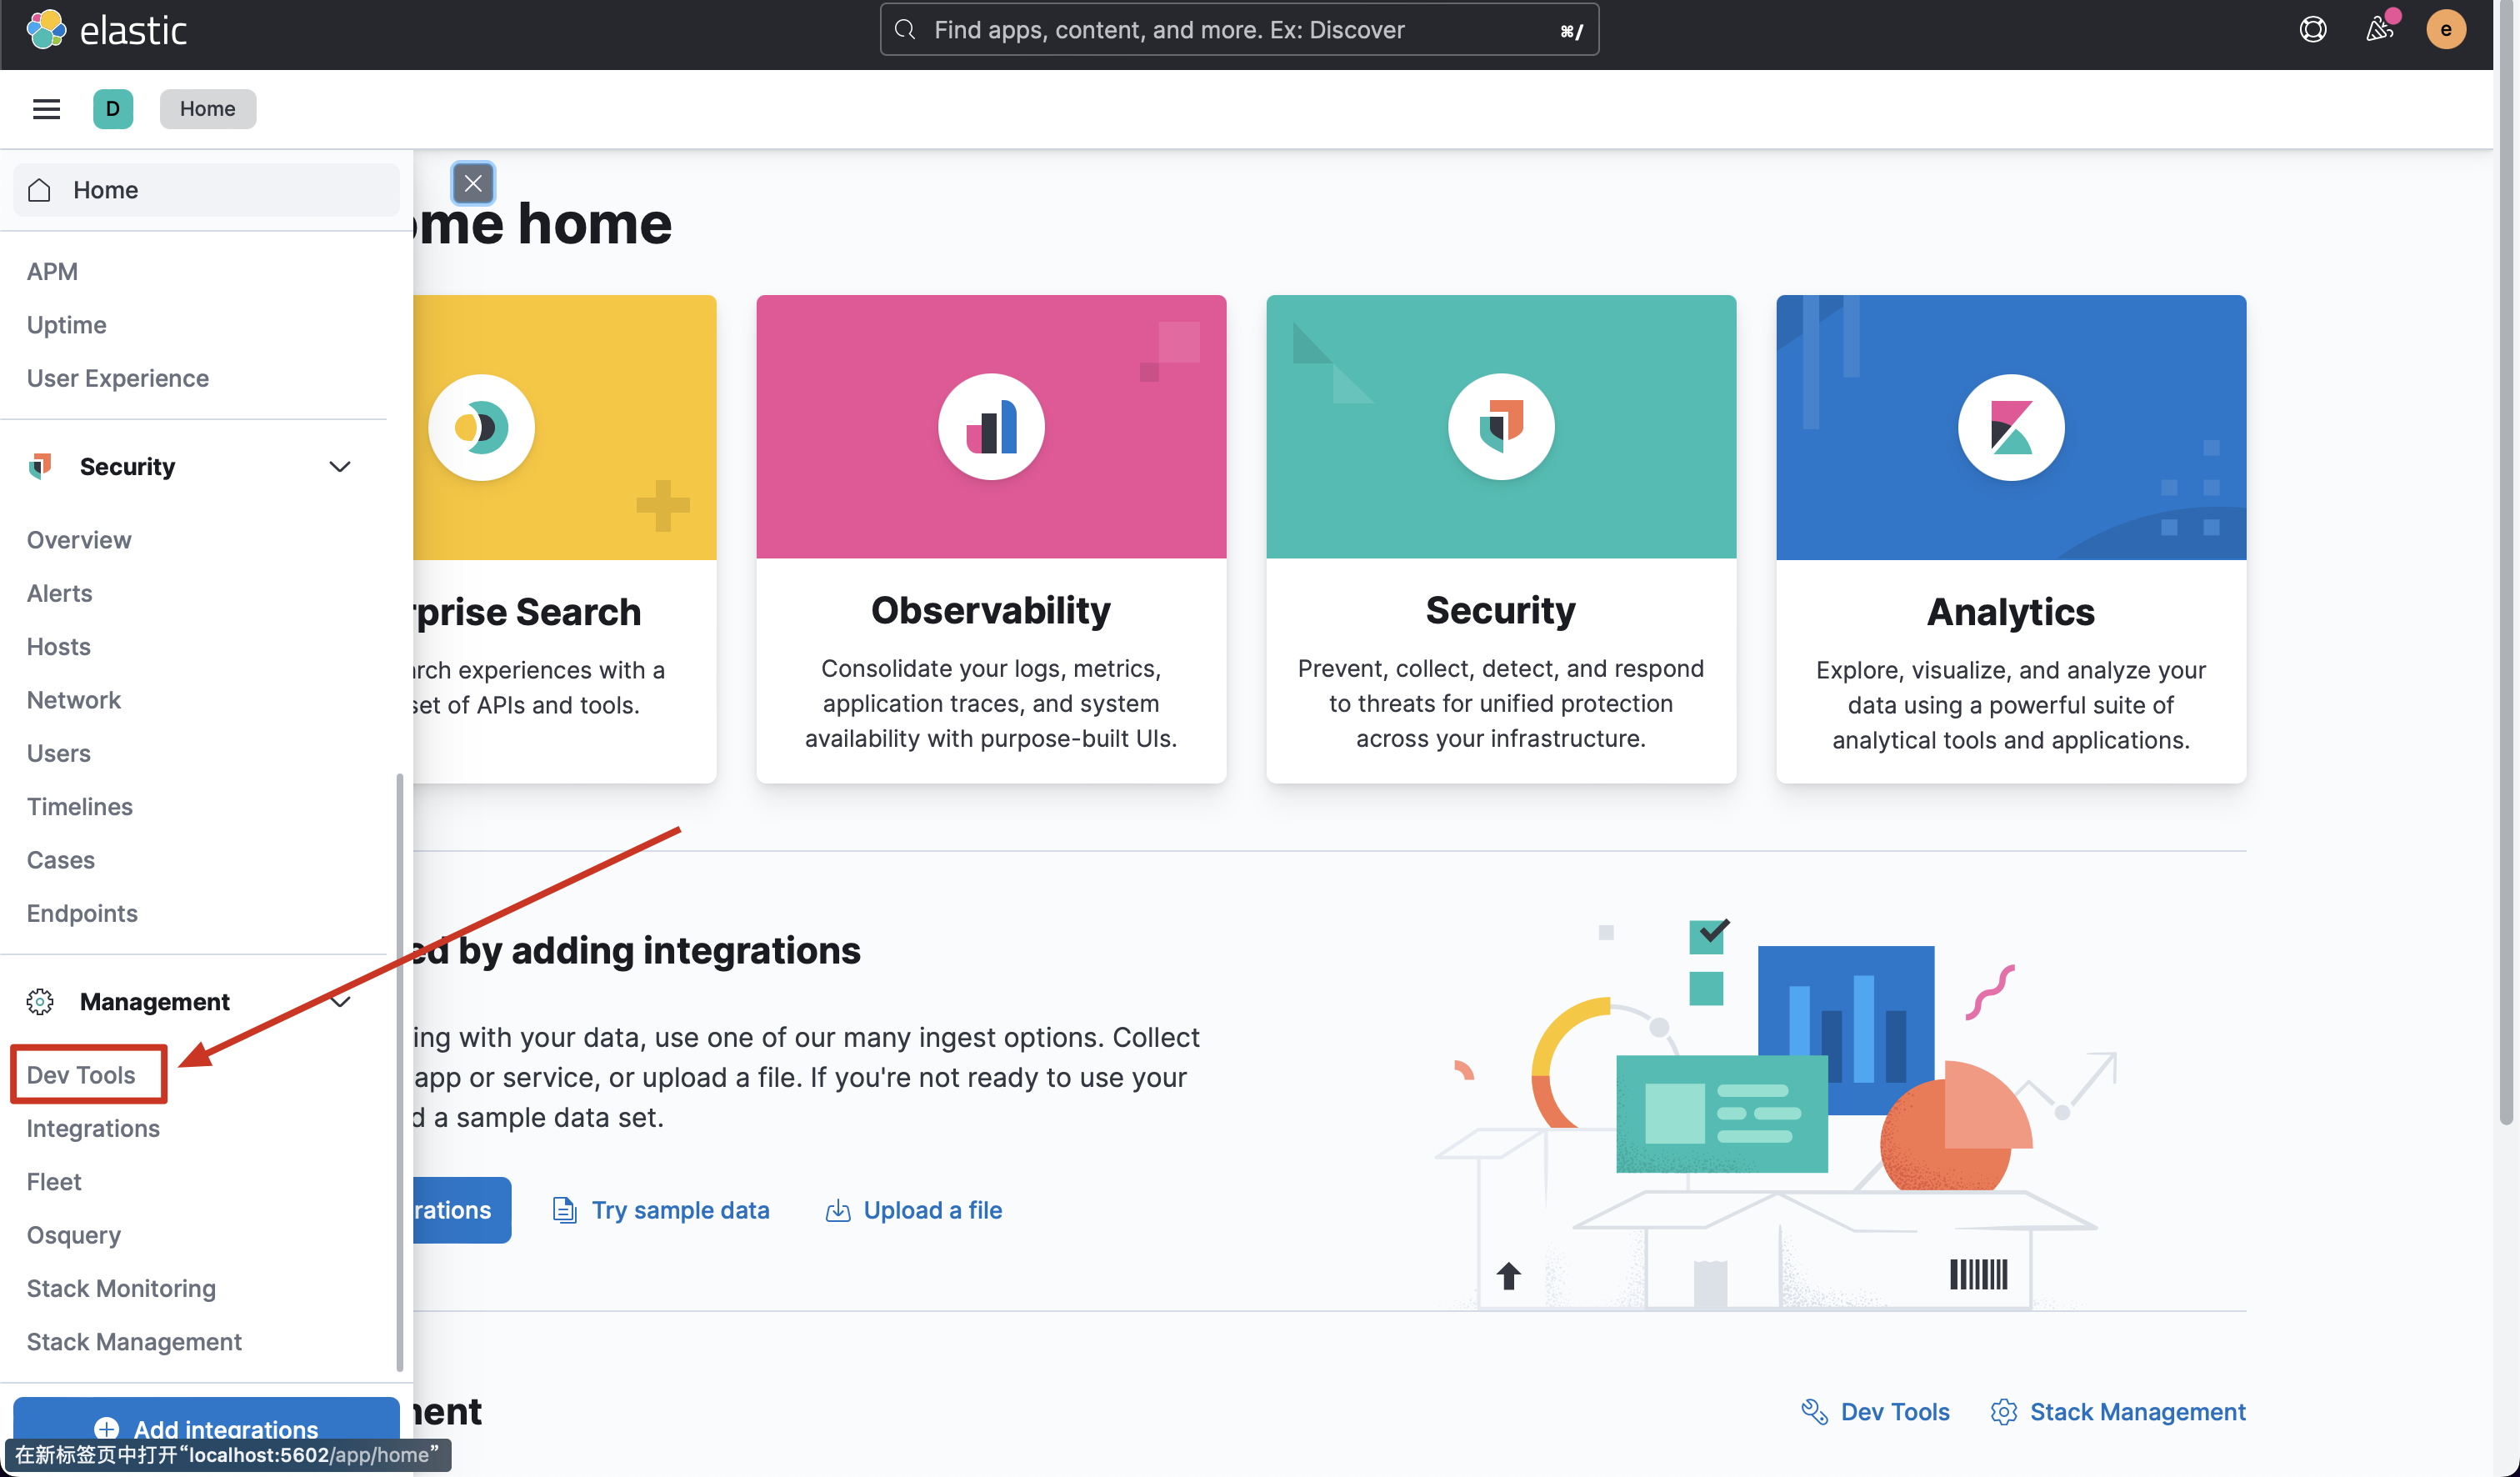
我们就可以在其控制台操作啦!

3.改变kibana语言为中文
kibana内置了i18n国际化组件,只需在kibana.yml中加上一句配置即可
i18n.locale: "zh-CN"- 1
但我们并没有挂载数据卷,只能直接修改容器内部文件
但问题来了,kibana容器内并没有
vi、vim命令,没办法修改这时就通过拷贝的方式进行修改
-
在执行容器外面执行如下命令先拷贝到本地
docker cp 容器id:/usr/share/kibana/config/kibana.yml /Users/ppsn/Desktop/config/kibana.yml- 1
-
修改这个拷贝出来的文件
-
执行如下命令拷贝本地文件到容器
docker cp /Users/ppsn/Desktop/config/kibana.yml 容器id:/usr/share/kibana/config/kibana.yml- 1
别忘了重启容器!再次访问kibana,可以看到页面已变成中文。
三、使用javaClient连接ES
官网参考:https://www.elastic.co/guide/en/elasticsearch/client/java-api-client/8.2/connecting.html
官网参考:https://www.elastic.co/guide/en/elasticsearch/client/java-api-client/8.2/_basic_authentication.html
1.导入依赖
<dependency> <groupId>co.elastic.clients</groupId> <artifactId>elasticsearch-java</artifactId> <version>8.2.3</version> </dependency> <dependency> <groupId>com.fasterxml.jackson.core</groupId> <artifactId>jackson-databind</artifactId> <version>2.12.3</version> </dependency> <dependency> <groupId>jakarta.json</groupId> <artifactId>jakarta.json-api</artifactId> <version>2.0.1</version> </dependency>- 1
- 2
- 3
- 4
- 5
- 6
- 7
- 8
- 9
- 10
- 11
- 12
- 13
- 14
- 15
- 16
2.编写配置
ES关闭安全访问时,即没有密码访问
import co.elastic.clients.elasticsearch.ElasticsearchClient; import co.elastic.clients.json.jackson.JacksonJsonpMapper; import co.elastic.clients.transport.rest_client.RestClientTransport; import org.apache.http.HttpHost; import org.elasticsearch.client.RestClient; import org.springframework.context.annotation.Bean; import org.springframework.context.annotation.Configuration; @Configuration public class ElasticSearchConfig { @Bean public ElasticsearchClient elasticsearchClient() { RestClient client = RestClient.builder(new HttpHost("127.0.0.1", 9201)).build(); RestClientTransport transport = new RestClientTransport(client, new JacksonJsonpMapper()); return new ElasticsearchClient(transport); } }- 1
- 2
- 3
- 4
- 5
- 6
- 7
- 8
- 9
- 10
- 11
- 12
- 13
- 14
- 15
- 16
- 17
- 18
步骤说明:
- 创建低级客户端RestClient
- 使用jackson映射器创建传输ElasticsearchTransport
- 创建 API 客户端ElasticsearchClient
ES打开安全访问时,即需密码访问
import co.elastic.clients.elasticsearch.ElasticsearchClient; import co.elastic.clients.json.jackson.JacksonJsonpMapper; import co.elastic.clients.transport.rest_client.RestClientTransport; import lombok.SneakyThrows; import org.apache.http.HttpHost; import org.apache.http.auth.AuthScope; import org.apache.http.auth.UsernamePasswordCredentials; import org.apache.http.client.CredentialsProvider; import org.apache.http.conn.ssl.NoopHostnameVerifier; import org.apache.http.conn.ssl.TrustStrategy; import org.apache.http.impl.client.BasicCredentialsProvider; import org.apache.http.impl.nio.client.HttpAsyncClientBuilder; import org.apache.http.nio.conn.ssl.SSLIOSessionStrategy; import org.apache.http.ssl.SSLContextBuilder; import org.elasticsearch.client.RestClient; import org.elasticsearch.client.RestClientBuilder; import org.springframework.context.annotation.Bean; import org.springframework.context.annotation.Configuration; import javax.net.ssl.SSLContext; import java.security.cert.CertificateException; import java.security.cert.X509Certificate; @Configuration public class ElasticSearchConfig { @SneakyThrows //这里投掷异常 @Bean public ElasticsearchClient elasticsearchClient() { final CredentialsProvider credentialsProvider = new BasicCredentialsProvider(); credentialsProvider.setCredentials(AuthScope.ANY, new UsernamePasswordCredentials("elastic", "2mNaYINjFRa4of3Pmq+J")); //这里更改为es的账号、密码 SSLContext sslContext = new SSLContextBuilder().loadTrustMaterial(null, new TrustStrategy() { // 信任所有请求 public boolean isTrusted(X509Certificate[] chain, String authType) { return true; } }).build(); SSLIOSessionStrategy sessionStrategy = new SSLIOSessionStrategy(sslContext, NoopHostnameVerifier.INSTANCE); //三个参数依次是ip、端口、协议 RestClientBuilder builder = RestClient.builder( new HttpHost("localhost", 9201,"https")) .setHttpClientConfigCallback(httpClientBuilder -> { httpClientBuilder.disableAuthCaching(); httpClientBuilder.setSSLStrategy(sessionStrategy); httpClientBuilder.setDefaultCredentialsProvider(credentialsProvider); return httpClientBuilder; }); RestClient client = builder.build(); RestClientTransport transport = new RestClientTransport(client, new JacksonJsonpMapper()); return new ElasticsearchClient(transport); } }- 1
- 2
- 3
- 4
- 5
- 6
- 7
- 8
- 9
- 10
- 11
- 12
- 13
- 14
- 15
- 16
- 17
- 18
- 19
- 20
- 21
- 22
- 23
- 24
- 25
- 26
- 27
- 28
- 29
- 30
- 31
- 32
- 33
- 34
- 35
- 36
- 37
- 38
- 39
- 40
- 41
- 42
- 43
- 44
- 45
- 46
- 47
- 48
- 49
- 50
- 51
- 52
- 53
- 54
- 55
- 56
- 57
- 58
3.测试连接
测试使用的数据请参考:https://www.notre1024.com/archives/elasticsearch%E6%8E%A7%E5%88%B6%E5%8F%B0%E6%93%8D%E4%BD%9C
import co.elastic.clients.elasticsearch.ElasticsearchClient; import co.elastic.clients.elasticsearch._types.aggregations.AvgAggregate; import co.elastic.clients.elasticsearch._types.aggregations.LongTermsBucket; import co.elastic.clients.elasticsearch._types.query_dsl.MatchQuery; import co.elastic.clients.elasticsearch._types.query_dsl.Query; import co.elastic.clients.elasticsearch.core.SearchResponse; import co.elastic.clients.elasticsearch.core.search.Hit; import com.alibaba.fastjson.JSON; import com.alibaba.fastjson.JSONObject; import com.qiandao.gulimall.search.entity.userTest; import lombok.SneakyThrows; import org.junit.jupiter.api.Test; import org.springframework.beans.factory.annotation.Autowired; import org.springframework.boot.test.context.SpringBootTest; import java.io.IOException; import java.util.List; @SpringBootTest class GulimallSearchApplicationTests { @Autowired private ElasticsearchClient elasticsearchClient; @Test void contextLoads() { SearchResponse<Object> search = null; try { search = elasticsearchClient.search(s -> s .index("bank") //查询name字段包含hello的document(不使用分词器精确查找) .query(q -> q .match(t -> t .field("balance") .query(16418) )), Object.class ); } catch (IOException e) { e.printStackTrace(); } System.out.println(search); } @SneakyThrows @Test void Search() { String searchText = "mill"; Query query = MatchQuery.of(m -> m .field("address") .query(searchText))._toQuery(); SearchResponse<userTest> search = elasticsearchClient.search(s -> s .index("bank") .query(query) .aggregations("ageAgg",a->a .terms(t->t .field("age") .size(10)) ) .aggregations("ageAve",a->a .avg(av->av .field("age")) ) .aggregations("balanceAvg",a->a .avg(av->av .field("balance")) ), userTest.class); System.out.println(search); AvgAggregate ageAve = search.aggregations().get("ageAve").avg(); JSONObject parse = (JSONObject)JSON.parse(String.valueOf(ageAve)); System.out.println("平均年龄:"+parse.get("value")); AvgAggregate balanceAvg = search.aggregations().get("balanceAvg").avg(); JSONObject parse1 =(JSONObject) JSON.parse(String.valueOf(balanceAvg)); System.out.println("平均工资:"+parse1.get("value")); List<LongTermsBucket> ageAgg = search.aggregations().get("ageAgg").lterms().buckets().array(); for (LongTermsBucket longTermsBucket : ageAgg) { System.out.println("年龄:"+longTermsBucket.key()+"数量:"+longTermsBucket.docCount()); } List<Hit<userTest>> hits = search.hits().hits(); for (Hit<userTest> hit: hits) { userTest source = hit.source(); System.out.println("内部数据:" + source + " 得分 " + hit.score()); System.out.println(source.getEmail()); } } }- 1
- 2
- 3
- 4
- 5
- 6
- 7
- 8
- 9
- 10
- 11
- 12
- 13
- 14
- 15
- 16
- 17
- 18
- 19
- 20
- 21
- 22
- 23
- 24
- 25
- 26
- 27
- 28
- 29
- 30
- 31
- 32
- 33
- 34
- 35
- 36
- 37
- 38
- 39
- 40
- 41
- 42
- 43
- 44
- 45
- 46
- 47
- 48
- 49
- 50
- 51
- 52
- 53
- 54
- 55
- 56
- 57
- 58
- 59
- 60
- 61
- 62
- 63
- 64
- 65
- 66
- 67
- 68
- 69
- 70
- 71
- 72
- 73
- 74
- 75
- 76
- 77
- 78
- 79
- 80
- 81
- 82
- 83
- 84
- 85
- 86
- 87
- 88
- 89
- 90
- 91
- 92
- 93
-
相关阅读:
开源IDaaS方舟一账通ArkID系统内置OIDC 认证插件配置流程
Flink的API分层、架构与组件原理、并行度、任务执行计划
Deno vs. Bun vs. Node.js功能比较
Autosar诊断实战系列19-UDS单帧数据接收代码逻辑分析
【我的渲染技术进阶之旅】你知道数字图像处理的标准图上的女孩子是谁吗?背后的故事你了解吗?为啥这张名为Lenna的图会成为数字图像处理的标准图呢?
第七章Redis_Jedis_测试
运行 Python 脚本/代码的几种方式
MySQL之创建高性能的索引和查询性能优化(一)
记一次 .NET 某智能交通后台服务 CPU爆高分析
Vue之ElementUI实现登陆及注册
- 原文地址:https://blog.csdn.net/m0_57538148/article/details/125530017
