-
Vue 组件化
1. 组件介绍
组件简单来说就是将代码封装,便于后续重复使用,被封装的代码可以包含多种例如 html、css、js。
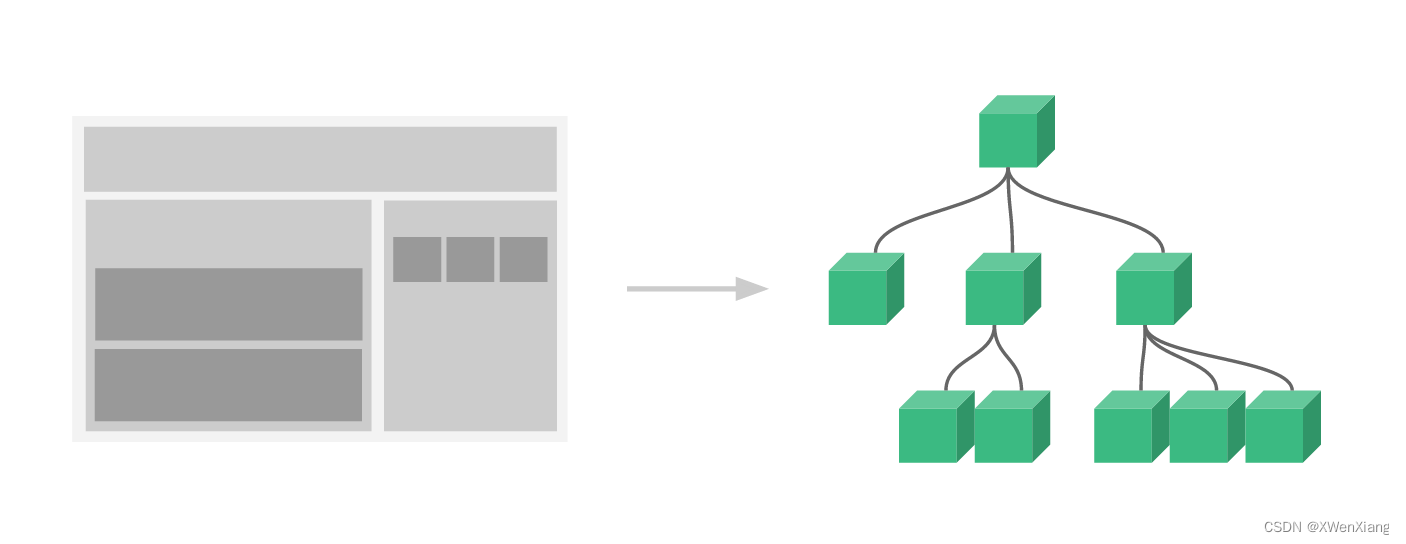
组件系统让我们可以用独立可复用的小组件来构建大型应用,几乎任意类型的应用的界面都可以抽象为一个组件树

2. 创建组件
全局注册
流程
- 通过
new Vue创建的 Vue 根实例,组件代码需要在根代码前 - 语句
Vue.component(tagName, options)注册组件,tagName 为组件名,options 为配置选项 - 使用语句
<组件名></组件名> - 在注册之后可以用在任何新创建的 Vue 根实例 (new Vue) 的模板中
<div id="app"> <child></child> </div> <script> Vue.component('Child', { template: ` <div> <p><input type="text" v-model="name"> {{ name }}</p> <p><input type="button" @click="func"></p> </div> `, data() { return { name: '', } }, methods: { func() { console.log('这是全局组件') } } }) var vm = new Vue({ el: '#app', data: { name: 'xwx' }, methods: {}, computed: {}, }) </script>- 1
- 2
- 3
- 4
- 5
- 6
- 7
- 8
- 9
- 10
- 11
- 12
- 13
- 14
- 15
- 16
- 17
- 18
- 19
- 20
- 21
- 22
- 23
- 24
- 25
- 26
- 27
- 28
- 29
- 30
- 31
- 32
因为组件是可复用的 Vue 实例,所以它们与 new Vue 接收相同的选项,例如
data、computed、watch、methods以及生命周期钩子等。除了像el这样根实例特有的选项。还有需要注意的是
data必须是函数。局部注册
局部注册可以写在 Vue 实例或者 组件实例中。
<div id="app"> <child></child> </div> <script> var vm = new Vue({ el: '#app', components: { 'Child': { template: `<div>这是局部组件</div>` } } }) </script>- 1
- 2
- 3
- 4
- 5
- 6
- 7
- 8
- 9
- 10
- 11
- 12
- 13
或
Vue.component('navbar', { template: ` <div> <p>全局组件</p> <child></child> </div> `, components: { child: { template: `<p>局部组件</p>`, } } })- 1
- 2
- 3
- 4
- 5
- 6
- 7
- 8
- 9
- 10
- 11
- 12
- 13
- 14
注意点:
局部注册的子组件只能在已经注册过的父组件中使用,也可以多层嵌套3. Prop 组件间通信之父传子
组件之间数据默认不互通,如下所示
<div id="app"> <one></one> </div> <script> var two = { template: `<p>局部组件{{name}}</p>`, data() { return { 'name': 'zzz' } }, } Vue.component('one', { template: ` <div> <p>全局组件{{name}}</p> <two></two> </div> `, data() { return { 'name': 'xwx' } }, components: { 'two': two } }) var vm = new Vue({ el: '#app', }) </script>- 1
- 2
- 3
- 4
- 5
- 6
- 7
- 8
- 9
- 10
- 11
- 12
- 13
- 14
- 15
- 16
- 17
- 18
- 19
- 20
- 21
- 22
- 23
- 24
- 25
- 26
- 27
- 28
- 29
- 30
- 31
- 32
- 33
- 34

- 全局与局部
此时可以将全局看成是父,局部是子
<div id="app"> <one></one> </div> <script> var two = { props: ['message',], template: `<p>局部组件-----{{ message }}</p>`, } Vue.component('one', { template: ` <div> <p>全局组件--{{ name }}</p> <two :message="name"></two> </div> `, data() { return { name: 'xwx' } }, components: { 'two': two } }) var vm = new Vue({ el: '#app', }) </script>- 1
- 2
- 3
- 4
- 5
- 6
- 7
- 8
- 9
- 10
- 11
- 12
- 13
- 14
- 15
- 16
- 17
- 18
- 19
- 20
- 21
- 22
- 23
- 24
- 25
- 26
- 27
- 28
- 29
- 30
- 31
- 根实例与全局组件
<div id="app"> <one :message="name"></one> </div> <script> Vue.component('one', { template: ` <div> <p>全局组件-----{{ message }}</p> </div> `, props: ['message',] }) var vm = new Vue({ el: '#app', data: { name: 'xwx' } }) </script>- 1
- 2
- 3
- 4
- 5
- 6
- 7
- 8
- 9
- 10
- 11
- 12
- 13
- 14
- 15
- 16
- 17
- 18
- 19
- 20
- 流程
- 父组件中需要有数据
- 调用子组件标签时创建自定义属性,属性的值就是父组件的数据
- 父组件的数据需要通过 props 把数据传给子组件,在子组件中需要声明
props - 动态的 props 就是用 v-bind 动态绑定 props 的值到父组件的数据中。每当父组件的数据变化时,该变化也会传导给子组件
Prop 属性验证
组件可以为 props 指定验证要求。
可以在子组件中添加定制 prop 的验证方式,将原本的 props: [‘message’,] 修改如下所示props: { 'message': Number }- 1
- 2
- 3
若是类型不符合,虽然会报错,但也会显示出来。

定制的类型如下所示
- String
- Number
- Boolean
- Array
- Object
- Date
- Function
- Symbol
4. 组件间通信之子传父
父组件是使用 props 传递数据给子组件,但如果子组件要把数据传递回去,就需要使用自定义事件
我们可以使用 v-on 绑定自定义事件, 每个 Vue 实例都实现了事件接口,即:
- 使用
$on(eventName)监听事件 - 使用
$emit(eventName)触发事件
<div id="app"> <p>子组件中myfunc的数据是:{{name}}</p> <one @myfunc="func"></one> </div> <script> Vue.component('one', { template: ` <div> <button @click="handleClick">点击按钮把子组件数据传递到父组件</button> </div> `, data() { return { name: 'xwx' } }, methods: { handleClick() { this.$emit('myfunc', this.name) } } }) var vm = new Vue({ el: '#app', data: { name: '' }, methods: { func(name) { console.log(123) this.name = name } } }) </script>- 1
- 2
- 3
- 4
- 5
- 6
- 7
- 8
- 9
- 10
- 11
- 12
- 13
- 14
- 15
- 16
- 17
- 18
- 19
- 20
- 21
- 22
- 23
- 24
- 25
- 26
- 27
- 28
- 29
- 30
- 31
- 32
- 33
- 34
- 35
- 36

- 流程
- 子组件创建数据
- 创建自定义事件 mufunc,在使用子组件标签时调用父组件函数。
- 在子组件内容中调用函数,函数中使用
this.$emit('myfunc', this.name),myfunc 就是自定义事件,后面的参数就是需要传给绑定的函数的参数,也就是执行了自定义事件的函数 - 在自定义事件函数中将子组件的值赋值即可
5. ref 属性
- ref 放在普通标签上,拿到的是原生节点,原生 dom 操作
- ref 放在组件上,拿到的是组件对象
- 看以下例子了解简易用法
<div id="app"> <p ref="p1">xwx</p> <button @click="handleClick">点我执行函数</button> </div> <script> var vm = new Vue({ el: '#app', methods: { handleClick() { this.$refs['p1'].innerHTML = 'XWenXiang' } } }) </script>- 1
- 2
- 3
- 4
- 5
- 6
- 7
- 8
- 9
- 10
- 11
- 12
- 13
- 14
上面的例子中,给一个标签添加 'ref' 属性,然后执行函数,从 'this.$refs' 中获取的就是原生节点, 可以使用原生的 DOM 操作- 1
- 2
- 实现子传父
同理放在组件上能获取组件对象,只要操作组件对象即可。
<div id="app"> <one ref="one1"></one> <p>这是子传父的属性{{name}}</p> <button @click="handleClick">点我执行函数</button> </div> <script> Vue.component('one', { template: ` <div></div> `, data() { return { name: 'xwx' } } }) var vm = new Vue({ el: '#app', data: { name: '' }, methods: { handleClick() { // 同理可以调用子组件的函数 this.name = this.$refs['one1'].name } } }) </script>- 1
- 2
- 3
- 4
- 5
- 6
- 7
- 8
- 9
- 10
- 11
- 12
- 13
- 14
- 15
- 16
- 17
- 18
- 19
- 20
- 21
- 22
- 23
- 24
- 25
- 26
- 27
- 28
- 29
- 30
- 实现父传子
可以获取子组件的数据,也可以设置子组件的数据
<div id="app"> <one ref="one1"></one> <button @click="handleClick">点我执行函数</button> </div> <script> Vue.component('one', { template: ` <div><p>这是父传子的属性{{name}}</p></div> `, data() { return { name: '' } } }) var vm = new Vue({ el: '#app', data: { name: 'xwx' }, methods: { handleClick() { this.$refs['one1'].name = this.name } } }) </script>- 1
- 2
- 3
- 4
- 5
- 6
- 7
- 8
- 9
- 10
- 11
- 12
- 13
- 14
- 15
- 16
- 17
- 18
- 19
- 20
- 21
- 22
- 23
- 24
- 25
- 26
- 27
- 28
- 29
6. 数据总线
事件总线可以对不同层级的不通组件通信
<div id="app"> <one></one> <two></two> </div> <script> var bus = new Vue() Vue.component('one', { template: ` <div> <button @click="handleClick">点我</button> </div> `, data() { return { name: 'xwx' } }, methods: { handleClick() { bus.$emit('func', this.name) } } }) Vue.component('two', { template: ` <div>收到的数据是 {{ name }}</div> `, data() { return { name: '' } }, mounted() { bus.$on('func', (name) => { this.name = name }) } }) var vm = new Vue({ el: '#app', }) </script>- 1
- 2
- 3
- 4
- 5
- 6
- 7
- 8
- 9
- 10
- 11
- 12
- 13
- 14
- 15
- 16
- 17
- 18
- 19
- 20
- 21
- 22
- 23
- 24
- 25
- 26
- 27
- 28
- 29
- 30
- 31
- 32
- 33
- 34
- 35
- 36
- 37
- 38
- 39
- 40
- 41
- 42
- 43
- 44
- 45
流程
- 创建数据总线,也就是空的 vue 实例
- 准备俩个全局组件,在一个组件中绑定点击事件,$emit 触发指定函数并传递参数。在另外一个组件中 $on 监听指定函数
7. 动态组件
当有多个组件时,切换起来较为繁琐,使用动态组件可以减轻冗余
Vue 的 <component> 元素加一个特殊的 is attribute 来实现<component> 元素,动态地绑定多个组件到它的 is 属性
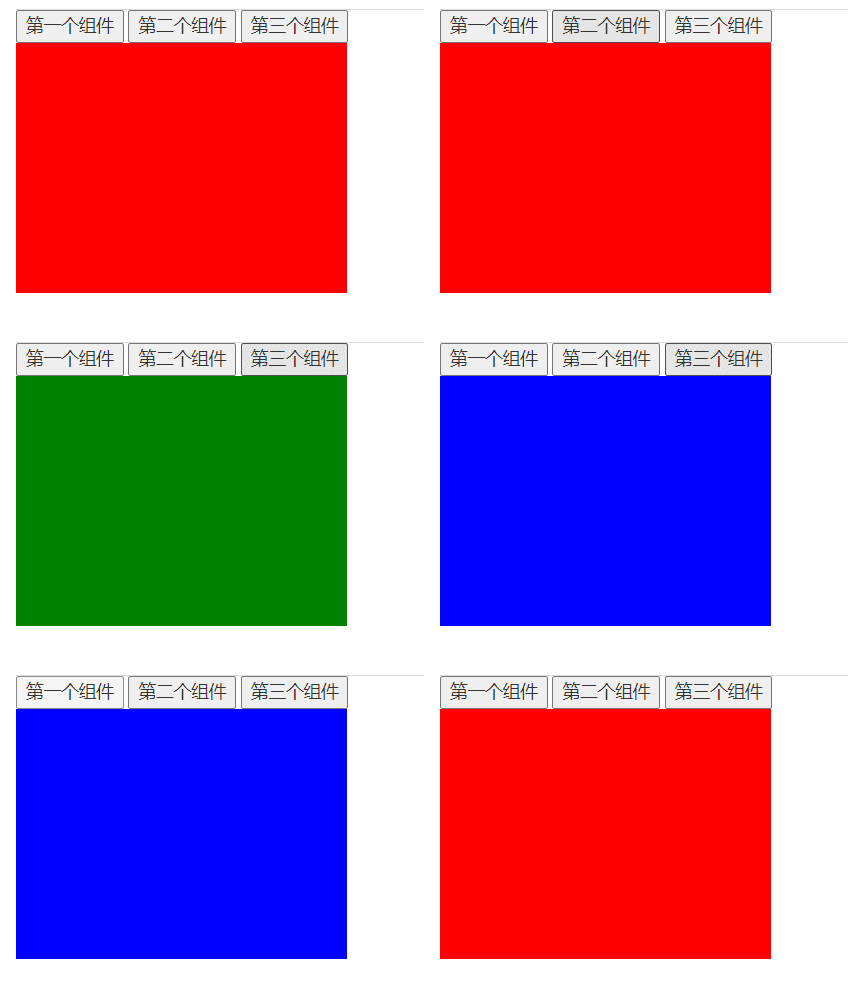
<keep-alive> 保留状态,避免重新渲染,适合表单标签<div id="app"> <button @click="who='one'">第一个组件</button> <button @click="who='two'">第二个组件</button> <button @click="who='three'">第三个组件</button> <component :is="who"> </component> </div> <script> Vue.component('one', { template: ` <div style="background: red; width: 265px; height: 200px;"></div> `, }) Vue.component('two', { template: ` <div style="background: green; width: 265px; height: 200px;"></div> `, }) Vue.component('three', { template: ` <div style="background: blue; width: 265px; height: 200px;"></div> `, }) var vm = new Vue({ el: '#app', data: { who: 'one' } }) </script>- 1
- 2
- 3
- 4
- 5
- 6
- 7
- 8
- 9
- 10
- 11
- 12
- 13
- 14
- 15
- 16
- 17
- 18
- 19
- 20
- 21
- 22
- 23
- 24
- 25
- 26
- 27
- 28
- 29
- 30
- 31
- 32
- 33
- 34
- 35
- 36
- 37

流程- Vue 的 <component> 元素加一个特殊的
isattribute 可以判断展示哪一个组件,我们只需要修改 is 的值即可。 - 对 is 属性进行动态绑定,使其绑定到根实例的 data 中,在 data 中可以设置默认展示的组件,属性的值是组件的名字。
- 对组件添加点击事件,用于修改 is 绑定的属性值达到切换组件的作用。
8. slot 插槽
在调用组件的适合使用的是 <组件名></组件名> 的形式,标签内部还可以存放内容,这就是插槽
<div id="app"> <one>你好</one> </div> <script> Vue.component('one', { template: ` <div> <slot></slot> </div> `, }) var vm = new Vue({ el: '#app', data: {} }) </script>- 1
- 2
- 3
- 4
- 5
- 6
- 7
- 8
- 9
- 10
- 11
- 12
- 13
- 14
- 15
- 16
- 17
在标签之间存放的值可以用 <slot></slot> 在组件中表示
当存在多个值的时候,可以添加名称,如下所示
<div id="app"> <one> <p slot="p1">你</p> <p slot="p2">好</p> <p slot="p3">啊</p> </one> </div> <script> Vue.component('one', { template: ` <div> <slot name="p1"></slot> <slot name="p2"></slot> <slot name="p3"></slot> </div> `, }) var vm = new Vue({ el: '#app', data: {} }) </script>- 1
- 2
- 3
- 4
- 5
- 6
- 7
- 8
- 9
- 10
- 11
- 12
- 13
- 14
- 15
- 16
- 17
- 18
- 19
- 20
- 21
- 22
- 23
- 通过
-
相关阅读:
TOGAF10标准读书会第2场活动精彩继续,高光时刻回顾!
uni-app设置分包和预下载
cmake中编译动态库且依赖fortran动态库问题记录
使用 SwiftUI 构建表单:综合指南
【考研数学】正交变换后如果不是标准型怎么办?| 关于二次型标准化的一些思考
基于springboot+vue.js+uniapp的房屋租赁系统附带文章源码部署视频讲解等
基于函数计算自定义运行时快速部署一个 springboot 项目
c++ 代码连接激光雷达,使用 pybind11 得到python模块,可以直接在python中连接雷达,获取 numpy 格式激光数据
Windows OpenGL ES 图像色阶
Qt样式表应用
- 原文地址:https://blog.csdn.net/m0_58987515/article/details/125525294
