-
jacob解决freemaker导出word文档手机无法预览问题(附下载地址)
jacob解决freemaker导出word文档手机无法预览问题(附下载地址)
github登不上的,百度云链接:https://pan.baidu.com/s/17rn533acfFiLC_eeX-q3oA?pwd=co3r
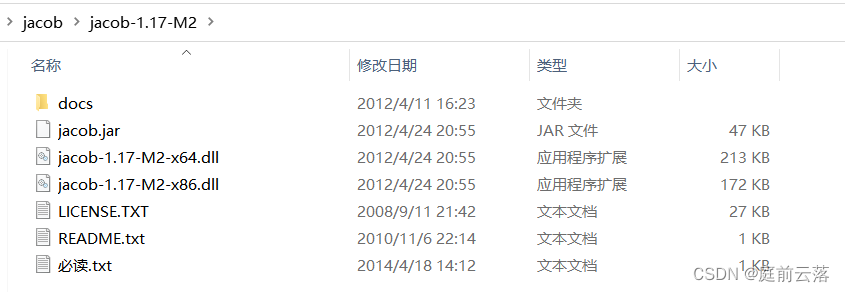
解压后是这个目录:

使用前准备
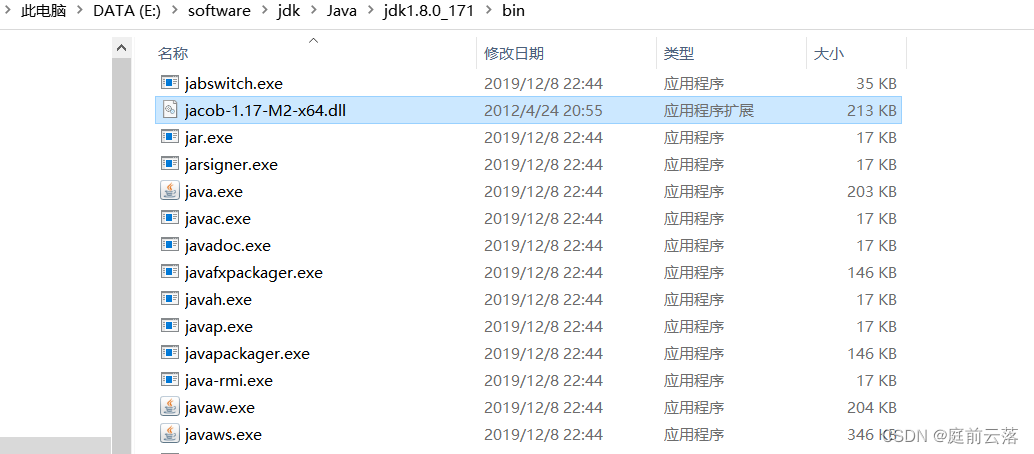
- 1、把dll文件放在%JAVA_HOME%\bin下(注意系统是32位还是64位),也可以放在C:\Windows\System32下,如果是64位应该放在C:\Windows\SysWOW64 下。建议放在jdk的bin目录下

2、如果是在eclipse下开发,需要重新引入jdk(Preference/Java/Installed JREs)
3、仓库里添加jar包,在1.17文件夹里面直接运行:
mvn install:install-file -DgroupId=com.jacob -DartifactId=jacob -Dversion=1.17 -Dfile=jacob.jar -Dpackaging=jar- 1
运行后,会多出三个文件:

4、pom添加依赖
<dependency> <groupId>com.jacob</groupId> <artifactId>jacob</artifactId> <version>1.17</version> </dependency>- 1
- 2
- 3
- 4
- 5
5、主要代码
outFile.getPath():freemarker生成的doc文件路径
newFilePath():另存为的路径,这个生成的手机就可以打开。
// 这里就是freemaker模板生成doc的代码,可以看我之前的博客 // 本地用的是wps所以我引用的是KWPS.Application,如果你使用的是office,那么相应的改为Word.Application。 ActiveXComponent _app = new ActiveXComponent("Word.Application"); _app.setProperty("Visible", Variant.VT_FALSE); Dispatch documents = _app.getProperty("Documents").toDispatch(); // 打开FreeMarker生成的Word文档 Dispatch doc = Dispatch.call(documents, "Open", outFile.getPath(), Variant.VT_FALSE, Variant.VT_TRUE).toDispatch(); // 另存为新的Word文档 Dispatch.call(doc, "SaveAs", newFilePath, Variant.VT_FALSE, Variant.VT_TRUE); Dispatch.call(doc, "Close", Variant.VT_FALSE); _app.invoke("Quit", new Variant[] {}); ComThread.Release(); // 后面我是读取新的文件然后以流的形式传输给前端,然后浏览器下载。- 1
- 2
- 3
- 4
- 5
- 6
- 7
- 8
- 9
- 10
- 11
- 12
- 13
- 14
- 15
- 16
- 17
- 18
只支持windows环境。
-
相关阅读:
基于html、css、javascript的选项卡网页设计
自动驾驶域控制器nvidia环境搭建
git常用命令等相关操作
【UE4】UE编辑器乱码问题
Flink部署之Yarn
Polygon zkEVM Binary状态机
MySQL日志管理
clickhouse学习笔记05
【Filament】材质系统
Rust更换Cargo国内源,镜像了寂寞
- 原文地址:https://blog.csdn.net/remsqks/article/details/125525539
