-
quartz详解
quartz
一、Quartz相关介绍
1.简介
1.1 Quartz 是一个完全由 Java 编写的开源作业调度框架,为在 Java 应用程序中进行作业调度提供了简单却强大的机制。
1.2 Quartz 可以与 J2EE 与 J2SE 应用程序相结合也可以单独使用。
1.3 Quartz 允许程序开发人员根据时间的间隔来调度作业。
1.4 Quartz 实现了作业和触发器的多对多的关系,还能把多个作业与不同的触发器关联。2.Quartz 核心概念
我们需要明白 Quartz 的几个核心概念,这样理解起 Quartz 的原理就会变得简单了。
2.1 Job 表示一个工作,要执行的具体内容。此接口中只有一个方法,如下:void execute(JobExecutionContext context)
2.2 JobDetail 表示一个具体的可执行的调度程序,Job 是这个可执行程调度程序所要执行的内容,另外 JobDetail 还包含了这个任务调度的方案和策略。
2.3 Trigger 代表一个调度参数的配置,什么时候去调。
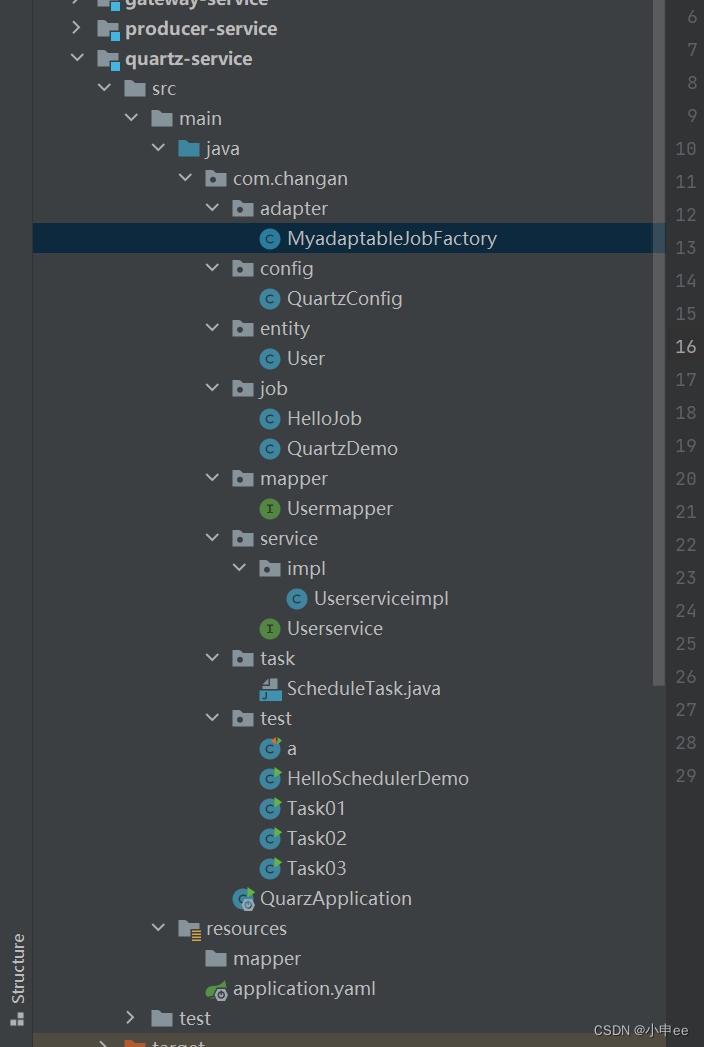
2.4 Scheduler 代表一个调度容器,一个调度容器中可以注册多个 JobDetail 和 Trigger。当 Trigger 与 JobDetail 组合,就可以被 Scheduler 容器调度了。项目层级
先说说常见的几种定时方法
线程休眠
先讲个故事
一名程序员网友发帖晒出了自己写的一段代码,是一段定时代码,根据他的语气,可以看出他对自己写的代码感觉很好,是一段java代码,好家伙,代码中多线程都用上了,还有sleep,然后自己这样写了就直接被老板赶走了,走之前为了面子还说到,你这公司我还看不上呢,其实一想写的确实没问题功能能实现,但是
Java线程实现采用内核线程实现,线程的休眠及唤醒(状态切换)需借助操作系统进行,这是一个极其耗时耗力的操作。在线程休眠或运行时间较长的情景下,其对性能的影响还不算明显,因为对线程状态的切换并不频繁。但若线程休眠及运行的时间都很短(例如毫秒/秒,文中案例就是一个典型案例),系统将频繁的对线程状态进行切换,导致严重的性能损耗,并对着循环次数的递增而放大。
所以是不推荐使用的!
/*** * 使用线程休眠实现定时任务,这种写法是不建议写的 */ public class Task01 { public static void main(String[] args) { Thread myThread = new Thread(new Runnable() { @Override public void run() { while (true) { System.out.println("TestThreadWait is called!"); try { // 使用线程休眠来实现周期执行 Thread.sleep(1000 * 3); } catch (InterruptedException e) { e.printStackTrace(); } } } }); myThread.start(); } }- 1
- 2
- 3
- 4
- 5
- 6
- 7
- 8
- 9
- 10
- 11
- 12
- 13
- 14
- 15
- 16
- 17
- 18
- 19
- 20
- 21
- 22
- 23
Timer
/*** * 延时任务 */ public class Task02 { public static void main(String[] args) { Timer timer = new Timer(); /*** * 参数一:需要执行的任务 * 参数二:延迟多久 参数二不加只会执行一次=定时任务 * 参数三,执行的频率 */ timer.schedule(new TimerTask() { @Override public void run() { System.out.println("使用timer实现定时任务"); } }, 0,1000); } }- 1
- 2
- 3
- 4
- 5
- 6
- 7
- 8
- 9
- 10
- 11
- 12
- 13
- 14
- 15
- 16
- 17
- 18
- 19
- 20
通过ScheduledExecutorService实现定时任务
package com.changan.test; import com.sun.org.apache.bcel.internal.generic.NEW; import java.util.concurrent.Executor; import java.util.concurrent.Executors; import java.util.concurrent.ScheduledExecutorService; import java.util.concurrent.TimeUnit; /** * @program: t139springcloudalibaba * @description: * @author: Mr.shen * @create: 2022-06-27 09:35 **/ public class Task03 { public static void main(String[] args) { Runnable runnable= new Runnable() { @Override public void run() { System.out.println("通过ScheduledExecutorService实现定时任务"); } }; ScheduledExecutorService service= Executors.newSingleThreadScheduledExecutor(); service.scheduleAtFixedRate(runnable,1,2, TimeUnit.SECONDS); } }- 1
- 2
- 3
- 4
- 5
- 6
- 7
- 8
- 9
- 10
- 11
- 12
- 13
- 14
- 15
- 16
- 17
- 18
- 19
- 20
- 21
- 22
- 23
- 24
- 25
- 26
- 27
- 28
进阶
quartz(编写触发器和调度器 )
package com.changan.test; /** * @program: t139springcloudalibaba * @description: 编写触发器和调度器 * @author: Mr.shen * @create: 2022-06-27 10:28 **/ import com.changan.job.HelloJob; //import com.changan.test.service.HelloJob; import org.quartz.*; import org.quartz.impl.StdSchedulerFactory; public class HelloSchedulerDemo { public static void main(String[] args) throws Exception{ //1、调度器(Schedular),从工厂中获取调度实例(默认:实例化new StdSchedulerFactory();) Scheduler scheduler= StdSchedulerFactory.getDefaultScheduler(); //2、任务实例(JobDetail) JobDetail jobDetail= JobBuilder.newJob(HelloJob.class) //加载任务类,与HelloJob完成绑定,要求HelloJob实现Job接口 .withIdentity("job1","group1") //参数1:任务的名称(唯一实例);参数2:任务组的名称 .build(); //3、触发器(Trigger) Trigger trigger= TriggerBuilder.newTrigger() .withIdentity("trigger1","group1") //参数1:触发器的名称(唯一实例);参数2:触发器组的名称 .startNow() //马上启动触发器 .withSchedule(SimpleScheduleBuilder.repeatSecondlyForever(5)) //每5秒执行一次 .build(); //让调度器关联任务和触发器,保证按照触发器定义的条件执行任务 scheduler.scheduleJob(jobDetail,trigger); //启动 scheduler.start(); } }- 1
- 2
- 3
- 4
- 5
- 6
- 7
- 8
- 9
- 10
- 11
- 12
- 13
- 14
- 15
- 16
- 17
- 18
- 19
- 20
- 21
- 22
- 23
- 24
- 25
- 26
- 27
- 28
- 29
- 30
- 31
- 32
- 33
job
package com.changan.job; /** * @program: t139springcloudalibaba * @description: 编写一个Job类,用来编写定时任务要做什么 * @author: Mr.shen * @create: 2022-06-27 10:25 **/ import org.quartz.Job; import org.quartz.JobExecutionContext; import org.quartz.JobExecutionException; import java.text.SimpleDateFormat; import java.util.Date; public class HelloJob implements Job { public void execute(JobExecutionContext jobExecutionContext) throws JobExecutionException { //输出当前时间 Date date=new Date(); SimpleDateFormat dateFormat=new SimpleDateFormat("yyyy-MM-dd HH:mm:ss"); String dateString=dateFormat.format(date); //工作内容 System.out.println("执行定时任务,时间是:"+dateString); } }- 1
- 2
- 3
- 4
- 5
- 6
- 7
- 8
- 9
- 10
- 11
- 12
- 13
- 14
- 15
- 16
- 17
- 18
- 19
- 20
- 21
- 22
- 23
- 24
- 25
高阶(使用springboot整合quartz并插入一条数据进入数据库)
下面也需要用到CronExpression表达式
推荐一个博主写的博客写的很好yyds
https://blog.csdn.net/ca1993422/article/details/123723693?spm=1001.2014.3001.5501
yaml
server: port: 8085 spring: application: name: quartz-service datasource: driver-class-name: com.mysql.cj.jdbc.Driver url: jdbc:mysql://localhost:3306/t139?useUnicode=true&characterEncoding=UTF-8&serverTimezone=GMT%2B8&zeroDateTimeBehavior=convertToNull username: root password: 123456 mybatis-plus: configuration: log-impl: org.apache.ibatis.logging.stdout.StdOutImpl #?????? map-underscore-to-camel-case: true #??????? ????????create_time?????_?? mapper-locations: classpath*:/mapper/*Mapper.xml #???? type-aliases-package: com.changan.entity #??- 1
- 2
- 3
- 4
- 5
- 6
- 7
- 8
- 9
- 10
- 11
- 12
- 13
- 14
- 15
- 16
- 17
- 18
pom.xml
<dependencies> <dependency> <groupId>org.springframework.boot</groupId> <artifactId>spring-boot-starter-quartz</artifactId> </dependency> <!-- mybatis-plus--> <dependency> <groupId>com.baomidou</groupId> <artifactId>mybatis-plus-boot-starter</artifactId> <version>3.5.1</version> </dependency> <dependency> <groupId>mysql</groupId> <artifactId>mysql-connector-java</artifactId> <scope>runtime</scope> </dependency> <dependency> <groupId>org.springframework.boot</groupId> <artifactId>spring-boot-starter-web</artifactId> </dependency> <dependency> <groupId>org.springframework.boot</groupId> <artifactId>spring-boot-starter-test</artifactId> </dependency> </dependencies>- 1
- 2
- 3
- 4
- 5
- 6
- 7
- 8
- 9
- 10
- 11
- 12
- 13
- 14
- 15
- 16
- 17
- 18
- 19
- 20
- 21
- 22
- 23
- 24
- 25
- 26
启动器
package com.changan; import org.mybatis.spring.annotation.MapperScan; import org.springframework.boot.SpringApplication; import org.springframework.boot.autoconfigure.SpringBootApplication; import org.springframework.boot.autoconfigure.jdbc.DataSourceAutoConfiguration; import org.springframework.scheduling.annotation.EnableScheduling; /** * @program: t139springcloudalibaba * @description: 启动类 * @author: Mr.shen * @create: 2022-06-27 09:42 **/ /*** * @EnableScheduling:开启定时任务 */ @MapperScan("com.changan.mapper") @SpringBootApplication @EnableScheduling public class QuarzApplication { public static void main(String[] args) { SpringApplication.run(QuarzApplication.class,args); } }- 1
- 2
- 3
- 4
- 5
- 6
- 7
- 8
- 9
- 10
- 11
- 12
- 13
- 14
- 15
- 16
- 17
- 18
- 19
- 20
- 21
- 22
- 23
- 24
- 25
- 26
- 27
- 28
Quartz配置类
package com.changan.config; import com.changan.adapter.MyadaptableJobFactory; import com.changan.job.QuartzDemo; import org.springframework.context.annotation.Bean; import org.springframework.context.annotation.Configuration; import org.springframework.scheduling.quartz.CronTriggerFactoryBean; import org.springframework.scheduling.quartz.JobDetailFactoryBean; import org.springframework.scheduling.quartz.SchedulerFactoryBean; import org.springframework.scheduling.quartz.SimpleTriggerFactoryBean; /** * @program: t139springcloudalibaba * @description: Quartz配置类 * @author: Mr.shen * @create: 2022-06-27 10:54 **/ @Configuration public class QuartzConfig { /** * 1、创建Job对象 */ @Bean public JobDetailFactoryBean jobDetailFactoryBean(){ JobDetailFactoryBean factoryBean=new JobDetailFactoryBean(); //关联我们自己的Job类 factoryBean.setJobClass(QuartzDemo.class); //就是触发这个定时任务执行的任务 return factoryBean; } /** * 2、创建Trigger对象 */ @Bean public CronTriggerFactoryBean cronTriggerFactoryBean(JobDetailFactoryBean jobDetailFactoryBean){ CronTriggerFactoryBean factoryBean=new CronTriggerFactoryBean(); factoryBean.setJobDetail(jobDetailFactoryBean.getObject());//将任务代进去 factoryBean.setCronExpression("0/5 * * * * ?");//设置任务触发条件 CronExpression表达式 return factoryBean; } /** * 3、创建Scheduler * 实现调度任务的配置 */ @Bean public SchedulerFactoryBean schedulerFactoryBean(CronTriggerFactoryBean cronTriggerFactoryBean, MyadaptableJobFactory myadaptableJobFactory){ SchedulerFactoryBean factoryBean=new SchedulerFactoryBean(); factoryBean.setTriggers(cronTriggerFactoryBean.getObject()); factoryBean.setJobFactory(myadaptableJobFactory); return factoryBean; } }- 1
- 2
- 3
- 4
- 5
- 6
- 7
- 8
- 9
- 10
- 11
- 12
- 13
- 14
- 15
- 16
- 17
- 18
- 19
- 20
- 21
- 22
- 23
- 24
- 25
- 26
- 27
- 28
- 29
- 30
- 31
- 32
- 33
- 34
- 35
- 36
- 37
- 38
- 39
- 40
- 41
- 42
- 43
- 44
- 45
- 46
- 47
- 48
- 49
- 50
- 51
- 52
- 53
- 54
- 55
Job类(就是你时间到了触发的方法)
package com.changan.job; import com.changan.entity.User; import com.changan.service.Userservice; import org.quartz.Job; import org.quartz.JobExecutionContext; import org.quartz.JobExecutionException; import org.springframework.beans.factory.annotation.Autowired; import java.util.Date; /** * @program: t139springcloudalibaba * @description: job类 * @author: Mr.shen * @create: 2022-06-27 10:40 **/ public class QuartzDemo implements Job { @Autowired private Userservice userService; @Override public void execute(JobExecutionContext jobExecutionContext) throws JobExecutionException { User user = new User(); user.setAge(12); user.setHead("dwwd"); user.setManager(123); user.setSex("dw"); user.setUpwd("wdwdw"); user.setUname("111"); System.out.println(userService.userinsert(user)); System.out.println("Execute..."+new Date()); } }- 1
- 2
- 3
- 4
- 5
- 6
- 7
- 8
- 9
- 10
- 11
- 12
- 13
- 14
- 15
- 16
- 17
- 18
- 19
- 20
- 21
- 22
- 23
- 24
- 25
- 26
- 27
- 28
- 29
- 30
- 31
- 32
- 33
- 34
做完这些操作之后你运行插入你会发现Userservice并没有注入bean 就算加service也不行下面就需要一个配置类了
MyadaptableJobFactory(注入对象)
package com.changan.adapter; /** * @program: t139springcloudalibaba * @description: 编写一个类MyAdaptableJobFactory继承AdaptableJobFactory,覆盖createJobInstance()方法。 * @author: Mr.shen * @create: 2022-06-27 10:54 **/ import org.quartz.spi.TriggerFiredBundle; import org.springframework.beans.factory.annotation.Autowired; import org.springframework.beans.factory.config.AutowireCapableBeanFactory; import org.springframework.scheduling.quartz.AdaptableJobFactory; import org.springframework.stereotype.Component; @Component("myadaptableJobFactory") //将该类实例化,使得可以直接用 public class MyadaptableJobFactory extends AdaptableJobFactory { //AutowireCapableBeanFactory可以将一个对象添加到Spring IOC容器中,并且完成该对象注入 @Autowired private AutowireCapableBeanFactory autowireCapableBeanFactory; //该方法将实例化的任务对象手动的添加到SpringIOC容器中并且完成对象的注入 @Override protected Object createJobInstance(TriggerFiredBundle bundle) throws Exception { Object object = super.createJobInstance(bundle); //将object对象添加到Spring IOC容器中并完成注入 this.autowireCapableBeanFactory.autowireBean(object); return object; } }- 1
- 2
- 3
- 4
- 5
- 6
- 7
- 8
- 9
- 10
- 11
- 12
- 13
- 14
- 15
- 16
- 17
- 18
- 19
- 20
- 21
- 22
- 23
- 24
- 25
- 26
- 27
- 28
- 29
-
相关阅读:
flutter 移动应用程序中打开URL
边缘计算网关的用途及其使用方法-天拓四方
基于WPF技术的换热站智能监控系统08--实现右上模式控制
TCP流套接字编程
HTML+CSS鲜花静态网页设计
嵌入式分享合集100
Maven - no main manifest attribute(SpringBoot 多模块)
驱动开发day2(编程实现LED三盏小灯亮灭)
C++模板编程(7)---实际运用模板:模板追踪器(tracer)
SQL11 高级操作符练习(1)
- 原文地址:https://blog.csdn.net/weixin_50098749/article/details/125516319
