-
SpringBoot 整合文件上传 elment Ui 上传组件
SpringBoot 整合文件上传 elment Ui 上传组件
本文章记录 自己学习使用 侵权必删!
前端代码
博主最近在学 elment Ui 所以 前端使用 elmentUi 的 upload 组件实现
- 因为 elmentui 是基于 vue 的环境 使用的 所以我们 得引用 vue 的 js 文件
引入 elmentUi 的 css 和 js
我们采用官网的这种 cdn 的方式
- 本地的引入的方式 容易导致elementUI与 vue 版本不匹配
- 出现
Vue warn]: Injection “elForm” not found报错解决方法
<!-- 引入Vue --> <script src="https://cdn.jsdelivr.net/npm/vue/dist/vue.js"></script> <!-- 引入样式 --> <link rel="stylesheet" href="https://unpkg.com/element-ui/lib/theme-chalk/index.css" /> <!-- 引入组件库 elementUi--> <script src="https://unpkg.com/element-ui/lib/index.js"></script>- 1
- 2
- 3
- 4
- 5
- 6
- 7
- 8
- 9
项目的目录结构:

搭建前端页面
页面效果

光光这些肯定不够 我们还需要前后端交互的页面
-
创建的文件名称:index.html
-
文件位置: /resources/static/index.html
<!DOCTYPE html> <html lang="en"> <head> <meta charset="UTF-8" /> <title>测试文件上传</title> <!-- 引入Vue --> <script src="https://cdn.jsdelivr.net/npm/vue/dist/vue.js"></script> <!-- 引入样式 --> <link rel="stylesheet" href="https://unpkg.com/element-ui/lib/theme-chalk/index.css" /> <!-- 引入组件库 elementUi--> <script src="https://unpkg.com/element-ui/lib/index.js"></script> </head> <body> <div id="app"> <el-upload class="avatar-uploader" action="http://localhost:8899/upload" :show-file-list="false" :on-success="handleAvatarSuccess" > <img v-if="imageUrl" :src="imageUrl" class="avatar" /> <i v-else class="el-icon-plus avatar-uploader-icon"></i> </el-upload> </div> </body> <script> new Vue({ el: '#app', data: { // 图片的url imageUrl: '', }, methods: { //上传成功 handleAvatarSuccess(res) { // 上传的图片路径 this.imageUrl = res }, }, }) </script> <style> .avatar-uploader .el-upload { border: 1px dashed #d9d9d9; border-radius: 6px; cursor: pointer; position: relative; overflow: hidden; } .avatar-uploader .el-upload:hover { border-color: #409eff; } .avatar-uploader-icon { font-size: 28px; color: #8c939d; width: 178px; height: 178px; line-height: 178px; text-align: center; } .avatar { width: 178px; height: 178px; display: block; } </style> </html>- 1
- 2
- 3
- 4
- 5
- 6
- 7
- 8
- 9
- 10
- 11
- 12
- 13
- 14
- 15
- 16
- 17
- 18
- 19
- 20
- 21
- 22
- 23
- 24
- 25
- 26
- 27
- 28
- 29
- 30
- 31
- 32
- 33
- 34
- 35
- 36
- 37
- 38
- 39
- 40
- 41
- 42
- 43
- 44
- 45
- 46
- 47
- 48
- 49
- 50
- 51
- 52
- 53
- 54
- 55
- 56
- 57
- 58
- 59
- 60
- 61
- 62
- 63
- 64
- 65
- 66
- 67
- 68
- 69
- 70
- 71
- 72
- 73
- 74
所使用的依赖
找到 pom.xml
- 因为只用到了接口 我们导入 web 的依赖即可
<parent> <artifactId>spring-boot-starter-parent</artifactId> <groupId>org.springframework.boot</groupId> <version>2.5.0</version> </parent> <properties> <maven.compiler.source>8</maven.compiler.source> <maven.compiler.target>8</maven.compiler.target> <project.build.sourceEncoding>UTF-8</project.build.sourceEncoding> </properties> <!-- web的依赖--> <dependencies> <dependency> <groupId>org.springframework.boot</groupId> <artifactId>spring-boot-starter-web</artifactId> </dependency> </dependencies>- 1
- 2
- 3
- 4
- 5
- 6
- 7
- 8
- 9
- 10
- 11
- 12
- 13
- 14
- 15
- 16
- 17
- 18
后端代码
controller
/** * @author : look-word * 2022-06-27 22:28 **/ @RestController public class FileController { /** * 设置/img/**的访问规则 * 意思就是当我们访问 http://localhost:8899/img/redis.png的时候 * 会去addResourceLocations这和目录下寻找 */ @Configuration public static class MyPicConfig implements WebMvcConfigurer { @Override public void addResourceHandlers(ResourceHandlerRegistry registry) { registry.addResourceHandler("/img/**") .addResourceLocations("file:"+System.getProperty("user.dir") + "\\src\\main\\resources\\static\\img\\"); } } /** * 接收上传文件的接口 * @param urlFile 上传的文件 * @param request 请求 * @return */ @PostMapping("/upload") public String upload(@RequestParam("file") MultipartFile urlFile,HttpServletRequest request) { // url =》 http://localhost:8899/upload StringBuffer url = request.getRequestURL(); // 意思是 取出ip地址加端口 http://localhost:8899 String baseUrl = url.substring(0, url.length() - (url.length() - url.lastIndexOf("/"))); // 文件名称 String fileName = System.currentTimeMillis() + urlFile.getOriginalFilename(); // 文件存储的路径 String filePath = System.getProperty("user.dir") + "\\src\\main\\resources\\static\\img\\"; File file = new File(filePath); // 当文件夹不存在 创建文件夹 if (!file.exists()) { file.mkdir(); } File dest = new File(filePath + fileName); String storeUrlPath = "/img/" + fileName; try { // 写到文件夹中 urlFile.transferTo(dest); System.out.println("上传成功"); } catch (IOException e) { System.out.println("上传失败"); throw new RuntimeException(e); } return baseUrl+storeUrlPath; } }- 1
- 2
- 3
- 4
- 5
- 6
- 7
- 8
- 9
- 10
- 11
- 12
- 13
- 14
- 15
- 16
- 17
- 18
- 19
- 20
- 21
- 22
- 23
- 24
- 25
- 26
- 27
- 28
- 29
- 30
- 31
- 32
- 33
- 34
- 35
- 36
- 37
- 38
- 39
- 40
- 41
- 42
- 43
- 44
- 45
- 46
- 47
- 48
- 49
- 50
- 51
- 52
- 53
- 54
- 55
- 56
- 57
解析代码
我们现在接收上传文件的接口 打上断点 下面一步一步解析里面的代码

- request.getRequestURL() 意思是 获取当前请求的地址
- http://localhost:8899/upload 是这种格式
- baseUrl: 是截取到http://localhost:8899这串字符
- 在返回到前端页面展示的时候需要用到
- fileName

- System.getProperty(“user.dir”) 获取的时候 当前项目在磁盘的路径


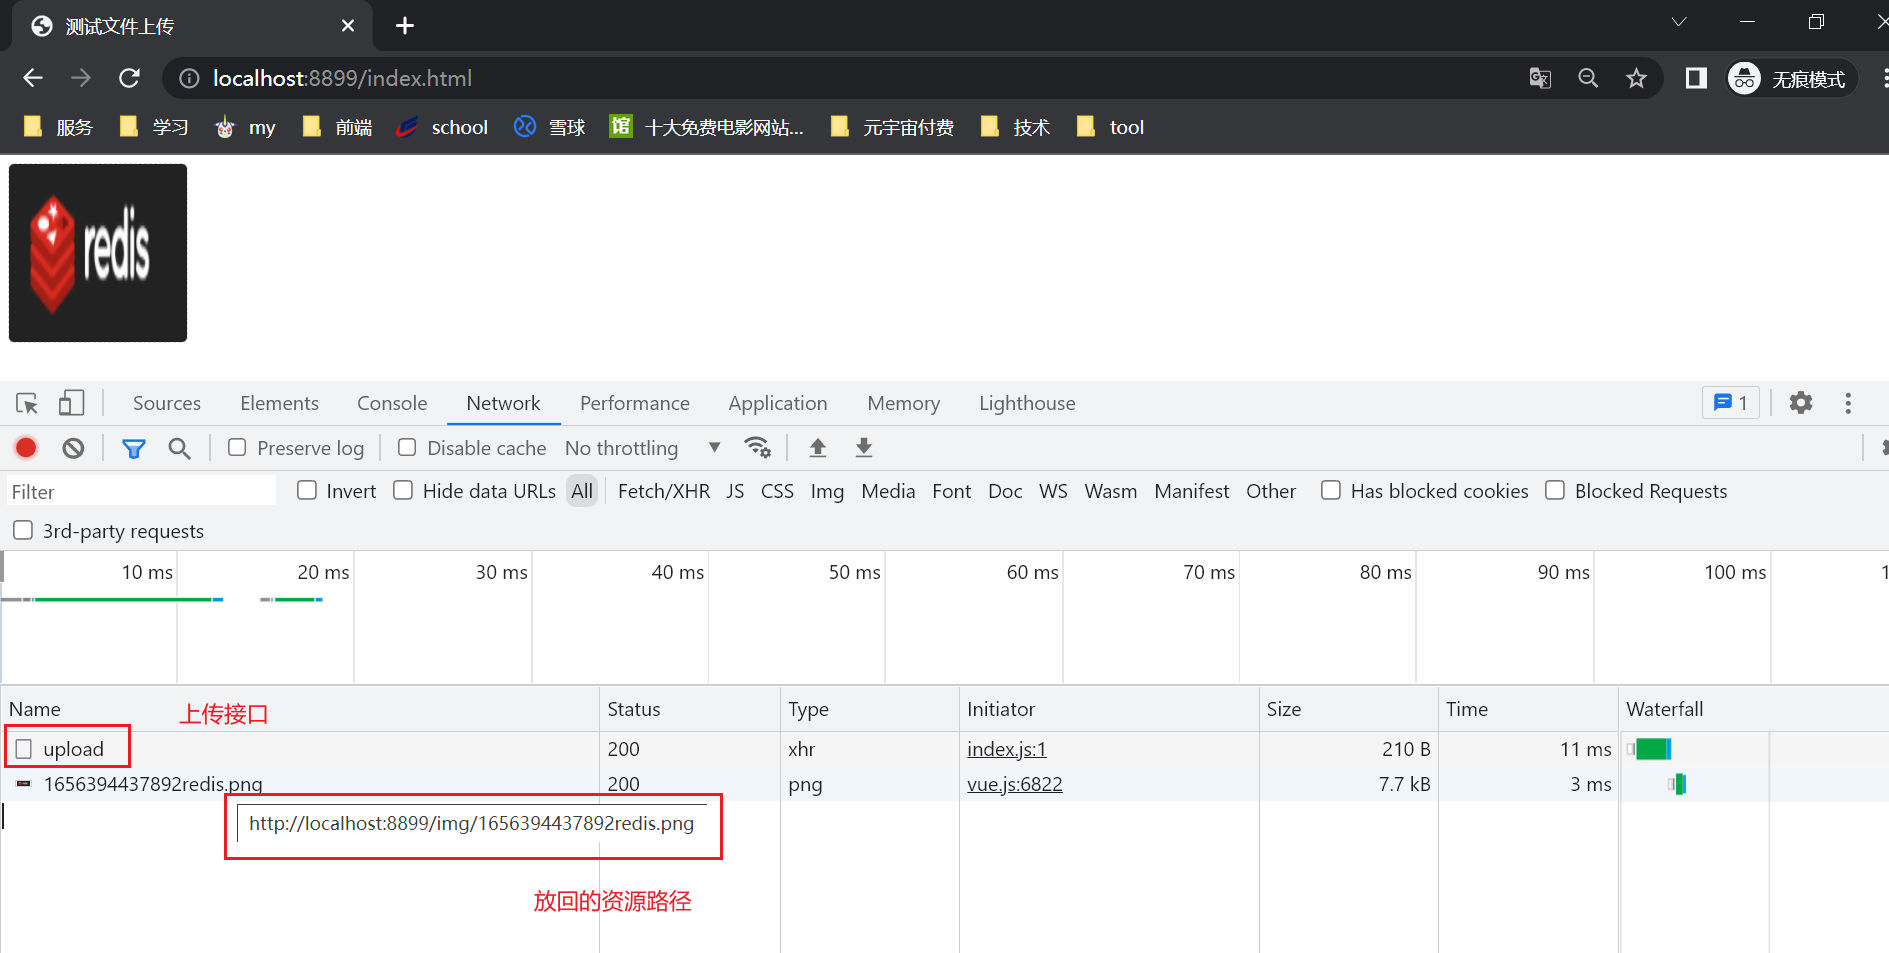
这样就上传成功啦 那么 我们该如何去访问这个图片呢?
来到这里 当我们访问的资源文件路径为/img开头的时候 会默认 去到"file:"+System.getProperty(“user.dir”) + "\src\main\resources\static\img\"来寻找 就是我们项目的静态资源文件夹的位置
- 这个位置可以是任意位置

页面效果
可以看到 当我们 上传成功后 资源成功的展示到了 我们的页面上
-
相关阅读:
Python全栈开发【基础-10】流程控制之for循环
Android开发使用SoundPool播放音乐
Netty入门学习
K8S知识点(七)
【甄选靶场】Vulnhub百个项目渗透——项目二十六:Pinky‘s-Palace-1(代理访问,缓冲区溢出)
零基础如何入门Web性能测试?
偶数科技入选 IDC 中国分布式数据库报告,获 Innovator 殊荣
PREPARE TO FAIL(OVER)
《优化接口设计的思路》系列:第七篇—接口限流策略
MySQL高级5-SQL优化
- 原文地址:https://blog.csdn.net/qq_50975965/article/details/125500628

