-
Python爬虫(五)
一、Seleniums简述
作用:
1.应用于web测试的工具
2.其测试直接在浏览器中,就像真正用户操作一样
3.支持各种驱动浏览器
4.支持无界面浏览器操作
如何安装赖?
操作谷歌浏览器驱动下载地址:https://chromedriver.storage.googleapis.com/index.htmlpip install selenium -i https://www.pypi.douban.com/simple- 1
# selenium # import urllib.request # url = 'https://www.jd.com/' # response = urllib.request.urlopen(url) # content = response.read().decode('utf-8') # print(content) # (1) 导入selenium from selenium import webdriver # (2) 创建浏览器操作对象 path = 'chromedriver.exe' browser = webdriver.Chrome(path) # (3) 访问网站 # url = 'https://www.baidu.com' # browser.get(url) url = 'https://www.jd.com/' browser.get(url) # page_source获取网页源码 content = browser.page_source print(content)- 1
- 2
- 3
- 4
- 5
- 6
- 7
- 8
- 9
- 10
- 11
- 12
- 13
- 14
- 15
- 16
- 17
- 18
- 19
- 20
二、selenium元素定位
# selenium元素定位 from selenium import webdriver from selenium.webdriver.common.by import By path = 'chromedriver.exe' browser = webdriver.Chrome(path) url = 'https://www.baidu.com' browser.get(url) # 元素定位 # 根据id找到对象 # button = browser.find_element(by=By.ID, value='su') # print(button) # 根据标签属性值获取对象名 # button = browser.find_element_by_name('wd') # print(button) # 根据xpath语句获取对象 button = browser.find_element_by_xpath('//input[@id="su"]') print(button) # 根据标签名获取对象 button = browser.find_element_by_tag_name('input') print(button) # 使用bs4语法实现 button = browser.find_element_by_css_selector('#su') button = browser.find_element_by_link_text("直播") print(button)- 1
- 2
- 3
- 4
- 5
- 6
- 7
- 8
- 9
- 10
- 11
- 12
- 13
- 14
- 15
- 16
- 17
- 18
- 19
- 20
- 21
- 22
- 23
- 24
- 25
三、selenium获取元素信息
from selenium import webdriver from selenium.webdriver.common.by import By path = 'chromedriver.exe' browser = webdriver.Chrome(path) url = 'http://www.baidu.com' browser.get(url) input = browser.find_element_by_id('su') # 获取标签属性 print(input.get_attribute('class')) # 获取标签名 print(input.tag_name) # 获取元素文本 a = browser.find_element_by_link_text('新闻') print(a.text)- 1
- 2
- 3
- 4
- 5
- 6
- 7
- 8
- 9
- 10
- 11
- 12
- 13
- 14
四、selenium_handless
# selenium_handless from selenium import webdriver from selenium.webdriver.chrome.options import Options chrome_options = Options() chrome_options.add_argument('--headless') chrome_options.add_argument('--disable-gpu') # path是个人的chrome浏览器文件路径 path = r'C:\Program Files\Google\Chrome\Application\chrome.exe' chrome_options.binary_location = path browser = webdriver.Chrome(chrome_options=chrome_options) url = 'https://www.baidu.com' browser.get(url) browser.save_screenshot('./file/baidu.png')- 1
- 2
- 3
- 4
- 5
- 6
- 7
- 8
- 9
- 10
- 11
- 12
- 13
封装的handless(极其好用)
# 封装的handless from selenium import webdriver from selenium.webdriver.chrome.options import Options def share_browser(): chrome_options = Options() chrome_options.add_argument('--headless') chrome_options.add_argument('--disable-gpu') # path是个人的chrome浏览器文件路径 path = r'C:\Program Files\Google\Chrome\Application\chrome.exe' chrome_options.binary_location = path browser = webdriver.Chrome(chrome_options=chrome_options) return browser browser = share_browser() url = 'https://www.baidu.com' browser.get(url)- 1
- 2
- 3
- 4
- 5
- 6
- 7
- 8
- 9
- 10
- 11
- 12
- 13
- 14
- 15
五、request
官方文档:https://doc.codingdict.com/request/docs.python-requests.org/zh_CN/latest/index.html
安装:pip install requests
requests基本使用
1.一个类型和六个属性# requests基本使用 import requests url = 'http://www.baidu.com' response = requests.get(url=url) # 一个类型和六个属性 # 1.response类型 print(type(response)) # 2.1设置响应的编码格式 response.encoding = 'utf-8' # 2.2 以字符串的形式返回网页源码 print(response.text) # 2.3 返回url地址 print(response.url) # 2.4 返回二进制的数据 print(response.content) # 2.5 返回响应的状态码 print(response.status_code) # 2.6 返回响应头 print(response.headers)- 1
- 2
- 3
- 4
- 5
- 6
- 7
- 8
- 9
- 10
- 11
- 12
- 13
- 14
- 15
- 16
- 17
- 18
- 19
2.get请求
import requests url = 'https://www.baidu.com/s?' headers = { 'user-agent': 'Mozilla/5.0 (Windows NT 10.0; Win64; x64) AppleWebKit/537.36 (KHTML, like Gecko) Chrome/102.0.5005.124 Safari/537.36 Edg/102.0.1245.44' } data = { 'wd':'北京' } # url 请求资源路径 # params 参数 # kwargs 字典 response = requests.get(url=url,params=data,headers=headers) content = response.text print(content) # (1)参数使用params传递 # (2)参数无需urlencode编码 # (3)不需要请求对象的定制 # (4)请求资源路径中的? 可以添加也可以不添加- 1
- 2
- 3
- 4
- 5
- 6
- 7
- 8
- 9
- 10
- 11
- 12
- 13
- 14
- 15
- 16
- 17
- 18
3.post请求
import requests url = 'https://fanyi.baidu.com/sug' headers = { 'user-agent': 'Mozilla/5.0 (Windows NT 10.0; Win64; x64) AppleWebKit/537.36 (KHTML, like Gecko) Chrome/102.0.5005.124 Safari/537.36 Edg/102.0.1245.44' } data = { 'kw':'eye' } # url 请求地址 # data 请求参数 # kwargs 字典 response = requests.post(url=url,data=data,headers=headers) content = response.text import json obj = json.loads(content) print(obj) # 总结 # (1)post请求不需要解码 # (2)post请求参数是data # (3)不需要请求对象的定制- 1
- 2
- 3
- 4
- 5
- 6
- 7
- 8
- 9
- 10
- 11
- 12
- 13
- 14
- 15
- 16
- 17
- 18
- 19
- 20
- 21
4.request代理
失败的案例,爬取的页面被百度安全验证拦截,目前没找到解决方法。。import requests url = 'https://www.baidu.com/s?' headers = { 'user-agent': 'Mozilla/5.0 (Windows NT 10.0; Win64; x64) AppleWebKit/537.36 (KHTML, like Gecko) Chrome/102.0.5005.124 Safari/537.36 Edg/102.0.1245.44' } data = { "wd":"ip" } proxy = { 'http':'112.6.117.135:8085' } response = requests.get(url=url,params=data,headers=headers,proxies=proxy) content = response.text with open('./file/daili.html','w',encoding='utf-8')as fp: fp.write(content)- 1
- 2
- 3
- 4
- 5
- 6
- 7
- 8
- 9
- 10
- 11
- 12
- 13
- 14
- 15
- 16
六、古诗文网案例
# 通过登录进入到主页面 # 登录时需要的参数 # __VIEWSTATE: MhTU6ngpY+d6+v03OI2VLwWkT9WEEg0WJXCgtQVoV3ub3U8WFLzuZ+6GAihlB8lY7d0Ndwv3vVQ1a191DlG8aU65pA604tMI4bfSRa51oYBFQynfi//xkA+oIOw= # __VIEWSTATEGENERATOR: C93BE1AE # from: http://so.gushiwen.cn/user/collect.aspx # email: 3047287962@qq.com # pwd: action # code: # denglu: 登录 # 观察到__VIEWSTATE __VIEWSTATEGENERATOR code 是变量 # 难点:(1) __VIEWSTATE __VIEWSTATEGENERATOR # (2) 验证码 import requests # 这是登录页面的url地址 url = 'https://so.gushiwen.cn/user/login.aspx?from=http://so.gushiwen.cn/user/collect.aspx' headers = { 'user-agent': 'Mozilla/5.0 (Windows NT 10.0; Win64; x64) AppleWebKit/537.36 (KHTML, like Gecko) Chrome/102.0.5005.124 Safari/537.36 Edg/102.0.1245.44' } response = requests.get(url=url,headers=headers) content = response.text # 解析页面源码 from bs4 import BeautifulSoup soup = BeautifulSoup(content,'lxml') # 获取__VIEWSTATE viewstate = soup.select('#__VIEWSTATE')[0].attrs.get('value') print(viewstate) # 获取__VIEWSTATEGENERATOR viewstategenerator = soup.select('#__VIEWSTATEGENERATOR')[0].attrs.get('value') print(viewstategenerator) # 获取验证码图片 code = soup.select('#imgCode')[0].attrs.get('src') code_url = 'https://so.gushiwen.cn' + code print(code_url) # 获取验证码的图片之后下载到本地,观察图片内容 在控制台输入验证码 # import urllib.request # urllib.request.urlretrieve(url=code_url,filename='./file/code.jpg') # requests里面有一个方法,session()方法 通过session的返回值使请求变成一个对象 session = requests.session() # 验证码url的内容 response_code = session.get(code_url) # 注意此时要使用二进制数 图片的下载 content_code = response_code.content # wb是将二进制数据写入文件 with open('./file/code.jpg','wb')as fp: fp.write(content_code) code_name = input('请输入验证码') # 点击登录 url_post = 'https://so.gushiwen.cn/user/login.aspx?from=http%3a%2f%2fso.gushiwen.cn%2fuser%2fcollect.aspx' data_post = { "__VIEWSTATE": viewstate, "__VIEWSTATEGENERATOR": viewstategenerator, "from": "http://so.gushiwen.cn/user/collect.aspx", "email": "3047287962@qq.com", "pwd": "090711zgf", "code": code_name, "denglu": "登录" } response_post = session.post(url=url,headers=headers,data=data_post) content_post = response_post.text with open('./file/gushiwen.html','w',encoding='utf-8') as fp: fp.write(content_post) # 难点 (1)隐藏域问题 (2)验证码- 1
- 2
- 3
- 4
- 5
- 6
- 7
- 8
- 9
- 10
- 11
- 12
- 13
- 14
- 15
- 16
- 17
- 18
- 19
- 20
- 21
- 22
- 23
- 24
- 25
- 26
- 27
- 28
- 29
- 30
- 31
- 32
- 33
- 34
- 35
- 36
- 37
- 38
- 39
- 40
- 41
- 42
- 43
- 44
- 45
- 46
- 47
- 48
- 49
- 50
- 51
- 52
- 53
- 54
- 55
- 56
- 57
- 58
- 59
- 60
- 61
- 62
- 63
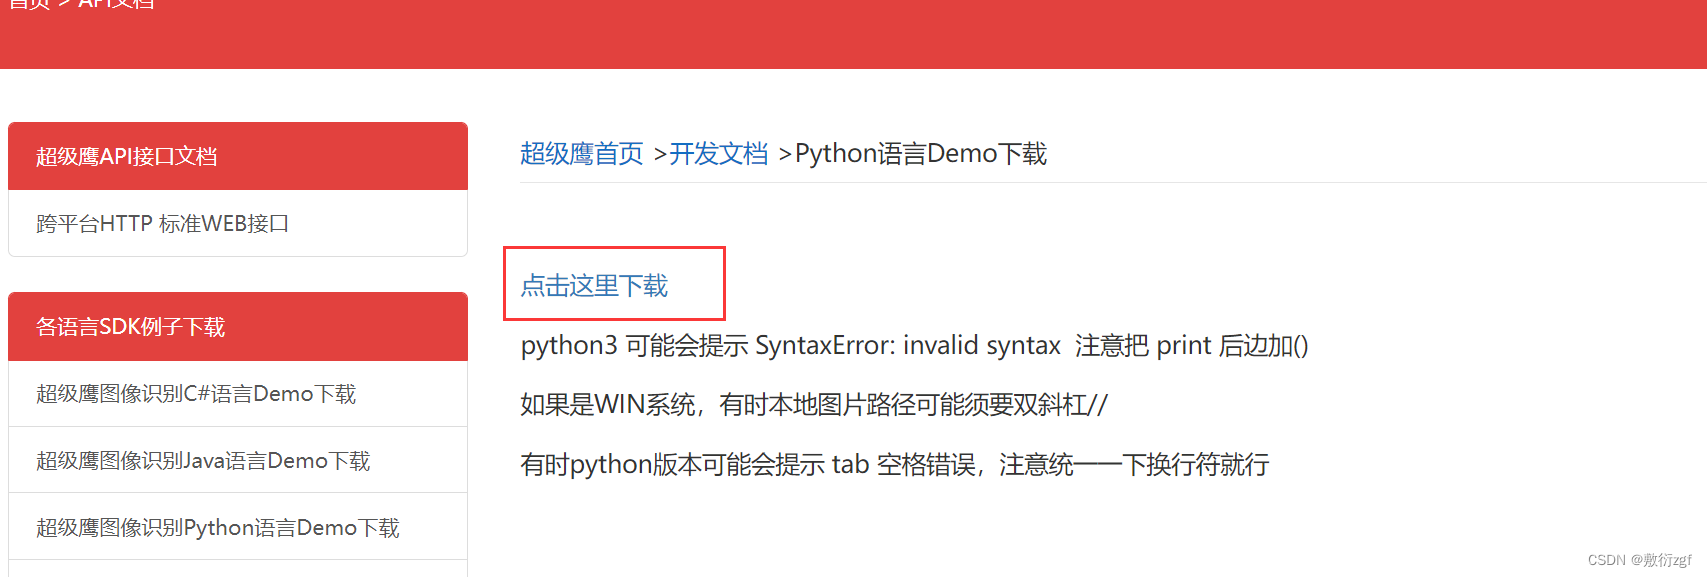
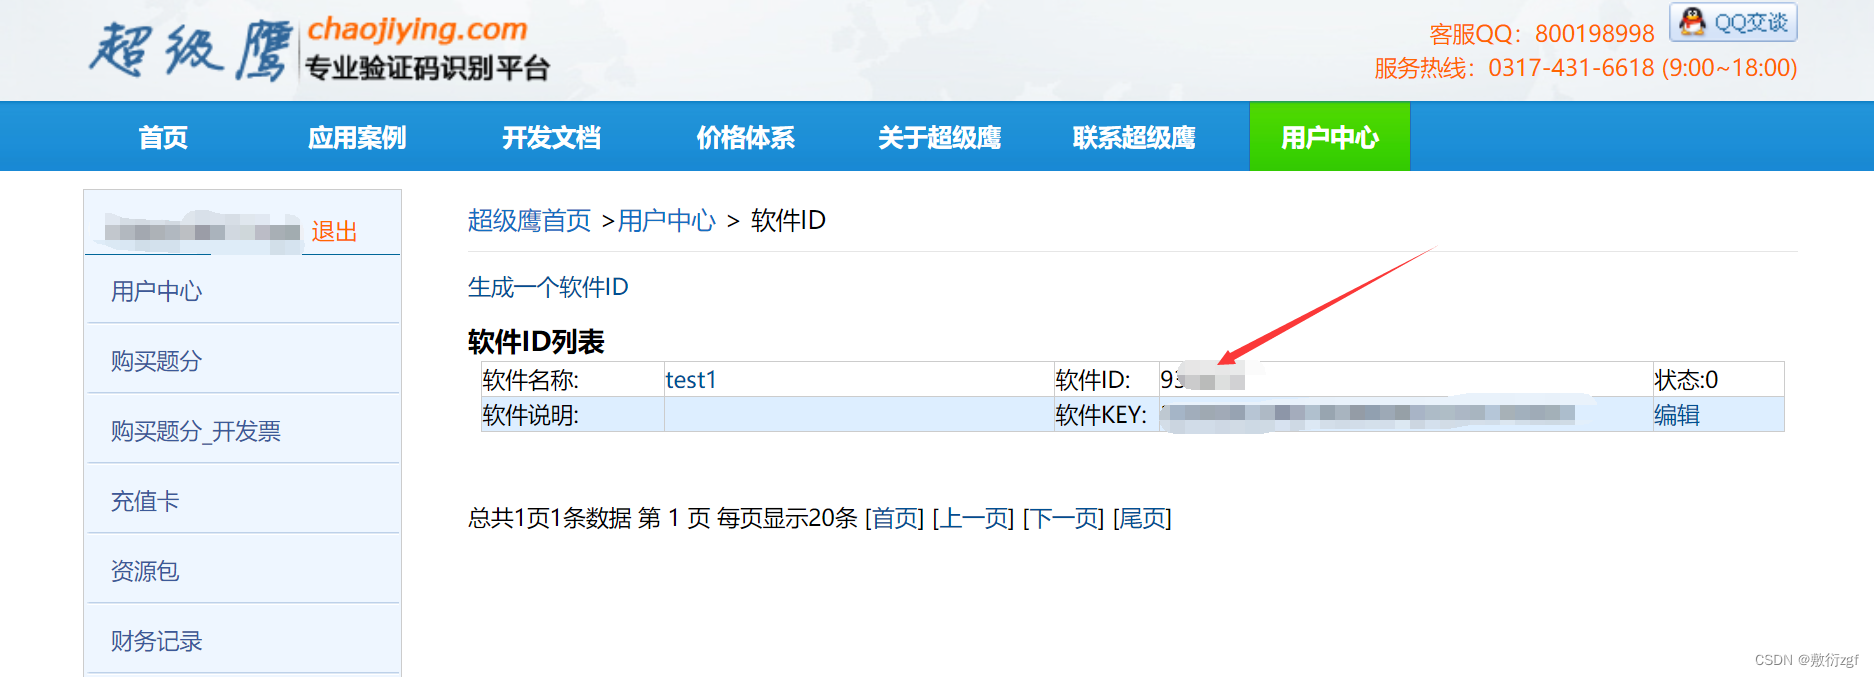
七、超级鹰打码平台的使用
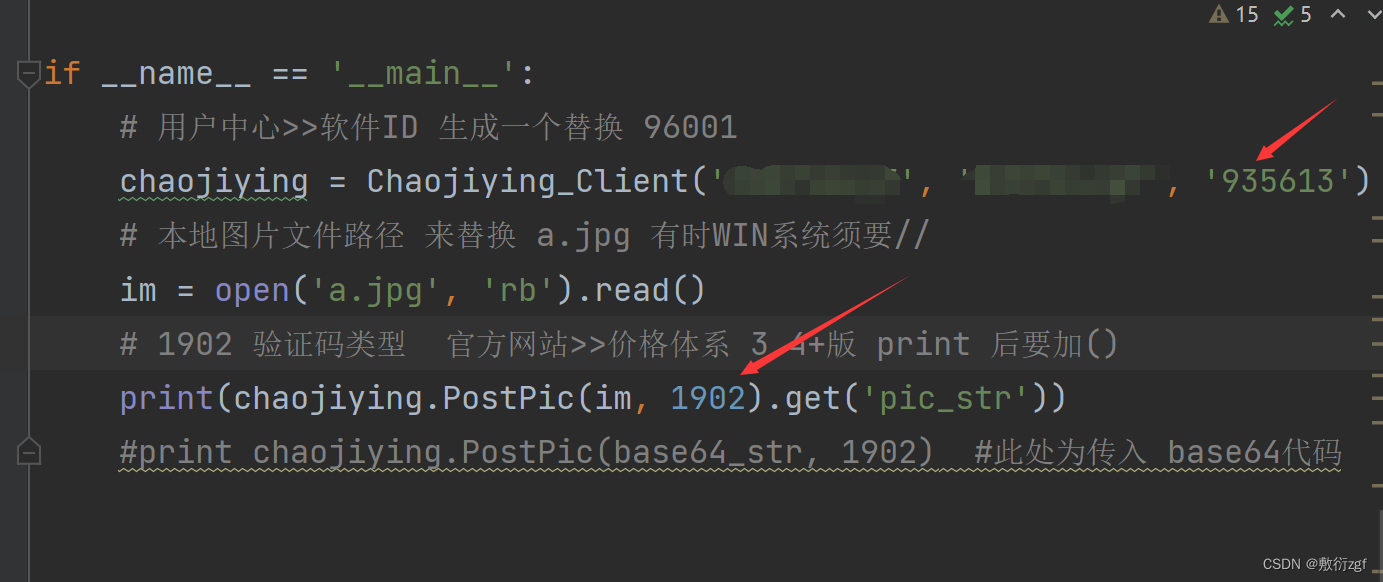
#!/usr/bin/env python # coding:utf-8 import requests from hashlib import md5 class Chaojiying_Client(object): def __init__(self, username, password, soft_id): self.username = username password = password.encode('utf8') self.password = md5(password).hexdigest() self.soft_id = soft_id self.base_params = { 'user': self.username, 'pass2': self.password, 'softid': self.soft_id, } self.headers = { 'Connection': 'Keep-Alive', 'User-Agent': 'Mozilla/4.0 (compatible; MSIE 8.0; Windows NT 5.1; Trident/4.0)', } def PostPic(self, im, codetype): """ im: 图片字节 codetype: 题目类型 参考 http://www.chaojiying.com/price.html """ params = { 'codetype': codetype, } params.update(self.base_params) files = {'userfile': ('ccc.jpg', im)} r = requests.post('http://upload.chaojiying.net/Upload/Processing.php', data=params, files=files, headers=self.headers) return r.json() def PostPic_base64(self, base64_str, codetype): """ im: 图片字节 codetype: 题目类型 参考 http://www.chaojiying.com/price.html """ params = { 'codetype': codetype, 'file_base64':base64_str } params.update(self.base_params) r = requests.post('http://upload.chaojiying.net/Upload/Processing.php', data=params, headers=self.headers) return r.json() def ReportError(self, im_id): """ im_id:报错题目的图片ID """ params = { 'id': im_id, } params.update(self.base_params) r = requests.post('http://upload.chaojiying.net/Upload/ReportError.php', data=params, headers=self.headers) return r.json() if __name__ == '__main__': # 用户中心>>软件ID 生成一个替换 96001 chaojiying = Chaojiying_Client('', '', '') # 本地图片文件路径 来替换 a.jpg 有时WIN系统须要// im = open('a.jpg', 'rb').read() # 1902 验证码类型 官方网站>>价格体系 3.4+版 print 后要加() print(chaojiying.PostPic(im, 1902).get('pic_str')) #print chaojiying.PostPic(base64_str, 1902) #此处为传入 base64代码- 1
- 2
- 3
- 4
- 5
- 6
- 7
- 8
- 9
- 10
- 11
- 12
- 13
- 14
- 15
- 16
- 17
- 18
- 19
- 20
- 21
- 22
- 23
- 24
- 25
- 26
- 27
- 28
- 29
- 30
- 31
- 32
- 33
- 34
- 35
- 36
- 37
- 38
- 39
- 40
- 41
- 42
- 43
- 44
- 45
- 46
- 47
- 48
- 49
- 50
- 51
- 52
- 53
- 54
- 55
- 56
- 57
- 58
- 59
- 60
- 61
- 62
- 63
- 64
- 65
- 66
- 67
- 68
-
相关阅读:
题目 1064: 二级C语言-阶乘数列
第六章《类的高级特性》第4节:抽象类
Linux应用层例程3 输入设备应用编程
【Spring-5.2】AbstractAutowireCapableBeanFactory#populateBean实现Bean的属性赋值
如何优化k8s中HPA的弹性速率
docker load and build过程的一些步骤理解
STM32CUBEMX(10)--内部Flash读写
ChatGPT3.5使用体验
calcite 校验层总结
基于CNN-GRU-Attention混合神经网络的负荷预测方法(Python代码实现)
- 原文地址:https://blog.csdn.net/qq_45556665/article/details/125452538


