-
手把手带你学会Odoo OWL组件开发(7):OWL项目实战使用
一、项目背景
这次有个新需求,要求在Odoo的菜单栏上新增一个Switch的切换按钮,在进行切换后Tree视图的数据也要通过Switch值进行过滤,考虑到数据响应和后续代码的优化,在源码的基础上进行扩展的方式不太好,刚好我们前端也对OWL也有了一定的介绍,那这次我们就用OWL实战操作下吧!
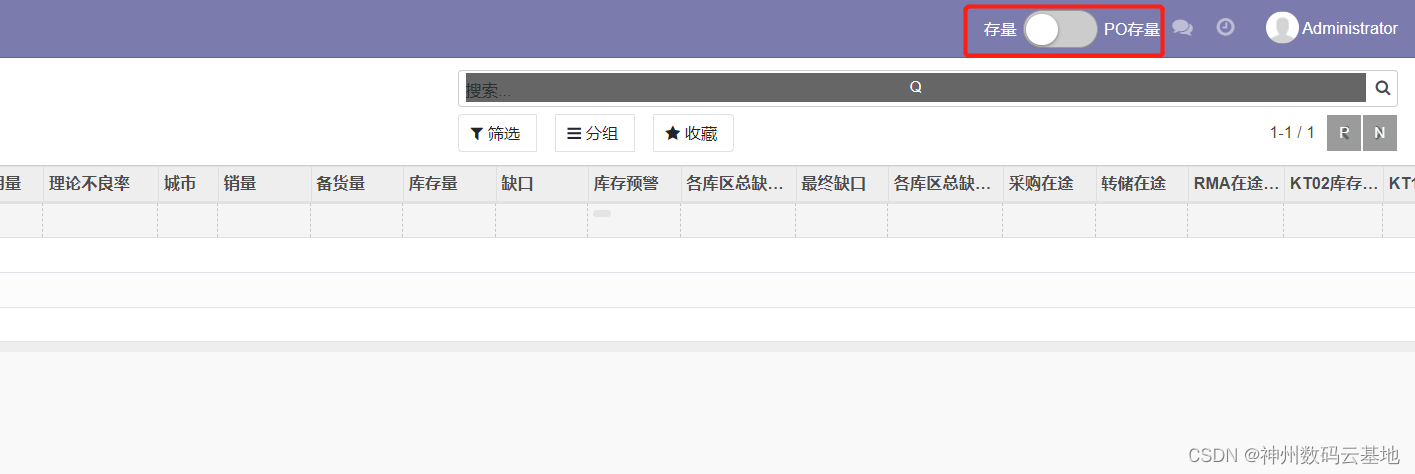
二、页面效果和预期
在对Switch按钮切换时,页面数据过滤更新。
三、实现步骤
1. 创建switch的xml文件,以OWL方式编写
(注:此处的 owl=“1” 不可缺少):
<?xml version="1.0" encoding="UTF-8"?> <templates xml:space="preserve"> <t t-name="owl.switchButton" owl="1"> <div class="switchContainer" style="display: flex; align-items: center;"> <span>存量</span> <input type="checkbox" class="switch-button" id="switch-button"/> <label for="switch-button" style="margin: 0 5px;"></label> <span>PO存量</span> </div> </t> </templates>- 1
- 2
- 3
- 4
- 5
- 6
- 7
- 8
- 9
- 10
- 11
2. 创建对应的js文件,以类组件的方式对Switch定义
odoo.define('switch_owl', function (require) { "use strict"; const {Component} = owl; class SwitchButton extends Component { static template="owl.switchButton"; }; return SwitchButton })- 1
- 2
- 3
- 4
- 5
- 6
- 7
- 8
- 9
3. 在需要展示的页面进行引用和实例化
既然我们是需要绑定在Tree视图上,并对数据进行过滤,那我们可以在ListController的renderButton方法中初始化,也比较利于我们绑定事件:
odoo.define('render_switch', function (require) { "use strict"; var ListController = require('web.ListController'); const {ComponentWrapper} = require("web.OwlCompatibility"); var session = require('web.session') var framework = require("web.framework"); // 引入Switch的Owl组件 var switch_owl = require('switch_owl') return ListController.extend({ renderButtons: function () { let self = this this._super.apply(this, arguments); if (this.$buttons) { //这⾥找到刚才定义的按钮和输入框 this.$buttons.find('.o_list_export_xlsx').addClass('d-none'); $('#switch_block').remove() // 在菜单栏目标前添加一个div来渲染Switch $('.o_menu_systray').css({'display': 'flex'}).prepend(`<div id="switch_block" style="display: flex; align-items: center"></div>`) $(document).ready(function () { // 实例化Switch + 渲染 (new ComponentWrapper(self, switch_owl)).mount($('#switch_block')[0]).then(()=>{ // 对Switch绑定切换事件 $('#switch-button').on('click', self.proxy('switch_func')); // 从sessionStorage中获取Switch状态值用于刷新后状态勾选 let switch_check = JSON.parse(window.sessionStorage.getItem('switch_check')) $('#switch-button')[0].checked = switch_check }); }) } }, updateButtons: function () { this.$buttons.find('.o_list_export_xlsx').hide(); this._super.apply(this, arguments); }, // Switch勾选事件 switch_func: function (ev){ let self = this // 将Switch的值缓存到sessionStorage中 window.sessionStorage.setItem('switch_check', $(ev.target)[0].checked) //切换后页面数据刷新 self.trigger_up('reload') } }); });- 1
- 2
- 3
- 4
- 5
- 6
- 7
- 8
- 9
- 10
- 11
- 12
- 13
- 14
- 15
- 16
- 17
- 18
- 19
- 20
- 21
- 22
- 23
- 24
- 25
- 26
- 27
- 28
- 29
- 30
- 31
- 32
- 33
- 34
- 35
- 36
- 37
- 38
- 39
- 40
- 41
- 42
- 43
- 44
4. 扩展basic_model.js中的search_read方法,切换Switch后调用方法:
odoo.define('summary_model', function (require) { "use strict"; var BasicModel = require('web.BasicModel'); return BasicModel.extend({ _searchReadUngroupedList: function (list) { var self = this; // 从缓存中获取Switch值,并将该参数放在context中 let switch_check = JSON.parse(window.sessionStorage.getItem('switch_check')) if(switch_check){ list.context.information_source = 'PO通知单' }else{ list.context.information_source = '存量表' } var fieldNames = list.getFieldNames(); var prom; if (list.__data) { // the data have already been fetched (alonside the groups by the // call to 'web_read_group'), so we can bypass the search_read prom = Promise.resolve(list.__data); } else { prom = this._rpc({ route: '/web/dataset/search_read', model: list.model, fields: fieldNames, context: _.extend({}, list.getContext(), {bin_size: true}), domain: list.domain || [], limit: list.limit, offset: list.loadMoreOffset + list.offset, orderBy: list.orderedBy, }); } return prom.then(function (result) { delete list.__data; list.count = result.length; var ids = _.pluck(result.records, 'id'); var data = _.map(result.records, function (record) { var dataPoint = self._makeDataPoint({ context: list.context, data: record, fields: list.fields, fieldsInfo: list.fieldsInfo, modelName: list.model, parentID: list.id, viewType: list.viewType, }); // add many2one records self._parseServerData(fieldNames, dataPoint, dataPoint.data); return dataPoint.id; }); if (list.loadMoreOffset) { list.data = list.data.concat(data); list.res_ids = list.res_ids.concat(ids); } else { list.data = data; list.res_ids = ids; } self._updateParentResIDs(list); return list; }); }, }); });- 1
- 2
- 3
- 4
- 5
- 6
- 7
- 8
- 9
- 10
- 11
- 12
- 13
- 14
- 15
- 16
- 17
- 18
- 19
- 20
- 21
- 22
- 23
- 24
- 25
- 26
- 27
- 28
- 29
- 30
- 31
- 32
- 33
- 34
- 35
- 36
- 37
- 38
- 39
- 40
- 41
- 42
- 43
- 44
- 45
- 46
- 47
- 48
- 49
- 50
- 51
- 52
- 53
- 54
- 55
- 56
- 57
- 58
- 59
- 60
- 61
- 62
- 63
5. 引入上面的两个js文件,绑定在ListView上,并绑定在对应的Tree的js_class
odoo.define('summary_predict_button', function (require) { "use strict"; var ListView = require('web.ListView'); var viewRegistry = require('web.view_registry'); var dom = require('web.dom'); var render_switch = require('render_switch') var ListRenderer = require('web.ListRenderer'); var SumPredictModel = require('summary_model') var SumPredictRenderer = ListRenderer.extend({ _renderSelector: function (tag, disableInput) { var $content = dom.renderCheckbox(); if (disableInput) { $content.find("input[type='checkbox']").prop('disabled', disableInput); } return }, }) var BiConListView = ListView.extend({ config: _.extend({}, ListView.prototype.config, { Controller: render_switch, Renderer: SumPredictRenderer, Model: SumPredictModel }), _extractParamsFromAction: function (action) { var params = this._super.apply(this, arguments); params.hasActionMenus = false; return params; }, }); //这⾥⽤来注册编写的视图BiConListView,第⼀个字符串是注册名到时候需要根据注册名调⽤视图 viewRegistry.add('summary_predict_button', BiConListView); return BiConListView; });- 1
- 2
- 3
- 4
- 5
- 6
- 7
- 8
- 9
- 10
- 11
- 12
- 13
- 14
- 15
- 16
- 17
- 18
- 19
- 20
- 21
- 22
- 23
- 24
- 25
- 26
- 27
- 28
- 29
- 30
- 31
- 32
- 33
6. 改写menu点击事件
到此你可以看到Switch按钮已经渲染到页面上了,并且在切换的时候,可以将值传到search_read接口,进而对数据进行过滤,但是会出现跳转到其他模块也会出现Switch,这是我们不希望的,所以要对menu的点击事件进行改写:
odoo.define('menu_toggle', function (require) { const Menu = require("web.Menu"); Menu.include({ events: _.extend( { 'click a': '_onDropdownClicked', }, Menu.prototype.events ), _onDropdownClicked: function (ev) { let current_menu_xmlid = $(ev.currentTarget).attr('data-menu-xmlid') if(current_menu_xmlid == undefined) return // 需要Switch按钮的页面 let menu_data_arr = ['xc_spare_parts.spare_parts_root_menu', 'xc_spare_parts.aggregate_forecasts_menu','xc_spare_parts.base_data_menu','xc_spare_parts.material_logic_menu', 'xc_spare_parts.bom_total_table_menu','xc_spare_parts.prepare_materials_menu','xc_spare_parts.week_estimates_views_menu', 'xc_spare_parts.alternative_prepare_materials_menu'] var menu_flag = menu_data_arr.some(function (item) { return item == current_menu_xmlid }) // 通过标识来对Switch进行展示和隐藏 if(menu_flag){ setTimeout( function() { $('#switch_block').show()}, 1000); }else{ setTimeout( function() { $('#switch_block').hide()}, 1000); } }, }); })- 1
- 2
- 3
- 4
- 5
- 6
- 7
- 8
- 9
- 10
- 11
- 12
- 13
- 14
- 15
- 16
- 17
- 18
- 19
- 20
- 21
- 22
- 23
- 24
- 25
- 26
- 27
- 28
7. 附上Switch的样式
.switch-button { display: none; /*隐藏表单元素*/ } .switch-button+label { /*+选择器选择紧跟“+”左边选择器的第一个元素*/ display: inline-block; position: relative; transition: all .3s; width: 60px; height: 30px; border: 1px solid #999; border-radius: 15px; background-color: #ccc; } .switch-button:checked+label { /*选中表单后的样式,:checked表示checkbox被选中后的状态*/ background-color: #169bd5; } .switch-button+label::before { /*使用伪元素生成一个按钮*/ content: ''; display: block; height: 25px; width: 25px; position: absolute; border-radius: 25px; left: 2px; top: 2px; background-color: #fff; box-shadow: 0 1px 3px rgba(0, 0, 0, .4); transition: all .3s; } .switch-button:checked+label::before { /*checkbox选中时按钮的样式*/ left: 32px; transition: all .2s linear; }- 1
- 2
- 3
- 4
- 5
- 6
- 7
- 8
- 9
- 10
- 11
- 12
- 13
- 14
- 15
- 16
- 17
- 18
- 19
- 20
- 21
- 22
- 23
- 24
- 25
- 26
- 27
- 28
- 29
- 30
- 31
- 32
- 33
- 34
- 35
- 36
- 37
- 38
- 39
- 40
- 41
- 42
8.更新完成
将js和xml文件分别在template和__manifest__中引用,更新模块后就完成了。
四、结语
这是OWL在实际开发中的一次尝试和应用,大家有什么好的点子和建议欢迎与我们讨论哦~
-
相关阅读:
Python语言:函数的使用
好用的办公软件有哪些
Debian Linux 的安装
美团面试:Redis 除了缓存还能做什么?可以做消息队列吗?
如何获取淘宝商品评论 API接口
微服务集成redis并通过redis实现排行榜的功能
2023湖南中医药大学计算机考研信息汇总
AI实战营第二期 第十节 《MMagic 代码课》——笔记11
OpenGL ES 学习初识(1)
c++万能开头<bits/stdc++.h>
- 原文地址:https://blog.csdn.net/CBGCampus/article/details/125444970