-
安卓案例:学生信息管理
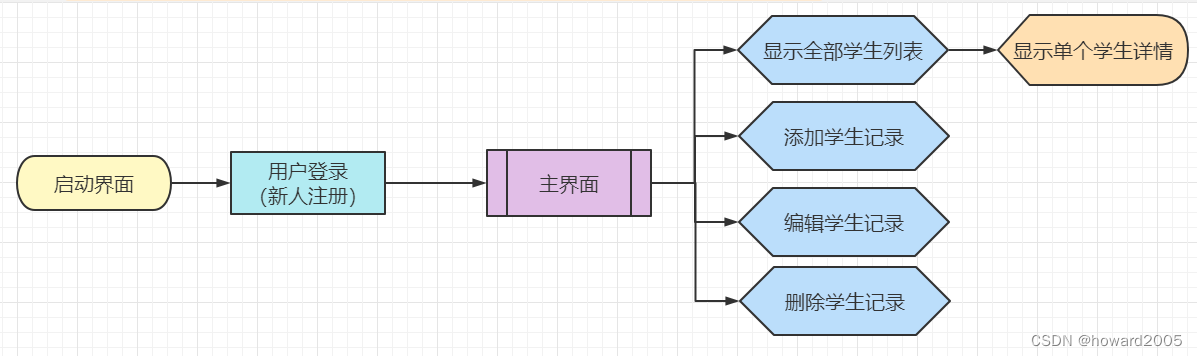
一、提出任务

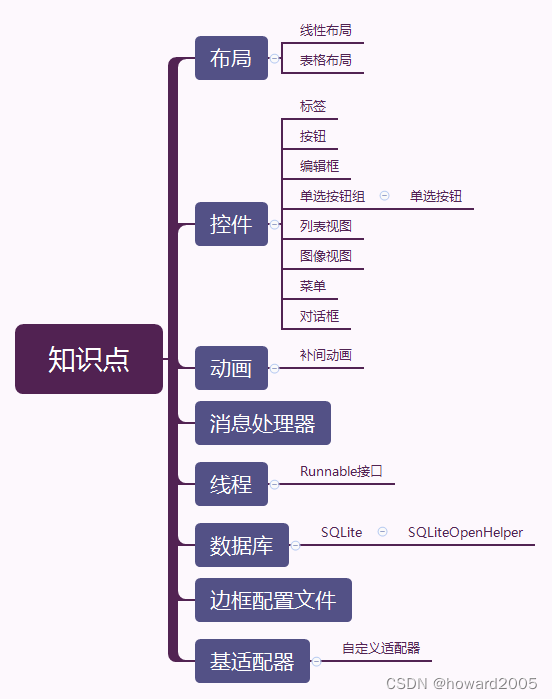
二、涉及知识点
三、完成任务
(一)创建安卓项目
- 基于
Empty Activity创建安卓项目 -StudentManagement
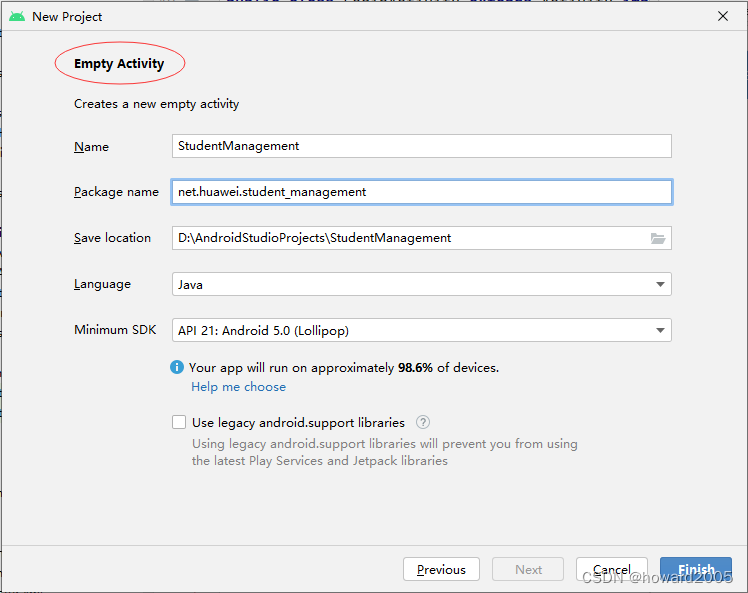
- 单击【Finish】按钮

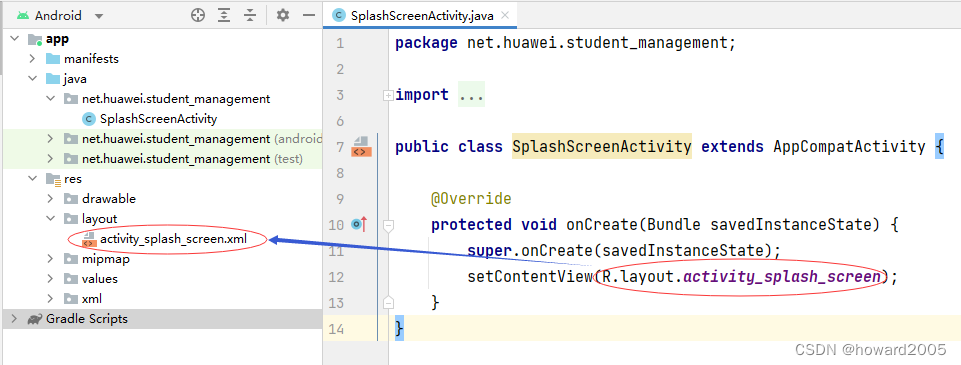
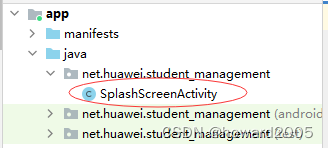
- 将
MainActivity改名为SplashScreenActivity
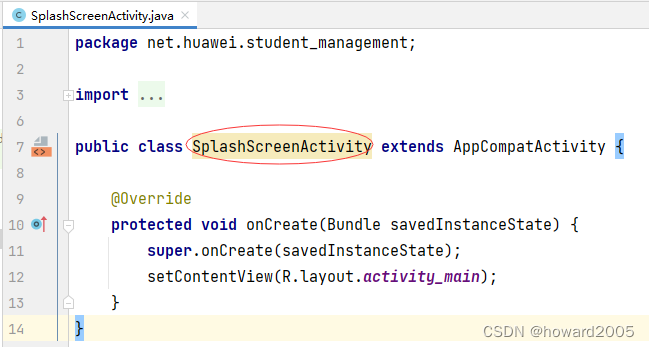
- 将对应的布局文件
activity_main.xml改名为activity_splash_screen.xml
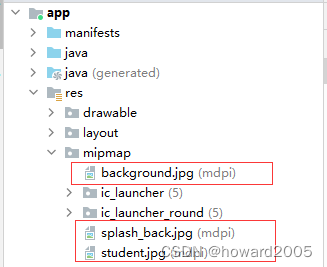
(二)准备图片资源
- 准备三张图片,拷贝到
mipmap目录里
(三)创建启动界面
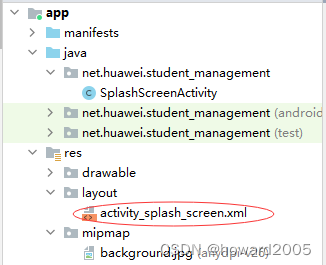
1、启动界面布局资源文件
- 布局资源文件 -
activity_splash_screen.xml
<?xml version="1.0" encoding="utf-8"?> <LinearLayout xmlns:android="http://schemas.android.com/apk/res/android" android:id="@+id/root_layout" android:layout_width="match_parent" android:layout_height="match_parent" android:orientation="vertical" android:background="@mipmap/splash_back" android:gravity="center_vertical|center_horizontal"> <ImageView android:id="@+id/iv_student" android:layout_width="wrap_content" android:layout_height="wrap_content" android:src="@mipmap/student" /> <TextView android:id="@+id/tv_title" android:layout_width="wrap_content" android:layout_height="wrap_content" android:textColor="#0000ff" android:textSize="30sp" android:layout_marginTop="20dp" android:text="@string/title" /> <TextView android:id="@+id/tv_version" android:layout_width="wrap_content" android:layout_height="wrap_content" android:textColor="#ff0000" android:layout_marginTop="20dp" android:textSize="20sp" android:text="@string/version" /> </LinearLayout>- 1
- 2
- 3
- 4
- 5
- 6
- 7
- 8
- 9
- 10
- 11
- 12
- 13
- 14
- 15
- 16
- 17
- 18
- 19
- 20
- 21
- 22
- 23
- 24
- 25
- 26
- 27
- 28
- 29
- 30
- 31
- 32
- 33
- 有两处报错,需要我们在字符串资源文件文理定义两个字符串变量
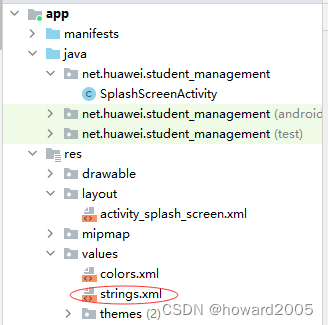
2、编辑字符串资源文件
- 字符串资源文件 -
strings.xml
<resources> <string name="app_name">学生信息管理系统V1.0</string> <string name="title">学生信息管理系统</string> <string name="version">Version 1.0</string> </resources>- 1
- 2
- 3
- 4
- 5
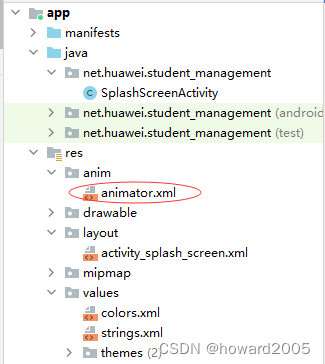
3、创建动画资源文件
- 在
res目录里创建anim子目录,在子目录里创建自定义动画资源文件animator.xml
<?xml version="1.0" encoding="utf-8"?> <set xmlns:android="http://schemas.android.com/apk/res/android" > <alpha android:duration="3000" android:fromAlpha="0.0" android:toAlpha="1.0" /> <rotate android:duration="3000" android:fromDegrees="0" android:interpolator="@android:anim/accelerate_decelerate_interpolator" android:pivotX="50%" android:pivotY="50%" android:toDegrees="+360" /> </set>- 1
- 2
- 3
- 4
- 5
- 6
- 7
- 8
- 9
- 10
- 11
- 12
- 13
- 14
- 15
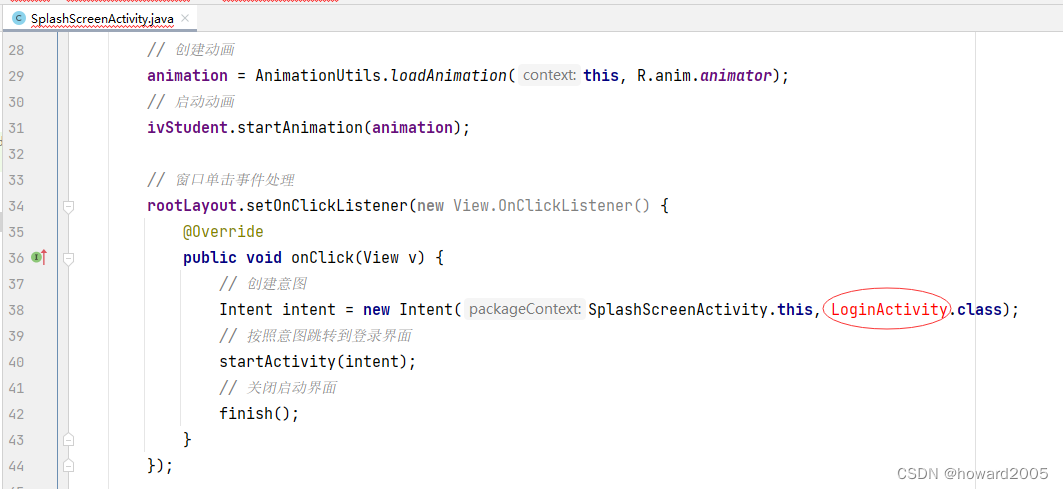
4、编写启动界面类
- 启动界面类 -
SplashScreenActivity
package net.huawei.student_management; import androidx.appcompat.app.AppCompatActivity; import android.content.Intent; import android.os.Bundle; import android.os.Handler; import android.view.View; import android.view.animation.Animation; import android.view.animation.AnimationUtils; import android.widget.ImageView; import android.widget.LinearLayout; public class SplashScreenActivity extends AppCompatActivity { private Animation animation; // 动画对象 private ImageView ivStudent; // 学生图像视图 private LinearLayout rootLayout; // 根布局 private final int DELAY_TIME = 4000; // 延迟时间 @Override protected void onCreate(Bundle savedInstanceState) { super.onCreate(savedInstanceState); // 利用布局资源文件设置用户界面 setContentView(R.layout.activity_splash_screen); // 通过资源标识符获取控件实例 ivStudent = findViewById(R.id.iv_student); rootLayout = findViewById(R.id.root_layout); // 创建动画 animation = AnimationUtils.loadAnimation(this, R.anim.animator); // 启动动画 ivStudent.startAnimation(animation); // 窗口单击事件处理 rootLayout.setOnClickListener(new View.OnClickListener() { @Override public void onClick(View v) { // 创建意图 Intent intent = new Intent(SplashScreenActivity.this, LoginActivity.class); // 按照意图跳转到登录界面 startActivity(intent); // 关闭启动界面 finish(); } }); // 利用消息处理器实现延迟跳转到启动界面 new Handler().postDelayed(new Runnable() { @Override public void run() { // 创建意图 Intent intent = new Intent(SplashScreenActivity.this, LoginActivity.class); // 按照意图跳转到登录界面 startActivity(intent); // 关闭启动界面 finish(); } }, DELAY_TIME); } }- 1
- 2
- 3
- 4
- 5
- 6
- 7
- 8
- 9
- 10
- 11
- 12
- 13
- 14
- 15
- 16
- 17
- 18
- 19
- 20
- 21
- 22
- 23
- 24
- 25
- 26
- 27
- 28
- 29
- 30
- 31
- 32
- 33
- 34
- 35
- 36
- 37
- 38
- 39
- 40
- 41
- 42
- 43
- 44
- 45
- 46
- 47
- 48
- 49
- 50
- 51
- 52
- 53
- 54
- 55
- 56
- 57
- 58
- 59
- 目前,程序会报错,因为登录界面
LoginActivity尚未创建
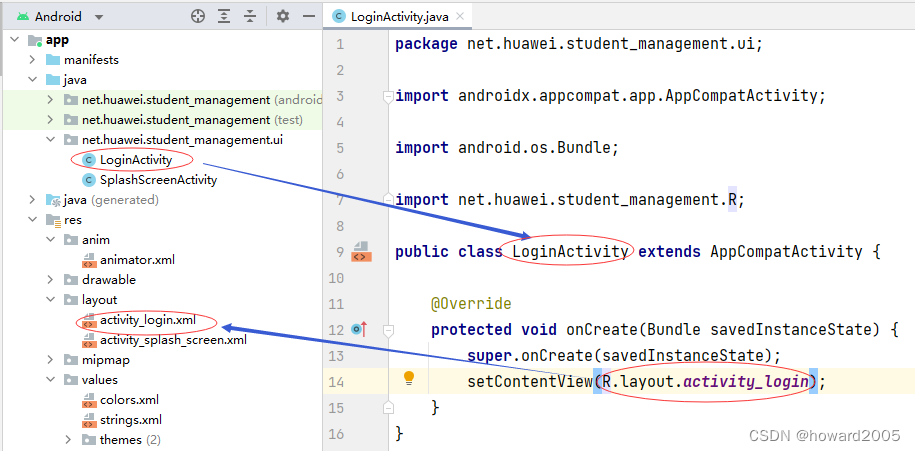
- 在
net.huawei.student_management包里创建ui子包

- 将启动界面类拖进
ui子包
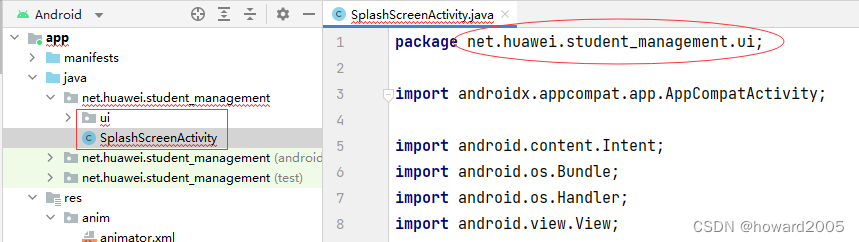
- 暂时创建一个空的登录界面,这样我们就可以测试启动界面运行效果
- 在
ui子包里基于模板创建登录界面 -LoginActivity
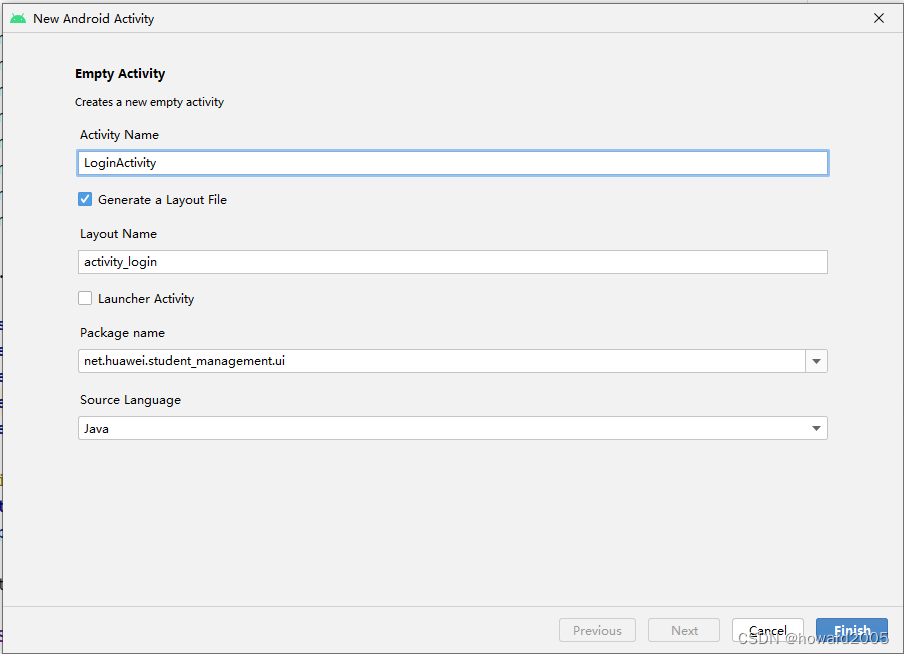
- 单击【Finish】按钮
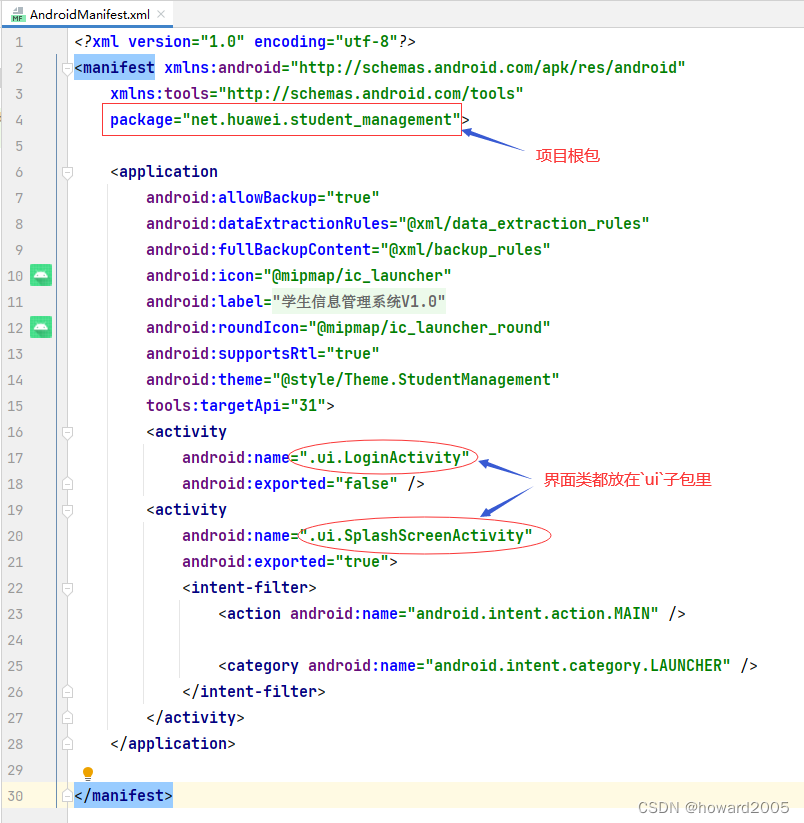
- 查看安卓项目清单文件
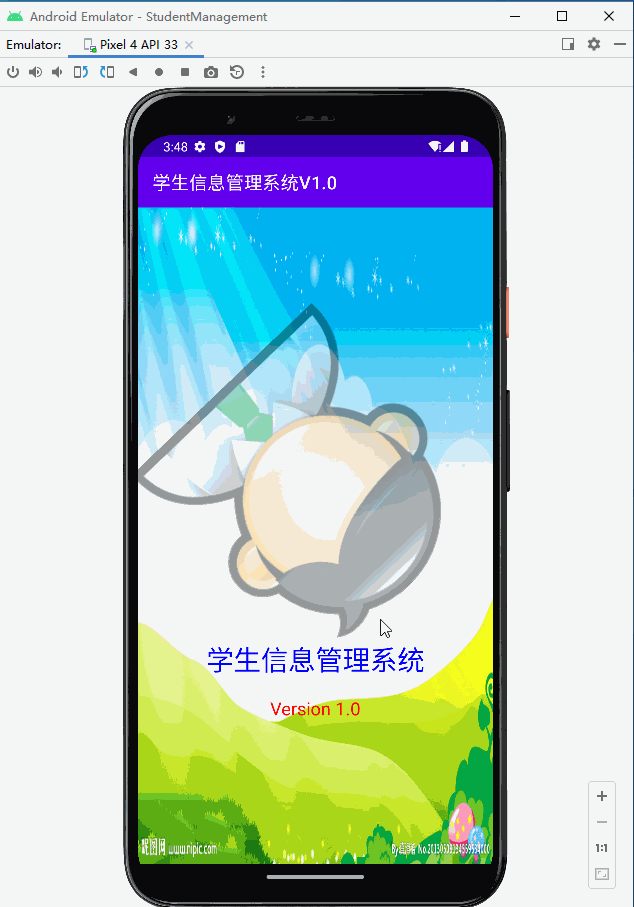
5、启动应用,查看效果
- 启动界面有动画,经过4秒自动跳转到登录界面
- 基于
-
相关阅读:
Python 获取旅游景点信息及评论并作词云、数据可视化
AWTK-MODBUS 发布,欢迎一起来完善。
ERP、CRM、SRM、PLM、HRM、OA……都是啥意思
【MicroPython RP2040】通过ADC调节PWM输出示例
Java 中四种引用类型
Spring Boot+Vue3前后端分离实战wiki知识库系统之分类管理功能开发
C++用new创建动态数组
day33 List接口
centos7升级python2到python3.6.8使用yum安装问题
TCP-3次握手小记
- 原文地址:https://blog.csdn.net/howard2005/article/details/125343445