-
从0实战一个 vue3+ ts+element-plus 项目
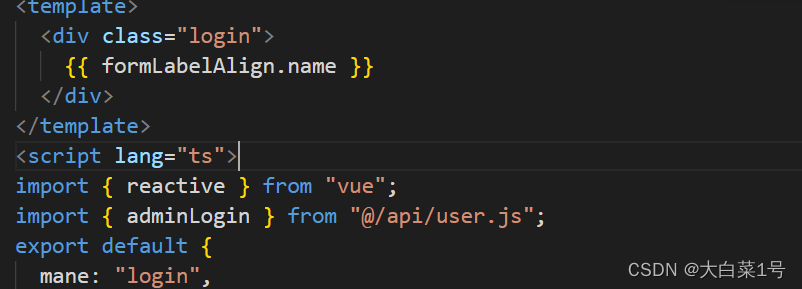
- 实现一个自定义变量数据渲染
<template> <div class="login"> {{formLabelAlign.name}} </div> </template> <script lang="ts" > import { reactive } from "vue"; export default { mane: "login", setup() { const formLabelAlign = reactive({ name: "小明", region: "", type: "" }); return { formLabelAlign }; } }; </script>- 1
- 2
- 3
- 4
- 5
- 6
- 7
- 8
- 9
- 10
- 11
- 12
- 13
- 14
- 15
- 16
- 17
- 18
- 19

- vue,config.js配置跨域代理
module.exports = { devServer: { proxy: { "/api": { "target": '对应的代理地址',//http://22.15.258.222:8888等 "secure": false, "changeOrigin": true, "pathRewrite": { '^/api': '' } } } }, }- 1
- 2
- 3
- 4
- 5
- 6
- 7
- 8
- 9
- 10
- 11
- 12
- 13
- 14
- 添加axios请求
npm install --save; npm install vue-axios --save;- 1
- 2
- 新建src/utils/request.js文件(用于新建和配置axios), 新建src/api/user.js文件(作为用户信息相关接口集合文件)
- request.js文件中
import axios from "axios"; //引入 const baseURL = "/api"; const service = axios.create({ baseURL }); // 发起请求内容, 这里配置根据实际情况配置 service.interceptors.request.use(config => { config.headers['Content-Type'] = 'application/json;charset=utf-8' return config }); // 响应内容, 这里配置根据实际情况配置 service.interceptors.response.use(response => { // 请求成功时候 if (response.status === 200 && response.data?.success) { return response.data } else { return Promise.reject(response.data) } }, error => {// 请求失败时候, 一些逻辑, 根据情况配置 let code = 0 try { code = error.response.status } catch (error) { // 网络请求超时 if (error.toString().indexOf('Error: timeout') !== -1) { return Promise.reject(error) } } if (code) { if (code === 401) { } else { const errorMsg = error.response.data.errorCode if (errorMsg !== undefined) { } else { } } } else { } return Promise.reject(error) }); export default service;- 1
- 2
- 3
- 4
- 5
- 6
- 7
- 8
- 9
- 10
- 11
- 12
- 13
- 14
- 15
- 16
- 17
- 18
- 19
- 20
- 21
- 22
- 23
- 24
- 25
- 26
- 27
- 28
- 29
- 30
- 31
- 32
- 33
- 34
- 35
- 36
- 37
- 38
- 39
- 40
- 41
- 42
- 43
- 44
- 45
- 46
- 47
- 48
- 49
- src/api/user.js中
import request from '@/utils/request' /** * @description 登录 * @param {*} params */ export function adminLogin (data) {//我是简写, 可以根据情况配置其他 console.log(data) return request({ url: '/admin/login', method: 'post', data }) } /** * @description 获取首页信息 * @param {*} params */ export function adminHome (params) { return request({ url: '/user', method: 'get', params }) }- 1
- 2
- 3
- 4
- 5
- 6
- 7
- 8
- 9
- 10
- 11
- 12
- 13
- 14
- 15
- 16
- 17
- 18
- 19
- 20
- 21
- 22
- 23
- 24
- 引入: import { adminLogin } from “@/api/user.js”;
- 发起请求:
adminLogin({password:"123456",username:"test"}).then((res: any)=>{ console.log(res) })- 1
- 2
- 3
- 结果: 请求成功

无法找到模块“@/api/user.js”的声明文件。“d:/桌面/mq2022/vue3shsili/vue3-typescipt/src/api/user.js”隐式拥有 "any" 类型。ts(7016)- 1

是因为ts中不能直接识别js文件,两种解决方法
- const xx:any = require(‘路径’) ,之后屏蔽警告;
- src目录下创建一个声明文件xx.d.ts,内容如下

之后正常使用import引入,就不会又警告了
(parameter) res: any
(parameter) res: any
参数“res”隐式具有“any”类型。ts(7006)
Parameter ‘res’ implicitly has an ‘any’ type.Vetur(7006)- 解决方法then((res)换成then((res: any)就可以了
- node_modules安装问题
- 如果报错npm ERR! code ERESOLVE npm ERR! ERESOLVE could not resolve npm ERR! npm ERR!问题 是npm 版本问题
命令后边添加--legacy-peer-deps就可以了

- 引入element-plus
- 使用vite创建一个vue3+ts+element-plus项目
新建文件夹之后npm init vite@latest
之后选择一些需要的选项按回车健


之后使用上图命令就可以启动了

之后使用element-plus
- 安装
npm install element-plus --save - 自动引入
npm install -D unplugin-vue-components unplugin-auto-import - 之后浅试一下; 这里图标类(icon)都要手动引入一下才显示,所以删除按钮时候要手动引入图标


问题1 这里又红色下划线, 直接删除引入就可

- 添加router
- npm install vue-router@4
- 创建src/router/index.ts文件
import { createRouter, createWebHashHistory, createWebHistory, RouteRecordRaw } from 'vue-router' //views中有新建这些文件 import login from '../views/login/index.vue' import echart from '../views/echart/index.vue' /** * 定义路由模块 */ const routes: Array<RouteRecordRaw> = [ { path: '/', name: 'echart', component: echart } ] /** * 定义返回模块 */ const router = createRouter({ history: createWebHistory('/'), routes }) export default router- 1
- 2
- 3
- 4
- 5
- 6
- 7
- 8
- 9
- 10
- 11
- 12
- 13
- 14
- 15
- 16
- 17
- 18
- 19
- 20
- 21
- 22
- 23
- 24
- 25
- 26
- 再main.ts中引入
import { createApp } from 'vue' import App from './App.vue' import router from './router/index' createApp(App).use(router).mount('#app')- 1
- 2
- 3
- 4
- 5
- 6
待更新中…
-
相关阅读:
P3378 【模板】堆
设计模式:迭代器模式
【优化调度】基于matlab遗传算法求解工件的并行调度组合优化问题【含Matlab源码 2234期】
纯js实现录屏并保存视频到本地的尝试
C51 贪吃蛇 基于 Proteus V1.0
主办方:上海视频媒体,多样式多渠道跨屏传播
近三年3D点云顶会论文及源码合集,含2023最新
Linux安装使用Minio
Halcon (4):如何开始自学
破防了,原来这才是机房运维的正确方法
- 原文地址:https://blog.csdn.net/men_gqi/article/details/124845724