-
SpringBoot笔记梳理
本次笔记目录结构如下
- 掌握SpringBoot自动配置的原理
- 掌握自定义SpringBoot的starter(起步依赖)
- 掌握SpringBoot的部署
- 了解实现加载第三方的Bean
1.SpringBoot自动配置原理

@ComponetScan 注解用于扫描某一个包下的所有的类,将类带有注解:@componet,@controller,@service@repository.默认的情况下,会自动的扫描,该注解的类所在的包以及子包。
@SpringBootConfiguration 作用就是修饰类标识该类就是一个配置类。
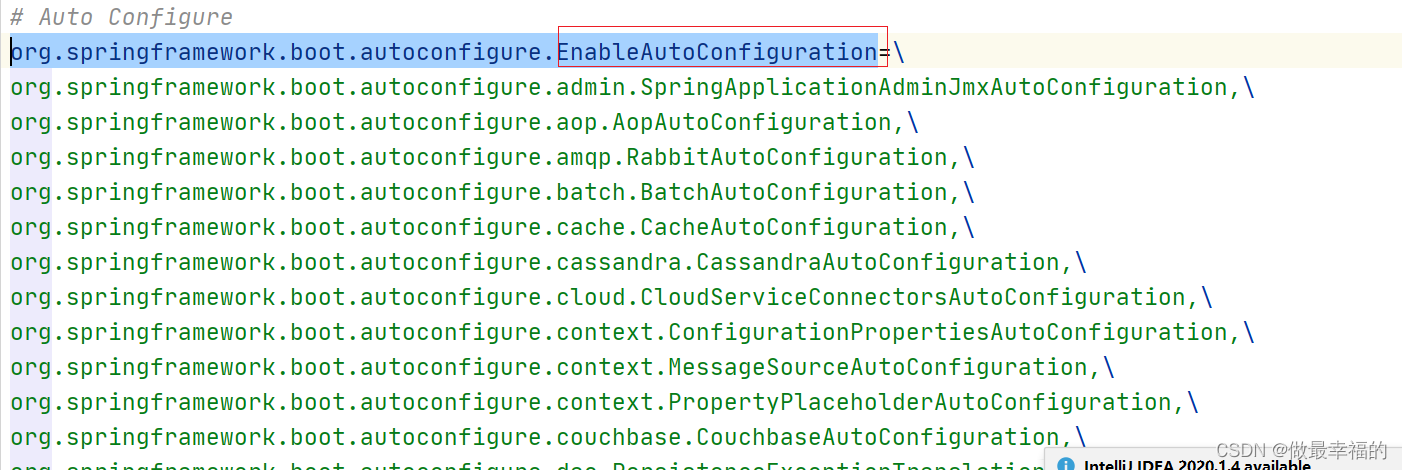
@EnableAutoConfiguration 启用自动配置


1.main方法跑起来 (tomcat跑起来)
2.初始化容器 找到@springbootapplication注解
3.找到开启自动配置的注解@enableautoconfiguration
4.注解导入了importSelector (作用就是从外部文件中获取对应的【配置类】的全路径,放到spring容器 就会根据条件自动的进行配置)
5.内部获取到自动配置的注解对应的属性值 作为 外部配置文件的key
6.从meta-info/spring.factories中获取 刚刚上边获取到的key 找配置文件中匹配这个key对应的所有的值
值就是所有需要用到的【自动配置类】
7.交给spring容器,自动的根据条件来执行自动配置 spring容器中就自动的有了某一些Bean
2.SpringBoot获取模块bean的几种方式
需求
1.定义两个工程demo2 demo3 demo3中有bean
2.demo2依赖了demo3
3.我们希望demo2直接获取加载demo3中的bean
demo2<?xml version="1.0" encoding="UTF-8"?> <project xmlns="http://maven.apache.org/POM/4.0.0" xmlns:xsi="http://www.w3.org/2001/XMLSchema-instance" xsi:schemaLocation="http://maven.apache.org/POM/4.0.0 http://maven.apache.org/xsd/maven-4.0.0.xsd"> <modelVersion>4.0.0</modelVersion> <parent> <groupId>org.springframework.boot</groupId> <artifactId>spring-boot-starter-parent</artifactId> <version>2.1.4.RELEASE</version> </parent> <groupId>org.example</groupId> <artifactId>SpringBoot2_enable</artifactId> <version>1.0-SNAPSHOT</version> <dependencies> <!-- 引入SpringBoot3_enable的jar--> <dependency> <groupId>com.wjs</groupId> <artifactId>SpringBoot3_enable</artifactId> <version>1.0-SNAPSHOT</version> </dependency> <dependency> <groupId>org.springframework.boot</groupId> <artifactId>spring-boot-starter</artifactId> </dependency> </dependencies> </project>- 1
- 2
- 3
- 4
- 5
- 6
- 7
- 8
- 9
- 10
- 11
- 12
- 13
- 14
- 15
- 16
- 17
- 18
- 19
- 20
- 21
- 22
- 23
- 24
- 25
- 26
- 27
- 28
在包com.wjs下定义demo2启动类,并加载第三方的依赖中的bean
package com.wjs; import com.config.EnableAutoUser; import com.config.MyImportSelector; import com.config.UserConfig; import com.itheima.pojo.Role; import com.itheima.pojo.User; import org.springframework.boot.SpringApplication; import org.springframework.boot.autoconfigure.SpringBootApplication; import org.springframework.context.ConfigurableApplicationContext; import org.springframework.context.annotation.ComponentScan; import org.springframework.context.annotation.Import; /** * @author wjs * @create 2022-03-15 9:51 */ @SpringBootApplication //放大包扫描 //@ComponentScan(basePackages = "com")1 //导入xml //@Import(UserConfig.class)2 //导入注解 //@EnableAutoUser3 //导入实现ImportSelector的类,但是不能通过名字获取,需要通过类的class获取 @Import(MyImportSelector.class) public class DemoEnable2Application { public static void main(String[] args) { ConfigurableApplicationContext run = SpringApplication.run(DemoEnable2Application.class); //得到demo3的bean //System.out.println(run.getBean("user")); System.out.println(run.getBean(User.class)); System.out.println(run.getBean(Role.class)); } }- 1
- 2
- 3
- 4
- 5
- 6
- 7
- 8
- 9
- 10
- 11
- 12
- 13
- 14
- 15
- 16
- 17
- 18
- 19
- 20
- 21
- 22
- 23
- 24
- 25
- 26
- 27
- 28
- 29
- 30
- 31
- 32
- 33
- 34
- 35
- 36
工程结构如下:

定义工程demo3<?xml version="1.0" encoding="UTF-8"?> <project xmlns="http://maven.apache.org/POM/4.0.0" xmlns:xsi="http://www.w3.org/2001/XMLSchema-instance" xsi:schemaLocation="http://maven.apache.org/POM/4.0.0 http://maven.apache.org/xsd/maven-4.0.0.xsd"> <modelVersion>4.0.0</modelVersion> <packaging>jar</packaging> <groupId>com.wjs</groupId> <artifactId>SpringBoot3_enable</artifactId> <version>1.0-SNAPSHOT</version> <parent> <groupId>org.springframework.boot</groupId> <artifactId>spring-boot-starter-parent</artifactId> <version>2.1.4.RELEASE</version> </parent> <dependencies> <dependency> <groupId>org.springframework.boot</groupId> <artifactId>spring-boot-starter</artifactId> </dependency> </dependencies> </project>- 1
- 2
- 3
- 4
- 5
- 6
- 7
- 8
- 9
- 10
- 11
- 12
- 13
- 14
- 15
- 16
- 17
- 18
- 19
- 20
- 21
- 22
在demo3工程中定义配置类和POJO
public class User { }- 1
- 2
- 3
配置类:注意,在com.config下创建配置类:
@Configuration public class UserConfig { @Bean public User user(){ return new User(); } }- 1
- 2
- 3
- 4
- 5
- 6
- 7
- 8
修改demo2工程的pom.xml:加入demo3的依赖如下图所示:

# 2.1 包路径放大,import注解进行导入配置类
1.第一种使用组件扫描 扫描包路径放大
2.第二种使用import注解进行导入配置类的方式即可

2.2 自定义注解@EnableUse
(1)在demo03中com.config下创建一个自定义注解@EnableUser:
package com.config; @Target(ElementType.TYPE) @Retention(RetentionPolicy.RUNTIME) @Documented @Import(UserConfig.class) public @interface EnableUser { }- 1
- 2
- 3
- 4
- 5
- 6
- 7
- 8
- 9
(2)在demo2中使用该注解即可

2.3 使用ImportSector实现类方式
在demo3工程中定义类
package com.config; public class MyImportSelector implements ImportSelector { @Override public String[] selectImports(AnnotationMetadata importingClassMetadata) { //返回要注册到spring容器中的Bean的全路径 return new String[]{"com.wjs.pojo.Role", "com.wjs.pojo.User"}; } }- 1
- 2
- 3
- 4
- 5
- 6
- 7
- 8
- 9
定义POJO:
package com.wjs.pojo; public class Role { }- 1
- 2
- 3
- 4
- 5
- 6
在demo2中修改导入:

3.@EnableAutoConfiguration(重要–>自动配置原理)

4.SpringBoot的yml配置
yaml文件等价于properties文件,在使用过程中都是一样的效果。但是yml文件书写的方式和properties文件不一样。更加简洁,那么我们可以根据需要选择性的使用properties和yml文件。如果同时存在两个文件,那么优先级properties要高于yml。
语法特点如下:
- 大小写敏感
- 数据值前必须有空格,作为分隔符
- 缩进的空格数目不重要,只需要对齐即可
#表示注释
书写格式如下要求如下:key和key之间需要换行以及空格两次。 简单key value之间需要冒号加空格。
key1: key2: key3: value key4: value4- 1
- 2
- 3
- 4
- 5
比如:
server: port: 8081- 1
- 2
注意:yml语法中,相同缩进代表同一个级别
# 基本格式 key: value name: zhangsan # 数组 - 用于区分 city: - beijing - tianjin - shanghai - chongqing #集合中的元素是对象形式 students: - name: zhangsan age: 18 score: 100 - name: lisi age: 28 score: 88 - name: wangwu age: 38 score: 90 #map集合形式(了解) maps: {"name":"zhangsan", "age": "15"} #参数引用 person: name: ${name} # 该值可以获取到上边的name定义的值- 1
- 2
- 3
- 4
- 5
- 6
- 7
- 8
- 9
- 10
- 11
- 12
- 13
- 14
- 15
- 16
- 17
- 18
- 19
- 20
- 21
- 22
- 23
- 24
4.1读取配置文件中的值
获取配置文件中的值我们一般有几种方式:
- @value注解的方式 只能获取简单值
- Environment的方式
- @ConfigurationProperties
yml中配置
# 基本格式 key: value name: zhangsan # 数组 - 用于区分 city: - beijing - tianjin - shanghai - chongqing #集合中的元素是对象形式 students: - name: zhangsan age: 18 score: 100 - name: lisi age: 28 score: 88 - name: wangwu age: 38 score: 90 #map集合形式 maps: {"name":"zhangsan", "age": "15"} #参数引用 person: name: ${name} # 该值可以获取到上边的name定义的值 age: 12- 1
- 2
- 3
- 4
- 5
- 6
- 7
- 8
- 9
- 10
- 11
- 12
- 13
- 14
- 15
- 16
- 17
- 18
- 19
- 20
- 21
- 22
- 23
- 24
- 25
java代码
@RestController public class Test2Controller { @Value("${name}") private String name; @Value("${city[0]}") private String city0; @Value("${students[0].name}") private String studentname; @Value("${person.name}") private String personName; @Value("${maps.name}")//value注解只能获简单的值对象 private String name1; @Autowired private Student student; @RequestMapping("/show") public String showHello() { System.out.println(name); System.out.println(city0); System.out.println(studentname); System.out.println(personName); System.out.println(">>>>"+student.getAge()); return "hello world"; } }- 1
- 2
- 3
- 4
- 5
- 6
- 7
- 8
- 9
- 10
- 11
- 12
- 13
- 14
- 15
- 16
- 17
- 18
- 19
- 20
- 21
- 22
- 23
- 24
- 25
- 26
- 27
- 28
- 29
- 30
- 31
- 32
- 33
pojo
@Component @ConfigurationProperties(prefix = "person") public class Student { private String name; private Integer age; public String getName() { return name; } public void setName(String name) { this.name = name; } public Integer getAge() { return age; } public void setAge(Integer age) { this.age = age; } }- 1
- 2
- 3
- 4
- 5
- 6
- 7
- 8
- 9
- 10
- 11
- 12
- 13
- 14
- 15
- 16
- 17
- 18
- 19
- 20
- 21
- 22
- 23
5. profile
在开发的过程中,需要配置不同的环境,所以即使我们在application.yml中配置了相关的配置项,当时在测试是,需要修改数据源等端口路径的配置,测试完成之后,又上生产环境,这时配置又需要修改,修改起来很麻烦。
- yml配置方式

application.yml:
#通过active指定选用配置环境 spring: profiles: active: pro- 1
- 2
- 3
- 4
application-dev.yml:
#开发环境 server: port: 8081- 1
- 2
- 3
application-test.yml:
#测试环境 server: port: 8082- 1
- 2
- 3
applicatioin-pro.yml
#生产环境 server: port: 8083- 1
- 2
- 3
还有一种是分隔符的方式(了解)
spring: profiles: active: dev --- #开发环境 server: port: 8081 spring: profiles: dev --- #测试环境 server: port: 8082 spring: profiles: test --- #生产环境 server: port: 8083 spring: profiles: pro- 1
- 2
- 3
- 4
- 5
- 6
- 7
- 8
- 9
- 10
- 11
- 12
- 13
- 14
- 15
- 16
- 17
- 18
- 19
- 20
- 21
- 22
- 23
- 24
激活profile的方式(了解)
- 配置文件的方式(上边已经说过)
- 运行是指定参数
java -jar xxx.jar --spring.profiles.active=test - 上面的spring.profiles.active=test就是在测试环境下使用
- jvm虚拟机参数配置 -Dspring.profiles.active=dev
6.springboot整合mybatis
1.导入依赖
<!--驱动--> <dependency> <groupId>mysql</groupId> <artifactId>mysql-connector-java</artifactId> <scope>runtime</scope> </dependency> <!--mybatis的 起步依赖--> <dependency> <groupId>org.mybatis.spring.boot</groupId> <artifactId>mybatis-spring-boot-starter</artifactId> <version>2.0.1</version> </dependency>- 1
- 2
- 3
- 4
- 5
- 6
- 7
- 8
- 9
- 10
- 11
- 12
2.配置yml文件
spring: datasource: driver-class-name: com.mysql.cj.jdbc.Driver url: jdbc:mysql://localhost/springboot_user?useUnicode=true&characterEncoding=UTF-8&serverTimezone=UTC username: root password: 1998 #配置mapper的映射文件的位置 mybatis: mapper-locations: classpath:mappers/*Mapper.xml- 1
- 2
- 3
- 4
- 5
- 6
- 7
- 8
- 9
3.Mapper扫描
@SpringBootApplication @MapperScan(basePackages = "com.itheima.dao") //MapperScan 用于扫描指定包下的所有的接口,将接口产生代理对象交给spriing容器 public class MybatisApplication { public static void main(String[] args) { SpringApplication.run(MybatisApplication.class,args); } }- 1
- 2
- 3
- 4
- 5
- 6
- 7
- 8
7.SpringBoot整合Junit
1.添加依赖
<dependency> <groupId>org.springframework.boot</groupId> <artifactId>spring-boot-starter-test</artifactId> <scope>test</scope> </dependency>- 1
- 2
- 3
- 4
- 5
2.在service层创建一个UserService
@Service public class UserService { public String getUser() { System.out.println("获取用户的信息"); return "zhangsan"; } }- 1
- 2
- 3
- 4
- 5
- 6
- 7
- 8
3.在test/java/下创建测试类,类的包名和启动类的报名一致即可
@RunWith(SpringRunner.class) @SpringBootTest public class SpringBootApplicationTests { @Autowired private UserService userService; @Test public void getUser() { String userinfo = userService.getUser(); System.out.println(userinfo); } }- 1
- 2
- 3
- 4
- 5
- 6
- 7
- 8
- 9
- 10
- 11
- 12
- 13
- 14
4.解释
@RunWith(SpringRunner.class) 使用springrunner运行器 @SpringBootTest 启用springboot测试 使用的方式和之前的spring的使用方式差不多。- 1
- 2
- 3
- 4
8.SpringBoot整合redis
1.添加起步依赖
2.准备好redis服务器 并启动
3.在Service中的方法中使用
3.1 注入redisTemplate
3.2 在方法中进行调用
4.配置yml 配置redis的服务器的地址
1.添加起步依赖<dependency> <groupId>org.springframework.boot</groupId> <artifactId>spring-boot-starter-data-redis</artifactId> </dependency>- 1
- 2
- 3
- 4
2.配置redis链接信息
spring: datasource: driver-class-name: com.mysql.jdbc.Driver url: jdbc:mysql://localhost/springboot_user?useUnicode=true&characterEncoding=UTF-8&serverTimezone=UTC username: root password: redis: host: localhost port: 6379 #配置mapper的映射文件的位置 mybatis: mapper-locations: classpath:mappers/*Mapper.xm- 1
- 2
- 3
- 4
- 5
- 6
- 7
- 8
- 9
- 10
- 11
- 12
3.service中调用
@Service public class UserServiceImpl implements UserService { @Autowired private UserMapper userMapper; @Autowired private RedisTemplate redisTemplate; @Override public List<User> findAllUser() { //1.获取redis中的数据 List<User> list = (List<User>) redisTemplate.boundValueOps("key_all").get(); //2.判断 是否有,如果有则返回,如果没有则从mysql中获取设置到redis中再返回 if (list != null && list.size() > 0) { return list; } List<User> allUser = userMapper.findAllUser(); //3 从mysql中获取设置到redis中再返回 redisTemplate.boundValueOps("key_all").set(allUser); return allUser; } }- 1
- 2
- 3
- 4
- 5
- 6
- 7
- 8
- 9
- 10
- 11
- 12
- 13
- 14
- 15
- 16
- 17
- 18
- 19
- 20
- 21
- 22
- 23
- 24
- 25
- 26
9.redis的序列化机制

如上图所示,出现了乱码,这个是由于redis的默认的序列化机制导致的。这里需要注意下:并不是错误,由于序列化机制,导致我们数据无法正常显示。如果有代码的方式获取则是可以获取到数据的。
1,默认的情况下redisTemplate操作key vlaue的时候 必须要求 key一定实现序列化 value 也需要实现序列化
2,默认的情况下redisTemplate使用JDK自带的序列化机制:JdkSerializationRedisSerializer
3,JDK自带的序列化机制中要求需要key 和value 都需要实现Serializable接口
4. RedisTemplate支持默认以下几种序列化机制:机制都实现了RedisSerializer接口
+ OxmSerializer
+ GenericJackson2JsonRedisSerializer
+ GenericToStringSerializer
+ StringRedisSerializer
+ JdkSerializationRedisSerializer
+ Jackson2JsonRedisSerializer
1.我们可以进行自定义序列化机制:例如:我们定义key 为字符串序列化机制,value:为JDK自带的方式则,应当处理如下:@Bean public RedisTemplate<Object, Object> redisTemplate( RedisConnectionFactory redisConnectionFactory) throws UnknownHostException { RedisTemplate<Object, Object> template = new RedisTemplate<>(); template.setConnectionFactory(redisConnectionFactory); //设置key的值为字符串序列化方式 那么在使用过程中key 一定只能是字符串 template.setKeySerializer(new StringRedisSerializer()); //设置value的序列化机制为JDK自带的方式 template.setValueSerializer(new JdkSerializationRedisSerializer()); return template; }- 1
- 2
- 3
- 4
- 5
- 6
- 7
- 8
- 9
- 10
- 11
在工作中,根据我们业务的需要进行设置和选择,如果没有合适的还可以自己定义。只要实现RedisSerializer接口即可。
10.实现加载第三方的Bean
需求:1.定义两个工程demo2 demo3 demo3中有bean
2.demo2依赖了demo3
3.我们希望demo2直接获取加载demo3中的bean1.放大包扫描
包的目录结构不一致的时候,可能获取不到另外一个bean的对象,这时候我们在demo2中手动添加 @ComponetScan(basePackage=“xxx”),放大包扫描可以达到预期的效果。
2.使用@Import
在demo2中引入 @Import(UserConfig.class) ,ps:UserConfig.class是一个配置类,类似于<bean id/ >
11.SpringBoot自定义starer
-
相关阅读:
Kaggle | Titanic - Machine Learning from Disaster | baseline
Python3程序捕获Ctrl+C终止信号
Mac下载安装配置运行MySQL
上班干,下班学!这份 Java 面试八股文涵盖 20 多个技术点,还有优质面经分享,别再说卷不过别人了~
EventSource(SSE) 实时通信的服务器推送机制
python之PyQt按钮右键菜单功能的实现代码
Python实现人脸识别
1分钟精准预测未来10天天气,谷歌开源GraphCast
nvidia-smi出现Failed to initialize NVML: Driver/library version mismatch
mac tableau 安装mysql驱动
- 原文地址:https://blog.csdn.net/qq_44794280/article/details/123205054