-
初学Vue(全家桶)-第16天(vue2):插槽
初学Vue
插槽
1、作用
让父组件可以向子组件指定位置插入html结构,也是一种组件间通信的方式,适用于父组件===>子组件
2、分类和使用方式
- 默认插槽
父组件中: <Category> <div>html结构1</div> <Category> 子组件中: <template> <div> <!-- 定义插槽 --> <slot>插槽默认内容</slot> </div> </template>- 1
- 2
- 3
- 4
- 5
- 6
- 7
- 8
- 9
- 10
- 11
- 12
- 具名插槽:
父组件中: <Category> <template slot="center"> <div>html结构1</div> </template> <template v-slot="footer"> <div>html结构2</div> </template> <Category> 子组件中: <template> <div> <!-- 定义插槽 --> <slot name="center">插槽默认内容</slot> <slot name="footer">插槽默认内容</slot> </div> </template>- 1
- 2
- 3
- 4
- 5
- 6
- 7
- 8
- 9
- 10
- 11
- 12
- 13
- 14
- 15
- 16
- 17
- 18
- 19
- 作用域插槽
1、数据在组件自身1,但根据数据生成的结构需要组件的使用者来决定。
2、具体使用代码:
父组件中: <Category> <template scope="scopeData"> <!--生成的是ul列表--> <ul> <li v-for="g in scopeData.games" :key="g">{{g}}</li> </ul> <template> <Category> <Category> <template slot-scope="scopeData"> <!--生成的是h4标题--> <h4 v-for="g in scopeData.games" :key="g">{{g}} </h4> </template> <Category> 子组件中: <template> <div> <!-- 定义插槽 --> <slot :games="games"></slot> </div> </template> <script> // 子组件中的数据 export default{ name:"Category", props:['title'], // 数据在子组件本身 data(){ return { games:[...] } } } </script>- 1
- 2
- 3
- 4
- 5
- 6
- 7
- 8
- 9
- 10
- 11
- 12
- 13
- 14
- 15
- 16
- 17
- 18
- 19
- 20
- 21
- 22
- 23
- 24
- 25
- 26
- 27
- 28
- 29
- 30
- 31
- 32
- 33
- 34
- 35
- 36
- 37
- 38
- 39
4、样例
例如,我们向下面图示中文字部分的内容通过插槽用图片和视频代替。
默认插槽
默认插槽相当于挖一个没有名字的坑(slot),等你往里面放入内容。(并且只能挖一个坑,但这个坑能填很多内容)
- App.vue
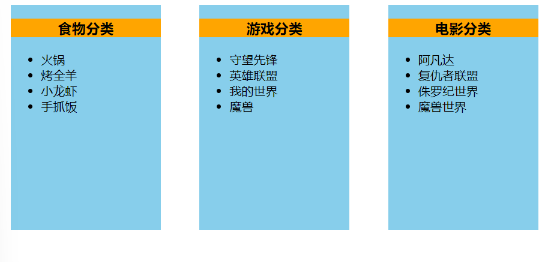
<template> <div class="container"> <Category title="食物"> <img src="https://s3.ax1x.com/2021/01/16/srJlq0.jpg" alt="" /> </Category> <Category title="游戏"> <ul> <li v-for="(g, index) in games" :key="index">{{ g }}</li> </ul> </Category> <Category title="电影"> <video src="http://clips.vorwaerts-gmbh.de/big_buck_bunny.mp4" controls></video> </Category> </div> </template> <script> import Category from "./components/Category.vue"; export default { name: "App", components: { Category }, data() { return { foods: ["火锅", "烤全羊", "小龙虾", "手抓饭"], games: ["守望先锋", "英雄联盟", "我的世界", "魔兽"], films: ["阿凡达", "复仇者联盟", "侏罗纪世界", "魔兽世界"], }; }, }; </script> <style lang="css"> .container { display: flex; justify-content: space-around; } img { width: 100%; } video { width: 100%; } </style>- 1
- 2
- 3
- 4
- 5
- 6
- 7
- 8
- 9
- 10
- 11
- 12
- 13
- 14
- 15
- 16
- 17
- 18
- 19
- 20
- 21
- 22
- 23
- 24
- 25
- 26
- 27
- 28
- 29
- 30
- 31
- 32
- 33
- 34
- 35
- 36
- 37
- 38
- 39
- 40
- 41
- 42
- 43
- 44
- 45
- 46
- Category.vue
<template> <div class="category"> <h3>{{title}}分类</h3> <slot></slot> </div> </template> <script> export default { name:"Category", props:['title'] } </script> <style> .category{ width: 200px; height:300px; background-color: skyblue; } h3{ background-color: orange; text-align: center; } </style>- 1
- 2
- 3
- 4
- 5
- 6
- 7
- 8
- 9
- 10
- 11
- 12
- 13
- 14
- 15
- 16
- 17
- 18
- 19
- 20
- 21
- 22
- 23
- 24
- 25
- 26
效果图如下:

具名插槽
具名插槽相当于挖一个坑,但你可以给这个坑起名字,并且用和这个坑名字相同的内容来填坑。这样名字不同就意味着可以有很多个坑。
- App.vue
<template> <div class="container"> <Category title="食物"> <img slot="center" src="https://s3.ax1x.com/2021/01/16/srJlq0.jpg" alt="" /> <div slot="footer" class="foods"> <a href="#">更多美食</a> </div> </Category> <Category title="游戏"> <ul slot="center"> <li v-for="(g, index) in games" :key="index">{{ g }}</li> </ul> <div class="otherGames" slot="footer"> <a href="#">单机游戏</a> <a href="#">网络游戏</a> </div> </Category> <Category title="电影"> <video slot="center" src="http://clips.vorwaerts-gmbh.de/big_buck_bunny.mp4" controls></video> <div slot="footer" class="filmsTypes"> <a href="#">喜剧</a> <a href="#">科幻</a> <a href="#">惊悚</a> </div> </Category> </div> </template> <script> import Category from "./components/Category.vue"; export default { name: "App", components: { Category }, data() { return { foods: ["火锅", "烤全羊", "小龙虾", "手抓饭"], games: ["守望先锋", "英雄联盟", "我的世界", "魔兽"], films: ["阿凡达", "复仇者联盟", "侏罗纪世界", "魔兽世界"], }; }, }; </script> <style lang="css"> .container { display: flex; justify-content: space-around; } img { width: 100%; } video { width: 100%; } .foods{ text-align: center; } .otherGames{ display: flex; justify-content: space-around; } .filmsTypes{ text-align: center; display: flex; justify-content: space-around; } </style>- 1
- 2
- 3
- 4
- 5
- 6
- 7
- 8
- 9
- 10
- 11
- 12
- 13
- 14
- 15
- 16
- 17
- 18
- 19
- 20
- 21
- 22
- 23
- 24
- 25
- 26
- 27
- 28
- 29
- 30
- 31
- 32
- 33
- 34
- 35
- 36
- 37
- 38
- 39
- 40
- 41
- 42
- 43
- 44
- 45
- 46
- 47
- 48
- 49
- 50
- 51
- 52
- 53
- 54
- 55
- 56
- 57
- 58
- 59
- 60
- 61
- 62
- 63
- 64
- 65
- 66
- 67
- 68
- 69
- 70
- 71
- 72
- 73
- Category.vue
<template> <div class="category"> <h3>{{title}}分类</h3> <!-- slot标签中可以添加内容,表示默认值 --> <slot name="center">中间部分</slot> <slot name="footer">底部部分</slot> </div> </template> <script> export default { name:"Category", props:['title'] } </script> <style> .category{ width: 200px; height:300px; background-color: skyblue; } h3{ background-color: orange; text-align: center; } </style>- 1
- 2
- 3
- 4
- 5
- 6
- 7
- 8
- 9
- 10
- 11
- 12
- 13
- 14
- 15
- 16
- 17
- 18
- 19
- 20
- 21
- 22
- 23
- 24
- 25
- 26
- 27
- 28
效果图如下:

作用域插槽
- App.vue
<template> <div class="container"> <Category title="游戏"> <template scope="recieveDatas"> <!-- {{recieveDatas.games}} --> <!--recieveDatas是一个对象,games是其下的一个内容--> <ul slot="center"> <li v-for="(g, index) in recieveDatas.games" :key="index">{{ g }}</li> </ul> </template> </Category> <Category title="游戏"> <template slot-scope="recieveDatas"> <ol slot="center"> <li v-for="(g, index) in recieveDatas.games" :key="index">{{ g }}</li> </ol> </template> </Category> <Category title="游戏"> <template slot-scope="recieveDatas"> <h4 v-for="(g, index) in recieveDatas.games" :key="index">{{ g }}</h4> </template> </Category> </div> </template> <script> import Category from "./components/Category.vue"; export default { name: "App", components: { Category }, }; </script> <style lang="css"> .container { display: flex; justify-content: space-around; } </style>- 1
- 2
- 3
- 4
- 5
- 6
- 7
- 8
- 9
- 10
- 11
- 12
- 13
- 14
- 15
- 16
- 17
- 18
- 19
- 20
- 21
- 22
- 23
- 24
- 25
- 26
- 27
- 28
- 29
- 30
- 31
- 32
- 33
- 34
- 35
- 36
- 37
- 38
- 39
- 40
- 41
- 42
- 43
- 44
- Category.vue
<template> <div class="category"> <h3>{{ title }}分类</h3> <!-- slot标签中可以添加内容,表示默认值 --> <slot :games="games">中间部分</slot> </div> </template> <script> export default { name: "Category", props: ["title"], data() { return { games: ["守望先锋", "英雄联盟", "我的世界", "魔兽"] }; }, }; </script> <style> .category { width: 200px; height: 300px; background-color: skyblue; } h3 { background-color: orange; text-align: center; } </style>- 1
- 2
- 3
- 4
- 5
- 6
- 7
- 8
- 9
- 10
- 11
- 12
- 13
- 14
- 15
- 16
- 17
- 18
- 19
- 20
- 21
- 22
- 23
- 24
- 25
- 26
- 27
- 28
- 29
- 30
- 31
- 32
效果图如下:

补充:
(1)和其他两种插槽方式相比,作用域插槽逻辑性更强。
(2)且就像其名一样,只在作用域范围内数据生效,这个作用域范围指的是你数据定义在哪个组件,那么你就只能在哪个组件上使用该数据。
(3)但有一种方式,即在<slot :xxxx="xxxx">中间部分</slot>标签上将数据类似props一样传输,在另一个组件上通过<template scope="xxx"> </template>可以获取到该组件上的数据,其中xxx就是接收到的数据(是一个对象,通过xxx.数据就可以使用数据了)。(xxx和xxxx的名字是可以不同的)
(4)作用域插槽必须使用template标签包裹
(5)template标签中的属性可以使用scope,也可以使用slot-scope,只是后者版本更新
组件自身是指使用插槽< slot></ slot>的那个组件。 ↩︎
-
相关阅读:
docker 命令
二叉树的重建问题
koa2学习和使用
Unity中Shader雾效的原理
Idea执行Pom.xml导入jar包提示sun.misc.BASE64Encoder jar找不到---SpringCloud工作笔记197
【CSP考点回顾】差分数组
ExtJS 教程汇总
Android 性能优化(六):启动优化的详细流程
Linux简单命令
广州搬砖第三年,从一枚小菜鸡到架构师
- 原文地址:https://blog.csdn.net/lalala_dxf/article/details/125261834