-
ssm项目搭建
编辑器:idea(已经下载配置好maven和tomcat)
整合的思路- .1. 先搭建整合的环境
- .2. 先把Spring的配置搭建完成
- .3. 再使用Spring整合SpringMVC框架
- .4. 最后使用Spring整合MyBatis框架
1.配置maven

2.新建项目

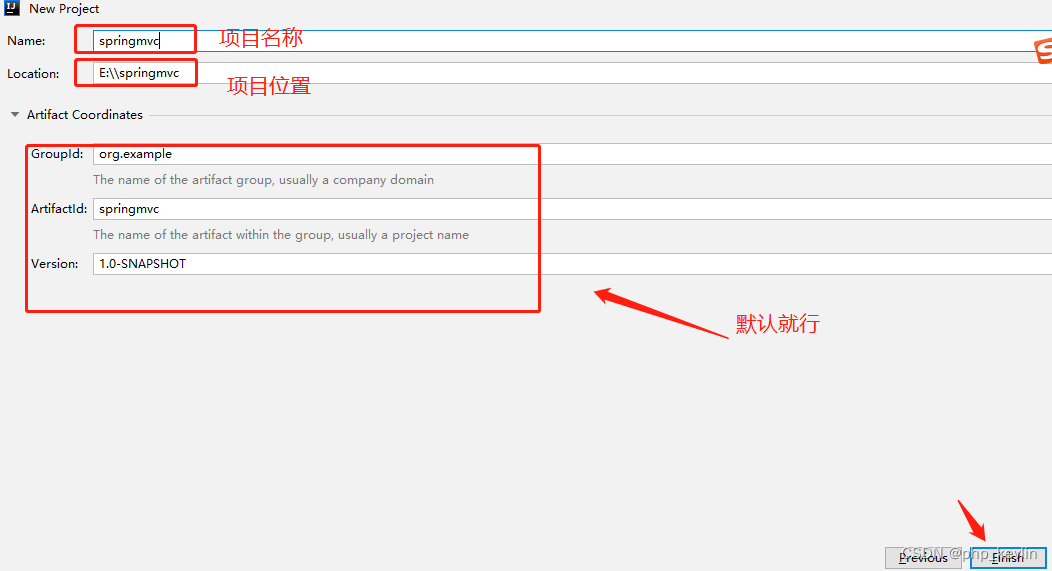
3.导入依赖包,文件是pom.xml(编辑器会提示)<?xml version="1.0" encoding="UTF-8"?> <project xmlns="http://maven.apache.org/POM/4.0.0" xmlns:xsi="http://www.w3.org/2001/XMLSchema-instance" xsi:schemaLocation="http://maven.apache.org/POM/4.0.0 http://maven.apache.org/xsd/maven-4.0.0.xsd"> <modelVersion>4.0.0</modelVersion> <groupId>org.example</groupId> <artifactId>springmvc01</artifactId> <version>1.0-SNAPSHOT</version> <packaging>war</packaging> <dependencies> <!-- spring-webmvc --> <dependency> <groupId>org.springframework</groupId> <artifactId>spring-webmvc</artifactId> <version>5.1.6.RELEASE</version> </dependency> <!-- jstl --> <dependency> <groupId>javax.servlet.jsp.jstl</groupId> <artifactId>jstl</artifactId> <version>1.2</version> </dependency> <dependency> <groupId>org.glassfish.web</groupId> <artifactId>jstl-impl</artifactId> <version>1.2</version> </dependency> <!-- servlet编译环境 --> <dependency> <groupId>javax.servlet</groupId> <artifactId>javax.servlet-api</artifactId> <version>3.1.0</version> <scope>provided</scope> </dependency> <!-- jsp编译环境 --> <dependency> <groupId>javax.servlet</groupId> <artifactId>jsp-api</artifactId> <version>2.0</version> <scope>provided</scope> </dependency> <!-- FastJson --> <dependency> <groupId>com.alibaba</groupId> <artifactId>fastjson</artifactId> <version>1.2.54</version> </dependency> <!-- pagehelper 分页 --> <dependency> <groupId>com.github.pagehelper</groupId> <artifactId>pagehelper</artifactId> <version>5.1.2</version> </dependency> <!-- Spring --> <dependency> <groupId>org.springframework</groupId> <artifactId>spring-context</artifactId> <version>5.1.16.RELEASE</version> </dependency> <!-- Spring --> <dependency> <groupId>org.springframework</groupId> <artifactId>spring-aspects</artifactId> <version>5.1.16.RELEASE</version> </dependency> <dependency> <groupId>org.springframework</groupId> <artifactId>spring-test</artifactId> <version>5.1.16.RELEASE</version> </dependency> <dependency> <groupId>org.springframework</groupId> <artifactId>spring-jdbc</artifactId> <version>5.1.16.RELEASE</version> </dependency> <!-- spring整合mybatis --> <dependency> <groupId>org.mybatis</groupId> <artifactId>mybatis-spring</artifactId> <version>1.3.1</version> </dependency> <!-- MyBatis --> <dependency> <groupId>org.mybatis</groupId> <artifactId>mybatis</artifactId> <version>3.4.5</version> </dependency> <!-- mysql驱动依赖 --> <dependency> <groupId>mysql</groupId> <artifactId>mysql-connector-java</artifactId> <version>5.1.6</version> </dependency> <!-- 连接池 --> <dependency> <groupId>com.alibaba</groupId> <artifactId>druid</artifactId> <version>1.1.12</version> </dependency> <!-- Junit --> <dependency> <groupId>junit</groupId> <artifactId>junit</artifactId> <version>4.12</version> </dependency> <!-- log4j --> <dependency> <groupId>log4j</groupId> <artifactId>log4j</artifactId> <version>1.2.17</version> </dependency> <dependency> <groupId>commons-logging</groupId> <artifactId>commons-logging</artifactId> <version>1.2</version> </dependency> </dependencies> <build> <resources> <resource> <directory>src/main/java</directory> <includes> <!-- <include>*.xml</include>--> <include>**/*.xml</include> </includes> <filtering>true</filtering> </resource> </resources> </build> </project>- 1
- 2
- 3
- 4
- 5
- 6
- 7
- 8
- 9
- 10
- 11
- 12
- 13
- 14
- 15
- 16
- 17
- 18
- 19
- 20
- 21
- 22
- 23
- 24
- 25
- 26
- 27
- 28
- 29
- 30
- 31
- 32
- 33
- 34
- 35
- 36
- 37
- 38
- 39
- 40
- 41
- 42
- 43
- 44
- 45
- 46
- 47
- 48
- 49
- 50
- 51
- 52
- 53
- 54
- 55
- 56
- 57
- 58
- 59
- 60
- 61
- 62
- 63
- 64
- 65
- 66
- 67
- 68
- 69
- 70
- 71
- 72
- 73
- 74
- 75
- 76
- 77
- 78
- 79
- 80
- 81
- 82
- 83
- 84
- 85
- 86
- 87
- 88
- 89
- 90
- 91
- 92
- 93
- 94
- 95
- 96
- 97
- 98
- 99
- 100
- 101
- 102
- 103
- 104
- 105
- 106
- 107
- 108
- 109
- 110
- 111
- 112
- 113
- 114
- 115
- 116
- 117
- 118
- 119
- 120
- 121
- 122
- 123
- 124
- 125
- 126
- 127
- 128
- 129
- 130
- 131
- 132
- 133
- 134
- 135
- 136
- 137
- 138
- 139
- 140
- 141
- 142
- 143
- 144
- 145
- 146
- 147
- 148
- 149
- 150
- 151
- 152
- 153
- 154
- 155
4.本质是tomcat运行网站的目录,所以新建如下目录

其中,web.xml内容如下:<?xml version="1.0" encoding="UTF-8"?> <web-app xmlns="http://xmlns.jcp.org/xml/ns/javaee" xmlns:xsi="http://www.w3.org/2001/XMLSchema-instance" xsi:schemaLocation="http://xmlns.jcp.org/xml/ns/javaee http://xmlns.jcp.org/xml/ns/javaee/web-app_4_0.xsd" version="4.0"> <!-- SpringMVC前端控制器 1.前端:接受所有请求 2.启动springMVC工厂 mvc.xml 3.springmvc流程调度 --> <servlet> <servlet-name>my_shine</servlet-name> <servlet-class>org.springframework.web.servlet.DispatcherServlet</servlet-class> <init-param> <param-name>contextConfigLocation</param-name> <param-value>classpath:mvc.xml</param-value> </init-param> <!-- 懒加载 饿加载 可选 --> <load-on-startup>1</load-on-startup> </servlet> <servlet-mapping> <servlet-name>my_shine</servlet-name> <url-pattern>/</url-pattern> </servlet-mapping> <!-- 解决post请求中文乱码的过滤器 --> <!-- 此时过滤器会进行:request.setCharactorEncoding("utf-8"); --> <filter> <filter-name>encoding</filter-name> <filter-class>org.springframework.web.filter.CharacterEncodingFilter</filter-class> <init-param> <param-name>encoding</param-name> <param-value>utf-8</param-value> </init-param> </filter> <filter-mapping> <filter-name>encoding</filter-name> <url-pattern>/*</url-pattern> </filter-mapping> <!-- 启动spring --> <listener> <listener-class>org.springframework.web.context.ContextLoaderListener</listener-class> </listener> <context-param> <param-name>contextConfigLocation</param-name> <param-value>classpath:applicationContext.xml</param-value> </context-param> </web-app>- 1
- 2
- 3
- 4
- 5
- 6
- 7
- 8
- 9
- 10
- 11
- 12
- 13
- 14
- 15
- 16
- 17
- 18
- 19
- 20
- 21
- 22
- 23
- 24
- 25
- 26
- 27
- 28
- 29
- 30
- 31
- 32
- 33
- 34
- 35
- 36
- 37
- 38
- 39
- 40
- 41
- 42
- 43
- 44
- 45
- 46
- 47
- 48
- 49
- 50
- 51
- 52
- 53
- 54
- 55
- 56
- 57
5.在web.xml中会引用springmvc的配置文件
mvc.xml和spring的配置文件applicationContext.xml,内容如下:<!--suppress ALL --> <beans xmlns="http://www.springframework.org/schema/beans" xmlns:xsi="http://www.w3.org/2001/XMLSchema-instance" xmlns:context="http://www.springframework.org/schema/context" xmlns:mvc="http://www.springframework.org/schema/mvc" xsi:schemaLocation=" http://www.springframework.org/schema/beans http://www.springframework.org/schema/beans/spring-beans.xsd http://www.springframework.org/schema/mvc http://www.springframework.org/schema/mvc/spring-mvc-4.0.xsd http://www.springframework.org/schema/context http://www.springframework.org/schema/context/spring-context.xsd"> <!-- 注解扫描 扫描controller的注解,别的不扫描--> <context:component-scan base-package="com.qf" use-default-filters="false"> <context:include-filter type="annotation" expression="org.springframework.stereotype.Controller"/> </context:component-scan> <!-- 注解驱动 --> <mvc:annotation-driven> <!-- 安装FastJson,转换器 --> <mvc:message-converters> <bean class="com.alibaba.fastjson.support.spring.FastJsonHttpMessageConverter"> <!-- 声明转换类型:json --> <property name="supportedMediaTypes"> <list> <value>application/json</value> </list> </property> <property name="features"> <array value-type="com.alibaba.fastjson.serializer.SerializerFeature"> <!-- 避免循环引用 --> <value>DisableCircularReferenceDetect</value> <!-- 是否输出值为null的字段 --> <value>WriteMapNullValue</value> <!-- <value>QuoteFieldNames</value>--> <!-- 数值字段如果为null,输出为0,而非null --> <!-- <value>WriteNullNumberAsZero</value>--> <!-- 字符类型字段如果为null,输出为"",而非null --> <value>WriteNullStringAsEmpty</value> <!-- List字段如果为null,输出为[],而非null --> <value>WriteNullListAsEmpty</value> <!-- Boolean字段如果为null,输出为false,而非null --> <!-- <value>WriteNullBooleanAsFalse</value>--> </array> </property> </bean> </mvc:message-converters> </mvc:annotation-driven> <!-- 视图解析器 作用:1.捕获后端控制器的返回值 =“hello” 2.解析:在返回值的前后 拼接 ==> "hello.jsp" --> <bean class="org.springframework.web.servlet.view.InternalResourceViewResolver"> <!-- 前缀 --> <property name="prefix" value="/"></property> <!-- 后缀 --> <property name="suffix" value=".jsp"></property> </bean> <mvc:default-servlet-handler /> </beans>- 1
- 2
- 3
- 4
- 5
- 6
- 7
- 8
- 9
- 10
- 11
- 12
- 13
- 14
- 15
- 16
- 17
- 18
- 19
- 20
- 21
- 22
- 23
- 24
- 25
- 26
- 27
- 28
- 29
- 30
- 31
- 32
- 33
- 34
- 35
- 36
- 37
- 38
- 39
- 40
- 41
- 42
- 43
- 44
- 45
- 46
- 47
- 48
- 49
- 50
- 51
- 52
- 53
- 54
- 55
- 56
- 57
- 58
- 59
- 60
- 61
- 62
- 63
- 64
- 65
- 66
6.在上一步中,
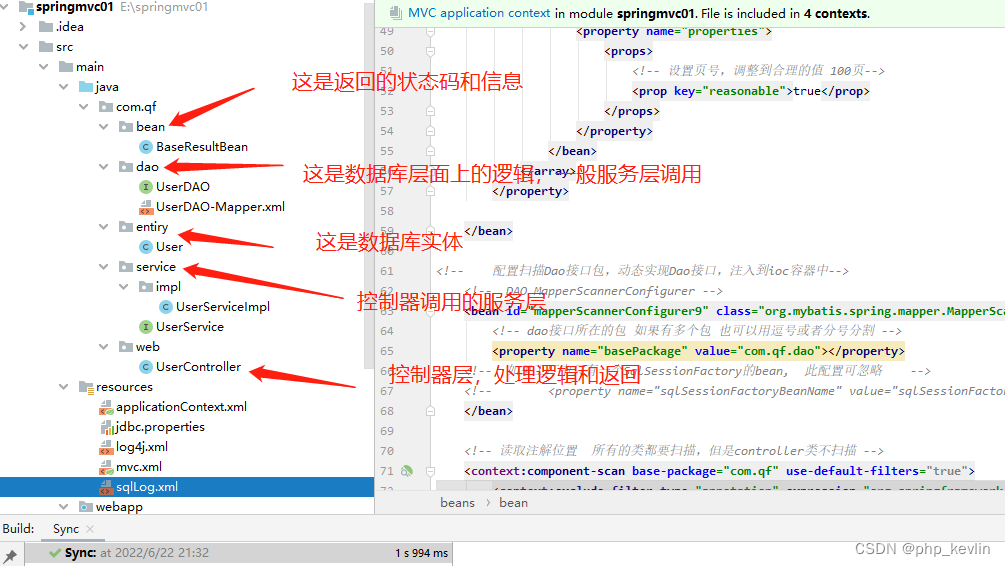
mvc.xml扫描controller的注解 ,在controller中设置路由和控制器对应,新建·userControlller.java·,目录如下图所示:
userController.java内容如下:package com.qf.web; import com.github.pagehelper.PageInfo; import com.qf.bean.BaseResultBean; import com.qf.entiry.User; import com.qf.service.UserService; import org.springframework.beans.factory.annotation.Autowired; import org.springframework.beans.factory.annotation.Qualifier; import org.springframework.stereotype.Controller; import org.springframework.ui.Model; import org.springframework.web.bind.annotation.*; import org.springframework.web.servlet.ModelAndView; import javax.servlet.http.HttpServletRequest; import java.text.SimpleDateFormat; import java.util.List; @Controller //声明后端控制器 public class UserController { @Autowired @Qualifier("userServiceImpl") private UserService userService; @GetMapping("/userlist") public ModelAndView queryUsers(HttpServletRequest request){ //service doGet doPost int page = Integer.parseInt(request.getParameter("page")); int size = Integer.parseInt(request.getParameter("size")); List<User> userlists = userService.queryUsers(page,size); PageInfo<User> pageInfo = new PageInfo<User>(userlists); System.out.println("queryUsers"+userlists); System.out.println("pageInfo"+pageInfo); ModelAndView modelAndView = new ModelAndView(); modelAndView.addObject("users",userlists ); modelAndView.setViewName("user"); // return modelAndView; } @RequestMapping("/user") @ResponseBody public Object queryOne(Integer id) { System.out.println("query user id:"+id); List<User> user = userService.queryOne(id); System.out.println(user); return user; } @PostMapping("/update") public BaseResultBean updateUser(User user) { System.out.println("update user" + user); userService.updateUser(user); BaseResultBean baseResultBean = new BaseResultBean(); baseResultBean.setStatus(true); baseResultBean.setMessage("成功"); return baseResultBean; } @RequestMapping("/add") public BaseResultBean addUser(User user) { System.out.println("add user" + user); userService.insertUser(user); BaseResultBean baseResultBean = new BaseResultBean(); baseResultBean.setStatus(true); baseResultBean.setMessage("成功"); return baseResultBean; } @RequestMapping("/deleteuser/{id}") public BaseResultBean deleteUser(@PathVariable Integer id) { System.out.println("delete user" + id); userService.deleteUser(id); BaseResultBean baseResultBean = new BaseResultBean(); baseResultBean.setStatus(true); baseResultBean.setMessage("成功"); return baseResultBean; } }- 1
- 2
- 3
- 4
- 5
- 6
- 7
- 8
- 9
- 10
- 11
- 12
- 13
- 14
- 15
- 16
- 17
- 18
- 19
- 20
- 21
- 22
- 23
- 24
- 25
- 26
- 27
- 28
- 29
- 30
- 31
- 32
- 33
- 34
- 35
- 36
- 37
- 38
- 39
- 40
- 41
- 42
- 43
- 44
- 45
- 46
- 47
- 48
- 49
- 50
- 51
- 52
- 53
- 54
- 55
- 56
- 57
- 58
- 59
- 60
- 61
- 62
- 63
- 64
- 65
- 66
- 67
- 68
- 69
- 70
- 71
- 72
- 73
- 74
- 75
- 76
- 77
- 78
- 79
- 80
- 81
- 82
- 83
- 84
- 85
- 86
7.第五步中spring的配置文件
applicationContext.xml如下所示<?xml version="1.0" encoding="UTF-8"?> <beans xmlns="http://www.springframework.org/schema/beans" xmlns:context="http://www.springframework.org/schema/context" xmlns:aop="http://www.springframework.org/schema/aop" xmlns:xsi="http://www.w3.org/2001/XMLSchema-instance" xmlns:tx="http://www.springframework.org/schema/tx" xsi:schemaLocation="http://www.springframework.org/schema/beans http://www.springframework.org/schema/beans/spring-beans.xsd http://www.springframework.org/schema/context http://www.springframework.org/schema/context/spring-context.xsd http://www.springframework.org/schema/aop http://www.springframework.org/schema/aop/spring-aop.xsd http://www.springframework.org/schema/tx http://www.springframework.org/schema/tx/spring-tx.xsd"> <!-- Datasource --> <context:property-placeholder location="classpath:jdbc.properties" /> <bean id="dataSource" class="com.alibaba.druid.pool.DruidDataSource" init-method="init"> <property name="driverClassName" value="${jdbc.driverClass}" /> <property name="url" value="${jdbc.url}" /> <property name="username" value="${jdbc.username}"/> <property name="password" value="${jdbc.password}"/> <!-- 配置获取连接等待超时的时间 --> <property name="maxWait" value="60000"/> <!-- 配置一个 连接在池中最小生存的时间 --> <property name="minEvictableIdleTimeMillis" value="300000" /> </bean> <!-- SqlSessionFactory --> <bean id="sqlSessionFactory" class="org.mybatis.spring.SqlSessionFactoryBean"> <!-- 注入数据库连接池 --> <property name="dataSource" ref="dataSource"></property> <!-- 注入dao-mapper文件信息,如果映射文件和dao接口 同包且同名,此配置可忽略 --> <property name="mapperLocations"> <list> <value>classpath:com/qf/dao/*.xml</value> </list> </property> <!-- 自动扫描mybatis配置文件,打印sql日志 --> <property name="configLocation" value="classpath:sqlLog.xml"></property> <!-- 扫描entity包 使用别名 为dao-mapper文件中的实体 定义缺省包路径 如:<select id="queryAll" resultType="User"> 中User类可以不定义包 --> <property name="typeAliasesPackage" value="com.qf.entiry"></property> <!-- 分页 --> <property name="plugins"> <array> <bean class="com.github.pagehelper.PageInterceptor"> <property name="properties"> <props> <!-- 设置页号,调整到合理的值 100页--> <prop key="reasonable">true</prop> </props> </property> </bean> </array> </property> </bean> <!-- 配置扫描Dao接口包,动态实现Dao接口,注入到ioc容器中--> <!-- DAO MapperScannerConfigurer --> <bean id="mapperScannerConfigurer9" class="org.mybatis.spring.mapper.MapperScannerConfigurer"> <!-- dao接口所在的包 如果有多个包 也可以用逗号或者分号分割 --> <property name="basePackage" value="com.qf.dao"></property> <!-- 如果工厂中只有一个SqlSessionFactory的bean, 此配置可忽略 --> <!-- <property name="sqlSessionFactoryBeanName" value="sqlSessionFactory"></property>--> </bean> <!-- 读取注解位置 所有的类都要扫描,但是controller类不扫描 --> <context:component-scan base-package="com.qf" use-default-filters="true"> <context:exclude-filter type="annotation" expression="org.springframework.stereotype.Controller"/> </context:component-scan> <!-- 引入一个事务管理器,其中依赖DataSource,借以获得连接,进而控制事务逻辑 --> <bean id="tx" class="org.springframework.jdbc.datasource.DataSourceTransactionManager"> <property name="dataSource" ref="dataSource"></property> </bean> <!-- @Transactional --> <tx:annotation-driven transaction-manager="tx" /> </beans>- 1
- 2
- 3
- 4
- 5
- 6
- 7
- 8
- 9
- 10
- 11
- 12
- 13
- 14
- 15
- 16
- 17
- 18
- 19
- 20
- 21
- 22
- 23
- 24
- 25
- 26
- 27
- 28
- 29
- 30
- 31
- 32
- 33
- 34
- 35
- 36
- 37
- 38
- 39
- 40
- 41
- 42
- 43
- 44
- 45
- 46
- 47
- 48
- 49
- 50
- 51
- 52
- 53
- 54
- 55
- 56
- 57
- 58
- 59
- 60
- 61
- 62
- 63
- 64
- 65
- 66
- 67
- 68
- 69
- 70
- 71
- 72
- 73
- 74
- 75
- 76
- 77
- 78
- 79
- 80
- 81
路虽远,行则将至
8.
spring.xml会读取dao层,service层下面的注解,内容如下:

不知道原理,写不去了… -
相关阅读:
红黑树的原理
if...else绝佳替换方案
快速使用UE4制作”大场景游戏“
【手撕AHB-APB Bridge】~ AMBA总线 之 APB
从零学算法(LCR 157)
Centos7原生hadoop环境,搭建Impala集群和负载均衡配置
Java微信小程序奶茶在线预定点单系统 uniapp小程序
ASP.NET Core框架探索之Authentication
Docker容器自启动
数组篇 第一题:删除排序数组中的重复项
- 原文地址:https://blog.csdn.net/kevlin_V/article/details/125417098