-
【小程序项目开发-- 京东商城】uni-app开发之轮播图

👋👋欢迎来到👋👋
🎩魔术之家!!🎩该文章收录专栏
✨— 2022微信小程序京东商城实战 —✨专栏内容(以下文章食用前强烈建议 先食用文章 )
✨— uni-app项目搭建 —✨
✨— 京东商城uni-app 配置tabBar & 窗口样式 —✨
✨— 京东商城uni-app开发之分包配置 —✨一、新建tabBar分支(选读*)
之所以为了创建分支,也是养成良好的项目开发习惯,这样在开放项目井井有条
也可以跳过本节内容,不影响阅读观感🌹在根目录下,右键打开
bash
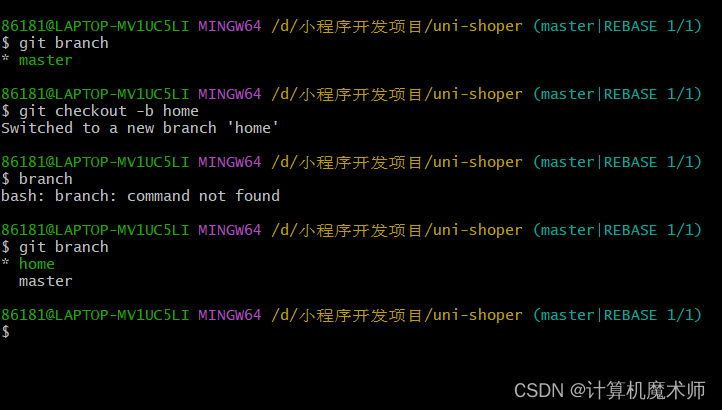
基于 master 分支在本地创建 home 子分支,用来开发和 home 相关的功能:git checkout -b home- 1
查看分支(前面有*代表着当前分支)
git branch- 1

二、配置网络请求
由于平台的限制,小程序项目中不支持 axios,而且原生的 wx.request() API 功能较为简单,不支持拦截器等全局定制的功能。因此,建议在 uni-app 项目中使用
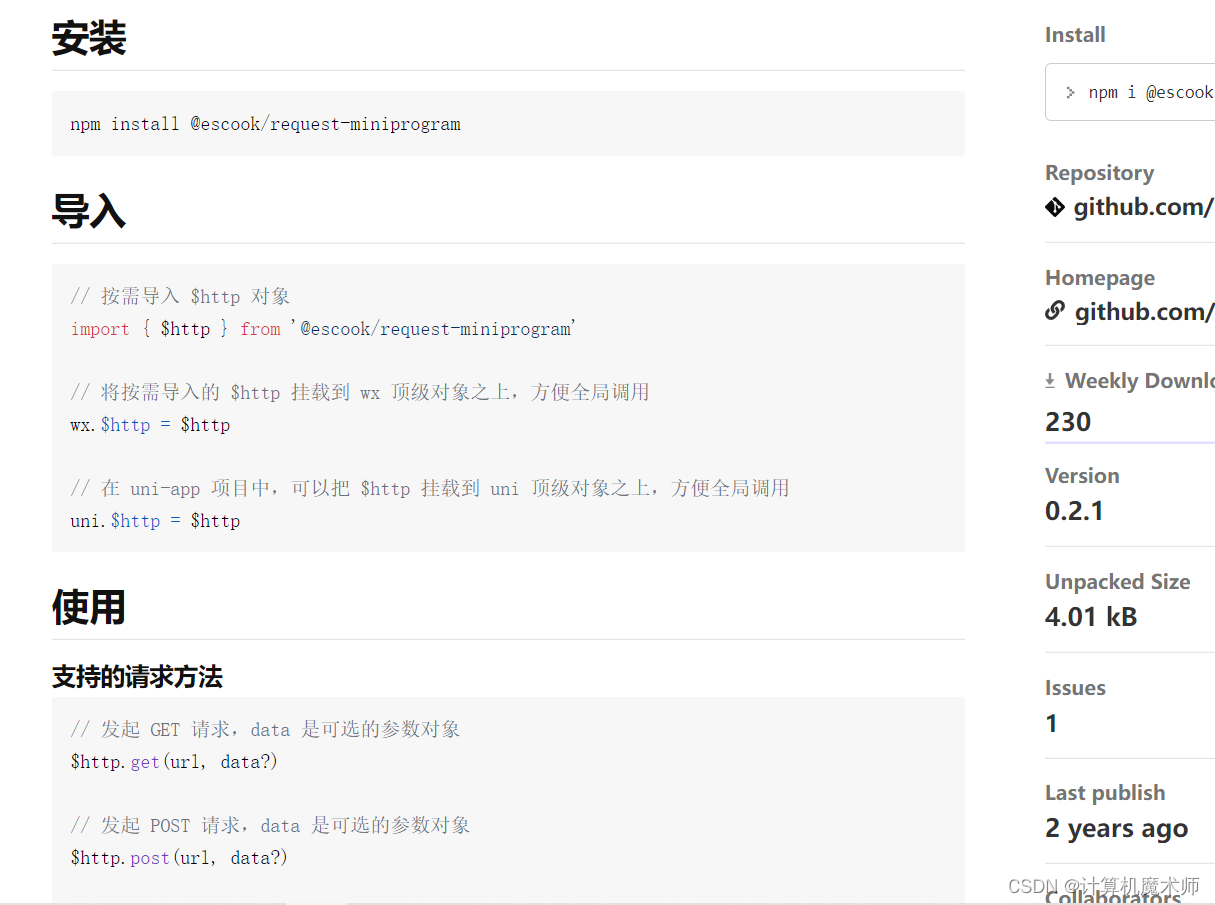
@escook/request-miniprogram第三方包发起网络数据请求。请参考 @escook/request-miniprogram 的官方文档进行安装、配置、使用
官方文档:https://www.npmjs.com/package/@escook/request-miniprogram
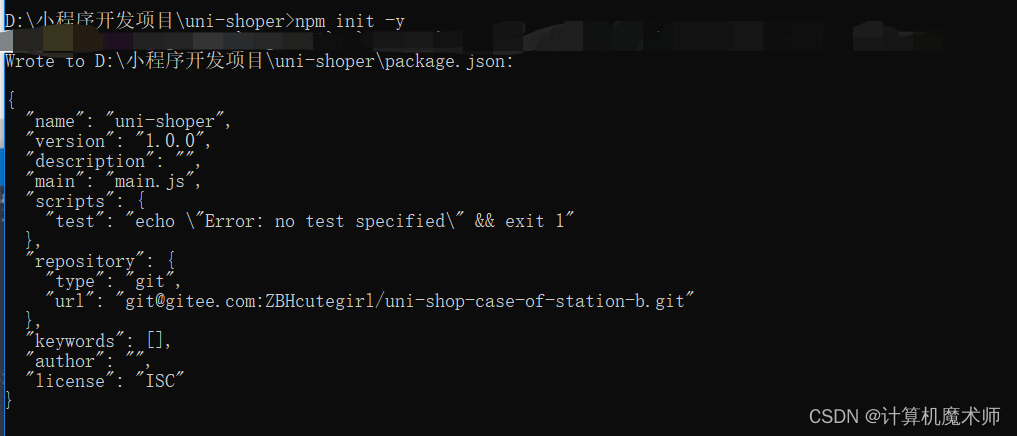
按照官方流程,我们首先安装对应包,使用命令行工具cmd进入到项目根目录下 进行初始化一个package.json文件npm init -y- 1

复制官网的导入命令输入npm install @escook/request-miniprogram- 1

在入口文件进行相关配置
main.js
导入对应包并进行挂载,以及定义 响应拦截器和请求响应器
(在uni-app开发中,尽量都是以uni作为顶级对象)//导入网络请求包 import { $http } from '@escook/request-miniprogram' //挂载 uni.$http = $http //设置请求地址的根路径 $http.baseUrl = 'https://www.uinav.com' // 请求拦截器 $http.beforeRequest = function() { uni.showLoading({ title: '数据加载中...', }); } // 响应拦截器 $http.afterRequest = function(){ uni.hideLoading() }- 1
- 2
- 3
- 4
- 5
- 6
- 7
- 8
- 9
- 10
- 11
- 12
- 13
- 14
- 15
- 16
- 17
- 18
- 19
三、轮播图区域
请求轮播图的数据
实现步骤:- 在 data 中定义轮播图的数组
- 在 onLoad 生命周期函数中调用获取轮播图数据的方法
- 在 methods 中定义获取轮播图数据的方法
3.1 主页API
获取首页轮播图数据:
- 请求路径:https://请求域名/api/public/v1/home/swiperdata
- 请求方法:GET
- 请求参数
参数名 参数说明 备注 无 - 响应参数
参数名 参数说明 备注 image_src 图片路径 open_type 导航链接类型 navigator_url 导航链接路径 - 响应数据参考
{ "message": [ { "image_src": "https://www.zhengzhicheng.cn/pyg/banner1.png", "open_type": "navigate", "goods_id": 129, "navigator_url": "/pages/goods_detail/main?goods_id=129" }, { "image_src": "https://www.zhengzhicheng.cn/pyg/banner2.png", "open_type": "navigate", "goods_id": 395, "navigator_url": "/pages/goods_detail/main?goods_id=395" }, { "image_src": "https://www.zhengzhicheng.cn/pyg/banner3.png", "open_type": "navigate", "goods_id": 38, "navigator_url": "/pages/goods_detail/main?goods_id=38" } ], "meta": { "msg": "获取成功", "status": 200 } }- 1
- 2
- 3
- 4
- 5
- 6
- 7
- 8
- 9
- 10
- 11
- 12
- 13
- 14
- 15
- 16
- 17
- 18
- 19
- 20
- 21
- 22
- 23
在home.vue 文件 中
<script> export default { data() { return { // 定义数据 swiperList: [] }; }, onLoad() { // 调取方法,获取轮播图数据 this.getSwiperList() }, methods: { async getSwiperList() { // '/' 根目录即为在main.js的文件配置的 baseUrl const res = await uni.$http.get('/api/public/v1/home/swiperdata') //输出 数据 console.log(res.data) } } } </script>- 1
- 2
- 3
- 4
- 5
- 6
- 7
- 8
- 9
- 10
- 11
- 12
- 13
- 14
- 15
- 16
- 17
- 18
- 19
- 20
- 21
- 22
打印成功(获取数据成功)

通过meta的status属性值判断是否 成功获取数据methods: { async getSwiperList() { // '/' 根目录即为在main.js的文件配置的 baseUrl const res = await uni.$http.get('/api/public/v1/home/swiperdata') // 调取失败弹出错误提示 if (res.data.meta.status != 200) { uni.showToast({ title: "数据拉取失败", // 文字显示 'icon': "error", // 显示错误图标 "duration": 1500 // 设置停留事件为 1.5s duration - 持续事件 }) // 将调用的数据 赋值 this.swiperList = res.data.message } } }- 1
- 2
- 3
- 4
- 5
- 6
- 7
- 8
- 9
- 10
- 11
- 12
- 13
- 14
- 15
- 16
赋值成功

四、注意事项!:
这里赋值不能像 原生小程序 调用
this.setData({this.swiperList = res.data.message})使用,在小程序中可以使用this.data更新数据不更新视图和thsi.setData({})数据和视图同步更新(会重新加载数据渲染页面),但是在uni-app 是没有
thsi.setData({})方法的,使用this.data直接赋值即可。这是因为在原生小程序开发中,数据节点data是定义为一个字典,而在uni-app中则是以一个函数返回值的形式得到数据,此时对该数据直接赋值即可。五、渲染轮播图UI结构
uswiper 快速生成 轮播代码块- 1
- 使用 vue-for 动态循环轮播图数组,循环动态绑定需要标签属性节点前都要加上
:(冒号:是v-bind的缩写,即动态绑定数据,后面可以跟变量或者变量表达式,如果没有冒号的则为字符串,此时循环会无法显示效果
<!-- 模板 --> <template> <view> <!-- 渲染轮播图UI结构 --> <swiper :indicator-dots="true" :autoplay="true" :interval="3000" :duration="1000" :circular="true"> <!-- 类似python for i,j in object 得到对应项目i以及索引j --> <swiper-item v-for="(item,i) in swiperList" :key="i"> <view class="swiper-item"> <image :src="item.image_src"></image> </view> </swiper-item> </swiper> </view> </template> <!-- 样式 --> <style lang="scss"> swiper { height: 333rpx; .swiper-item, image { width: 100%; height: 100%; } } </style>- 1
- 2
- 3
- 4
- 5
- 6
- 7
- 8
- 9
- 10
- 11
- 12
- 13
- 14
- 15
- 16
- 17
- 18
- 19
- 20
- 21
- 22
- 23
- 24
- 25
- 26
- 效果:

✨谢谢你的阅读,您的点赞和收藏就是我创造的最大动力!✨- 1
-
相关阅读:
Flink多流转换(一)
【学习笔记】AGC036
代码自动化审核操作详解(svnchecker+checkstyle)
【数据结构-堆】堆
华为HCIP—Datacom(821新增)
解决@Data与@Builder冲突的N种策略
图形推理到底如何推?
云小课|MRS基础原理之MapReduce介绍
基于XML配置的AOP
《golang设计模式》第三部分·行为型模式-05-仲裁者/中介模式(Mediator)
- 原文地址:https://blog.csdn.net/weixin_66526635/article/details/125308592