-
使用EISeg自动标注数据,yolov5训练模型(保姆教程)
如何使用EISeg自动标注数据,并用yolov5 v6.1训练模型🦁
一. EISeg自动标注📎
官方链接⭐
https://github.com/PaddlePaddle/PaddleSeg/tree/develop/EISeg
EISeg介绍🌊
EISeg(Efficient Interactive Segmentation)是以RITM及EdgeFlow算法为基础,基于飞桨开发的一个高效智能的交互式分割标注软件。
安装EISeg🌈
提前安装好
PaddlePaddle,请参考PaddlePaddle快速安装文档pip安装EISeg
pip install opencv-python==4.5.5.64 pip install opencv-contrib-python==4.5.5.64 pip install opencv-python-headless==4.5.5.64 pip install eiseg- 1
- 2
- 3
- 4
安装完成后命令行输入,即可运行软件。
eiseg- 1

下载模型🍟
选择合适自己的模型下载并解压
模型类型 适用场景 模型结构 模型下载地址 高精度模型 通用场景的图像标注 HRNet18_OCR64 static_hrnet18_ocr64_cocolvis 轻量化模型 通用场景的图像标注 HRNet18s_OCR48 static_hrnet18s_ocr48_cocolvis 高精度模型 通用图像标注场景 EdgeFlow static_edgeflow_cocolvis 高精度模型 人像标注场景 HRNet18_OCR64 static_hrnet18_ocr64_human 轻量化模型 人像标注场景 HRNet18s_OCR48 static_hrnet18s_ocr48_human 轻量化模型 遥感建筑物标注场景 HRNet18s_OCR48 static_hrnet18_ocr48_rsbuilding_instance 轻量化模型 医疗肝脏标注场景 HRNet18s_OCR48 static_hrnet18s_ocr48_lits 高精度模型 * x光胸腔标注场景 Resnet50_Deeplabv3+ static_resnet50_deeplab_chest_xray 高精度模型 * x光胸腔标注场景 Resnet18_Deeplabv3+ static_resnet18_deeplab_chest_xray 轻量化模型 * MRI椎骨图像标注场景 HRNet18s_OCR48 static_hrnet18s_ocr48_MRSpineSeg 轻量化模型 * 质检铝板瑕疵标注场景 HRNet18s_OCR48 static_hrnet18s_ocr48_aluminium 标注数据✍
数据文件夹目录树
data +Annotations +images- 1
- 2
- 3
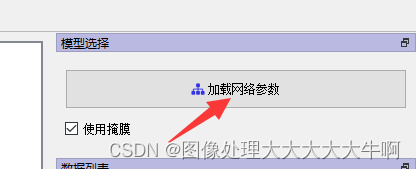
1. 加载网络参数
选择前面解压好的模型
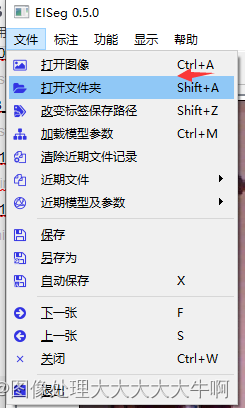
2. 打开文件夹
打开images图片数据的文件夹
3. 更改标签保存路径
打开存放标签的Annotations文件夹

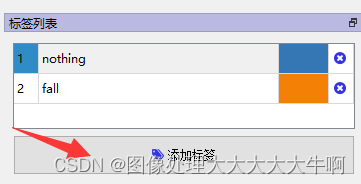
4. 添加标签
添加需要标注的标签
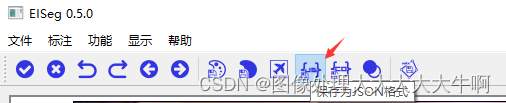
5. 选择json格式保存,点击目标开始标注
取消其他选项,选择保存为json格式
选择自动保存,F下一张,S上一张 只要标注翻页就可以自动保存
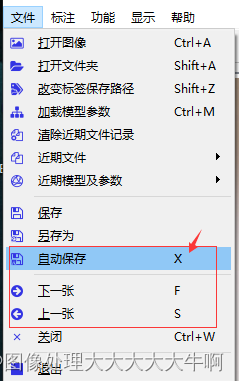
点击图片的人物,然后F下一张,提示是否完成最后一个标注之类的直接确定。会自动保存。

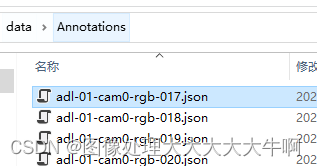
保存的json就像这样
二. 将数据转换为yolov5 训练所用的格式😠
将目录结构补全
data +Annotations +images +labels- 1
- 2
- 3
- 4
1. 将json文件 转换为txt
json2txt.py
#!/usr/bin/ python # -*- encoding: utf-8 -*- ''' @文件 :json2txt.py @说明 : @时间 :2022/05/25 10:28:19 @作者 :刘子沫 @邮箱 :spiritai@qq.com @版本 :1.0 ''' import json import cv2 import numpy as np import glob def totxt(): # 第二列:中心归一化横坐标(x) # 第三列:中心归一化纵坐标(y) # 第四列:归一化宽度(w) # 第五列:归一化高度(h) height,width = img.shape[0],img.shape[1] dw = 1 / width dh = 1/ height with open(out_txt_file, "w+") as f: for shape in data: points = shape["points"] cls_id = shape["labelIdx"]-1 xmin, ymin, w, h = cv2.boundingRect(np.array(points, dtype=np.int)) xmax = xmin+w ymax = ymin+h x = (xmin + xmax) / 2.0 - 1 y = (ymin + ymax) / 2.0 - 1 w = xmax - xmin h = ymax - ymin if w < 50 or h < 50: continue x = x * dw w = w * dw y = y * dh h = h * dh f.write("%s %s %s %s %s\n"%(cls_id,x, y, w, h)) if __name__=="__main__": # 文件列表 json_list = glob.glob("Annotations/*.json") for file in json_list: basename = file.split("\\")[-1].split(".")[0] # 读取图片 img = cv2.imread("images/"+basename+".png") if img is None: continue # 读取json文件 data = "" with open(file, 'r', encoding='utf-8') as f: data = json.load(f) # yololabels out_txt_file = "labels/" + basename + ".txt" totxt()- 1
- 2
- 3
- 4
- 5
- 6
- 7
- 8
- 9
- 10
- 11
- 12
- 13
- 14
- 15
- 16
- 17
- 18
- 19
- 20
- 21
- 22
- 23
- 24
- 25
- 26
- 27
- 28
- 29
- 30
- 31
- 32
- 33
- 34
- 35
- 36
- 37
- 38
- 39
- 40
- 41
- 42
- 43
- 44
- 45
- 46
- 47
- 48
- 49
- 50
- 51
- 52
- 53
- 54
- 55
- 56
- 57
- 58
- 59
- 60
- 61
- 62
- 63
- 64
2. 按比例分割为train,test,val 数据集
maketxt.py
#!/usr/bin/ python # -*- encoding: utf-8 -*- ''' @文件 :maketxt.py @说明 : @时间 :2022/05/25 11:13:15 @作者 :刘子沫 @邮箱 :spiritai@qq.com @版本 :1.0 ''' import glob import numpy as np sets = ['train', 'test','val'] percent = [65,15,20] # 比例总和100 if __name__=="__main__": labels_list = glob.glob("labels/*.txt") # 文件下标转换为100列的矩阵 l = len(labels_list) remainder = l%100 total = np.asarray(range(l-remainder)) # 随机打乱 np.random.shuffle(total) total = total.reshape(int(l/100),100) # 按比例分割矩阵 取下标 for idx,(set,per) in enumerate(zip(sets,percent)): index = total[:,:per].copy() # 更新total total = np.delete(total,np.s_[:per],axis=1) index = index.reshape(-1) # 写入txt with open(set+".txt", "w+") as f: for i in index: f.write("data/images/%s.png\n"%labels_list[i].split("\\")[-1].split(".")[0]) # 剩余的写入txt if idx==0: for i in range(l-remainder,l): f.write("data/images/%s.png\n"%labels_list[i].split("\\")[-1].split(".")[0])- 1
- 2
- 3
- 4
- 5
- 6
- 7
- 8
- 9
- 10
- 11
- 12
- 13
- 14
- 15
- 16
- 17
- 18
- 19
- 20
- 21
- 22
- 23
- 24
- 25
- 26
- 27
- 28
- 29
- 30
- 31
- 32
- 33
- 34
- 35
- 36
- 37
- 38
- 39
三. 训练yolov5 模型😸
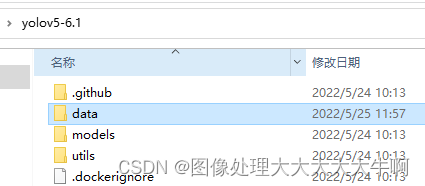
将data文件放入yolov5 的目录下面 合并原来的data
1. 修改data下面的yaml文件
将data下面的coco.yaml 复制一份 重新命名为my.yaml,主要修改以下内容
# data train: data/train.txt val: data/val.txt test: data/test.txt # Classes nc: 2 # 数量 number of classes names: ['nothing', 'fall',] # 自己的class names- 1
- 2
- 3
- 4
- 5
- 6
- 7
- 8
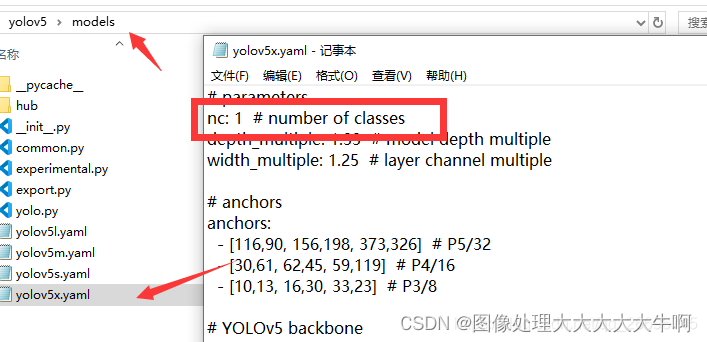
2. 修改model下面的对应的模型文件的分类数量
用哪个模型就改哪个模型对应的文件,新手只修改nc 类别数量
3. 命令行训练
指定我们刚才修改的两个文件,设置适当的batch-size 和 epoch(内存不足就调小),windows 下面需要将 workers 设置为1
python train.py --data data/my.yaml --cfg models/yolov5x.yaml --batch-size 16 --epochs 300 --workers 1- 1
😼
😼
😼最后:接软件定制,代写。群 686070107- 1
-
相关阅读:
Python接口自动化测试之Requests库&Pytest框架
leetcode-----二叉树习题
OpenStack新版UI管理skyline
SkyWalking 入门教程
3-10:统一记录日志
6 获取AOE网的关键路径--来源王英S同学
设计模式之享元模式
高精度地图定位在高速公路自动驾驶系统中的应用
为什么要让img浮动:
Redis 哨兵集群工作原理
- 原文地址:https://blog.csdn.net/qq_26696715/article/details/124942122