-
教你用python制作人脸卡通画(附源码)
教你用python制作人脸卡通画(附源码)
效果展示:
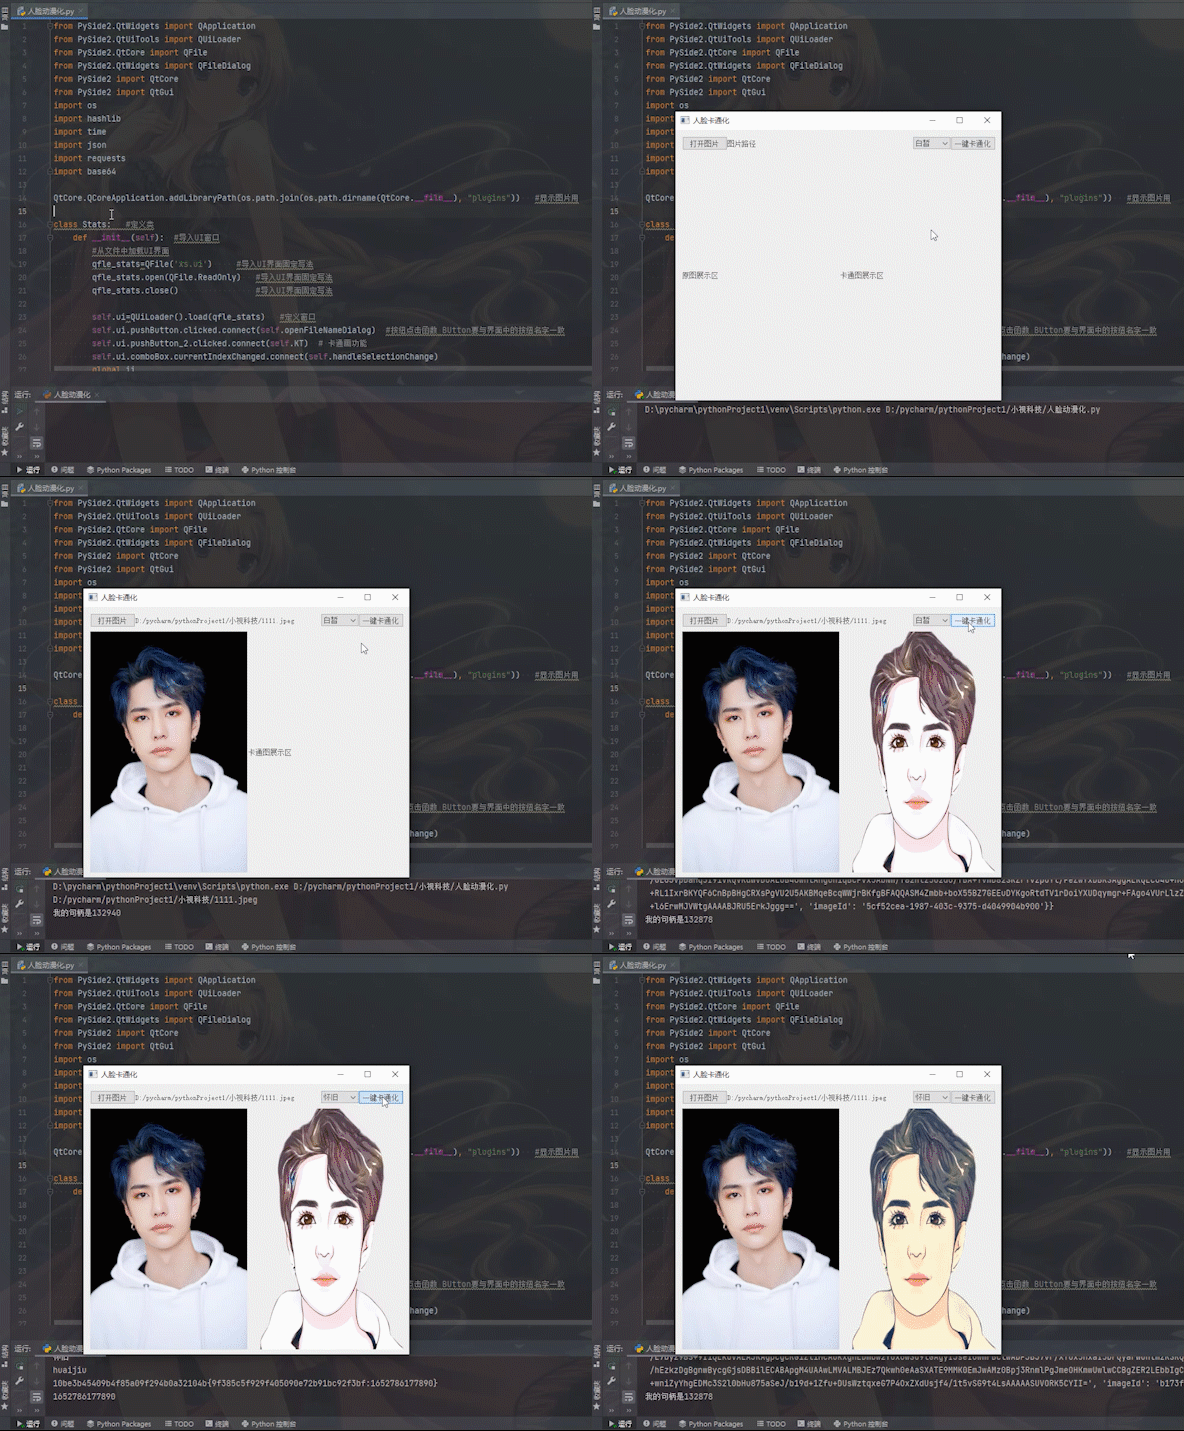

让我们开始学习之路:
原理:利用第三方人脸接口将图像人脸化
第三方接口注册地址:https://ai.minivision.cn/#/login
注册成功后-进入控制台-创建APP Key
记录好 APP Key 和App Secret
参见API文档开始调用吧from PySide2.QtWidgets import QApplication from PySide2.QtUiTools import QUiLoader from PySide2.QtCore import QFile from PySide2.QtWidgets import QFileDialog from PySide2 import QtCore from PySide2 import QtGui import os import hashlib import time import json import requests import base64 QtCore.QCoreApplication.addLibraryPath(os.path.join(os.path.dirname(QtCore.__file__), "plugins")) #显示图片用 class Stats: #定义类 def __init__(self): #导入UI窗口 #从文件中加载UI界面 qfle_stats=QFile('xs.ui') #导入UI界面固定写法 qfle_stats.open(QFile.ReadOnly) #导入UI界面固定写法 qfle_stats.close() #导入UI界面固定写法 self.ui=QUiLoader().load(qfle_stats) #定义窗口 self.ui.pushButton.clicked.connect(self.openFileNameDialog) #按纽点击函数 BUtton要与界面中的按纽名字一致 self.ui.pushButton_2.clicked.connect(self.KT) # 卡通画功能 self.ui.comboBox.currentIndexChanged.connect(self.handleSelectionChange) global ii ii="baixi" def handleSelectionChange(self): method = self.ui.comboBox.currentText() print(method) global ii if method=='白皙': ii='baixi' elif method=='怀旧': ii = 'huaijiu' elif method == '年代': ii = 'niandai' elif method == '咖啡': ii = 'kafei' elif method == '浪漫': ii = 'langman' elif method == '青葱': ii = 'qingcong' elif method == '想象': ii = 'xiangxiang' elif method == '梦幻': ii = 'menghuan' elif method == '浪漫': ii = 'langman' elif method == '字云': ii = 'ziyun' elif method == '素描': ii = 'sumiao' elif method == '剪纸': ii = 'jianzhi' elif method == '琉璃': ii = 'liuli' elif method == '皮革': ii = 'pige' elif method == '羊皮纸': ii = 'yangpizhi' elif method == '油画': ii = 'youhua' elif method == '豹纹': ii = 'baowen' elif method == '海洋': ii = 'haiyang' elif method == '金属': ii = 'jinshu' elif method == '香槟': ii = 'xiangbin' elif method == '大爆炸': ii = 'dabaozha' elif method == '星空': ii = 'xingkong' elif method == '牛仔': ii = 'niuzai' elif method == '星轨': ii = 'xinggui' elif method == '渲染': ii = 'xuanran' elif method == '意识流': ii = 'yishiliu' print(ii) def openFileNameDialog(self): options = QFileDialog.Options() options |= QFileDialog.DontUseNativeDialog fileName, _ = QFileDialog.getOpenFileName(self.ui, "QFileDialog.getOpenFileName()", "", "All Files (*);;Python Files (*.py)", options=options) #self后面要加.ui不然出现错误 print(fileName) self.ui.label.setText(fileName) 句柄 = self.ui.label_2.winId() print('我的句柄是'+str(句柄)) pixmap = QtGui.QPixmap(fileName) self.ui.label_2.setPixmap(pixmap) self.ui.label_2.setScaledContents(True) #图片自适应 def KT(self): app_key = '你的app key' app_secret = '你的app secret' timestamp = int(round(time.time() * 1000)) # 时间戳 i = generate_token(timestamp, app_key, app_secret) # Token with open(self.ui.label.text(), 'rb')as f: base64data = base64.b64encode(f.read()) s = base64data.decode() # print(s) params = { "imageBase64": s, # 本地图片 base64值 "appKey": "你的app key", "timestamp": timestamp, "needFilter": "true", "filterName": ii } params1 = json.dumps(params) print(timestamp) headers = { 'Content-Type': 'application/json', 'Token': i, 'cache-control': 'no-cache' } response = requests.post('https://ai.minivision.cn/apiagw/api/v1/cartoon/self_cartoon', headers=headers, data=params1).text response = json.loads(response) print(response) imagedata = base64.b64decode(response.get('data').get('base64')) with open('abc.jpg', 'wb')as f: # 保存为abc.jpg f.write(imagedata) 句柄 = self.ui.label_3.winId() print('我的句柄是'+str(句柄)) pixmap = QtGui.QPixmap('abc.jpg') self.ui.label_3.setPixmap(pixmap) self.ui.label_3.setScaledContents(True) #图片自适应 def generate_token(timestamp, app_key, app_secret): text_array = [app_key, '{', app_secret, ':', str(timestamp), '}'] text = ''.join(text_array) print(text) m = hashlib.md5(text.encode('utf-8')) return m.hexdigest() if "__main__" == __name__: app = QApplication([]) Stats = Stats() Stats.ui.show() app.exec_()- 1
- 2
- 3
- 4
- 5
- 6
- 7
- 8
- 9
- 10
- 11
- 12
- 13
- 14
- 15
- 16
- 17
- 18
- 19
- 20
- 21
- 22
- 23
- 24
- 25
- 26
- 27
- 28
- 29
- 30
- 31
- 32
- 33
- 34
- 35
- 36
- 37
- 38
- 39
- 40
- 41
- 42
- 43
- 44
- 45
- 46
- 47
- 48
- 49
- 50
- 51
- 52
- 53
- 54
- 55
- 56
- 57
- 58
- 59
- 60
- 61
- 62
- 63
- 64
- 65
- 66
- 67
- 68
- 69
- 70
- 71
- 72
- 73
- 74
- 75
- 76
- 77
- 78
- 79
- 80
- 81
- 82
- 83
- 84
- 85
- 86
- 87
- 88
- 89
- 90
- 91
- 92
- 93
- 94
- 95
- 96
- 97
- 98
- 99
- 100
- 101
- 102
- 103
- 104
- 105
- 106
- 107
- 108
- 109
- 110
- 111
- 112
- 113
- 114
- 115
- 116
- 117
- 118
- 119
- 120
- 121
- 122
- 123
- 124
- 125
- 126
- 127
- 128
- 129
- 130
- 131
- 132
- 133
- 134
- 135
- 136
- 137
- 138
- 139
- 140
- 141
- 142
- 143
- 144
- 145
- 146
- 147
- 148
- 149
- 150
- 151
- 152
- 153
- 154
- 155
- 156
- 157
- 158
- 159
- 160
- 161
- 162
- 163
- 164
- 165
- 166
- 167
- 168
- 169
- 170
- 171
- 172
- 173
- 174
- 175
- 176
-
相关阅读:
登录网页优化与最佳做法
亚马逊云AI大语言模型应用下的创新Amazon Transcribe的使用
归并排序和直接插入排序结合的排序算法
[pytorch]关于进行代码构建网络的一点补充内容(会持续补充)
每天都要学算法——day1
opnet物联网仿真2.5 陈敏 包交换网络全解----修正版
html+css制作3D七夕表白旋转相册特效
jFinal框架之拦截器的使用
【带头学C++】----- 六、结构体 ---- 6.6 结构体的指针成员
Java安全之Resin2内存马
- 原文地址:https://blog.csdn.net/wg2627/article/details/124828170